

Ah, you know those desserts from childhood parties that just bring a smile to your face? I think bringing a taste of that simple joy back into my kitchen as an adult is one of my favorite things to do here at Gourmet Gusto. It’s why I absolutely love sharing recipes that are easy, impressive, and don’t demand hours standing over a hot stove, like my fantastic dirt cake!
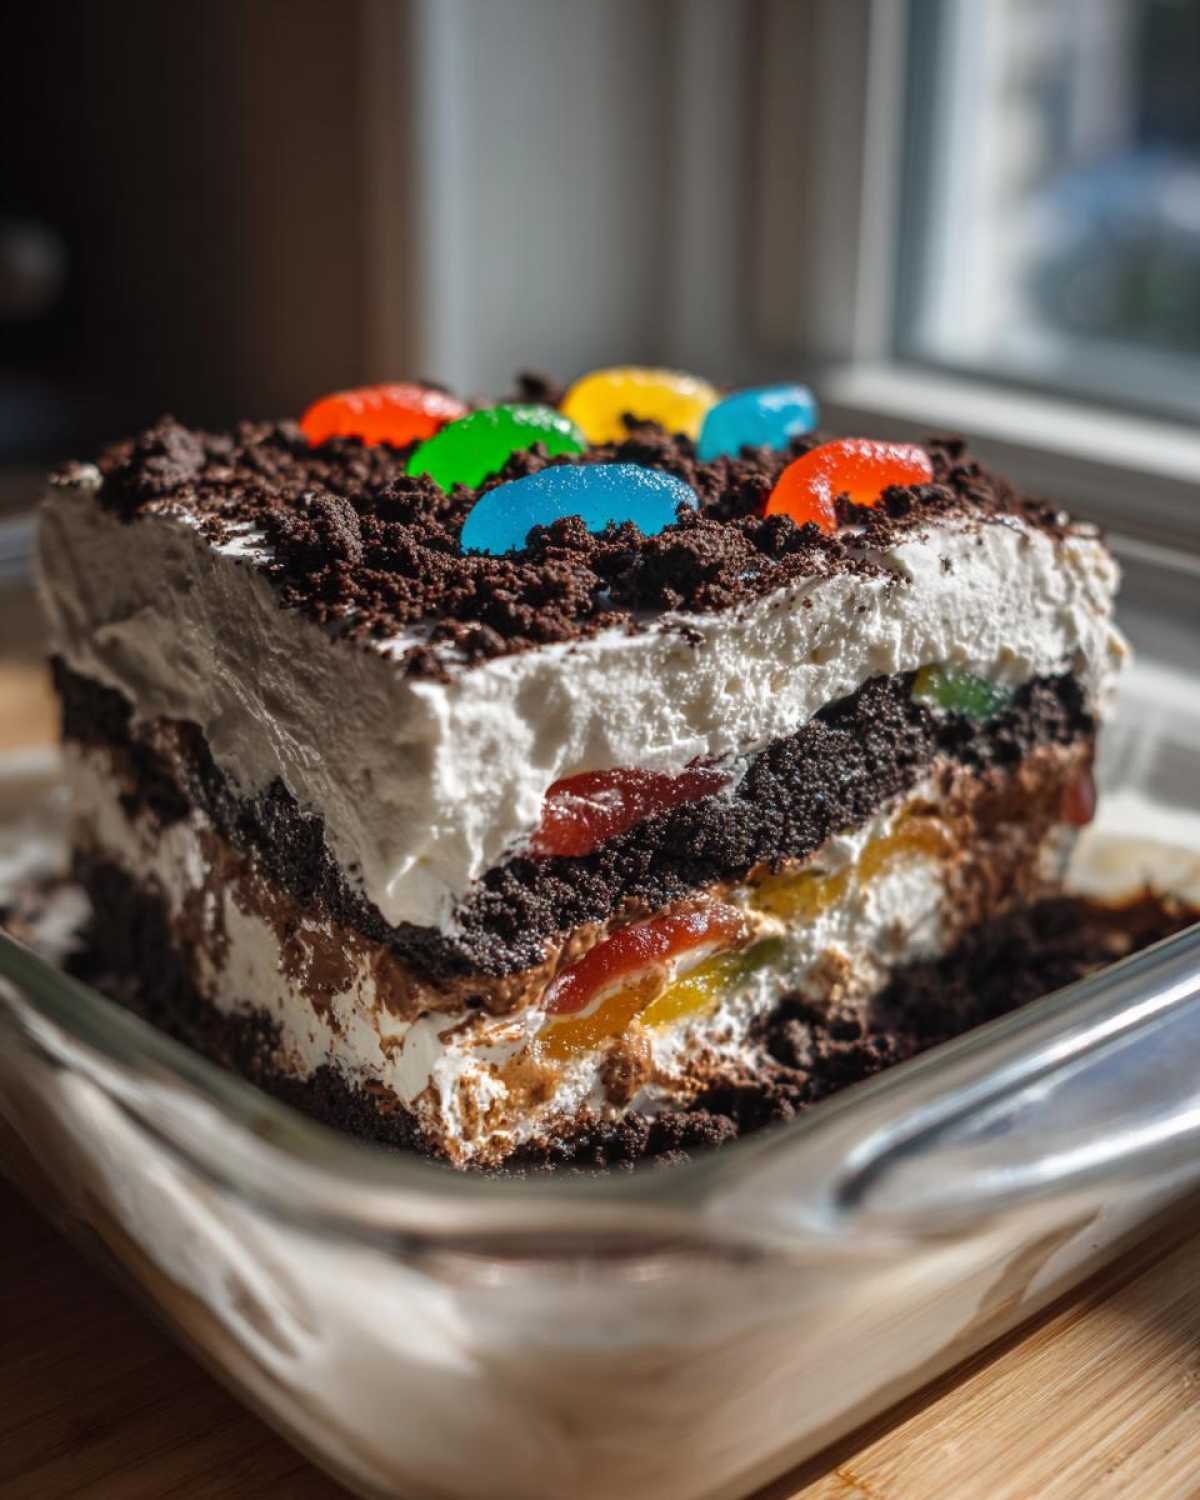
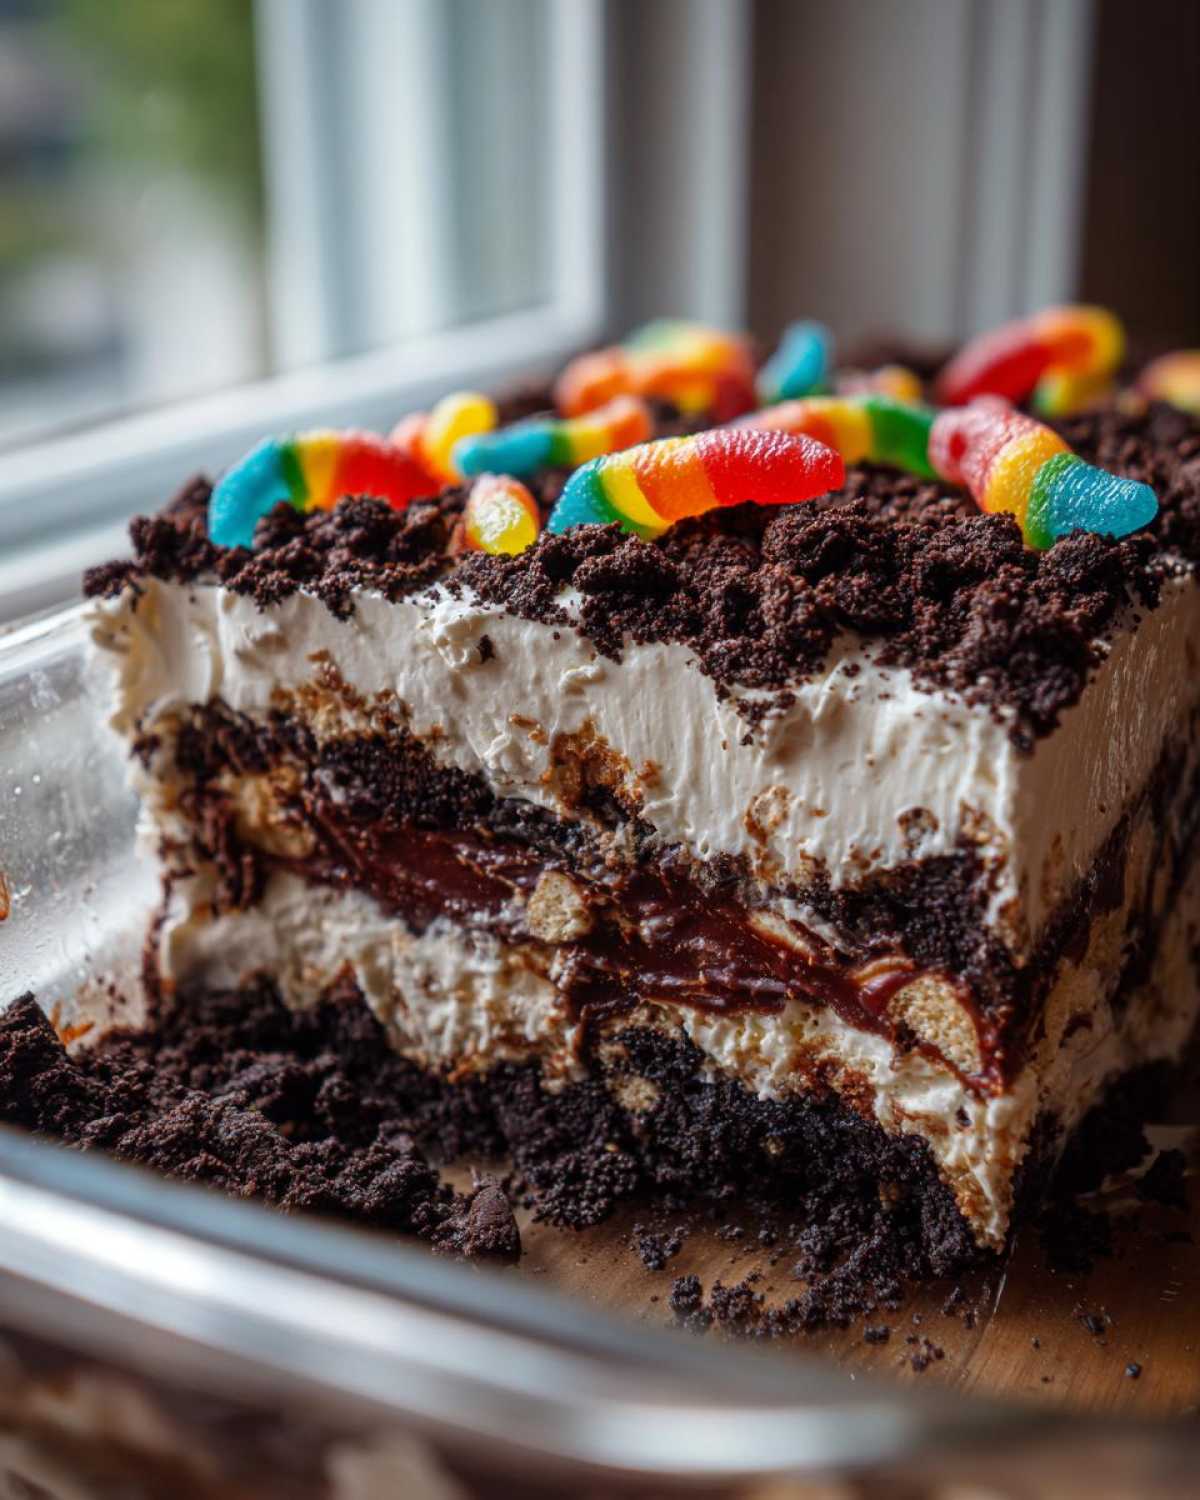
This classic treat, especially the Oreo Dirt Cake Recipe everyone remembers, is wonderfully nostalgic and requires absolutely no baking. It’s the perfect combination of creamy filling and crunchy cookie crumbs, and it never fails to be the star at family nights or any gathering I bring it to. Trust me, pulling out a recipe that is this fun and this delicious is what cooking is all about!

As someone who grew up learning that the best flavors often come from the simplest methods, I’ve carefully perfected this version to make sure it’s foolproof for you. If you are curious about how we manage privacy while you enjoy these recipes, you can always check out our cookies policy for transparency.
Why This Easy No-Bake Oreo Dirt Cake Recipe is a Must-Make
There is a reason this dessert keeps showing up on dessert tables everywhere! It’s just one of those recipes where the effort you put in is completely outweighed by how much everyone loves it. This dirt cake is magic for busy cooks like us.
- Quick Assembly for the Best Dirt Cake: You only spend about 25 minutes putting this all together! Since it’s a total no-bake recipe, even if you’re new to the kitchen, this is incredibly kid-friendly and super easy to manage.
- Crowd-Pleasing Layers of Creamy Chocolate Pudding Dessert: Oh, the texture! You get that perfect contrast between the rich, silky filling and the crunch of the cookie crumbs. It’s a genuine Creamy Chocolate Pudding Dessert experience.
- Perfect Make Ahead Dessert for Any Event: When I need guaranteed hits for potlucks or family dinners, this is the one I lean on. It *requires* chilling time, making it the ultimate make ahead dessert.
Honestly, if you need a simple, show-stopping treat, grab the pudding mix and let’s get layering. You can check out my chicken parmesan recipe when you need a main course that hits just as big!
Gathering Ingredients for Your Classic Dirt Cake
For any great dessert, especially a treasured one like this dirt cake, you must start with the right ingredients handled correctly. This isn’t the time for guesswork, my friends! Getting your butter and cream cheese perfectly softened is crucial for that smooth, luxurious filling. I always pull mine out about an hour before I plan to mix. Remember, we want silky layers, not lumpy ones!
When you gather everything, pay close attention to the preparation notes—they are what brings this recipe to life. While you’re gathering ingredients, if you need a savory break, my egg salad recipe is always a winner.
For the Creamy Filling Layer
This is what makes the whole dessert so rich and wonderful. You will need:
- One package (8 ounces) of cream cheese, making sure it is completely softened.
- One cup of unsalted butter, also softened soft!
- One cup of confectioners’ sugar (powdered sugar). Don’t use granulated here; we need that fine texture!
- One container (12 ounces) of frozen whipped topping, which must be thawed completely before you fold it in.
For the Chocolate Pudding and Oreo Dirt
This mixture provides the color and the crunch. Get these ready:
- Two packages (3.9 ounces each) of instant chocolate pudding mix. Instant sets up much firmer than cooked pudding, which is what we need here.
- Three cups of very cold milk. The colder the better to help the instant pudding set fast!
- One whole package (14.3 ounces) of Oreo cookies. These need to be crushed into that signature fine crumb texture—think rough sand, not powder! This makes for the best Crushed Oreo Dessert.
- And of course, the fun part: gummy worms for decoration!
Step-by-Step Instructions for the Perfect dirt cake
Now we get to the fun part—putting all our lovely components together! Since this is a no bake dirt cake, the construction is almost as important as the mixing itself. We are building layers here, making sure every scoop delivers a little bit of everything. Everything comes together so quickly, but that chilling time afterwards is non-negotiable, so plan ahead!
Preparing the Cream Cheese Base
Grab your big mixing bowl for this first step where we build the creamy heart of the dessert. You need to beat your softened cream cheese, softened butter, and the confectioners’ sugar until it is completely smooth. I mean *smooth*—no lumps allowed! Once that looks like perfect, pale fluff, you gently fold in the thawed whipped topping. Don’t overmix the topping; just fold it in until you don’t see any more white streaks.
Mixing the Chocolate Pudding
This is teamwork! While your cream base is resting, grab a separate bowl. Whisk your two packages of instant chocolate pudding mix together with the three cups of cold milk. You only need to whisk vigorously for about two minutes, just until you see the mixture really starting to grab onto itself and thicken up nicely.
Assembling the Simple Dirt Cake Layers
Time to build! I usually use a 9×13 pan for serving a crowd, but a big trifle dish works beautifully if you want to show off those gorgeous layers. Start by sprinkling one-third of your crushed Oreos right on the bottom. Over those crumbs, spread half of your prepared cream cheese mixture evenly. Next, pour half of that thickened chocolate pudding right on top of the cream. Then, you simply repeat those layers: another third of the crushed Oreos, the rest of the cream, and finally, the last of the pudding.

Finishing and Chilling the dirt cake
We need that final layer of ‘dirt’ to make it look authentic! Top the entire thing with the remaining crushed Oreos—don’t be shy! Now, for the playful finish: gently press your gummy worms into that top layer of ‘dirt’. They look so silly poking out! Finally, cover the entire dish tightly. This step is vital: you must chill this beauty for at least four hours, but honestly, making it the day before tastes even better. My vanilla cake recipe is much quicker if you need something faster!
Expert Tips for the Best dirt cake Recipe
You know, even with an easy recipe like this dirt cake, a little chef’s intuition can make it spectacular. I like to think of these little tricks as the Italian grandmother secret—they aren’t hard, but they elevate the final result from great to unforgettable. Follow these tips, and you’ll have the best version of this dessert! If you ever need a side dish that feels just as soul-satisfying, my baked sweet potato recipe is perfection.
Achieving Perfect Oreo Crumb Texture
When you are crushing those Oreos, don’t feel like you have to turn them into fairy dust! I know we want that delicious ‘dirt’ texture, but if you process them too finely, they just dissolve into the cream layers. I pulse them in the food processor a few times, then stop and check. You want most of the crumbs to be fine, but leaving some slightly larger, irregular chunks gives you that fantastic textural contrast when you take a bite. That little crunch matters!
Chilling Time for Optimal Firmness
Listen to me carefully: you *can* serve this after four hours of chilling, but why rush perfection? This is the key to making it the absolute best No Bake Dirt Cake you’ve ever had. If you can manage it, wrap your dish tightly and let it hang out in the refrigerator overnight. When that happens, the pudding has time to fully hydrate the cookie crumbs just enough, making the whole thing sliceable without oozing everywhere. Trust me, patience pays off here!
Variations on the Classic dirt cake
While I adore the classic dirt cake exactly as my grandmother taught me, sometimes we need to mix things up, right? This comforting dessert is so flexible, and adapting it for different occasions is part of the fun! I have a few small tweaks that I love, especially when I don’t want to deal with slicing a big pan!
Making Individual dirt cup recipe Servings
If you are hosting a big group or need something super easy to hand out—maybe for a kid’s birthday party—skip the big casserole dish and make this into a Dirt Cup Recipe! You just layer the same way, but in small jars, clear plastic tumblers, or even tiny terracotta pots if you are feeling extra themed!
They look adorable lined up on a tray, and everyone gets their own perfect little portion. Plus, you don’t have to worry about making that first messy slice!
Flavor Twists for this Chocolate Dirt Dessert
If you want to sneak in a little something extra into this Chocolate Dirt Dessert, I have a couple of secrets. Next time you mix the pudding, try adding just half a teaspoon—no more!—of instant espresso powder. It deepens the chocolate flavor without tasting like coffee at all. Magic, I tell you!
Also, feel free to swap a little bit of the cream cheese mixture for slightly softened cream cheese mixed with a teaspoon of peanut butter. It adds an extra layer of richness that pairs beautifully with the Oreos. For more quick, satisfying chocolate ideas, check out my moist chocolate mug cake recipe!
Serving Suggestions for Your Layered Oreo Dessert
When you serve this dirt cake, presentation is everything! Beyond the classic gummy worms sticking out of the top, think about how you can make this colorful dessert pop, especially if it’s for a big party. If you are using a large dish, lightly dust the top ‘dirt’ layer with a tiny, tiny bit of powdered sugar right before serving—it looks like dusty earth, it’s charming!
For a true Dessert for Parties feel, try serving it next to fresh berries or sliced bananas; the fruit freshness balances the richness of the cream and cookies perfectly. And if you need something savory alongside this sweet treat, those homemade breadsticks are always waiting for you!
Storage and Make Ahead Dessert Instructions
Since this wonderful dirt cake has so much creamy filling, it simply must be stored correctly! Always cover your dish tightly with plastic wrap or a secure lid before putting it anywhere near the cold air in your refrigerator. I always aim to make this a make ahead dessert by preparing it the day before we need it. This gives those layers time to really meld together, making it firm.
You can safely keep this delicious treat refrigerated for up to three or four days. If you are planning a big event, knowing you made the star dessert yesterday is such a relief, isn’t it? For other great make-ahead comfort foods, you should certainly look at my famous crockpot chili recipe!
Frequently Asked Questions about dirt cake
It’s natural to have questions when you are making a recipe for the first time, or even when you are trying to make your favorite dish just a little bit better! I want you to have success every single time you put this dessert together. I’ve answered a few of the things I hear most often about getting this classic dirt cake just right.
Can I use homemade chocolate pudding instead of instant for this dirt cake?
You absolutely *can*, but I usually strongly recommend sticking with the instant mix for this specific layered dessert. Homemade pudding, while delicious, sets up much softer and is cooked on the stove, which means it might not give you the firm structure we need when building these simple dirt cake layers. The instant pudding sets up quickly because of the stabilizers, ensuring your layers don’t slump into each other, keeping that perfect contrast!
What is the best way to crush Oreos without making dust?
Oh, that dust! I hate when I open the food processor and it looks like I just made cocoa powder instead of cookie crumbs! My favorite way to get the perfect texture—a mix of fine ‘dirt’ and slightly larger, satisfying chunks—is to toss the Oreos (filling and all!) into a very sturdy zip-top bag.
Lay that bag on your counter, grab a rolling pin—or even the bottom of a heavy saucepan—and just gently tap and roll over them until you get the texture you like. It feels a little old-fashioned, but it is so effective and it keeps the mess completely contained!
How long can this No Bake Dirt Cake safely stay refrigerated?
Because this is such a rich, No Bake Dirt Cake relying on dairy and pudding, it needs to stay cozy in the fridge. You can safely keep it covered tightly for about three to four days. I find that day two is honestly when it tastes the absolute best because the crumbs have softened just a touch, but it remains perfectly safe and delicious until day four. Any longer and the cream cheese layer starts to lose its freshness for me.
If you are looking for other long-lasting comfort foods, you must try my recipe for date nut bread; that one keeps beautifully on the counter!
Nutritional Estimate for this Creamy Chocolate Pudding Dessert
Now, my dear friends, while this dessert isn’t exactly something my *nonna* would categorize as ‘light’—and honestly, when it tastes this good, who cares about the numbers?—I still believe in being transparent about what we are enjoying. Cooking is about pleasure, yes, but also about information!
I always work with standard package sizes when developing these recipes, so please keep in mind that these figures are just an estimate based on the ingredients listed for the whole dish, divided into 12 generous servings. If you use different brands of pudding or Oreos, your totals will change a little. For any deeper dive into recipes that might be lighter, you can always explore my stovetop rice pudding!
Here is the approximate breakdown for one lovely serving of this delicious, layered chocolate treat:
- Serving Size: 1 serving
- Calories: 450
- Sugar: 45g (Yes, it’s a treat, but the flavor is worth every grain!)
- Sodium: 350mg
- Fat: 25g
- Saturated Fat: 14g
- Unsaturated Fat: 11g
- Trans Fat: 0.5g
- Carbohydrates: 55g
- Fiber: 2g
- Protein: 6g
- Cholesterol: 45mg
Enjoy every bite! We cook to share joy, and that joy deserves to be savored!
Print
Easy No-Bake Oreo Dirt Cake Recipe with Gummy Worms
- Total Time: 4 hr 25 min
- Yield: 12 servings
- Diet: Vegetarian
Description
Make this super fun and easy no-bake Oreo dirt cake. It features rich, creamy chocolate pudding layers and crushed Oreos, perfect for your next gathering or family treat.
Ingredients
- 1 package (8 ounces) cream cheese, softened
- 1 cup unsalted butter, softened
- 1 cup confectioners’ sugar
- 1 container (12 ounces) frozen whipped topping, thawed
- 2 packages (3.9 ounces each) instant chocolate pudding mix
- 3 cups cold milk
- 1 package (14.3 ounces) Oreo cookies, crushed
- Gummy worms for decoration
Instructions
- In a large bowl, beat the softened cream cheese, softened butter, and confectioners’ sugar until the mixture is smooth and creamy.
- Gently fold in the thawed whipped topping until just combined. Set this cream layer aside.
- In a separate bowl, whisk together the instant chocolate pudding mix and cold milk for about two minutes, or until the mixture begins to thicken.
- To assemble the dirt cake, use a large trifle dish or a 9×13 inch pan. Start by placing one-third of the crushed Oreo cookies on the bottom layer.
- Spread half of the cream cheese mixture evenly over the Oreo layer.
- Pour half of the prepared chocolate pudding mixture over the cream layer.
- Repeat the layers: add another third of the crushed Oreos, the remaining cream cheese mixture, and the remaining chocolate pudding.
- Top the entire dessert with the remaining crushed Oreos to create the ‘dirt’ effect.
- Press gummy worms lightly into the top layer of ‘dirt’ for decoration.
- Cover the dish and chill in the refrigerator for at least four hours, or preferably overnight, to allow the layers to set properly.
Notes
- For the best texture, crush the Oreos finely, leaving some slightly larger chunks for variety.
- You can make this a make ahead dessert; it tastes even better the next day.
- If you are serving this in individual cups, layer the ingredients similarly for fun dirt cup recipes.
- Prep Time: 25 min
- Cook Time: 0 min
- Category: Dessert
- Method: No Bake
- Cuisine: American
Nutrition
- Serving Size: 1 serving
- Calories: 450
- Sugar: 45g
- Sodium: 350mg
- Fat: 25g
- Saturated Fat: 14g
- Unsaturated Fat: 11g
- Trans Fat: 0.5g
- Carbohydrates: 55g
- Fiber: 2g
- Protein: 6g
- Cholesterol: 45mg


Comments are closed.