
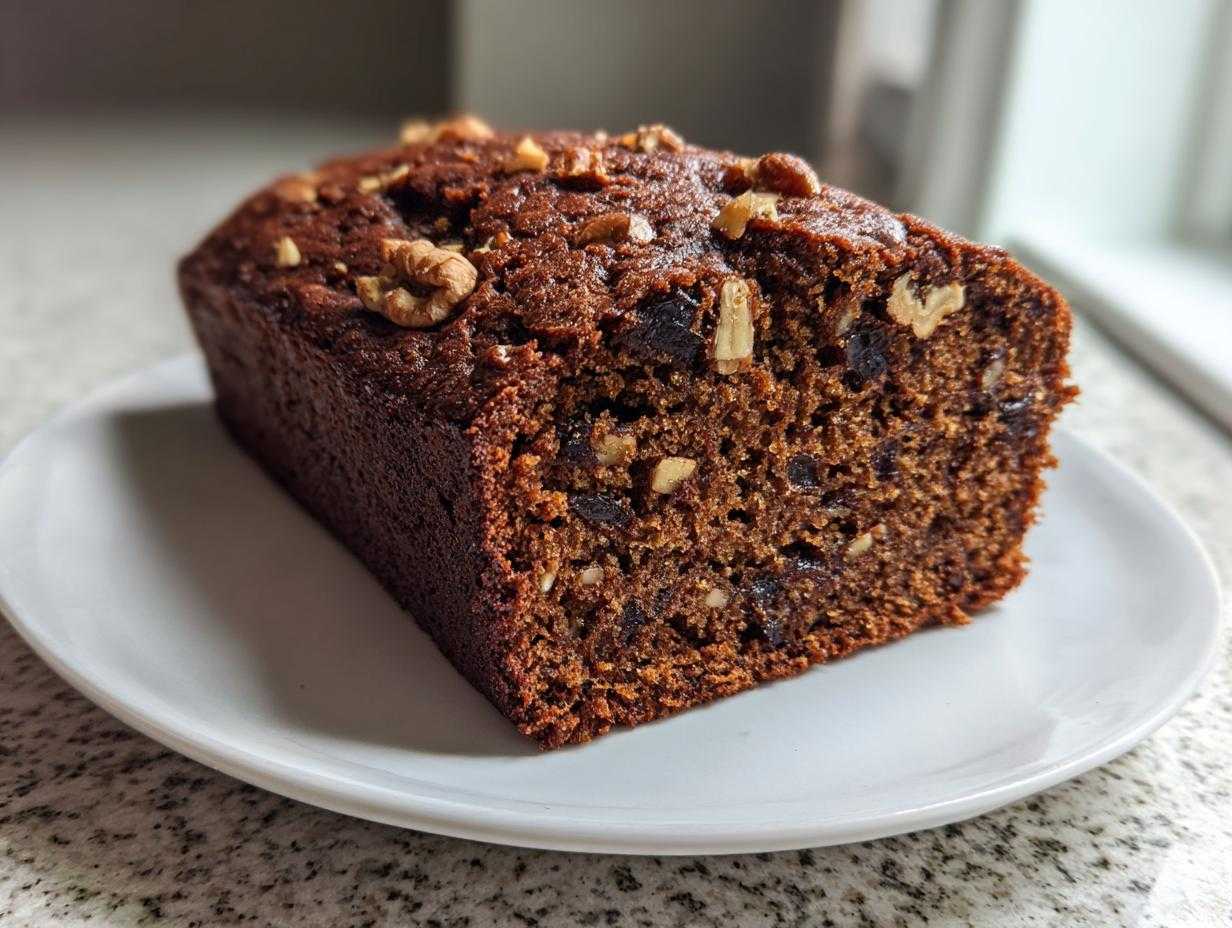
There’s just something about pulling a warm loaf out of the oven, right? It smells like history and total comfort. We all need those reliable recipes that never fail us, especially when we need a fantastic snack fast. For me, that recipe has always been my **Old-Fashioned, Ultra-Moist Date Nut Bread Recipe**.
I spent years trying to nail down that perfect texture—you know, the kind that doesn’t crumble into dry dust the second you slice it? So many quick breads just miss the mark! I tested every trick until I found the combination that locks in moisture. This isn’t just any loaf; this is the ultimate, tender, can’t-stop-eating-it version of classic **date nut bread** that I always rely on for holidays, brunch, or just a tough Tuesday.
Trust me, once you try this specific method with the soaking dates, you won’t look back. It’s simple, but those little details make all the difference in keeping this loaf incredibly moist.
Why This Old-Fashioned Date Nut Bread Recipe Guarantees Moisture
If you’ve ever been burned by a dry, crumbly quick bread, I feel you! It’s the worst when you follow the directions perfectly, and it still comes out tasting like cardboard. That’s why I’m obsessed with making sure this **Moist Date Nut Bread Recipe** stays soft for days. This isn’t some delicate cake; it’s hearty, wholesome, and built to last, which is why it reminds me of a **Classic Loaf Cake** from childhood.
We’re tackling dryness head-on with a few crucial steps. It’s all about locking in that hydration before the loaf even hits the heat. Seriously, mastering this recipe means you’ll never have an excuse to buy that sad plastic-wrapped stuff at the grocery store again!
The Secret to Tender Date Nut Bread
Okay, step one in guarding your moisture levels is treating those dates right. You can’t just throw chopped dates into the batter dry; they’ll steal water from everything else while baking! My absolute must-do is soaking them in boiling water along with the baking soda. This softens them beautifully, almost turning them into a creamy paste. It also activates the soda early, so everything works together to give you that tender crumb we’re after.
Tips for Perfect Date Nut Bread Baking
Once that date mixture is ready, we need to keep the batter gentle. The number one mistake people make when baking quick breads like this **nut and date cake recipe** is overmixing once the flour goes in. Mix until you just don’t see streaks of flour anymore—a few lumps are totally fine!
Another thing I learned through painful trial and error is pan prep. Don’t just lightly grease your loaf pan! Because this loaf is so rich and moist, it loves to stick to the bottom. I use the good old-fashioned grease-and-flour method, but I make sure to coat every single corner well. If you’re nervous, you could always check out a great guide on other moist baking techniques; it confirms why hydration is key!
Gathering Ingredients for Your Date Nut Bread Loaf
Alright, let’s get organized! Gathering everything before you start is the secret to making this **Homemade Date Bread** feel like totally relaxed **Comfort Food Baking**. You probably have most of this stuff in your pantry already. The recipe is super straightforward, calling for simple pantry staples—flour, sugar, eggs—but a few items need your attention before they hit the bowl.
Remember, we need those dates chopped up nice and small; they blend better if they aren’t huge chunks! Also, your butter absolutely must be softened. I mean soft enough to smash easily with a spoon, but not melted into a puddle. That matters for the creaming step!
Ingredient Notes and Substitutions for Date Nut Bread
My recipe calls for walnuts, but honestly, use whatever nuts you have on hand! Pecans give it a richer, buttery flavor, so feel free to swap those in if you prefer a **Walnut Date Loaf** alternative. And hey, while this recipe uses standard brown sugar, if you’re playing around with making a **Naturally Sweetened Bread**, you could potentially experiment with maple syrup here, though you’d need to cut back on the liquid to compensate!
Also, I mentioned coffee in the other section as a swap for water—even just a splash of cooled, strong coffee deepens the spice flavor in this **Sweet Loaf Recipe**. If you wanted to see some other ways I use moisture boosters in my baking, check out this easy moist fresh plum cake recipe for inspiration!
Step-by-Step Instructions for Easy Date Nut Bread
This recipe is designed to be totally painless! Honestly, making **Easy Quick Bread Baking** a success hinges on staying organized and moving smoothly from one stage to the next. You’ll want to get your oven warmed up first—350 degrees F (175 degrees C)—and make sure your 9×5 loaf pan is greased and floured. I always take a second to run my paper towel around the corners so nothing snags when it comes time to flip it out! If you want more ideas on simple baking timelines, check out this guide on Easy Quick Bread Baking.
Once everything is prepped, we move right into the moisture activation phase. Don’t skip this—it’s critical! Then it’s just a matter of mixing things together gently. We’ll separate things into wet and dry bowls, just like you learned in grade school baking, which keeps our **Homemade Date Bread** from getting tough. For more tips on mixing batters without developing too much gluten, look at what makes This easy no-knead cranberry walnut bread successful.
The final bake time can vary, so keep an eye on it around the 55-minute mark. And remember that resting time! It’s super important for quick breads to set up before you try to handle them.
Preparing the Dates and Wet Ingredients for Date Nut Bread
Let’s tackle the dates first! This is where the magic starts. Take your chopped dates and put them in a safe bowl—I use a glass Pyrex one—and pour that boiling water right over the top, almost covering them. Stir in that teaspoon of baking soda. Yes, I know it will fizz a little bit, that’s good! Let that sit untouched for about ten minutes. They’ll soften up beautifully, turning almost jammy. This step is essential for our **Moist Date Nut Bread Recipe**.
While those dates are soaking, grab your big mixing bowl for the wet ingredients. Cream that softened butter (one stick!) and the brown sugar together. You want this mixture to look light, fluffy, and pale yellow—it should hold peaks when you lift your spoon. Seriously, if your butter is too cold or your eggs aren’t room temp, this won’t fluff up correctly! If your eggs are cold, just drop them in a bowl of warm water for five minutes first; it makes them mix so much better into that creamed butter base, giving you that perfect base for a **Classic Loaf Cake**.
Once you have that dreamy fluffy base, beat in those two eggs one at a time until they are fully incorporated. A quick splash of vanilla, and you’re done with the wet stuff! Now you have the foundation for a truly fantastic piece of **Date Nut Bread**.
Serving Suggestions for Your Homemade Date Bread
Okay, now that you’ve managed not to eat the whole loaf while it was cooling (I’ve definitely lost that battle before!), it’s time to enjoy this masterpiece. I usually like to slice this **Homemade Date Bread** when it’s just slightly warm—not hot, but definitely not stone cold. It makes the subtle spice flavors really pop!
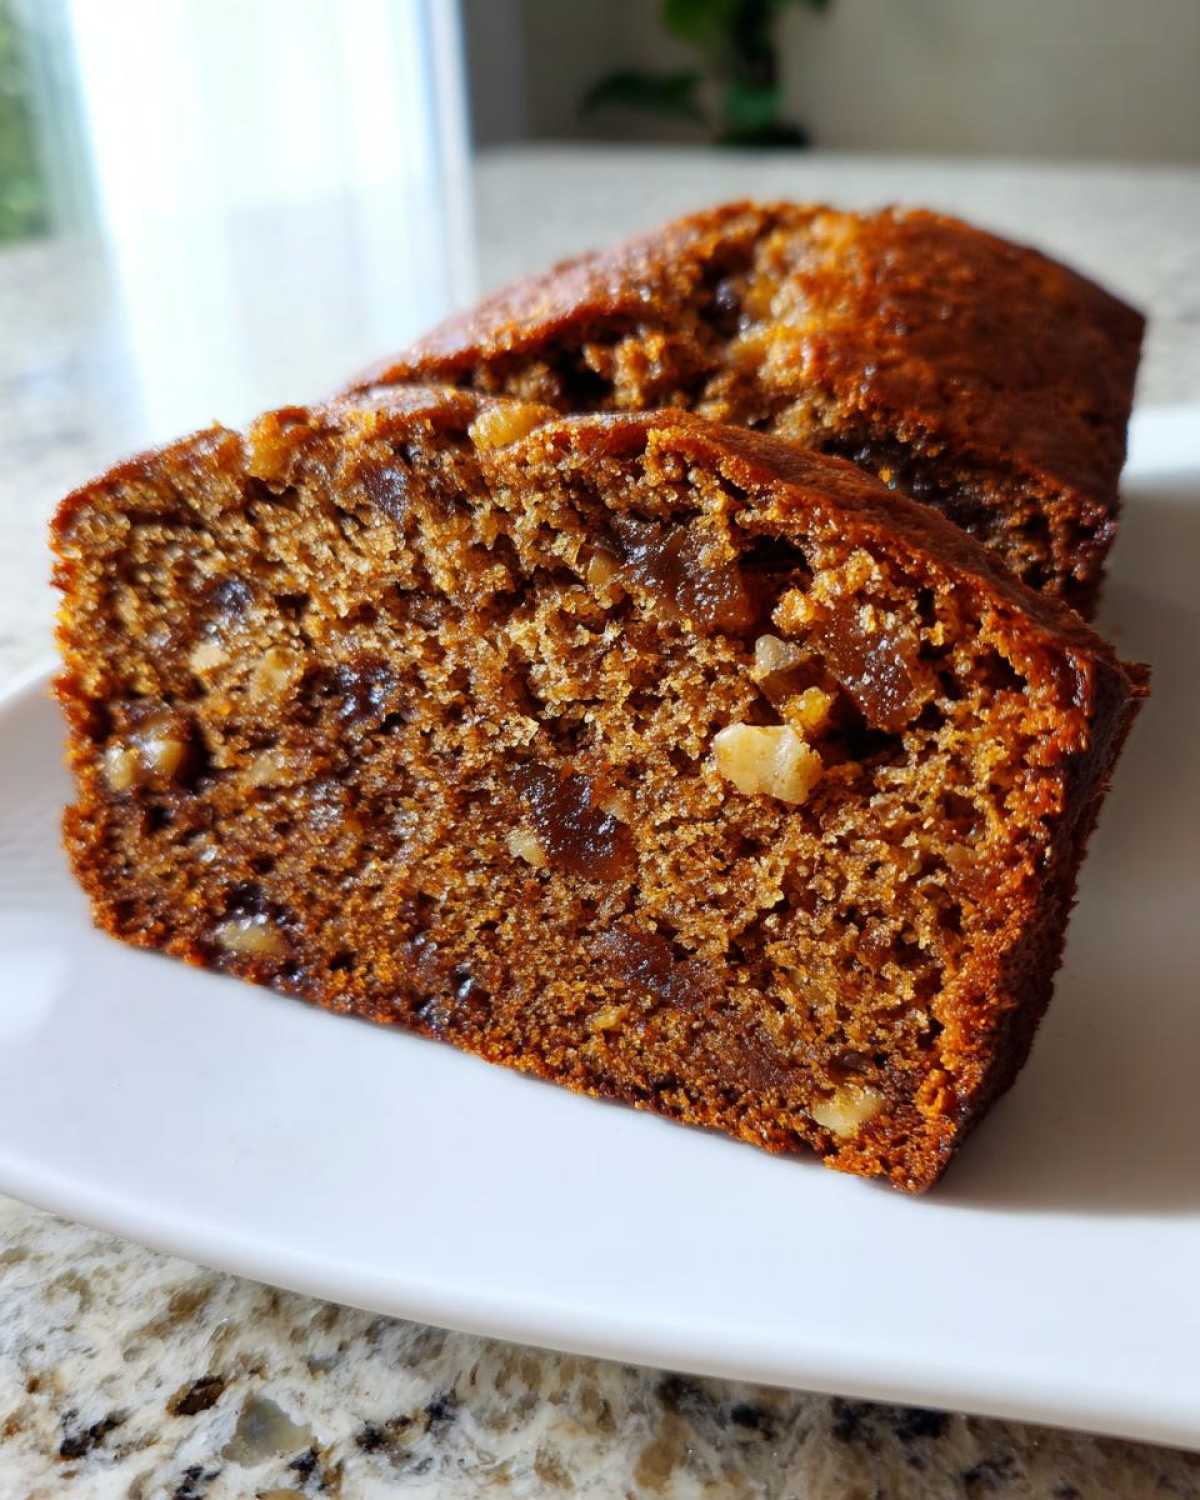
The classic way to serve this is simple: a generous smear of good, slightly salted butter. Oh my gosh, that melts right into the tender crumbs. If you want something a little richer, a schmear of creamy whipped cream cheese is amazing, too. Honestly, I think it’s a fantastic **Wholesome Snack Bread** just as it is, perfect alongside a hot mug of coffee or black tea halfway through the afternoon.
If you are looking for other fun spreads or pairings that bring out those nice, rich flavors, you might want to check out some other great additions that work well with sweet loaves, like the toppings suggested for these sweet potato biscuits recipe!
Storage and Make Ahead Tips for Date Nut Bread
One of the things I love most about quick breads is that they are champions of the **Make Ahead Bread** category. You can bake this loaf, let it cool completely (and I mean *completely*—don’t cheat!), and it just sits there waiting for you to slice into it later. On the counter, wrapped tightly in plastic wrap then foil, it stays beautifully moist for about three days. The moisture just seems to redistribute nicely overnight!
If you are planning ahead for the holidays or just want to stock up on your favorite **Homemade Date Bread**, you can totally freeze this thing. Once it’s cooled solid, wrap it super tight in plastic wrap—I usually do two layers—and then wrap that whole thing in aluminum foil. It lasts fantastic for up to three months! When you want some, just let it thaw on the counter still wrapped up. You can even refresh it slightly in a low oven for ten minutes!
It’s such a lifesaver to have a frozen loaf ready to go for unexpected guests. If you want to see even more foolproof ways to plan your baking schedule, check out this guide on make ahead bread techniques!
Date Nut Bread Variations: Spiced Date Bread and More
The beauty of a standard loaf like this is how easy it is to customize! If you think the basic recipe needs a little more cozy warmth, you can absolutely turn this into a **Spiced Date Bread**. I usually throw in about half a teaspoon of cinnamon and a pinch of ground cloves right along with the dry ingredients. It makes the whole kitchen smell like Christmas morning!
Now, if you’re looking for a really fun twist, you have to try the **Banana Date Nut Bread Variation**. It’s so good! The trick is to substitute about half a cup of the date mixture with a cup of very ripe, mashed banana. It adds another layer of deep, rich sweetness. Just make sure the banana is super spotty—that’s when the sugars are highest!
If you’re trying to sneak in a little more goodness, swapping out half of the all-purpose flour for whole wheat flour works perfectly fine; it just gives the loaf a slightly nuttier texture. For lots of other ways to boost flavor in similar recipes, take a peek at these moist easy sweet potato muffins; the principles of boosting moisture are the same!
Frequently Asked Questions About Making Date Nut Bread
I get asked the same few things about this loaf all the time, and honestly, they are all totally valid questions! It’s great that you’re thinking ahead about making sure your **date nut bread** turns out exactly right. We want this to be the best loaf you’ve ever made, so let’s clear up any lingering doubts about ingredients and texture so you can nail that perfect result every time.
For more inspiration on what to serve alongside your fresh-baked loaf for those weekend get-togethers, you should definitely check out some great ideas in this guide on Brunch Quick Breads.
Can I use dried cranberries instead of dates in this date nut bread?
You absolutely can, but it changes the flavor profile significantly! Dates bring a deep, almost caramel-like sweetness and a softer texture when soaked. If you swap in dried cranberries, you’ll get a much tangier, brighter flavor. Since cranberries are naturally a little tougher, you might want to soak them in warm water for a little longer than the recipe suggests, maybe 15 minutes, just to ensure they soften up nicely in the oven.
Why is my date nut bread dense?
Usually, density comes down to two things! First, if you mixed the flour in too vigorously or too long after adding it, you’ve developed too much gluten, which tightens everything up. Stop mixing the second the flour disappears! Second, check your leavening agents—make sure your baking powder hasn’t expired. Old powder means no rise, resulting in a heavy, squashed loaf. Also, ensure you creamed your butter and sugar enough initially; that traps the air that helps lift the loaf!
What is the best nut for this classic loaf cake?
This is purely a matter of personal preference, but I’m very loyal to walnuts! They have that slightly bitter, earthy crunch that plays perfectly against the sweetness of the dates and brown sugar in this **Classic Loaf Cake**. Pecans are a close second—they are softer and slightly sweeter, which definitely makes for a richer, melt-in-your-mouth experience. Either way, make sure they are roughly chopped so you get a good distribution throughout the batter!
Estimated Nutritional Data for This Sweet Loaf Recipe
I always like to give folks a heads-up on the nutritional side of things, especially since this is such a satisfying **Sweet Loaf Recipe**! Now, please remember that because we are using real butter, brown sugar, and nuts, these numbers are just my best estimate based on standard ingredient measurements. If you swap walnuts for pecans or use a different sugar, your final count will shift a bit!
This bread is hearty—it’s meant to be breakfast or a wonderful afternoon indulgence, not a low-calorie treat! I used the provided data, which breaks down nicely for a single slice. Knowing what’s coming helps you plan if you’re having this with a big dollop of cream cheese!
To see how this loaf stacks up against other baked goods, you can always compare it to other fantastic recipes over at this link for sweet loaf recipes.
Here’s the general breakdown per serving:
- Serving Size: 1 slice
- Calories: About 305
- Fat: 14g (Be sure to note that about 5g of that is the good saturated fat from the butter!)
- Carbohydrates: 44g
- Protein: 5g
- Sugar: 30g (That sweetness comes from the dates and brown sugar—worth every bit!)
It’s a great source of energy for your morning, and honestly, the small amount of fiber helps balance out the sweetness just a touch. Enjoy it!
Share Your Baking Results
Now comes my favorite part! I put all my heart and soul into perfecting this **Old-Fashioned, Ultra-Moist Date Nut Bread Recipe**, but the real fun starts when YOU bake it in your kitchen. Seriously, I’m dying to know how it turned out!
Did you stick with the walnuts, or did you go for the pecans? Were you brave enough to try swapping half the water for coffee? Don’t be shy! When you have a moment, please come back here and leave a rating for the recipe—five stars if it didn’t turn out dry, ha! Even a quick sentence about how much your family loved this **Comfort Food Baking** staple is encouragement enough for me.
If you snapped a picture of your gorgeous, golden loaf, tag me on social media! Seeing your beautiful **Date Nut Bread** fresh out of the oven is the best reward. Happy baking, everyone!
Print
Old-Fashioned, Ultra-Moist Date Nut Bread Recipe
- Total Time: 75 min
- Yield: 1 loaf (about 10 slices)
- Diet: Vegetarian
Description
Bake a classic, moist date nut bread loaf using simple ingredients. This recipe yields a tender, flavorful quick bread perfect for snacking or breakfast.
Ingredients
- 1 cup boiling water
- 1 teaspoon baking soda
- 1 cup packed pitted dates, chopped
- 1/2 cup (1 stick) unsalted butter, softened
- 1 cup packed light brown sugar
- 2 large eggs
- 1 teaspoon vanilla extract
- 1 3/4 cups all-purpose flour
- 1 teaspoon baking powder
- 1/2 teaspoon salt
- 1 cup chopped walnuts or pecans
Instructions
- Preheat your oven to 350 degrees F (175 degrees C). Grease and flour a standard 9×5 inch loaf pan.
- Place the chopped dates in a bowl and pour the boiling water over them. Stir in the baking soda and let the mixture stand for 10 minutes. The dates will soften.
- In a large bowl, cream together the softened butter and brown sugar until light and fluffy. Beat in the eggs one at a time, then stir in the vanilla extract.
- In a separate bowl, whisk together the flour, baking powder, and salt. Gradually add the dry ingredients to the wet ingredients, mixing until just combined. Do not overmix.
- Stir the softened date mixture and the chopped nuts into the batter until evenly distributed.
- Pour the batter into the prepared loaf pan.
- Bake for 55 to 65 minutes, or until a wooden skewer inserted into the center comes out clean.
- Let the bread cool in the pan for 10 minutes before turning it out onto a wire rack to cool completely.
Notes
- For extra moisture, you can substitute half of the boiling water with strong brewed coffee.
- This bread freezes well. Wrap the cooled loaf tightly in plastic wrap and then foil.
- Serve slices warm with butter or cream cheese.
- Prep Time: 15 min
- Cook Time: 60 min
- Category: Breakfast
- Method: Baking
- Cuisine: American
Nutrition
- Serving Size: 1 slice
- Calories: 305
- Sugar: 30
- Sodium: 180
- Fat: 14
- Saturated Fat: 5
- Unsaturated Fat: 9
- Trans Fat: 0
- Carbohydrates: 44
- Fiber: 2
- Protein: 5
- Cholesterol: 55



Comments are closed.