
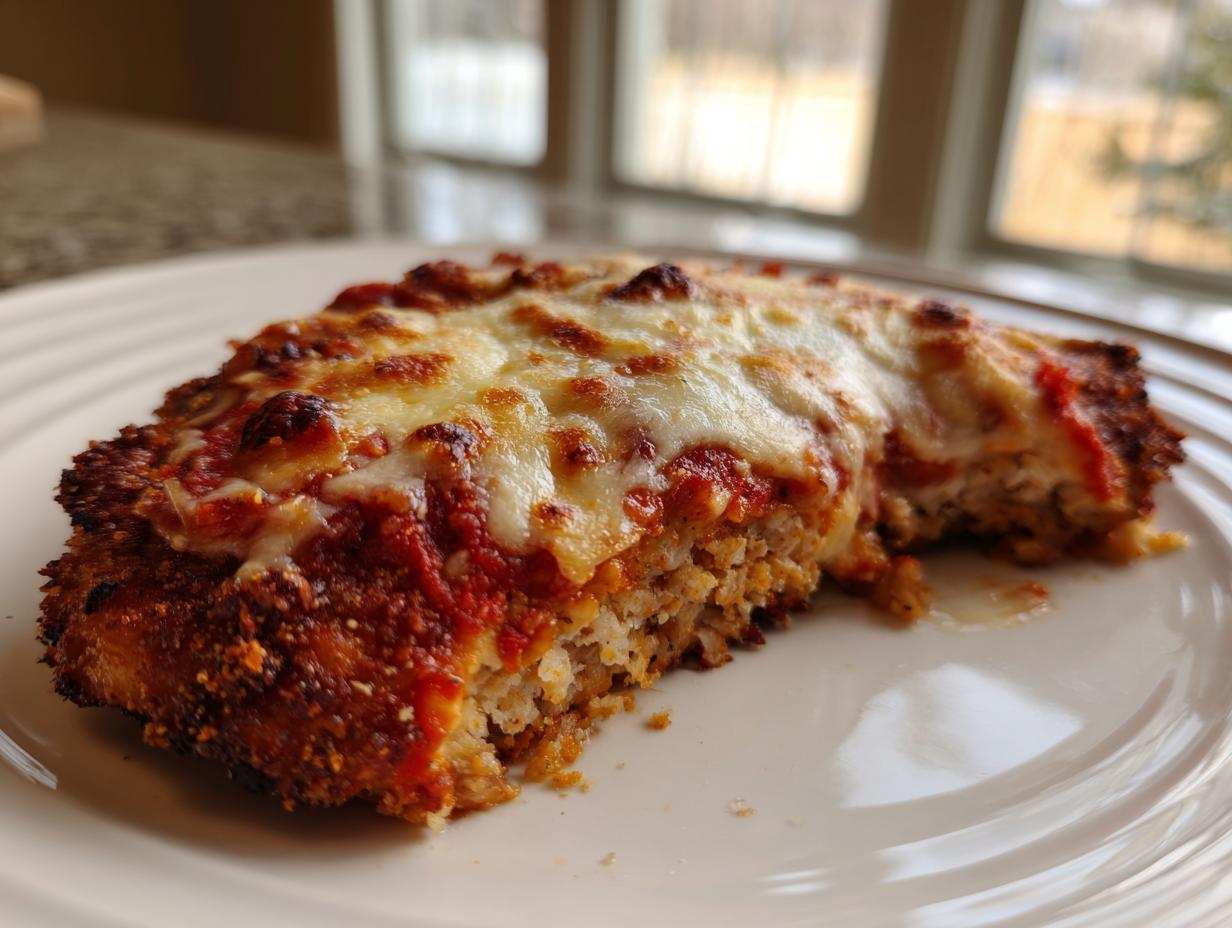
Oh, I know that feeling! You’re staring down a Tuesday night, totally craving that restaurant-quality Italian comfort food, but the thought of frying chicken cutlets in splattering oil just makes you want to order pizza instead. Nope! We aren’t doing that tonight. Trust me, I worked this **Easy Chicken Parmesan** recipe until it was foolproof—truly dependable for when you need a huge win in under 40 minutes.
This version gives you that gorgeous, golden-brown, impossibly cheesy experience you see on Pinterest, but we do it all right on a baking sheet. It’s less mess, less fuss, and honestly, the flavor is just as incredible. I promise, once you nail this simple baked method, this cheesy chicken dinner idea is going straight into your weekly rotation. It’s Italian comfort food at home, revolutionized for busy life!
Why This **Easy Chicken Parmesan** is Your New Weeknight Hero
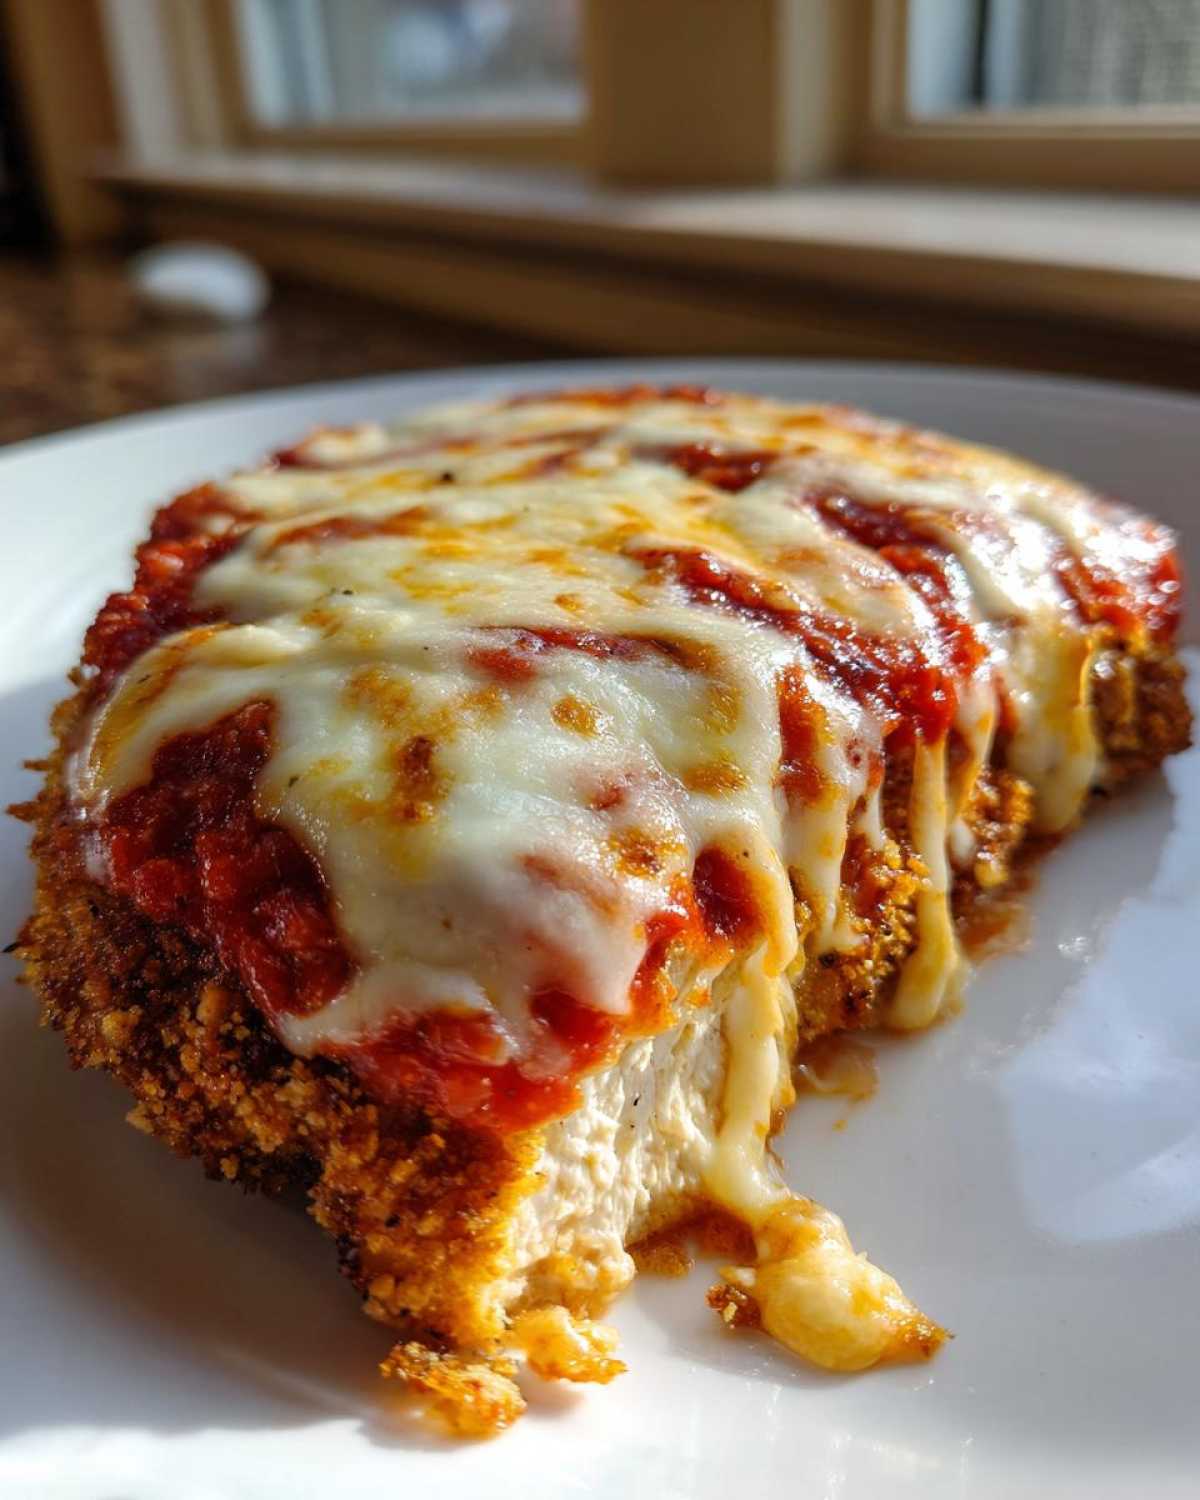
I developed this **baked chicken parm recipe** specifically because I was tired of deep-frying on a Tuesday. Who has the time or the counter cleanup for that? This method is the answer! We get that beautiful, shatteringly crisp coating that you see in all the gorgeous food photos, but we do it safely and quickly in the oven.
It’s my go-to for a **quick chicken parmesan**. The whole thing takes less than 40 minutes start to finish, which feels like magic when you remember how good it tastes. Seriously, who knew an easy honey garlic chicken could be usurped so quickly? This baked version delivers big flavor without any fuss.
Achieving Crispy, **Cheesy Chicken Cutlets** Without the Mess
The real superstar here is the Panko breadcrumb mixed with that little bit of Parmesan right in the coating. Panko is just superior for crunch, and because we give it a little drizzle of olive oil before baking, it toasts up perfectly golden brown. You avoid that soggy layer you sometimes get when you bake chicken parm.
When the cheese melts over the sauce on top of those perfectly **cheesy chicken cutlets**, it really seals the deal. You get all the texture you want without dealing with a pot of hot oil splashing all over your stove. It’s truly the best of both worlds for a busy weeknight!
Gathering Ingredients for Your **Easy Chicken Parmesan**
Getting started is the easiest part, I swear! You don’t need a complicated list of gourmet items for this **easy chicken Parmesan**—just good, quality basics. When you have fewer steps, every ingredient really shines through, so let’s make sure we have exactly what we need on hand before we start our breading station frenzy.
- 4 boneless, skinless chicken breasts, pounded to 1/2 inch thickness – Don’t skip the pounding!
- 1 cup all-purpose flour (just your everyday white flour)
- 2 large eggs, beaten until they look uniform
- 1 1/2 cups panko breadcrumbs – These make all the difference for crunch!
- 1/2 cup grated Parmesan cheese, plus more for topping
- 1 teaspoon dried oregano
- 1/2 teaspoon garlic powder
- Salt and black pepper to taste
- 2 tablespoons olive oil (just for drizzling, not deep frying!)
- 2 cups marinara sauce (use your absolute favorite jarred one!)
- 8 ounces fresh mozzarella cheese, sliced
Ingredient Notes and Substitutions
Because this recipe is so straightforward, the quality of what you use really shows. First off, the chicken: try to find breasts that aren’t super thick to begin with. Pounding them to about half an inch ensures they cook fast and stay tender. If you pound them too thin, they’ll dry out before the cheese melts, oops!
For the cheese situation, I specify fresh mozzarella because it melts so beautifully and doesn’t release a ton of extra water, but if I’m in a pinch, low-moisture shredded mozzarella works just fine. Just use less of it, maybe. Also, Panko breadcrumbs are non-negotiable for me; the standard fine breadcrumbs won’t give you that rugged, crispy exterior we’re aiming for in our **Italian comfort food at home**.
Finally, the marinara sauce. I know some people insist on making theirs from scratch, and that’s great, but for a weeknight **easy chicken dinner idea**, use a high-quality store-bought jar! Taste it first—if you like it straight out of the jar, you’ll love it baked onto your chicken. That’s my secret to speed and keeping my sanity!
Step-by-Step Instructions for **Easy Chicken Parmesan**
Okay, this is where the magic happens! Don’t let the three dishes intimidate you; this breading station setup is actually the key to making sure every bite of your **easy chicken Parmesan** is perfectly coated and ready to crisp up beautifully. We’re moving fast, so have everything ready before you flip the oven on!
First things first, fire up that oven to 400 degrees Fahrenheit (that’s about 200 Celsius). Grab your baking sheet and give it a little grease—I just use a tiny bit of cooking spray or brush on a drop of olive oil. We want everything ready to go simultaneously.
Preparing the Chicken and Breading Station
This preparation step saves us from sogginess later, so listen up! You need to take those chicken breasts and pound them down evenly to about half an inch thick. I use the flat side of a meat mallet inside a gallon zip-top bag—it keeps the mess contained and stops the chicken from tearing while you flatten it out. Even thickness means even cooking, which is crucial here!
Now, set up three shallow dishes in a row, like an assembly line. This is your breading station, the secret weapon for a consistent crust:
- Dish One: All-purpose flour.
- Dish Two: The two beaten eggs.
- Dish Three: Panko, that half-cup of grated Parmesan, dried oregano, garlic powder, plus salt and pepper mixed together really well.
Take one floured chicken piece, shake off any dusty excess. Dip it completely in the egg wash, letting the extra drip off back into the bowl—we don’t want a wet coating. Finally, press that cutlet firmly into the Panko mix. I mean really press it! Make sure both sides are completely covered. Place that ready-to-be-crispy chicken onto your prepared baking sheet while you finish the others.
Baking and Melting the Cheese for Perfect **Easy Chicken Parmesan**
Once all your coated cutlets are on the sheet, you need to drizzle just a tiny bit of olive oil over the tops of the breading. Just a light drizzle! This helps the Panko get golden brown instead of pale white. Pop the pan straight into that 400-degree oven for 15 minutes. Don’t peek too much!
When the timer goes off, pull the pan out quickly. Now we move to the cheesy topping layer! Spoon about a quarter cup of your saved marinara sauce over each chicken piece. It doesn’t need to cover the edges, just the center. Then, layer on those slices of fresh mozzarella and finish with a generous dusting of that extra Parmesan cheese.
Back into the oven they go! This second bake is shorter—about 5 to 7 minutes. You are looking for that cheese to be completely melted, bubbly, and maybe just starting to brown a little at the edges. The most important part: pull the pan out and let the chicken rest for about five minutes before you serve it. It lets the juices settle, keeping your **easy chicken Parmesan** juicy and perfect!
If you’re looking for ways to speed things up even more without sacrificing taste, you might want to check out how I make air fryer chicken parmesan—it’s another great trick for getting that crispiness fast!
Tips for the Best **Crispy Breaded Chicken Breast**
Even though we are baking this Parm, we still want that signature crunch, right? Getting a truly crispy breaded chicken breast without deep-frying definitely takes a couple of tricks up my sleeve. I’ve experimented a ton to make sure the texture holds up beautifully under that blanket of sauce and cheese, even when you’re serving leftovers the next day!
Here are the things I absolutely insist on doing to maximize the crisp factor when I bake this **easy chicken Parmesan**:
- Drizzle vs. Drown: When you put that little bit of olive oil on the Panko before the first bake, don’t pour! You just want a light sheen. If you add too much oil, the breading steams instead of toasting. Think of it as giving the crumbs a gentle tanning session rather than throwing them in a pool.
- Don’t Skip the Rest: Seriously, let it sit for five minutes after it comes out of the oven, even if you are starving. While it’s resting, the residual steam escapes, and that locks in the crunch. If you cut into it immediately, you trap steam, and that equals moisture transfer—the enemy of crispiness!
Now, for the pro move, which I sometimes employ when I have an extra 10 minutes. This is pulled right from the notes section because it really works wonders, giving you that fried texture with less intense oil involvement:
The Quick Pan-Fry Option: If you want that truly shatteringly crisp exterior—the kind you only get from a skillet—I suggest a quick, shallow fry before it ever sees the oven. Just heat about half an inch of neutral oil in a skillet over medium-high heat. Flash-fry those breaded cutlets for just two minutes per side. They don’t need to cook all the way through, just enough to set the crust and give it some deep golden color. Then, move them right onto your baking sheet to finish the baking process with the sauce and cheese. It adds about four minutes total, but WOW, the texture lift is huge. If you like crunchy chicken, you have to try this! For other quick, crispy ideas, you can see how I get my crispy air fryer chicken wings done.
Serving Suggestions for Your **Easy Chicken Dinner Idea**
When you’ve made this incredible **easy chicken Parmesan**, the next question is always: what goes on the side? Since this recipe is already focused on maximizing flavor with minimal effort, we want sides that are just as simple but still feel like a proper Italian feast.
This is the kind of dish that makes any night feel like a **family friendly pasta night**! The obvious partner is, well, pasta! You can use whatever shape your family prefers—angel hair cooks so fast, or you can go classic with spaghetti. Personally, if I’m using a jarred marinara on the chicken, I often just toss my noodles with a little butter and garlic powder, maybe a splash of the reserved pasta water, and let that extra chicken sauce spill over the top. Simple, right?
But if you’re trying to keep things a little lighter, I love serving it alongside a bright, acidic salad. Think fresh greens, thinly sliced red onion, cucumber, and a simple red wine vinaigrette. That acidity just cuts right through the richness of the mozzarella and Parmesan beautifully. If you’re feeling ambitious and want to make a homemade sauce for the pasta instead, you absolutely have to try my recipe for best homemade alfredo sauce—though save that for a weekend, because weeknights demand efficiency!
Another great, speedy side is steamed or roasted green beans tossed with lemon zest—they add a nice pop of color and freshness to the plate. The goal is easy, complementary flavors. You’ve done the hard work creating that perfect crispy chicken; now let it shine without twenty heavy sides weighing it down!
Storage and Reheating for Leftover **Easy Chicken Parmesan**
Even though this dish is so good you’ll probably just eat it all in one sitting (my family certainly tries!), sometimes you actually end up with leftovers. And let me tell you, reheating this **easy chicken Parmesan** correctly is key, or you end up with a sad, soggy mess that tastes nothing like the beautiful dinner we just made! We want to protect that hard-earned crispiness.
If you know you’re going to have leftovers, try to store the components separately before you even sit down to eat. If you can, scrape a bit of the sauce off the chicken, and try not to leave the cheese sitting on it overnight if you can help it. But let’s be real—sometimes you just eat it as is. If that’s the case, just transfer everything to an airtight container.
If you added the pasta to the plate with the chicken underneath the sauce, the pasta will probably soak up all that flavor (which isn’t the worst thing ever!), but the chicken crust will definitely suffer. Store everything in the fridge for up to three days, max.
Best Way to Reheat for Maximum Crisp
Please, I’m begging you, do not microwave this chicken. Microwaves are the absolute enemy of crispy breading! They essentially steam the crust from the inside out, and you lose all that beautiful texture we worked so hard to achieve with the Panko.
The oven is your best friend for reheating. Preheat your oven—I usually stick it around 350 degrees Fahrenheit. Place the leftover chicken pieces directly onto a clean baking sheet. If you happen to have any of that reserved sauce lying around, you can spoon a tiny bit over the top just to keep the cheese moist, but avoid soaking the bottom crust.
Bake for about 8 to 12 minutes, depending on how big your cutlets are. You are just heating them through and re-crisping the outside. If you only need one piece heated up, you could use a toaster oven, which heats up faster and does a decent job of re-crisping the breading without needing to warm up the whole main oven.
Can I Reheat This Straight from Frozen?
Honestly, I haven’t tried freezing the fully sauced and cheesy version, because I would worry about the mozzarella getting grainy when thawed. If you wanted to freeze these, I’d suggest breading the chicken, cooking it through (step 5 in the recipe), letting it cool COMPLETELY, and then freezing the un-sauced, un-cheesed cutlets in a single layer separated by wax paper inside a freezer bag.
When you want to use them, thaw overnight in the fridge, and then treat it like you are making it fresh: proceed straight to step 6 (add sauce and cheese) and bake as directed. It just saves you the mess of pounding and breading on a busy night—a nice little cheat for future **easy chicken dinner ideas**!
Frequently Asked Questions About Making **Easy Chicken Parmesan**
I’ve been making this **easy chicken Parmesan** recipe for so long now that I’ve fielded every question under the sun about substitutions or timing. It’s a great recipe because it’s flexible, but having a quick reference guide helps keep things moving fast when you’re in the kitchen. Here are the things folks ask me most often when they try it out!
Can I make this a **quick chicken parmesan** using an air fryer?
Oh, absolutely, you can! Since this baked recipe already uses very little oil and is designed for speed, transferring it to an air fryer is super simple. You don’t even need to pre-cook it much first. Set your air fryer to 380 degrees Fahrenheit. Pop the breaded cutlets in—make sure they aren’t overlapping! Air fry for about 10 to 12 minutes until they look golden. Then, pull them out, spoon on your sauce and cheese, and pop them back in for just 3 to 5 more minutes until that mozzarella is perfectly melted and bubbly. It’s even faster than the oven, if you can believe it!
What is the best way to ensure the chicken stays tender while getting **cheesy chicken cutlets**?
Tender chicken is all about thickness management, honestly. When you pound the chicken breasts down to that even 1/2 inch thickness, you ensure that by the time the outside breading is perfectly crispy, the inside is cooked through but hasn’t had time to dry out. If your cutlets are too thick on one end, that thinner end will be tough by the time the thick end is done. Also, remember that second bake for the cheese is short—don’t leave it in too long once the cheese is melted! A five-minute quick rest afterward seals in all the moisture so you get those tender, **cheesy chicken cutlets** every time.
I’ve written about other quick meals like quick chicken fried rice, but when it comes to Italian classics, speed doesn’t mean sacrificing tenderness if you manage that thickness correctly!
Nutritional Snapshot (Estimated Data)
Now, let’s talk numbers real quick. I always include this snapshot because I know so many of you track your macros or just like to know what you’re really eating when you bring a classic dish like this **easy chicken Parmesan** into your home kitchen. I pulled these estimates straight from my standard recipe card, which assumes reasonably sized chicken breasts and regular breading.
But here’s my big caveat—and please read this part! These values are just rough estimates based on standard ingredient databases. The actual numbers on your plate are going to change wildly depending on if you use low-sodium marinara, how much cheese you pile on (I know I usually use extra!), or if you use low-fat mozzarella versus the whole milk fresh kind. It’s a good guideline, but it’s not a lab result, folks!
- Serving Size: 1 cutlet
- Calories: 550
- Protein: 50g (That’s packing a punch for a weeknight!)
- Fat: 25g (Includes that lovely mozzarella fat!)
- Saturated Fat: 10g
- Carbohydrates: 35g
- Sugar: 8g (Mostly from the tomato sauce)
- Sodium: 750mg (Marinara makes this number higher, so watch the sauce!)
- Fiber: 3g
See? It’s a balanced meal, especially if you pair it with a big green salad instead of loading up heavy on the pasta. It’s still an amazingly satisfying bit of **Italian comfort food at home** without breaking the bank on calories!
Share Your **Italian Comfort Food at Home** Creations
Now it’s your turn to take the reins! I’ve shared all my secrets, the pounding technique, the Panko crust trick, and why I think this baked **Easy chicken Parmesan** is the ultimate weeknight winner. But the best part of cooking is seeing how it turns out in your kitchen!
I really, truly want to know what you think. Did you manage to keep the cutlets super crispy? Did you add any secret spice blends to that breading mix? Did you serve it over spaghetti or maybe some zucchini noodles? Pop down into the comment section below and tell me everything! Rate this recipe—five stars if it saved your busy weeknight, but I want to hear the honest reviews, too.
If you snapped a picture of your beautiful, cheesy result—maybe the whole family gathered round for this homemade **Italian comfort food at home**—please, please share it online! Tag me on social media so I can cheer you on. Knowing that my favorite family recipe is finding a place in your home rotation just absolutely makes my day!
And hey, if you’re already thinking about what cozy, comforting Italian meal is next on your list, make sure you check out my recipe for healing Italian penicillin soup—it’s the perfect companion for when comfort food needs to be gentle instead of cheesy!
Print
Easy Baked Chicken Parmesan
- Total Time: 37 min
- Yield: 4 servings
- Diet: None
Description
A simple recipe for crispy, cheesy chicken cutlets baked until golden brown, perfect for a weeknight Italian dinner.
Ingredients
- 4 boneless, skinless chicken breasts, pounded to 1/2 inch thickness
- 1 cup all-purpose flour
- 2 large eggs, beaten
- 1 1/2 cups panko breadcrumbs
- 1/2 cup grated Parmesan cheese, plus more for topping
- 1 teaspoon dried oregano
- 1/2 teaspoon garlic powder
- Salt and black pepper to taste
- 2 tablespoons olive oil
- 2 cups marinara sauce
- 8 ounces fresh mozzarella cheese, sliced
Instructions
- Preheat your oven to 400 degrees Fahrenheit (200 degrees Celsius). Lightly grease a baking sheet.
- Set up a breading station with three shallow dishes. Place flour in the first dish. Whisk eggs in the second dish. In the third dish, combine panko breadcrumbs, 1/2 cup Parmesan cheese, oregano, and garlic powder. Season the breadcrumb mix with salt and pepper.
- Dredge each chicken cutlet first in the flour, shaking off excess. Dip it into the egg mixture, letting excess drip off. Finally, press the cutlet firmly into the breadcrumb mixture to coat both sides completely.
- Place the coated cutlets on the prepared baking sheet. Drizzle the tops lightly with olive oil.
- Bake for 15 minutes.
- Remove the pan from the oven. Spoon about 1/4 cup of marinara sauce over each cutlet. Top each with slices of mozzarella cheese and a sprinkle of extra Parmesan.
- Return the pan to the oven and bake for another 5 to 7 minutes, or until the cheese is melted and bubbly and the chicken is cooked through (internal temperature reaches 165 degrees Fahrenheit).
- Let the chicken rest for a few minutes before serving hot, perhaps over pasta.
Notes
- For extra crispiness, you can briefly pan-fry the breaded cutlets in a little oil for 2 minutes per side before adding the sauce and cheese and moving them to the oven.
- Use your favorite store-bought or homemade marinara sauce.
- If you do not have fresh mozzarella, use shredded low-moisture mozzarella cheese.
- Prep Time: 15 min
- Cook Time: 22 min
- Category: Dinner
- Method: Baking
- Cuisine: Italian
Nutrition
- Serving Size: 1 cutlet
- Calories: 550
- Sugar: 8
- Sodium: 750
- Fat: 25
- Saturated Fat: 10
- Unsaturated Fat: 15
- Trans Fat: 0
- Carbohydrates: 35
- Fiber: 3
- Protein: 50
- Cholesterol: 150



Comments are closed.