
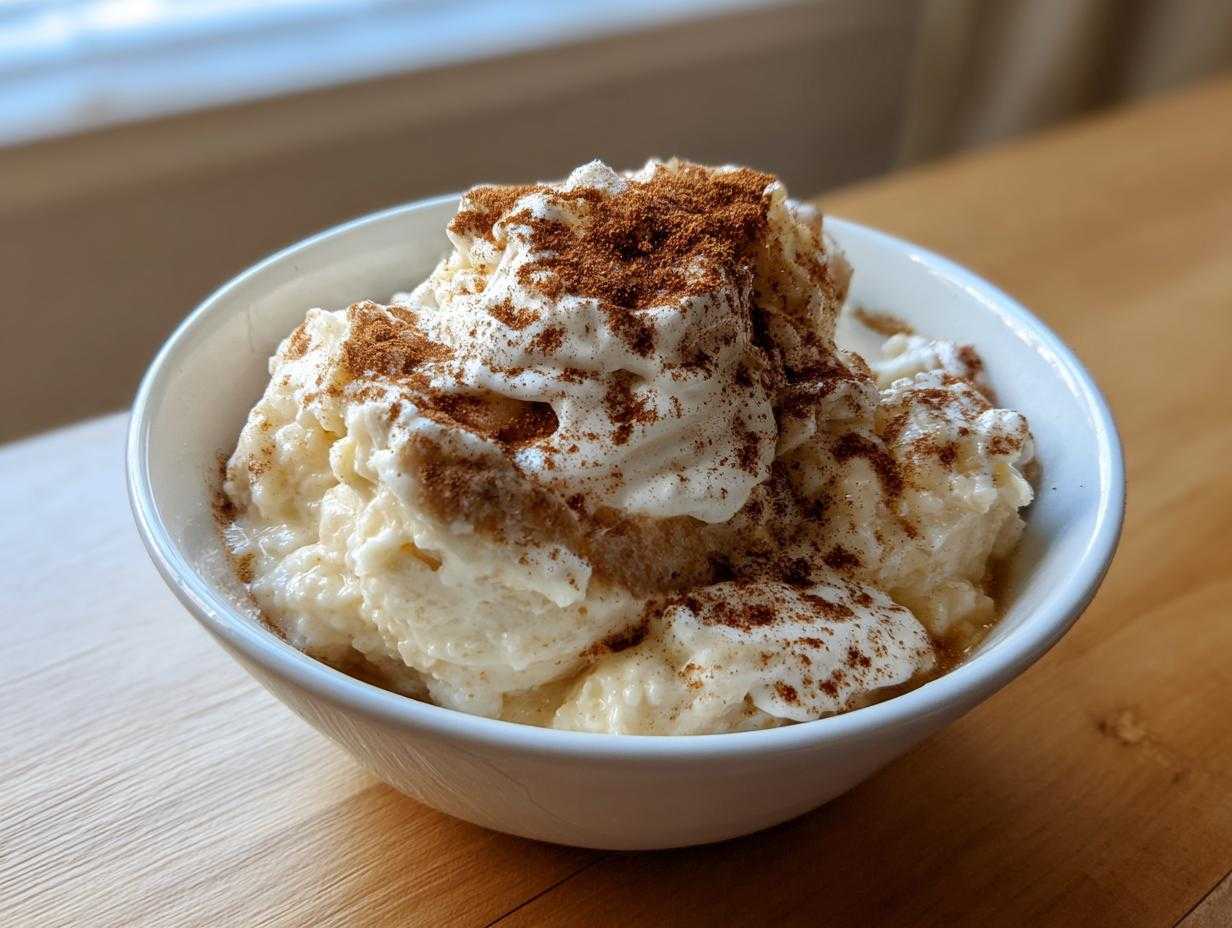
If you’re anything like me, sometimes only a bowl of something warm, sweet, and utterly nostalgic will hit the spot. Forget those gloppy, weirdly gelatinous versions you sometimes accidentally make—we are talking about the real deal! I spent years tinkering with ratios, burning the bottom of pans, and ruining batches before I finally cracked the code on the creamiest rice pudding you’ll ever scoop up.
This isn’t some fancy baked casserole; this is the old-fashioned rice pudding done perfectly right on the stovetop. It uses simple ingredients you likely already have, but the slow simmer and the secret egg trick give it that luxurious, thick texture you dream about. Trust me on this one—once you make our stovetop rice pudding this way, you won’t go back to any other recipe. It’s pure, edible comfort.
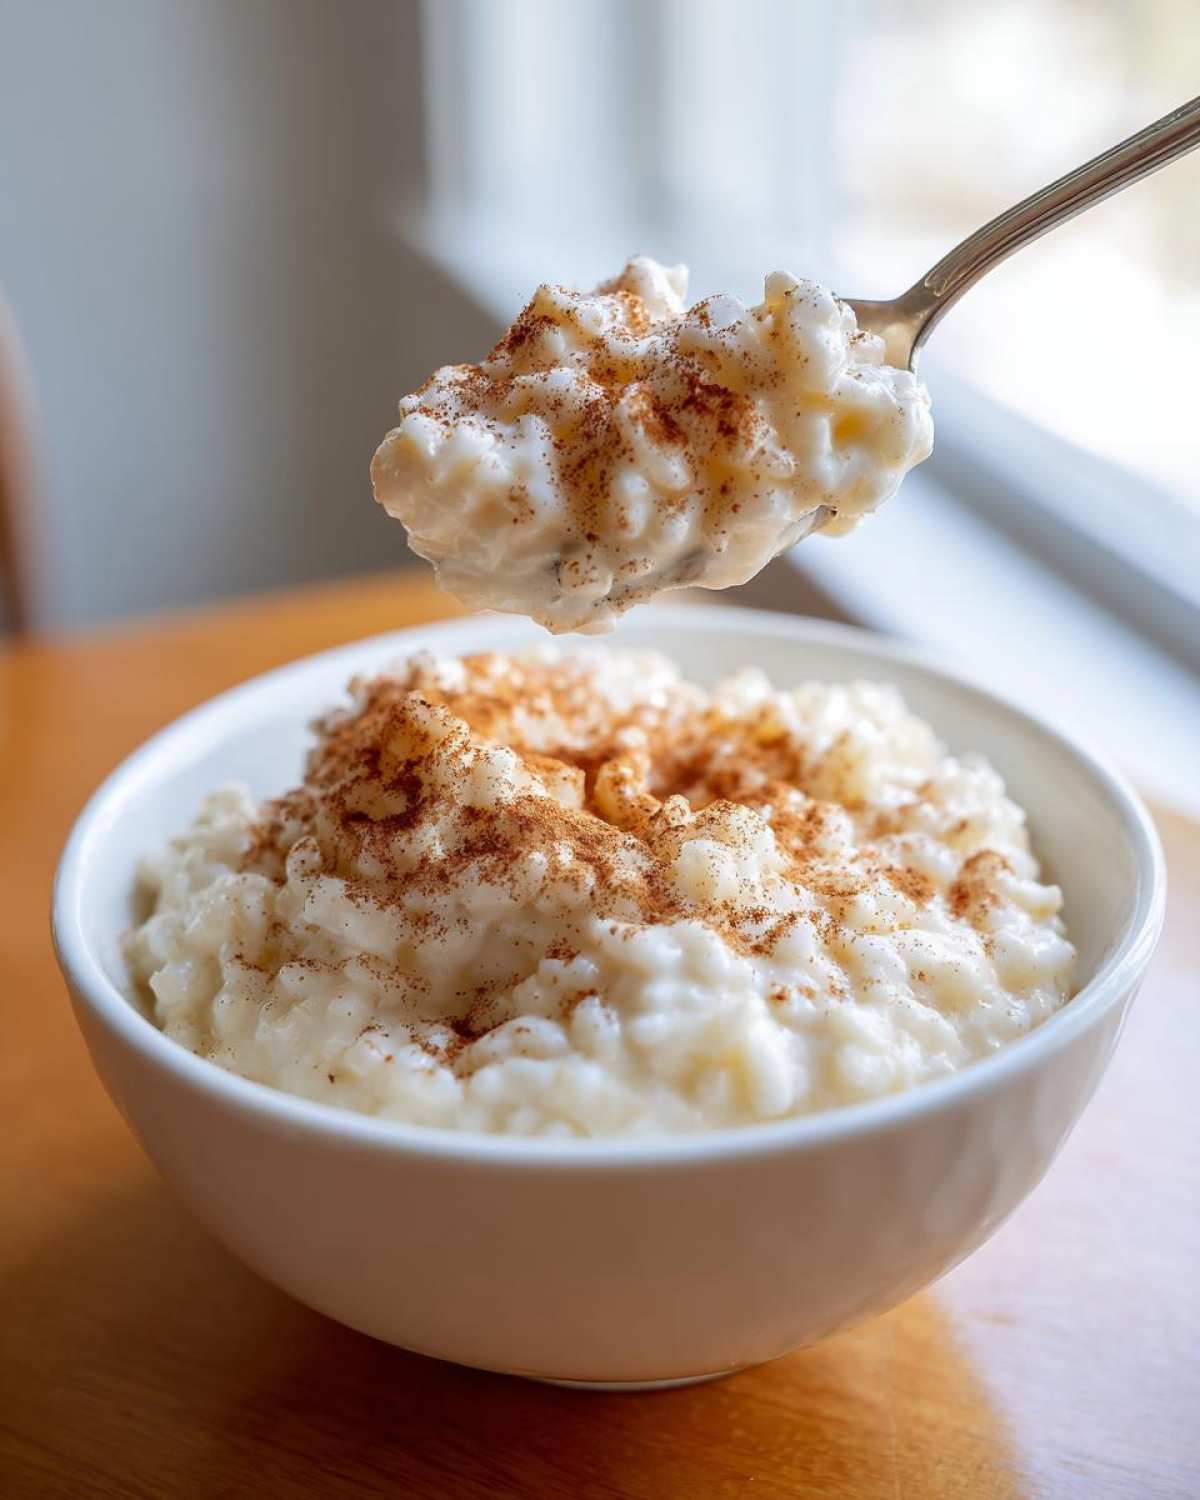
Why This Old Fashioned Rice Pudding Recipe is the Best
What makes this recipe rise above all the rest? It’s simple: texture and tradition. This is truly the best rice pudding recipe because it delivers exactly what you want in a classic comfort dessert without any fussy baking involved. People ask me all the time how I get that incredible richness!
- It’s the ultimate creamy rice pudding recipe—rich, velvety, and smooth—using just milk (and the magic of eggs!).
- We keep it traditional since there’s no heavy baking required; everything happens right in one pot.
Achieving Ultimate Creaminess
The creaminess isn’t an accident, sweetie! It comes from using the right short-grain rice which releases its starches slowly during the long simmer. Then, we finish it by carefully tempering the eggs right at the end. That tempering step is key to getting that thick, spoon-coating texture that screams homemade goodness.
Simple Stovetop Rice Pudding Method
I love that this is a pure stovetop rice pudding. You don’t have to constantly worry about the water bath or the top drying out like in baked versions. We just watch it closely on the stove, stir often, and you end up with this gorgeous, tender dessert in under an hour. Perfect for a weeknight treat!
Ingredients for Your Creamy Rice Pudding Recipe
Okay, let’s talk about what you need for this dreamy dessert. Don’t try cutting corners here; the quality of these simple things really shines through in the final product! You absolutely must grab a heavy-bottomed saucepan—if you try this in a thin one, you’ll get scorched rice, and nobody wants that bitter surprise in their old fashioned rice pudding.
Rice and Liquid Base
We need one cup of short-grain white rice. It releases the starch we need for that body, so don’t swap it for basmati! Then measure out four cups of water for the first soak, plus a half teaspoon of salt. After that initial boil down, we bring in the good stuff: four full cups of whole milk. I insist on whole milk; skim won’t give you the right richness for this homemade pudding dessert.
Sweeteners and Flavorings for Rice Pudding
You’ll need a half cup of regular granulated sugar. For flavor, grab your vanilla extract—one full teaspoon of it! And we need that lovely spice: one half teaspoon of ground cinnamon to cook into the pudding, plus extra cinnamon for sprinkling on top when we serve it warm. That toasted, sweet aroma is what makes it perfect.
The Egg Tempering Component
This is the secret hug that makes it so thick! You just need two large eggs, and you want them lightly beaten in a separate bowl before we start combining things. This step is crucial for that velvety texture you see in the very first bits of this creamy rice pudding recipe. Be super careful when adding these in later!
Step-by-Step Instructions for Stovetop Rice Pudding
Alright, put on your apron! This is where the magic really happens, and it’s all about patience and paying attention. Remember how important that heavy pan was? Don’t walk away during the simmering stages, I promise you’ll regret it if you do! While we aren’t making bread today, mastering one-pot cooking secrets for things like easy homemade breads definitely helps with not burning your pudding!
Cooking the Rice Initial Absorption
First things first: Dump your cup of rice, four cups of water, and that salt right into your heavy-bottomed saucepan. Get that going over medium-high heat until it hits a total rolling boil. Once it’s churning away nicely, knock that heat way down to low, pop the lid on, and let it simmer for about 15 minutes or until you see most of that water is gone. You have to stir it every few minutes here, or it sticks instantly! I learned that the hard way!
Simmering the Rice Pudding with Milk
Now we introduce the richness! Pour in all four cups of whole milk. Bring this new mixture up to a gentle simmer over medium heat—and I mean gentle. Don’t let it rage into a full boil, or it might splash everywhere or scorch underneath. Cook this uncovered for about 30 to 40 minutes. Keep stirring frequently until the rice is tender and the whole thing looks noticeably thicker, like a nice porridge.
Tempering Eggs for the Creamiest Rice Pudding
Time to get serious! Take the pan *off* the heat completely—this is critical. In a separate small bowl, whisk your sugar into your beaten eggs. Now, this is the tempering step for our rice pudding: slowly drizzle about one cup of that hot milk mixture into the eggs while whisking constantly, like you’re trying to convince them to join the party gently. Once they’re used to the heat, pour this whole egg mixture back into the saucepan, whisking it in well.
Finalizing the Stovetop Rice Pudding Texture
Return the pan to the lowest heat setting—and I mean low. Cook this for just 2 or 3 more minutes, stirring nonstop. The pudding will thicken just a touch more from the eggs, but don’t let it boil after the eggs go in, or they’ll curdle! Seriously ruins the whole look. Once it’s reached that final creamy stage, pull it off the heat for good, stir in your vanilla extract, and decide if you’re serving it warm with cinnamon or chilling it down!
Tips for Perfect Old Fashioned Rice Pudding
Now that you know the main steps for this old fashioned rice pudding, let me give you the cheat sheet—the little nuggets of wisdom I’ve picked up over the years so you serve up perfection every single time. These aren’t flashy tricks; they are just solid cooking habits that guarantee that silky texture.
Choosing the Right Rice for Your Rice Pudding
This is huge! You absolutely must use short-grain rice, like Arborio or Calrose, if you can find it. I know, Arborio is pricey because it’s for risotto, but it works wonders here too! Short-grain rice has more starch, and that starch is what dissolves into your milk, creating that thick, luxurious sauce. If you use long-grain rice—like the stuff we usually use for dinner—it stays firm and tends to just float around in the liquid rather than blending into the pudding. Don’t risk it; use the starchy stuff for the best results!
Preventing Scorch Marks on Your Homemade Pudding Dessert
Okay, I can’t stress this enough: the saucepan choice is non-negotiable. If you use a lightweight pot, the heat concentrates on the bottom, and boom—you get those black, smelly scorch marks that taste like failure. Always use a heavy-bottomed stainless steel or enameled cast iron pot. Also, remember I told you to keep stirring during that long 40-minute milk simmer? That’s your only defense against sticking. The constant motion scrapes the bottom and rubs off any bits that try to cling on. If you’re aiming for a slightly quick rice pudding dessert, you still need this step, but a heavy pan makes the stirring easier because you’re less worried about tearing up the rice.
If you can master this technique, you’ll find you can make wonderful stovetop sauces, just like I learned when perfecting my recipe for incredible homemade Alfredo sauce—low and slow heat control is everything!
Ingredient Notes and Rice Pudding Variations
Now that you’ve got the basic framework for this classic recipe down, let’s talk about making it your own! This is where the fun begins. While I stand by the vanilla rice pudding flavor as the true, timeless classic, there are so many easy rice pudding variations you can try without messing up the technique we worked so hard on.
Making a Richer Rice Pudding with Cream
If you want to take this from great to ridiculously decadent, you can substitute one cup of the whole milk with heavy cream. This is one of my favorite little upgrades for special occasions. Instead of using four cups of milk, use three cups of whole milk and one cup of heavy cream. The extra fat content melts right into the pudding as it cooks down, making the final texture even silkier and richer. It makes the pudding cling to the spoon even more beautifully. It truly transforms it into a more luxurious dessert!
Flavor Swaps for Your Rice Pudding with Cinnamon
Cinnamon is amazing, right? It’s the quintessential spice for this kind of warm sweet treats dessert, but mixing it up keeps things interesting! If you’re out of cinnamon or just feeling adventurous, nutmeg is an absolutely beautiful substitute. It gives the pudding a slightly earthier, sweeter spice note that pairs wonderfully with the vanilla. Cardamom is another winner if you happen to have some on hand; just use about half the amount of cinnamon called for, as cardamom is quite potent.
As for sweeteners, if you don’t want pure white sugar next time, feel free to swap out up to half of the sugar for packed light brown sugar. It melts down beautifully and adds this deep, subtle molasses flavor. Or, if you’re feeling very rustic, a drizzle of maple syrup right before serving is divine—though I wouldn’t cook the maple syrup in the pudding itself, as it can change the texture when you’re simmering it for so long.
Storage and Make Ahead Dessert Rice Tips
I often make a double batch when I’m testing things because, honestly, this creamy rice pudding recipe is even better the next day! It’s a fantastic make ahead dessert rice because it sets up beautifully overnight in the fridge. But you have to know how to store it and, most importantly, how to wake it back up!
When you put this homemade pudding dessert away, the starches in the rice and the thickness from the eggs keep working. So, when you pull it out the next day, it will be *very* firm. Don’t panic; this is totally normal for an old fashioned rice pudding. If you used a thin container, make sure you put plastic wrap right on the surface—direct contact stops that gross skin from forming on top. I’ve seen people try to reheat it straight from the fridge, and that’s a recipe for sadness!
Reheating Your Leftover Rice Pudding
Here’s the essential trick: when you scoop out your portion to reheat, you need to reintroduce some moisture. This is key for getting back to that spoon-coating texture we worked so hard for. For every cup of cold pudding you are heating, stir in about two or three tablespoons of fresh whole milk or half-and-half. This loosens everything up.
You can reheat this slowly either on the stove or in the microwave. If you go stovetop, use that same low heat and keep stirring until it’s hot all the way through. If you microwave it, stop every 45 seconds to stir it. That small addition of milk helps it steam gently and rehydrate the rice grains without scrambling the eggs or scorching the bottom. It ensures you still get that smooth, comforting texture, even if you made it yesterday! For more excellent make-ahead ideas, check out how I handle my no-knead cranberry bread—it’s all about managing the moisture!
Serving Suggestions for This Classic Comfort Dessert
So, you’ve got this gorgeous, creamy pot of magic ready to go! The biggest question people always ask me is: warm or cold? Honestly, this classic comfort dessert shines both ways, but they are totally different experiences! If it’s a chilly evening or you’ve just finished dinner and want something immediately soothing, serve it warm right out of the pot, maybe 10 minutes after you stirred in that vanilla. That warmth truly enhances the cinnamon notes, making it one of my favorite ways to enjoy these warm sweet treats.
When it’s served warm, the pudding is slightly looser, almost like a very thick sauce coating the rice grains. I highly recommend topping it immediately with a generous dusting of extra cinnamon, just a quick shake right over the top. It smells heavenly!
However, if you let it chill in the fridge overnight, it sets up beautifully and becomes almost spoon-able dessert cheese. It’s colder, denser, and feels richer, almost like a chilled custard, but those rice grains still give you that satisfying texture. When I serve it cold, I tend to get a little fancier with toppings—but a little tip: warm toppings work great on cold pudding to bring back some excitement!
Speaking of toppings, don’t stop at cinnamon! Since this rice pudding is based on simple vanilla and sugar, it’s a fantastic canvas. If you’re feeling extra decadent, a tiny dollop of good quality whipped cream melts perfectly on the warm version. Or, if you’re looking for extra complexity, try a drizzle of real maple syrup or even a sprinkle of toasted pecans or walnuts for crunch. If you love those gooey, comforting bakery smells, you might be tempted to make my famous gooey cinnamon buns next, but for this simple pudding, keep the toppings clean and complementary!
Frequently Asked Questions About Creamy Rice Pudding
I always get questions about making this perfect, especially from folks who are trying to make their first batch of truly creamy rice pudding recipe. Don’t worry, I’m here to help you troubleshoot! Here are the things I hear most often when people are making this classic dessert.
Can I make this easy rice pudding without eggs?
That’s a common question if you are looking for an easy rice pudding alternative, maybe due to an allergy or just not having eggs on hand! The eggs are really doing two jobs here: they add richness because we’re using whole milk, and they thicken the pudding beautifully when we temper them. If you absolutely must skip them, you can use a cornstarch slurry instead—that’s what a lot of commercial puddings use. Just mix about two tablespoons of cornstarch with a quarter cup of cold milk until it’s totally smooth. Whisk that into the pudding after you take it off the heat (before the vanilla goes in, of course). It will give you a thicker pudding, but I admit, it won’t have that rich, velvety mouthfeel that the eggs provide in our old fashioned rice pudding.
What is the best rice to use for stovetop rice pudding?
I covered this a bit above, but it’s worth repeating because it makes such a difference! For this stovetop rice pudding, you need the short-grain starches at work. I recommend Arborio or Calrose rice. When you cook these types of rice slowly in milk, they release tons of starch granules into the liquid. Those starches are what naturally thicken the pudding and give it that luxurious, heavy texture. If you use long-grain white rice (like Jasmine or Basmati), the grains stay separate and firm, and your final result will look more like rice soup than a rich, scoopable homemade pudding dessert.
How long does this homemade pudding dessert last in the fridge?
This recipe is wonderful for meal prepping because it holds up so well! As a general rule, this homemade pudding dessert tastes perfect for about three to four days when stored properly in an airtight container in the fridge. Remember that tip about adding a splash of milk when reheating? Make sure you always use fresh milk when you revive it, and never try to store leftovers that have been sitting out at room temperature for more than two hours. If you keep it covered well, it stays delicious!
Estimated Nutritional Data for This Rice Pudding
Now, listen up—I’m not a registered dietitian, and this recipe is based on loving tradition, not strict lab work! So please take these numbers with a massive grain of salt, because what you add on top (butter, extra sugar, whatever!) changes everything.
However, based on the core ingredients listed for one serving size (about one cup), here is a general idea of what you’re diving into with this old fashioned rice pudding. It’s definitely a treat, but honestly, the comfort factor alone is worth all the calories!
This estimate is for one standard serving:
- Calories: Around 320 – A nice, satisfying number for a dessert!
- Fat: About 9 grams total. We use whole milk and eggs, which keeps the fat content reasonable but guarantees flavor.
- Protein: Roughly 10 grams, thanks to the milk and those powerhouse eggs!
- Carbohydrates: Around 50 grams. This is where the rice and sugar contribute, giving you that warm, sweet energy boost.
- Sugar: Expect about 25 grams of sugar, mostly from the added sugar and the natural lactose in the milk.
It’s a hearty, satisfying homemade pudding dessert, not a light fluff. So enjoy every spoonful when you make this creamy rice pudding recipe!
Share Your Nostalgic Recipes Experience
I truly hope this recipe brings you as much cozy goodness as it brings to my own kitchen! Making this rice pudding—smelling that slow-simmering milk and cinnamon—it instantly pulls me back to the best kind of memories. Now it’s your turn to make some memories with this simple classic!
I’d be absolutely thrilled if you gave this a whirl. Once you’ve made your batch and enjoyed that first perfect, creamy spoonful, please come back and let me know how you liked it! Did you stick to the traditional warm scoop sprinkled with cinnamon? Or did you let it chill completely so you could enjoy it cold the next day?
Take a minute to leave a rating—if you think this is the best rice pudding recipe out there, give it five stars! And drop a comment below telling me your favorite toppings. Are you a maple syrup person? Do you prefer a splash of orange zest leftover from a baking project? I love hearing how you put your own spin on these nostalgic recipes.
If you’re whipping up something else comforting and looking for inspiration, maybe you should check out my recipe for creamy white chicken chili sometime soon—it hits that same comfort-food sweet spot, trust me!
Happy cooking, and I can’t wait to read all about your wonderful rice pudding adventures!
Print
Creamy Old-Fashioned Stovetop Rice Pudding
- Total Time: 65 min
- Yield: 6 servings
- Diet: Vegetarian
Description
Make a classic, creamy rice pudding on the stovetop using simple ingredients for a comforting dessert.
Ingredients
- 1 cup short-grain white rice
- 4 cups water
- 1/2 teaspoon salt
- 4 cups whole milk
- 1/2 cup granulated sugar
- 2 large eggs, lightly beaten
- 1 teaspoon vanilla extract
- 1/2 teaspoon ground cinnamon, plus extra for topping
Instructions
- Combine rice, water, and salt in a heavy-bottomed saucepan. Bring to a boil over medium-high heat.
- Reduce heat to low, cover, and simmer for 15 minutes, or until most of the water is absorbed. Stir occasionally to prevent sticking.
- Add the whole milk to the rice mixture. Bring the mixture to a gentle simmer over medium heat, stirring frequently. Do not let it boil rapidly.
- Cook uncovered for 30 to 40 minutes, stirring often, until the rice is tender and the pudding has thickened to your desired consistency.
- Remove the saucepan from the heat. In a small bowl, whisk the beaten eggs with the sugar.
- Temper the eggs: Slowly pour about 1 cup of the hot milk mixture into the egg mixture while whisking constantly.
- Pour the tempered egg mixture back into the saucepan with the remaining hot milk and rice.
- Return the saucepan to low heat. Cook, stirring constantly, for 2 to 3 minutes until the pudding thickens slightly more. Do not allow it to boil after adding the eggs.
- Remove from heat and stir in the vanilla extract.
- Serve warm, sprinkled with extra cinnamon, or chill for a cold dessert.
Notes
- For a richer flavor, substitute 1 cup of the whole milk with heavy cream.
- If the pudding thickens too much upon cooling, stir in a splash of milk when reheating or serving.
- You can substitute the cinnamon topping with a sprinkle of nutmeg or a drizzle of maple syrup.
- Prep Time: 10 min
- Cook Time: 55 min
- Category: Dessert
- Method: Stovetop
- Cuisine: American
Nutrition
- Serving Size: 1 cup
- Calories: 320
- Sugar: 25
- Sodium: 210
- Fat: 9
- Saturated Fat: 5
- Unsaturated Fat: 4
- Trans Fat: 0
- Carbohydrates: 50
- Fiber: 1
- Protein: 10
- Cholesterol: 85



Comments are closed.