

Oh, there is nothing quite like the smell of bread baking filling your kitchen, is there? It’s the purest form of comfort! When I was growing up in Italy, baking with my grandmother was everything, and even now, standing here in the USA, I chase that feeling daily. Forget those dry, crumbly loaves you find on the store shelves; the recipe I’m sharing today for whole wheat bread is different. This Soft Honey Whole Wheat Sandwich Loaf is my promise to you: it results in the most incredibly soft, family-friendly loaf perfect for sandwiches, toast, and everything in between. Trust me, this recipe has heart!
Why This Soft Honey Whole Wheat Bread Recipe Works for Everyone
I know baking bread from scratch can feel intimidating, especially when you are dealing with 100 percent whole wheat flour. But I promise you, my family’s methods make this process almost foolproof! This recipe is built around delivering that perfect texture you crave for daily use.
- It yields the softest crumb, making it ideal for packing in school lunches or making the best whole wheat sandwich loaf.
- It uses simple steps that build flavor without needing overnight processes or complicated equipment.
- The sweet addition of honey makes the bread appealing even to picky eaters who might usually avoid whole grain loaves.
Achieving the Perfect Soft Whole Wheat Bread Crumb
The true secret to avoiding bricks when baking with whole wheat flour is balance. We use just a little bit of all-purpose flour—that’s optional, but I highly recommend it—because the lighter gluten structure helps keep the loaf fluffy. Plus, the honey we use here doesn’t just add sweetness; it acts as a humectant, meaning it locks moisture in, keeping your soft whole wheat bread tender for days!
An Easy Whole Wheat Bread Recipe for Beginners
Even if you’ve only tried a beginner bread baking recipe once or twice, you can handle this! We do need to knead it for about 8 to 10 minutes to develop the strength in the dough. While some people love a true no knead whole wheat bread approach, kneading this batch ensures you get that beautiful, lofty rise perfect for slicing.
Gathering Ingredients for Your Homemade Whole Wheat Bread
Alright, let’s get organized! Before we even think about turning on the mixer, we need our players lined up. Having everything ready—mise en place, as the chefs say—is part of my Italian tradition. For this wonderful homemade whole wheat bread, make sure your water is warm, specifically between 105°F and 115°F. If it’s too hot, the yeast dies, and then my little process won’t work!
You need the yeast, our essential honey, melted butter for richness, salt for flavor, the majority of the whole wheat flour, and that optional bit of all-purpose flour for softness.
Ingredient Notes and Substitution Tips
If you are trying for the ultimate wholesome loaf, feel free to skip that half-cup of all-purpose flour, but know the texture will be denser—still delicious, just not quite as fluffy. If you don’t have honey, pure maple syrup works beautifully as a straight swap, giving you that lovely sweetness. For the flour, using 100% whole wheat is great, but sometimes using a blend of whole wheat and bread flour instead of AP flour gives you a stronger structure if you plan on making a big, rustic loaf later on!
Step-by-Step Instructions for Soft Honey Whole Wheat Bread
Okay, deep breath! We are moving from preparation into the fun part—making the dough itself. Follow these steps exactly, and you’ll see how quickly this whole wheat bread comes together. I always put on some music while I do this; baking should feel relaxing, not like a chore!
Activating Yeast and Mixing the Dough for Whole Wheat Bread
First things first: we wake up the yeast. Pour that warm water—remember, 105°F to 115°F, not hotter!—into your bowl and sprinkle the yeast over the top. Give it a gentle swirl and just wait five minutes. If it gets foamy (it looks like creamy bubbles, beautiful!), your yeast is happy and ready to work its magic. Next, stir in the honey, melted butter, and salt. Now, add the whole wheat flour gradually, mixing until it looks shaggy, like a rough ball. If you are using that optional all-purpose flour, mix it in now too.
Kneading and the First Rise of Your Whole Wheat Bread Dough
Time to bring the dough to life! Turn that shaggy mess out onto your counter dusted lightly with flour. We need to knead this for a good 8 to 10 full minutes. Don’t rush it! You’re looking for the dough to transform; it should feel smooth and elastic under your hands. When you poke it, it should spring back slowly. Lightly grease a clean bowl, toss the dough in there, turning it to coat, and then cover it well. Let it sit in a warm, draft-free spot for an hour, or until it has doubled in size. That’s our first rise done!
Shaping, Second Rise, and Baking Your Whole Wheat Sandwich Loaf
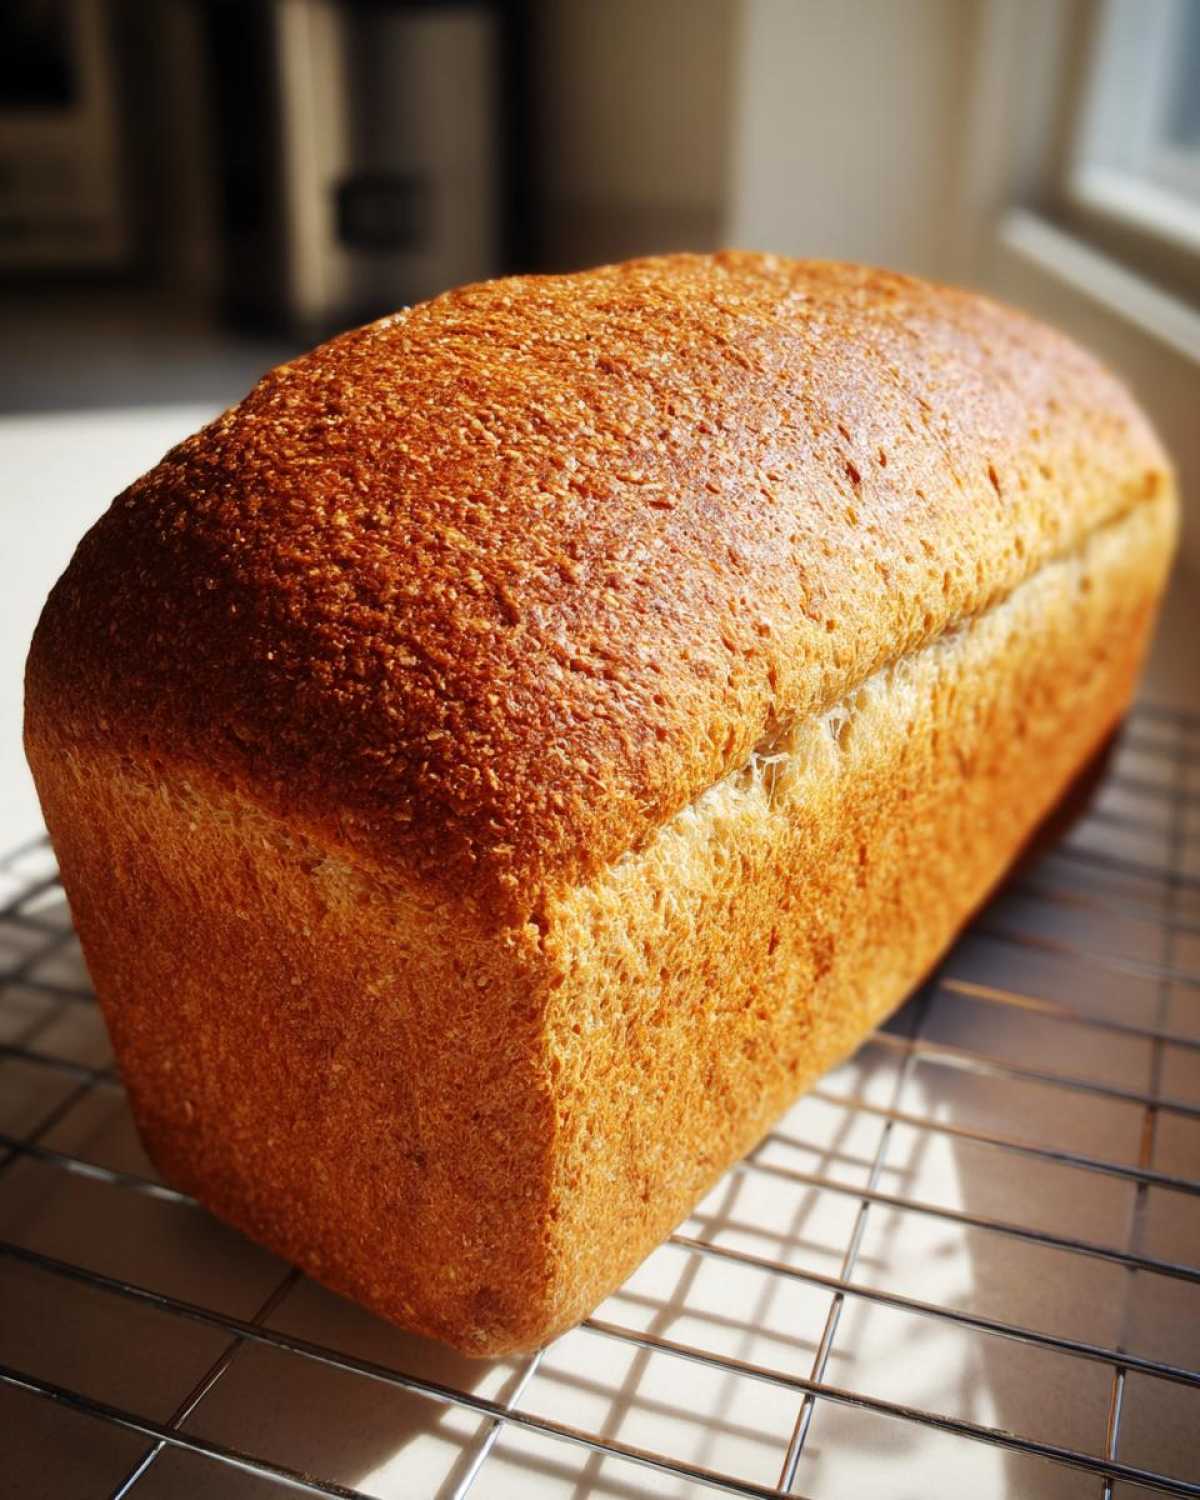
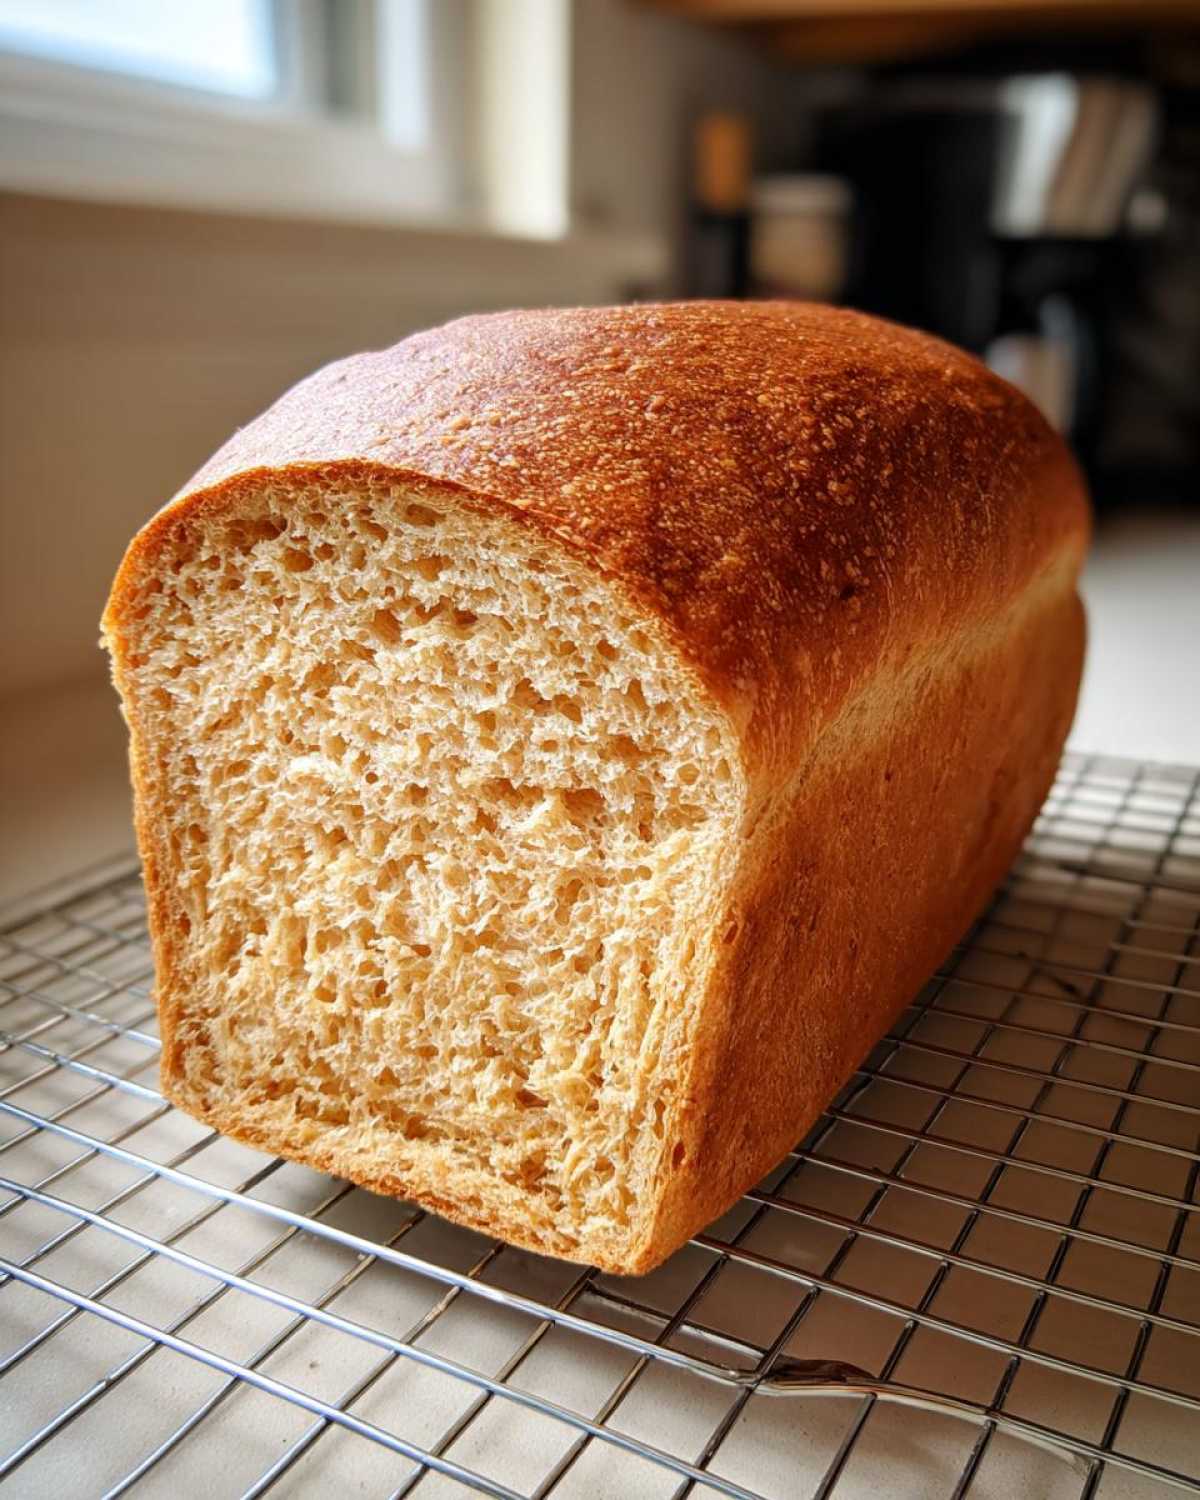
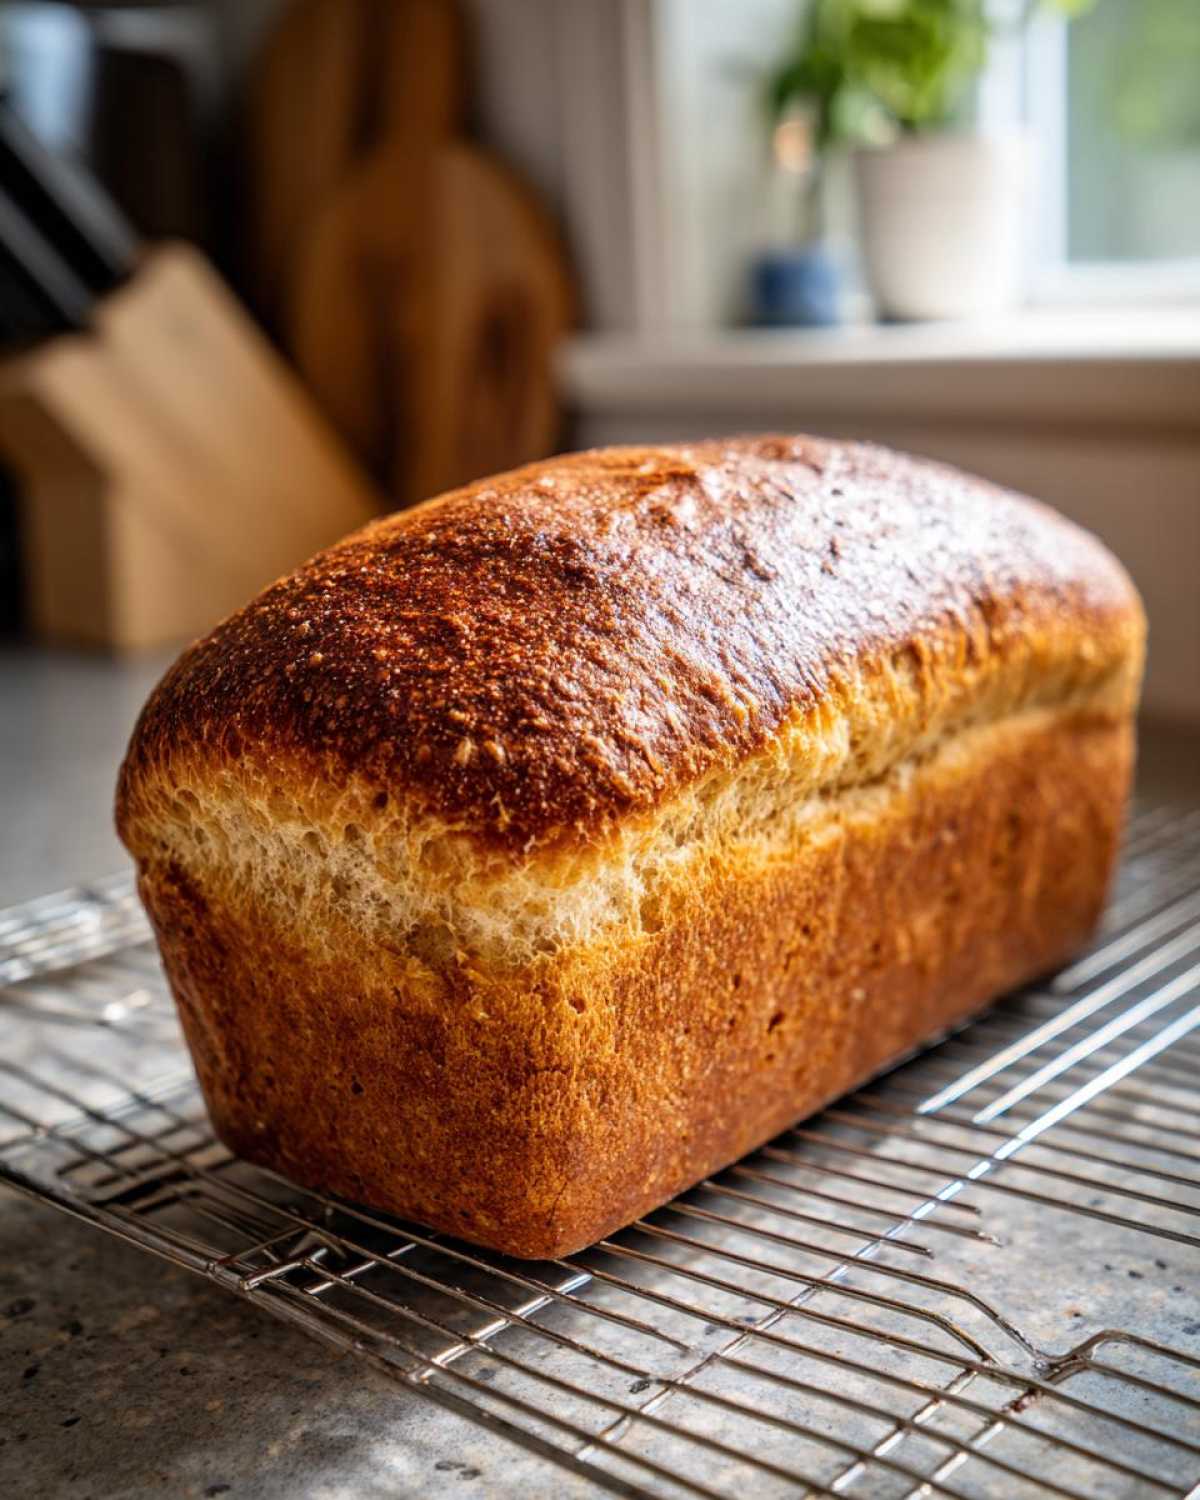
Gently punch the air out of the dough—it’s dramatic, but necessary! Shape it into a neat log and press it snugly into your greased 9×5 inch loaf pan. Cover it again, but this time, let it rest for only 30 to 45 minutes. This second rise is crucial; you want it to crown about an inch over the rim of the pan for that beautiful tall slice. During the last bit of this rise, set your oven to 375°F. Bake for 30 to 35 minutes until golden brown. I always check the internal temperature—it should hit 190°F. When it comes out, get it onto a wire rack right away! If you leave it in the hot pan, the bottom will steam itself soggy, and we certainly don’t want that for our homemade bread from scratch!
Tips for Baking the Best Whole Wheat Bread
Baking whole wheat bread takes a little more grace than white flour, but if you keep these few things in mind, you will get a beautiful loaf every time. My biggest piece of advice—and this is something my grandmother always repeated when dealing with heartier flours—is patience during the rising times! You cannot rush whole grains.
If your dough seems too stiff during the initial mix, add just a splash more warm water; whole wheat flour loves to soak up liquid! Also, please, please, please let the bread cool completely on the wire rack before slicing. I know how tempting that warm loaf is, but if you cut it early, the internal structure collapses, and you end up with a gummy bottom slice.
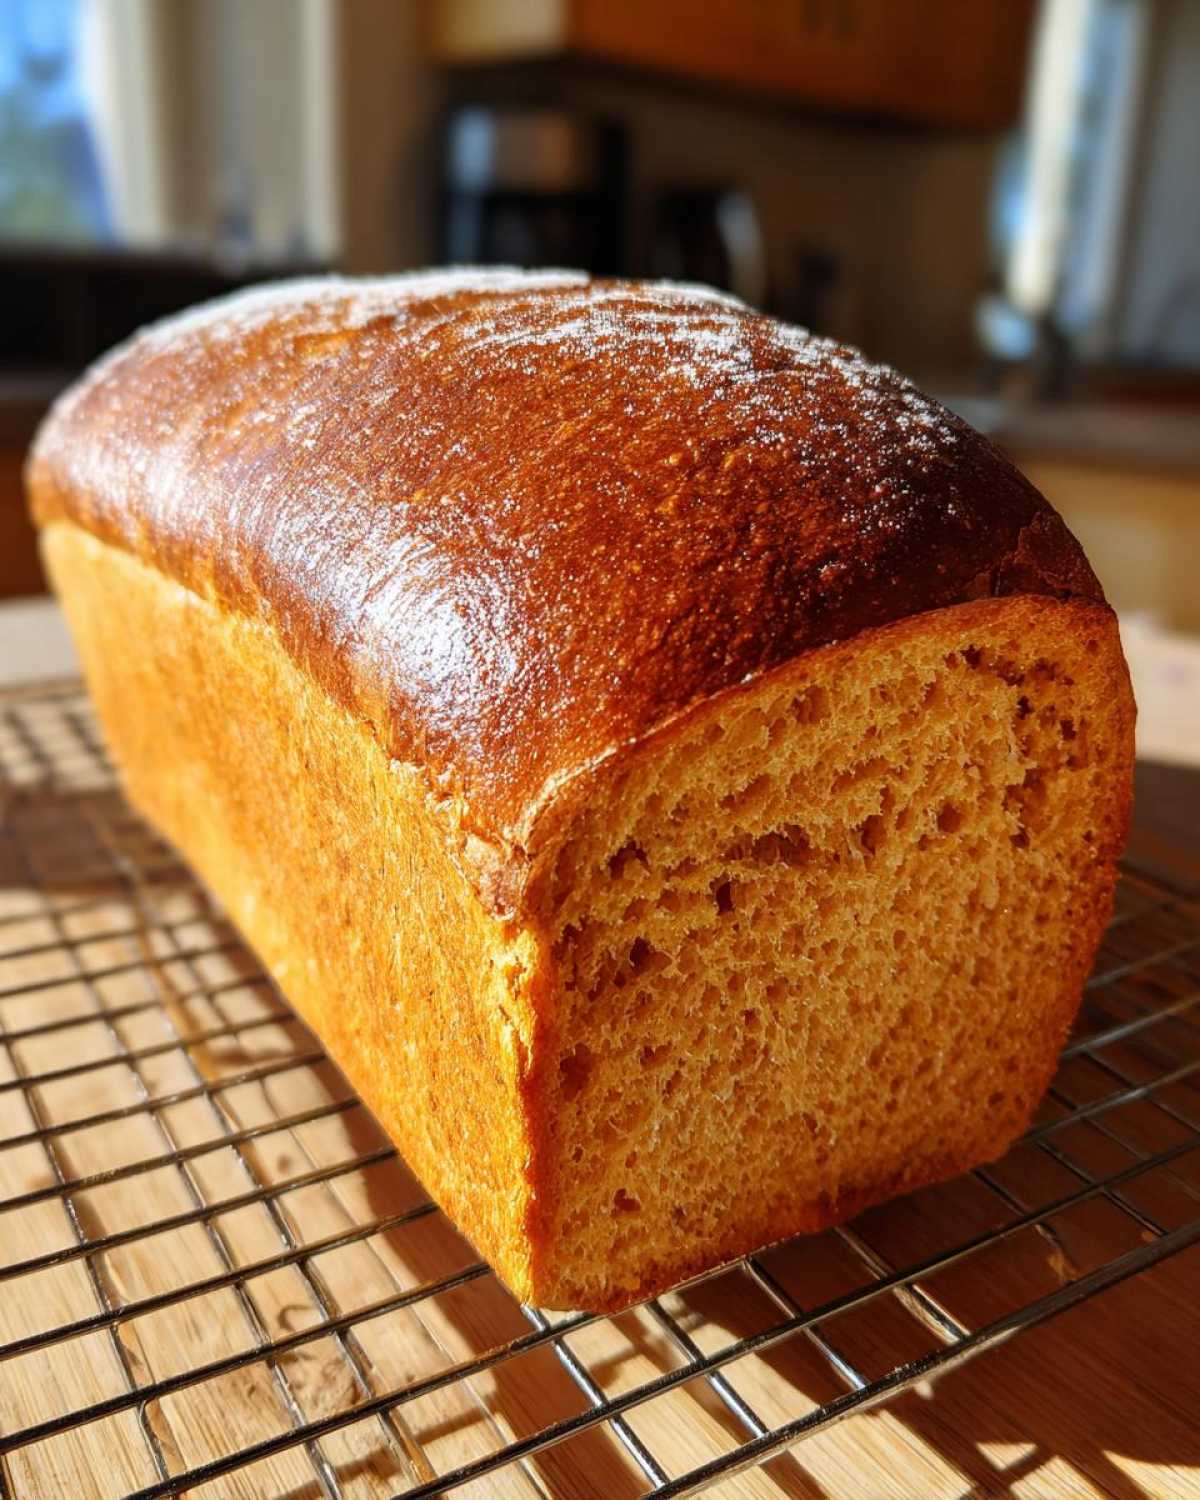
Remember to brush the top with a little melted butter immediately after it comes out of the oven; this tricks the crust into softening just enough while it cools. This little trick is essential for a perfect whole wheat bread sandwich loaf!
Making Variations of This Whole Wheat Bread Recipe
While this recipe is designed to be your favorite soft, everyday whole wheat bread for toast and sandwiches, sometimes you crave something a little more rustic, yes? I love experimenting once I know the base recipe is solid!
If you want that beautiful, crackly crust that reminds you of an artisan whole wheat bread from a European bakery, ditch the loaf pan entirely for one bake. After the second rise, gently shape the dough into a round boule right onto a baking sheet dusted heavily with cornmeal or semolina. It will bake up beautifully, giving you a wonderful, slightly uneven crust.
Or, if you have one, try the famous Dutch oven method! Preheat your Dutch oven inside the oven while the dough does its second rise. You carefully place the dough inside the hot pot, cover it, and bake. The steam trapped inside creates the most amazing texture, giving you that perfectly crisp exterior that makes a rustic whole wheat bread. Just remember, the cooking time might change slightly, so keep an eye on it!
Want to add texture and nutrition? Wonderful idea! After the first rise, when you punch the dough down, this is the perfect time to fold in your additions. I love adding about half a cup of sunflower seeds and poppy seeds for crunch. You could also mix in flax seeds or even toasted oats. Just make sure whatever you add isn’t soaking wet, or it could interfere with the dough’s development!
Storing and Reheating Your Homemade Whole Wheat Bread
Ah, the painful part: waiting for it to cool! Look, I know that first slice of warm whole wheat bread is calling your name, whispering sweet promises of butter melting perfectly. But I have to insist—you must let this loaf cool completely on the wire rack before you slice it. If you cut into this soft whole wheat bread while it’s still hot, all those lovely air pockets we worked so hard to create will collapse, making your beautiful loaf look flat and gummy. Give it at least two full hours, honestly, three is even better!
Once it’s completely cool, store it however you like. We usually keep our loaves in a simple paper bag on the counter for three or four days. This keeps the crust from getting too soft while still protecting the crumb. If you really want it to last longer—maybe you made two loaves because, honestly, that always happens—the freezer is your best friend.
Once completely cooled, slice the entire loaf—or half of it—and wrap the pieces tightly in plastic wrap first, then wrap that whole packet tightly in aluminum foil. It freezes beautifully for up to three months. When you want a slice, just pull one out, unwrap it, and pop it straight into the toaster. It reheats perfectly this way, tasting almost exactly like it just came out of the oven!
Serving Suggestions for Whole Wheat Sandwich Loaf
Now that you have this magnificent, fluffy loaf of whole wheat bread cooling on the rack, what are you going to do with it? Of course, it makes the most wonderful, sturdy sandwich loaf—it holds up beautifully to tomatoes, lettuce, and even wetter spreads without getting soggy immediately. That’s the magic of a well-made batch!
But my favorite thing to do is use it for breakfast. Since we’ve added that honey, it gets wonderfully caramelized when toasted. This bread is absolutely divine when turned into a slice of French toast! I have an amazing baked French toast casserole recipe that I adore, but even simple pan-fried slices dipped in cinnamon and egg mix are spectacular.
And for simple toast? Forget about it! It’s the best bread for toast you will ever make. The whole grains toast up perfectly crunchy on the outside while staying slightly soft in the center. A smear of good quality jam or even some salty butter when it comes out of the toaster—that nutty, slightly sweet flavor is just heaven. Honestly, sometimes I just slice it thick, toast it, and call it dinner!
Frequently Asked Questions About Baking Whole Wheat Bread
Every baker has questions, especially when working with whole grains! It’s smart to ask them. I find that understanding why we do certain things—like why we use warm water or why we knead—is the key to never needing a recipe again. Here are some questions I hear all the time about making the best whole wheat bread recipe at home.
Can I make this an easy no knead whole wheat bread recipe?
Oh, that’s a great question for a busy week! While I love a true no knead whole wheat bread, this recipe is actually designed to be kneaded for 8-10 minutes. Kneading develops the structure needed for a tall, fluffy loaf when using a higher percentage of whole wheat flour. If you skip the kneading entirely, the result will be much denser and flatter—more like a rustic artisan loaf baked in a Dutch oven, which is lovely, but not the soft sandwich bread we are making here.
How do I ensure my whole wheat bread is 100 percent whole wheat?
That’s the goal for many who want the healthiest version! To make this a 100 percent whole wheat bread, simply omit the optional half-cup of all-purpose flour and replace it with another half-cup of whole wheat flour. You might need one extra tablespoon of warm water while mixing, as 100% whole wheat can be a bit thirstier. Just be aware that removing the white flour means you lose a bit of that airy structure, so the loaf will be heartier and slightly less fluffy than pictured, but still utterly delicious and wholesome!
Sharing Your Baking Success with Gourmet Gusto
Now that you’ve pulled a perfect loaf of whole wheat bread from the oven, I just can’t wait to hear all about it! Please come back here, leave a rating, and share your thoughts in the comments—did it turn out as soft as you hoped?
And if you want to see more of my kitchen adventures and get daily inspiration, come join our community over on Pinterest. Happy baking!
Print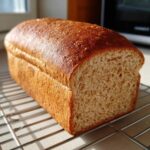
Soft Honey Whole Wheat Sandwich Loaf
- Total Time: 1 hour 50 min
- Yield: 1 loaf (about 12 slices)
- Diet: Vegetarian
Description
Bake this easy recipe for incredibly soft and wholesome honey whole wheat bread. It creates a beautifully textured loaf perfect for your family’s favorite sandwiches and toast.
Ingredients
- 1 cup warm water (105-115°F)
- 2 1/4 teaspoons active dry yeast
- 1/4 cup honey
- 2 tablespoons unsalted butter, melted
- 1 1/2 teaspoons salt
- 3 cups whole wheat flour, plus more for dusting
- 1/2 cup all-purpose flour (optional, for a softer crumb)
Instructions
- In a large bowl, dissolve the yeast in the warm water. Let it sit for 5 minutes until foamy.
- Stir in the honey, melted butter, and salt into the yeast mixture.
- Gradually add the whole wheat flour, mixing until a shaggy dough forms. If using, mix in the all-purpose flour now.
- Turn the dough out onto a lightly floured surface. Knead for 8 to 10 minutes until the dough is smooth and elastic. You are aiming for a soft, manageable dough.
- Lightly grease a large bowl. Place the dough in the bowl, turning to coat. Cover the bowl with plastic wrap or a clean kitchen towel.
- Let the dough rise in a warm place for 1 to 1.5 hours, or until doubled in size. This is your first rise.
- Gently punch down the risen dough. Shape it into a loaf and place it into a greased 9×5 inch loaf pan.
- Cover the pan loosely and let the dough rise again in a warm spot for 30 to 45 minutes, or until the dough has crowned about 1 inch above the rim of the pan. This is your second rise.
- Preheat your oven to 375°F (190°C) during the last 15 minutes of the second rise.
- Bake for 30 to 35 minutes, or until the top is golden brown and the internal temperature reaches 190°F (88°C).
- Remove the loaf from the pan immediately and place it on a wire rack to cool completely before slicing for the best texture.
Notes
- For an even softer loaf, use bread flour instead of all-purpose flour for the optional addition.
- If you prefer a slightly rustic look, you can skip the loaf pan and bake the dough free-form on a baking sheet, adjusting the bake time slightly.
- This homemade whole wheat bread is excellent toasted the next day.
- Prep Time: 20 min
- Cook Time: 35 min
- Category: Baking
- Method: Kneading and Baking
- Cuisine: American
Nutrition
- Serving Size: 1 slice
- Calories: 145
- Sugar: 4g
- Sodium: 250mg
- Fat: 3g
- Saturated Fat: 1.5g
- Unsaturated Fat: 1.5g
- Trans Fat: 0g
- Carbohydrates: 27g
- Fiber: 3g
- Protein: 5g
- Cholesterol: 6mg

Comments are closed.