
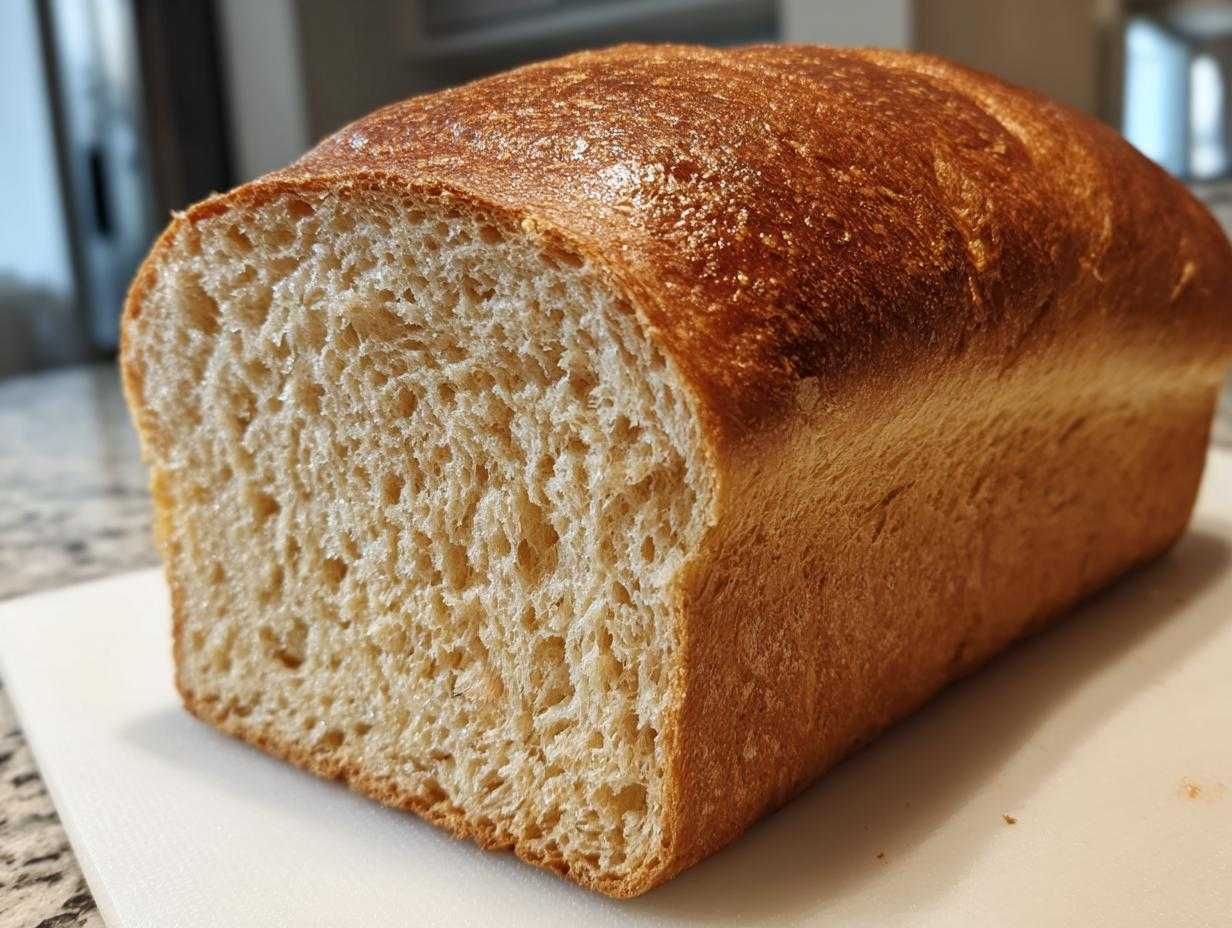
Oh, the tragedy of the dense loaf! We’ve all been there, right? You pull a beautiful, brown brick out of the oven, excited for some wholesome goodness, and it’s like trying to eat a healthy hockey puck. Seriously, getting that delightful, soft texture when you’re trying to make good, honest whole wheat bread can feel impossible. Many recipes promise fluffy results but deliver hockey pucks anyway!
Well, stop giving up on your dreams of perfect slices! I’ve finally cracked the code, and it comes down to this recipe: the Easy Soft Honey Whole Wheat Sandwich Bread. This isn’t just bread; it’s the holy grail of homemade whole wheat bread. This loaf comes out consistently soft and fluffy every single time, even though it leans heavily on that wonderful whole grain goodness. Trust me, I’ve wasted enough flour over the years failing to get a good rise, but this honey-sweetened version is foolproof for beginners.

Why This Soft & Easy Honey Whole Wheat Bread Recipe Works
We’ve all seen those tutorials where they say, “just use 100% whole wheat flour!” and then you end up with something that feels like a paving stone. That’s because whole wheat bran cuts the gluten chains, making it tough to get that gorgeous rise. The beauty of this recipe is that we aren’t afraid to cheat just a little bit to get big results! We use that nice, hearty whole wheat flour you want, but we balance it with some all-purpose flour.
This little trick is the secret sauce for yielding Soft Whole Wheat Sandwich Bread. It keeps the structure light enough so you get that beautiful, Fluffy Homemade Bread we all crave. For extra insurance, check out my tips for soft naan if you want to play around with flatbreads while the big loaf is rising!
Achieving a Fluffy Homemade Bread Texture
The main thing that keeps this from turning into a brick is that partial substitution of the strong white flour. Whole wheat flour absorbs more liquid, and if you use too much of it, your dough gets heavy fast. By mixing in that all-purpose flour, we let the gluten relax just enough while ensuring we still get that wholesome fiber and great taste. It’s the perfect compromise that means your sandwich bread won’t crumble when you try to make a PB&J!
The Role of Honey in Our Whole Wheat Bread Recipe
Honey isn’t just for taste, though let’s be honest, it tastes amazing! Honey is a liquid sweetener, and it draws moisture into the dough and holds onto it while baking. That means it keeps things tenderized throughout the whole process. That gentle sweetness transforms the earthy flavor of the grain; it’s what makes this a fantastic Honey Wheat Bread Recipe perfect for anyone who thinks plain whole wheat is a little too… rustic. It’s the perfect touch for that healthy, slightly sweet profile.
Ingredients for Your Soft Whole Wheat Sandwich Bread
Okay, time to look at what goes into this miracle loaf! Getting the right measurements is super important here—that’s how we get that perfect, soft rise instead of a dense bake. Don’t skimp on quality, but don’t stress about finding anything exotic either. We’re keeping it simple for this whole wheat bread adventure. If you’re curious about other delicious baked goods that use mindful measuring, you should peek at my sweet potato biscuit recipe; it’s another place where precise ingredient handling matters!
Yeast Activation Ingredients
First up is waking up the yeast! This is critical. You need one cup of water, but for the love of baking, don’t use water that’s too hot, or you’ll kill the little critters responsible for all our bubbles. It needs to be warm to the touch, really, aiming for between 105°F and 115°F. We take our 2 1/4 teaspoons of active dry yeast and add just a tiny pinch of honey to get it going. You wait about 10 minutes until it gets foamy—that’s how you know your yeast is alive and ready to work for you!
Dough Structure Ingredients for Whole Wheat Bread
Next come the heavy hitters that make up the body of the loaf. We need salt, of course, for flavor—1 1/2 teaspoons should do it. Melt up 2 tablespoons of unsalted butter for richness; that really helps with the soft crust later on. For the flour, which is key to getting that beautiful homemade whole wheat bread texture, we use 3 cups of whole wheat flour. Remember what I said about fluffiness? That’s why we mix in 1/2 cup of standard all-purpose flour to give it that lift. And don’t forget the rest of that lovely honey for sweetness!
Step-by-Step Instructions for Easy Whole Wheat Loaf
Now for the fun part! Making this Easy Whole Wheat Loaf is straightforward, but you have to follow the order. It might seem like a lot of waiting time, but most of that is hands-off rising time, so don’t worry. If you’re looking for even faster bakes, I have a fantastic no-knead recipe too, but the kneading here is what builds the structure for our fluffy goal!
Activating the Yeast and Mixing the Dough
First things first: proof the yeast! Pour your warm water (remember, 105°F to 115°F—warm, not hot!) into a big bowl, stir in a tiny bit of honey, and sprinkle that yeast over top. Wait around 5 to 10 minutes until it looks foamy and bubbly. If nothing happens, start over with new yeast—it’s a bummer, but essential! Once it’s proven its life, stir in the remaining honey, the melted butter, and the salt. Now, dump in all your flours—the whole wheat and that little bit of white—and mix it all up with a sturdy wooden spoon until you have a shaggy mess. That’s right, a shaggy mess; we aren’t looking for perfection yet!
Kneading and First Rise for Perfect Whole Wheat Bread
Turn that shaggy dough out onto a lightly floured counter. This is where we build strength! Knead this dough for a good 6 to 8 minutes. I know, whole wheat dough feels different—it’s often a touch tackier than white dough—but keep working it until it feels smooth and elastic. It should spring back slowly when you poke it. Once it’s happy, lightly oil a clean bowl, pop the dough in, turn it over once to coat, and cover it up tight. Let that beauty rise in a warm spot for a full 1 to 1.5 hours, or until it has definitely doubled in size. Don’t rush this part!
Shaping and Second Proofing
When it’s doubled, gently punch the air out—don’t beat it up, just let the gas escape! Now, quickly shape it into a log and tuck it snugly into your greased 9×5 inch loaf pan. Pop the pan back in a warm spot, covered loosely, for the second rise. This one is shorter, about 30 to 45 minutes. You’re looking for it to crest about an inch over the top edge of the pan. It should look puffy and light.
Baking and Cooling Your Hearty Whole Grain Baking
Toward the end of that second rise, crank up your oven to 375°F (190°C). You want it fully preheated when the dough is perfectly proofed. Now, slide that pan in and bake for 30 to 35 minutes. The top should be beautifully golden brown. For the best Hearty Whole Grain Baking success, use a thermometer! You want the center temp to hit 200°F (93°C). As soon as it’s done, pull it out of the oven and—this is important!—get it out of the pan immediately so the bottom doesn’t steam and get gummy. Let it cool completely on a wire rack before you dare try to slice it!
Tips for Best Results in Whole Wheat Bread Baking
Baking good whole wheat bread is all about anticipation and tiny fixes! You can have the best recipe in the world, but if you miss one little thing—like the crust getting too hard—the whole experience suffers. I’ve gathered the little secrets I learned trying to move past that dense phase, especially when I want that nice, soft texture for my everyday slices. You’ll find that these small details really elevate your game.
Crust Softening Technique for Whole Wheat Bread
Okay, this is my favorite trick for making the crust disappear! Right when you pull that beautiful loaf out of the oven—literally within 30 seconds of it hitting the cooling rack—take a little pat of butter and spread it thinly over the top crust. Just a teaspoon or two, melted quickly under the heat of the loaf itself. That butter melts right in and keeps the crust beautifully pliable instead of letting it dry out and harden into something you could use as a doorstop. It adds a tiny bit of flavor, too, which is just a bonus!
Handling Sticky Dough During Kneading
When you’re working with whole wheat flour, the dough often feels stickier than white flour dough, which makes new bakers panic and dump in half a cup of extra flour. Don’t do it! Adding too much flour when you’re kneading is the fastest way to get a dry, crumbly loaf. If your dough is clinging just a bit too much to your clean hands or the counter while you’re working it during that initial 6 to 8 minutes, just add flour one tablespoon at a time. Seriously, one! That keeps the dough moist enough for a good springy texture but firm enough for you to handle. For more deep dives into using grain flours, make sure you read up on the basics of baking with whole wheat flour.
Serving Suggestions for Your Whole Wheat Bread
Now that you have this gloriously soft loaf, what are you going to do with it? Forget those sad, tasteless slices you used to buy! Because this bread is so tender, it’s just as good for grilling or toasting as it is straight out of the bag. It really shines in everyday moments.
Perfect Bread for Sandwiches and Toast
This is exactly what it’s designed for—the classic sandwich! Because we worked hard to make it fluffy, it holds up to wet fillings like tuna or leftover chicken salad without immediately turning soggy. It toasts up beautifully too, giving you a satisfying crunch that still yields to your bite. I love using it for egg sandwiches in the morning; you can find a great creamy egg salad to put on top once the bread is toasted!
Pairing This Honey Wheat Bread Recipe
You don’t always need a big meal, though. Sometimes, a thick slice of this bread, hot from the toaster, slathered with just a little good quality salted butter, is heaven. The honey flavor just sings! It’s also incredible when you dip it into coffee or use it to soak up syrup as French toast. The blend of sweetness from the honey and the grain stands up perfectly to both sweet and savory toppings.
Storage and Reheating of Homemade Whole Wheat Bread
Even the best homemade whole wheat bread goes stale if you don’t treat it right! Since this loaf is made with butter and honey, it stays softer longer than a lean, plain loaf, but you still need a plan. I always try to bake two loaves at once—one for immediate eating and one for wrapping up. It’s just easier that way, because once you taste this stuff, you’ll realize you need more than one loaf sitting around!
Keeping Your Whole Wheat Bread Fresh
For the first three days, I just leave the loaf right on the counter. You have to keep it airtight, though! I usually place it inside a large zip-top bag—squeezing out as much air as possible—or wrap it tightly in foil. Keep it at room temperature. Humidity is the real enemy; if your kitchen is extremely humid, sometimes putting it in a paper bag temporarily can help keep the crust from getting soggy, but generally, airtight plastic is the winner for maintaining moisture in this whole wheat bread recipe.
If you need it to last longer than four days, you should freeze it! Slice the loaf first—this is crucial for easy reheating later. Wrap the whole stack tightly in plastic wrap, and then wrap that whole package again in heavy-duty foil or a freezer bag. It freezes beautifully for up to three months, no problem.
Reheating for a Fresh-Baked Taste
If you stashed the bread on the counter, you can just pop a slice in the toaster, and it’s instantly better. But if you pulled it from the freezer after a month, you need a little reheat love. Don’t use the microwave—that always makes bread chewy! My preferred method is simple:
- Take a frozen slice right out of the freezer.
- Wrap it loosely in foil.
- Pop it in a preheated oven at about 350°F (175°C) for about 10 minutes, or until warmed through.
It comes out tasting like it was just pulled out of the oven, seriously! It’s the best way to get that warm, soft texture back, especially if you plan to slather it with butter or jam.
Frequently Asked Questions About 100 Percent Whole Wheat Baking
I get so many questions about moving to 100 Percent Whole Wheat Baking, especially from people who are just starting out with Beginner Whole Wheat Bread recipes. It’s totally normal to have hurdles! Whole wheat flour just behaves differently than the regular white stuff we grew up with, but once you understand its quirks, you’ll be golden.
Can I make this recipe using only whole wheat flour?
Yes, you absolutely can, but I want to warn you: the results are going to be very different! If you swap out that half-cup of all-purpose flour for more whole wheat, you’ll end up with a much heartier, denser loaf. It will be incredibly wholesome, which is great, but it won’t achieve that fluffy, soft texture we worked so hard for in this specific Soft Whole Wheat Sandwich Bread recipe. For this recipe, stick to the blend if you want the fluff!
Why is my homemade whole wheat bread dense?
Oh, trust me, I’ve made dense bread that could stop a door! Usually, density comes down to one of three things. First, often people accidentally add way too much flour when measuring, making the dough stiff. Second, your water might have been too hot and killed your yeast early on, meaning no rise! And the third big reason is rushing the rising process or not kneading long enough. The dough needs time to develop the strength to hold up the bran, so impatience is the enemy of fluffy whole wheat bread!
What is the best way to measure flour for whole wheat bread?
This is a fantastic, practical question! When you scoop your measuring cup directly into the flour bag, you compress it, and you end up with way too much flour in your bowl. For the most accurate results—which is super important when you’re aiming for the best structure—you should try the spoon-and-level method. Gently spoon the flour into your measuring cup until it overflows a little, and then use the back of a flat knife to sweep the excess off the top. If you’re serious about your baking, investing in a cheap kitchen scale is the final step to perfection. You can even find some great advice on simple kitchen routines that add efficiency, which applies perfectly here.
Estimated Nutritional Data for This Whole Wheat Bread
Every single slice of this glorious whole wheat bread packs a wholesome punch! We’re talking good fiber and solid protein to start your day off right. Remember that while this recipe is designed to be healthy and wholesome, these numbers are just my best estimates based on standard ingredients. The exact values will always change a little depending on the brand of honey you use or exactly how much butter ends up soaking into the pan!
Here’s a quick look at what you’re getting in every slice:
- Serving Size: 1 slice
- Calories: 130
- Fat: 2g (with only 1g saturated fat—that’s great!)
- Carbohydrates: 25g
- Fiber: 4g (Hello, happy digestion!)
- Protein: 5g
- Sugar: 5g (Mostly from that lovely honey!)
- Sodium: 250mg
- Cholesterol: 5mg
See? It really holds up well against those fluffier white breads while being so much better for you. It’s proof that you don’t have to sacrifice texture for nutrition when you’re baking your own healthy homemade bread!
Share Your Soft Whole Wheat Bread Creations
Now you have absolutely everything you need to conquer the intimidating world of whole wheat bread and produce a loaf that is genuinely soft, fluffy, and delicious! I really hope you give this Simple Whole Wheat Recipe a try. Honestly, there is nothing better than slicing into warm, homegrown bread for dinner.
When you do bake your loaf—and I truly hope you do—I want to hear all about it! Did it come out perfectly soft on the first try? Did you manage to resist eating the whole thing before it cooled (I never do)?
Please leave a rating below using the five-star system. A rating tells other bakers that this is a reliable recipe worth trying! If you have any pictures of your beautiful Soft Whole Wheat Sandwich Bread fresh out of the oven, please share them in the comments! I love seeing your successes. It truly makes my day when I know my family recipe is bringing wholesome bread to your table. For more baking inspiration that focuses on fluffiness, take a look at my recipes for fluffy baked oatmeal pancakes—the same principles of keeping batter light apply!
Happy baking, friend!
Print
Easy Soft Honey Whole Wheat Sandwich Bread
- Total Time: 2 hours 5 minutes
- Yield: 1 loaf
- Diet: Vegetarian
Description
Bake a soft, fluffy loaf of 100% whole wheat bread sweetened lightly with honey, perfect for daily sandwiches and toast.
Ingredients
- 1 cup warm water (105-115°F)
- 2 1/4 teaspoons active dry yeast
- 1/4 cup honey
- 2 tablespoons unsalted butter, melted
- 1 1/2 teaspoons salt
- 3 cups whole wheat flour
- 1/2 cup all-purpose flour (or more whole wheat flour for denser bread)
Instructions
- Combine the warm water, yeast, and a pinch of honey in a large bowl. Let stand for 5 to 10 minutes until foamy.
- Stir in the remaining honey, melted butter, and salt into the yeast mixture.
- Add the whole wheat flour and the all-purpose flour to the wet ingredients. Mix with a wooden spoon until a shaggy dough forms.
- Turn the dough out onto a lightly floured surface. Knead for 6 to 8 minutes until the dough is smooth and elastic. It will feel softer than typical white bread dough.
- Place the dough in a lightly oiled bowl, turning to coat. Cover the bowl with plastic wrap or a clean towel. Let it rise in a warm place for 1 to 1.5 hours, or until doubled in size.
- Gently punch down the risen dough. Shape it into a loaf and place it in a greased 9×5 inch loaf pan.
- Cover the pan loosely and let the dough rise again for 30 to 45 minutes, or until it crests about 1 inch above the rim of the pan.
- Preheat your oven to 375°F (190°C) during the last 15 minutes of the second rise.
- Bake for 30 to 35 minutes, or until the top is golden brown and the internal temperature reaches 200°F (93°C).
- Remove the bread from the pan immediately and cool completely on a wire rack before slicing.
Notes
- For a softer crust, brush the top of the loaf with melted butter immediately after removing it from the oven.
- If your dough seems too sticky during kneading, add flour one tablespoon at a time; avoid adding too much, as this leads to dense bread.
- Using warm water that is too hot will kill the yeast, preventing the bread from rising properly.
- Prep Time: 20 min
- Cook Time: 35 min
- Category: Baking
- Method: Baking
- Cuisine: American
Nutrition
- Serving Size: 1 slice
- Calories: 130
- Sugar: 5g
- Sodium: 250mg
- Fat: 2g
- Saturated Fat: 1g
- Unsaturated Fat: 1g
- Trans Fat: 0g
- Carbohydrates: 25g
- Fiber: 4g
- Protein: 5g
- Cholesterol: 5mg



Comments are closed.