

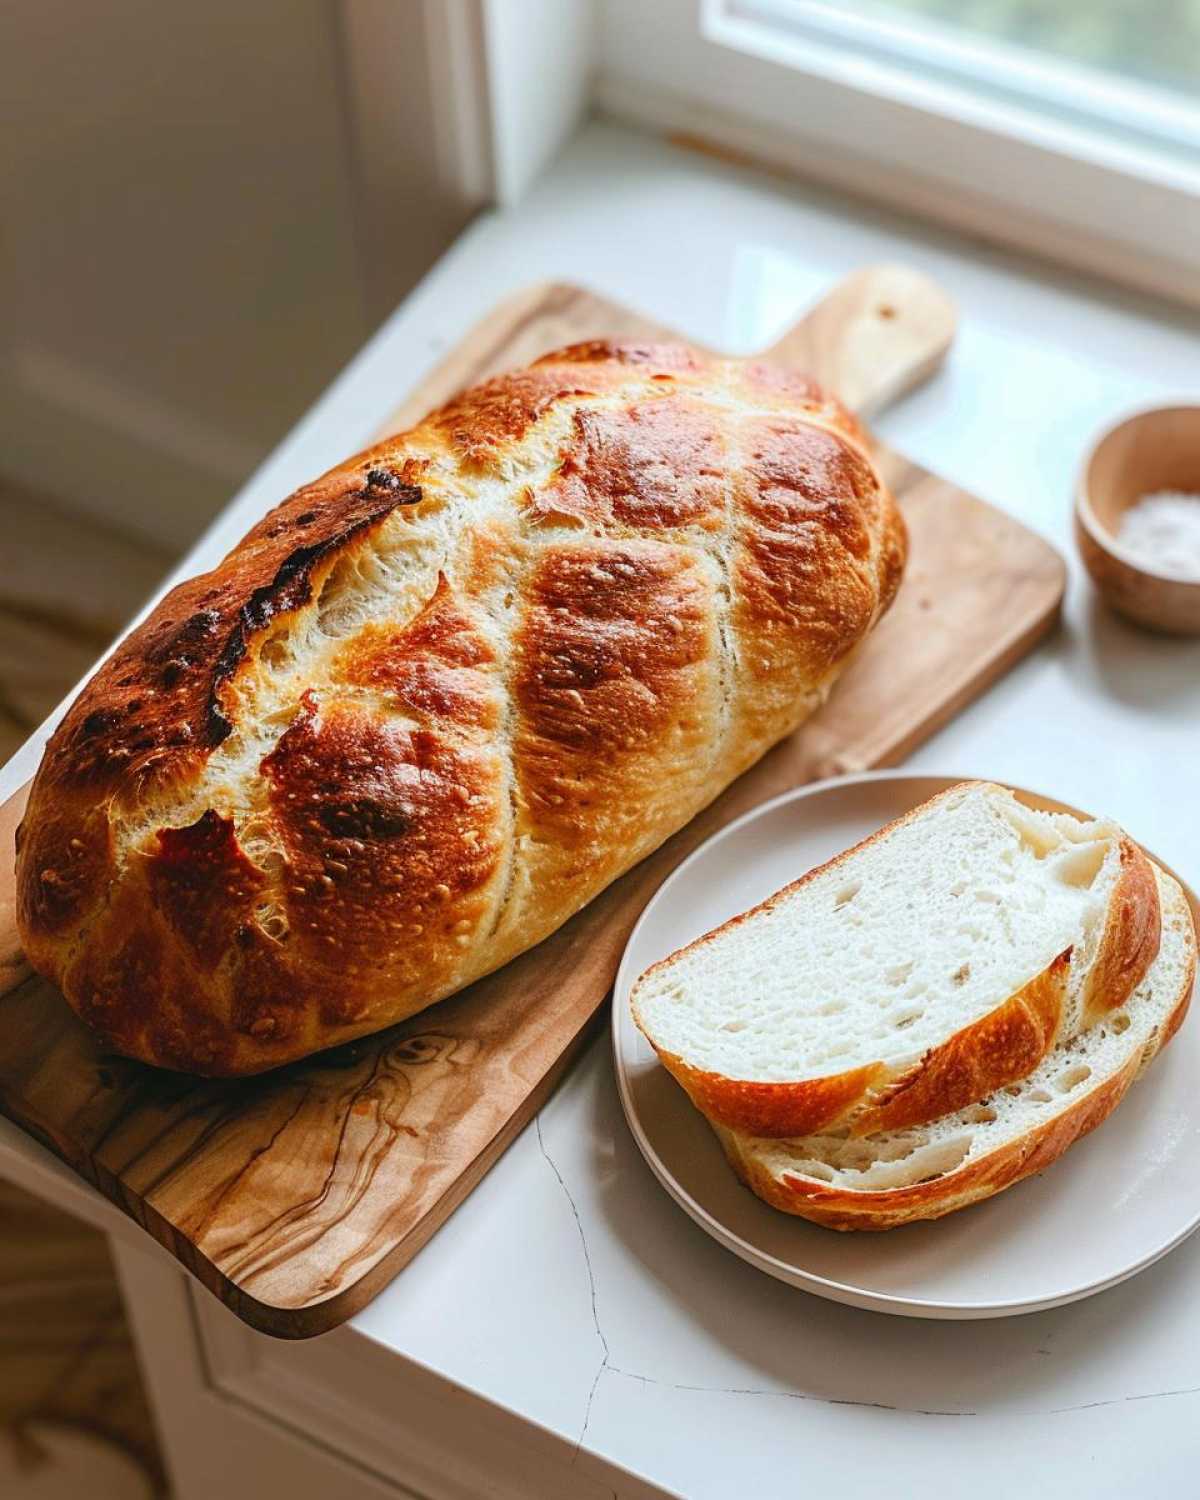
Stop dreaming about those gorgeous, rustic loaves you see in the Italian bakery window! I used to think making truly amazing Italian bread at home was impossible—that you needed some secret, three-day fermentation process. Nope! After years of trying different methods, this technique finally cracked the code for me. This honestly is my go-to Easy Crusty Italian Bread recipe, and the result is pure magic: a crackly, crisp crust that shatters just right, giving way to the softest, chewiest interior you could ever ask for.
If you’ve been scared of yeast, don’t you worry. This recipe is designed to be incredibly straightforward, perfect even if you’re still figuring out how to work with dough. The secret isn’t complicated; it’s all about a little timing and one special trick in the oven that mimics a professional steam injection system. Get ready for incredible aromas filling your kitchen!
Why This Is the Best Italian Bread Recipe for Home Bakers
Honestly, what makes this the Best Italian Bread Recipe is how much it tricks you into thinking you’re a professional baker. We’re achieving true Bakery Style Bread at Home, and it truly comes down to one non-negotiable step: steam. That beautiful, blistered, shatteringly crisp crust you crave? That only happens when the dough hits a super-humid, ultra-hot oven environment right away. Don’t worry, I give you the simple kitchen hack to pull it off.
It’s the combination of that crust and the forgiving interior that makes people keep coming back to this recipe. I’ve linked to my quick guide on artisan bread recipes if you want to compare, but this one wins every time for sheer reliability.
Achieving That Perfect Crusty Italian Bread Exterior
If you skip the steam, you get a dull, soft crust. Period. When we toss that hot water into the preheated pan at the bottom of the oven, the resulting cloud of steam keeps the surface of the dough moist for the first ten minutes of baking. This lets the bread expand fully before the crust sets hard. It’s the key to that gorgeous, dark, shiny exterior that screams ‘freshly baked!’
The Secret to a Soft and Chewy Interior for Your Italian Bread
Texture isn’t just luck, it’s done in the hands! We knead this dough just enough—you don’t want to overwork it into tough pretzels. Five to seven minutes on the counter is perfect. That gentle kneading develops just the right amount of gluten structure so you get that lovely pull and stretch. This creates the ideal structure for a Soft and Chewy Italian Loaf that’s perfect for soaking up every last bit of sauce.
Simple Ingredients for Your Homemade Italian Bread
You won’t believe how few things you need for this loaf! Seriously, these are the most basic building blocks of fantastic bread. I always keep these items stocked now that I know how easy it is to whip up a batch. Remember, good results start with good basics, so pay attention to the water temperature!
- 3 cups all-purpose flour – just your standard white flour works great here.
- 1 teaspoon instant dry yeast – that little packet works wonders!
- 1 1/2 teaspoons salt – don’t skip this, it’s crucial for flavor.
- 1 1/4 cups warm water (about 105-115°F) – this is the temperature range where the yeast wakes right up. Too hot and you lose them!
- 1 tablespoon olive oil (for greasing) – just a touch to keep the dough happy during its nap.
I keep a running list of my favorite staples over on my essentials page if you ever need a reminder about what I lean on for baking simple bread ingredients.
Step-by-Step Instructions for Crusty Italian Bread
Okay, are you ready for the fun part? This is where we turn simple things into an amazing loaf. Follow these steps closely, and you’ll have nailed the Crispy Crust Bread Tutorial in no time. Remember, bread baking is all about rhythm. Once you get into the flow, you won’t even need to look at the instructions!
Mixing and Kneading the Italian Bread Dough
First up, get everything dry—flour, yeast, and salt—mixed in a big bowl. I use a wooden spoon, just to get things started. Pour in that warm 1 1/4 cups of water and mix until it looks shaggy, like a messy bundle. That’s your cue to get your hands dirty! Turn that mess onto a lightly floured counter and knead, knead, knead. You are looking for smooth and elastic, which usually takes about 5 to 7 minutes. If you stop too soon, the texture will be weak!
First Rise and Shaping Your Rustic Italian Loaf
Grab a clean bowl and brush the inside with just a little olive oil so the dough doesn’t stick when it swells up. Tuck your dough ball in there and cover it tight. Now, patience! Let it rest in a warm spot for 1 to 1.5 hours. We want it doubled, no excuses! Once it’s risen beautifully, punch it down gently—that’s the relaxing part—and shape it by hand into a nice oval. This forms the basis for our classic Rustic Italian Loaf. Place that shaped dough on a parchment-lined baking sheet and cover it loosely for a quick 30-minute rest while the oven cranks up.
The Steam Secret: Baking Your Italian Bread Perfectly
This is the most important part of the entire process. About 20 minutes before you are ready to bake, crank your oven to 425°F (220°C). Crucially, place a shallow metal pan on the bottom rack while it preheats. Right before the bread goes in, use a super sharp knife to score the top once or twice—this helps control where the loaf expands. Now, quickly pour about a cup of hot water into that hot pan—watch out, it makes a LOT of steam! Immediately slide your loaf into the hot oven. The steam locks in moisture for that incredible crust. Check out this guide on soft stovetop breads for other quick dough tips!
Tips for the Perfect Golden Brown Italian Loaf
Even following the steam method perfectly, small tweaks can take your loaf from great to absolutely unforgettable. We are aiming for that deep, mouthwatering color—that beautiful Golden Brown Italian Loaf sheen that signals ultimate deliciousness. Trust me, these tiny additions really matter when you’re trying to replicate bakery standards.
If you feel your crust isn’t quite getting dark enough halfway through the bake time, try this trick: carefully open the oven, and quickly brush the exposed crust with a little water—just a light coating! This restarts the steaming process for a few vital minutes right before things set. Also, don’t rely solely on color; the true professional test is temperature. You want that internal reading to hit 200°F (93°C).
Pulling it out based on internal temperature ensures it’s done all the way through without drying out. If you love other recipes that bake up golden, take a peek at my easy artisan bread recipes collection—they share similar temperature needs!
Making Easy Homemade Bread: Prep and Rest Times Explained
I know, I know. When you look up bread recipes, sometimes the total time sounds like it requires you to start baking yesterday. Who has three days to wait for bread? That’s why I love this recipe so much—it truly delivers an Easy Homemade Bread experience without demanding your entire day.
Let’s break down the clock, because it’s mostly hands-off time, which is the real key to making this a Fast Rising Bread Recipe you’ll actually use.
Active time is super short. You’re looking at about 20 minutes total for mixing, measuring, and kneading. That’s less time than it takes to decide what movie to watch. The rest is all rising time, and you can actually get a few chores done during those rising periods!
Here’s the timeline, roughly: 20 minutes active prep, 1 to 1.5 hours for the first rise (doubling in size), 30 minutes resting after shaping, and then 30 minutes baking. If you do the math—and you can see the full breakdown if you check my no-knead bread guide for comparison—you are looking at a total window of about 2 hours and 20 minutes, most of which is just letting the yeast do its hard work. You get that bakery flavor much faster than you think!
Serving Suggestions for Your Warm Italian Loaf
Now comes the hardest part: waiting for this beauty to cool down! You absolutely cannot cut into this loaf piping hot—trust me, I’ve tried, and the inside gets gummy. But once it’s just warm enough to handle, this Warm Italian Loaf hits different. It’s amazing just ripped apart with some good quality olive oil, which is why I always keep a bottle ready for Italian Bread for Dipping.
My favorite memory involving this bread is last Sunday. I made a massive pot of Bolognese sauce—you can find my favorite recipe here, by the way—and we just tore off chunks of the crusty loaf to use as sponges for the sauce. Forget spoons; it’s the Italian way! The high contrast between the soft, airy inside of the bread and the rich, heavy sauce? Perfection.
The Best Use for Italian Sandwich Bread
But this isn’t just a sauce accessory! Because the structure is so sturdy thanks to that perfect bake, it makes the world’s best base for a hearty Italian sandwich. Try toasting thick slabs and piling on prosciutto, provolone, and roasted peppers. The firmness of the crust means the bread won’t collapse the minute you load it up with wet fillings. It holds up beautifully, unlike some of those flimsy store-bought loaves.
Frequently Asked Questions About Making Italian Bread
I know when you’re diving into a new bread recipe, you always have a few nagging questions pop up right before you start. It’s totally normal! Even experienced bakers run into little snags, especially when dealing with yeast for the first time. I put together a few things I hear most often about this specific recipe to help smooth out your first attempt at Beginner Bread Baking.
What if I only have Active Dry Yeast instead of Instant Yeast?
Oh, that’s an easy fix! Most recipes call for instant yeast because it can just be mixed right into the flour, but you can totally use active dry yeast if that’s what you have. The difference is you have to “wake it up” first. Before adding your flour, mix the active dry yeast into the warm water by itself and let it sit for about five minutes. If it gets foamy or bubbly on top, it’s active and ready to go! If nothing happens, your water was probably too hot, or the yeast is old, and you’ll need to try again with fresh yeast.
My crust didn’t get crispy like I wanted. Did I skip the steam step?
This is the most common complaint, and almost always, it comes down to steam! You MUST preheat that shallow pan in the oven for at least 20 minutes while the oven heats up alongside the bread. When you put the dough in, you need to pour that cup of very hot water into that hot pan right before closing the door. If you wait even 30 seconds, the oven air gets dry too fast, and the crust sets before it can puff up and crisp out. Make sure to work fast when adding that water!
Do I really need to use a thermometer to check if it’s done?
I love my digital thermometer for almost everything, but for bread, it just gives you peace of mind. You can absolutely tell by tapping the bottom of the loaf—it should sound hollow, like knocking on a wooden door. However, if you are worried about that soft, chewy interior, aiming for 200°F (93°C) inside is the foolproof way to know every last bit of the dough is cooked through without being dry. It brings a level of certainty that I really appreciate, which is why I recommend it for first-timers!
Can I skip kneading entirely and just do a no-knead version?
You could, but I wouldn’t advise it for *this* recipe if crispness is your goal. Our recipe relies on a moderate 5 to 7 minutes of kneading to build structure. No-knead loaves rely on very, very long, slow fermentation times to develop gluten, which we just don’t have here because we are aiming for a relatively quick turnaround. If you knead for the specified time, you get the best of both worlds: excellent texture without waiting 18 hours for the dough to rise!
Storage and Reheating Instructions for Fresh Italian Bread
You’ve done the hard work—you baked the most aromatic, crusty loaf imaginable! The next challenge is keeping it perfect until you eat the last piece. My biggest rule for crusty bread? Keep it away from plastic bags! Plastic traps all that lovely moisture escaping from the bread, and guess what that turns your crisp crust into? Soggy disappointment.
The absolute best way to store this Italian bread for up to two days is in a simple brown paper bag. Yes, the crust will soften a bit by day two—that’s just the nature of bread—but it stays soft on the inside and is still miles better than anything wrapped in plastic wrap. Keep it on the counter, away from direct sunlight.
If you need to keep it longer than 48 hours, you’ve got to freeze it. Slice the loaf first. This is a crucial step! You don’t want to thaw the whole thing just for one slice later. Wrap individual slices tightly in plastic wrap first (to prevent freezer burn), then tuck those wrapped slices into a heavy-duty freezer bag. It lasts great for about a month this way.
When you’re ready to eat a frozen slice, don’t thaw it on the counter! That just makes it chewy. Take the frozen, wrapped slice and pop it directly into a 350°F (175°C) oven for about 8 to 10 minutes. This method effectively re-crisps the exterior while warming the center perfectly. It tastes almost as good as fresh out of the oven—I promise it’s worth the extra few minutes!
Estimated Nutritional Information for This Italian Bread
Okay, folks, let’s chat about the numbers! I always feel like bread is a bit of a mystery zone nutritionally, but since you asked, here is the breakdown for one generous slice of this crusty loaf. You should know right away that these figures are just estimates based on the simple ingredients we used—flour, water, salt, yeast, and a tiny bit of oil. So, take these numbers as a helpful guide, not gospel!
When I look at these figures, what I see is basic goodness. It’s not sneaky high in sugar or fat, which is what I love about keeping my baking simple. This is honest, rustic food!
Here is the snapshot based on a standard serving size:
- Serving Size: 1 slice
- Calories: 150 (Perfect for dipping, right?)
- Total Fat: 1g (That’s mostly the olive oil we brushed on the bowl!)
- Saturated Fat: 0g
- Cholesterol: 0mg
- Sodium: 350mg (Remember to use unsalted butter if you make any accompanying dips!)
- Total Carbohydrates: 31g
- Dietary Fiber: 1g
- Sugars: 1g (Natural sugars from the flour, mainly.)
- Protein: 5g
See? Pretty fantastic for something so delicious! It proves you don’t need a ton of strange things to get that amazing, crusty exterior and soft inside. It’s just good, reliable baking foundations. Happy baking!
Print
Easy Crusty Italian Bread
- Total Time: 2 hours 20 min
- Yield: 1 loaf
- Diet: Vegetarian
Description
Make bakery-style crusty Italian bread at home. This recipe yields a loaf with a crisp exterior and a soft, chewy interior, perfect for beginners.
Ingredients
- 3 cups all-purpose flour
- 1 teaspoon instant dry yeast
- 1 1/2 teaspoons salt
- 1 1/4 cups warm water (about 105-115°F)
- 1 tablespoon olive oil (for greasing)
Instructions
- In a large bowl, mix the flour, yeast, and salt together.
- Pour in the warm water and mix with a wooden spoon until a shaggy dough forms.
- Turn the dough out onto a lightly floured surface. Knead for 5 to 7 minutes until the dough is smooth and elastic.
- Lightly grease a clean bowl with olive oil. Place the dough in the bowl, turning to coat. Cover the bowl with plastic wrap or a clean kitchen towel.
- Let the dough rise in a warm place for 1 to 1.5 hours, or until doubled in size.
- Gently punch down the risen dough. Shape it into a long, oval loaf.
- Place the shaped loaf on a baking sheet lined with parchment paper. Cover loosely and let it rest for 30 minutes.
- Preheat your oven to 425°F (220°C) 20 minutes before baking. Place a shallow pan on the bottom rack to hold water for steam.
- Just before baking, score the top of the loaf once or twice with a sharp knife.
- Carefully pour 1 cup of hot water into the shallow pan on the bottom rack to create steam. Immediately place the bread in the oven.
- Bake for 25 to 30 minutes, or until the crust is deep golden brown and the internal temperature reaches 200°F (93°C).
- Remove the bread from the oven and let it cool completely on a wire rack before slicing.
Notes
- For an extra crispy crust, brush the loaf lightly with water halfway through the baking time.
- If you do not have instant yeast, use active dry yeast and let it proof in the warm water for 5 minutes before adding the flour.
- This bread is excellent served warm with pasta sauce or used for hearty sandwiches.
- Prep Time: 20 min
- Cook Time: 30 min
- Category: Bread
- Method: Baking
- Cuisine: Italian
Nutrition
- Serving Size: 1 slice
- Calories: 150
- Sugar: 1
- Sodium: 350
- Fat: 1
- Saturated Fat: 0
- Unsaturated Fat: 1
- Trans Fat: 0
- Carbohydrates: 31
- Fiber: 1
- Protein: 5
- Cholesterol: 0

Comments are closed.