

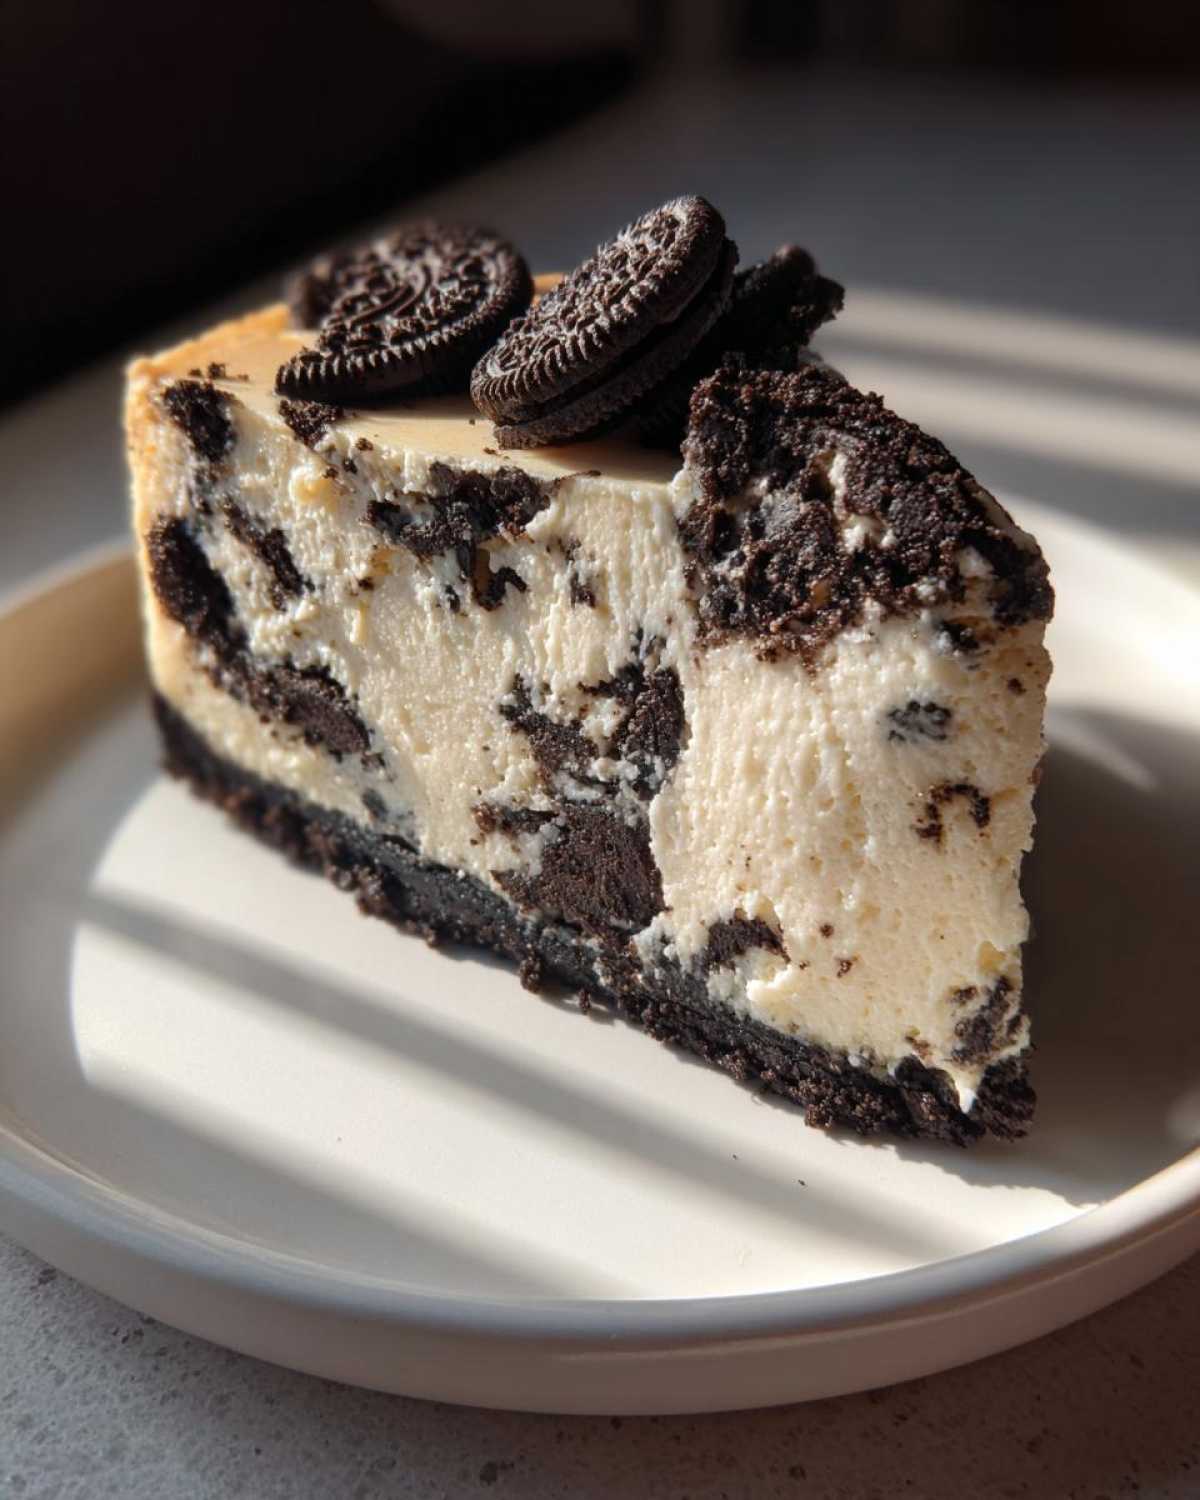
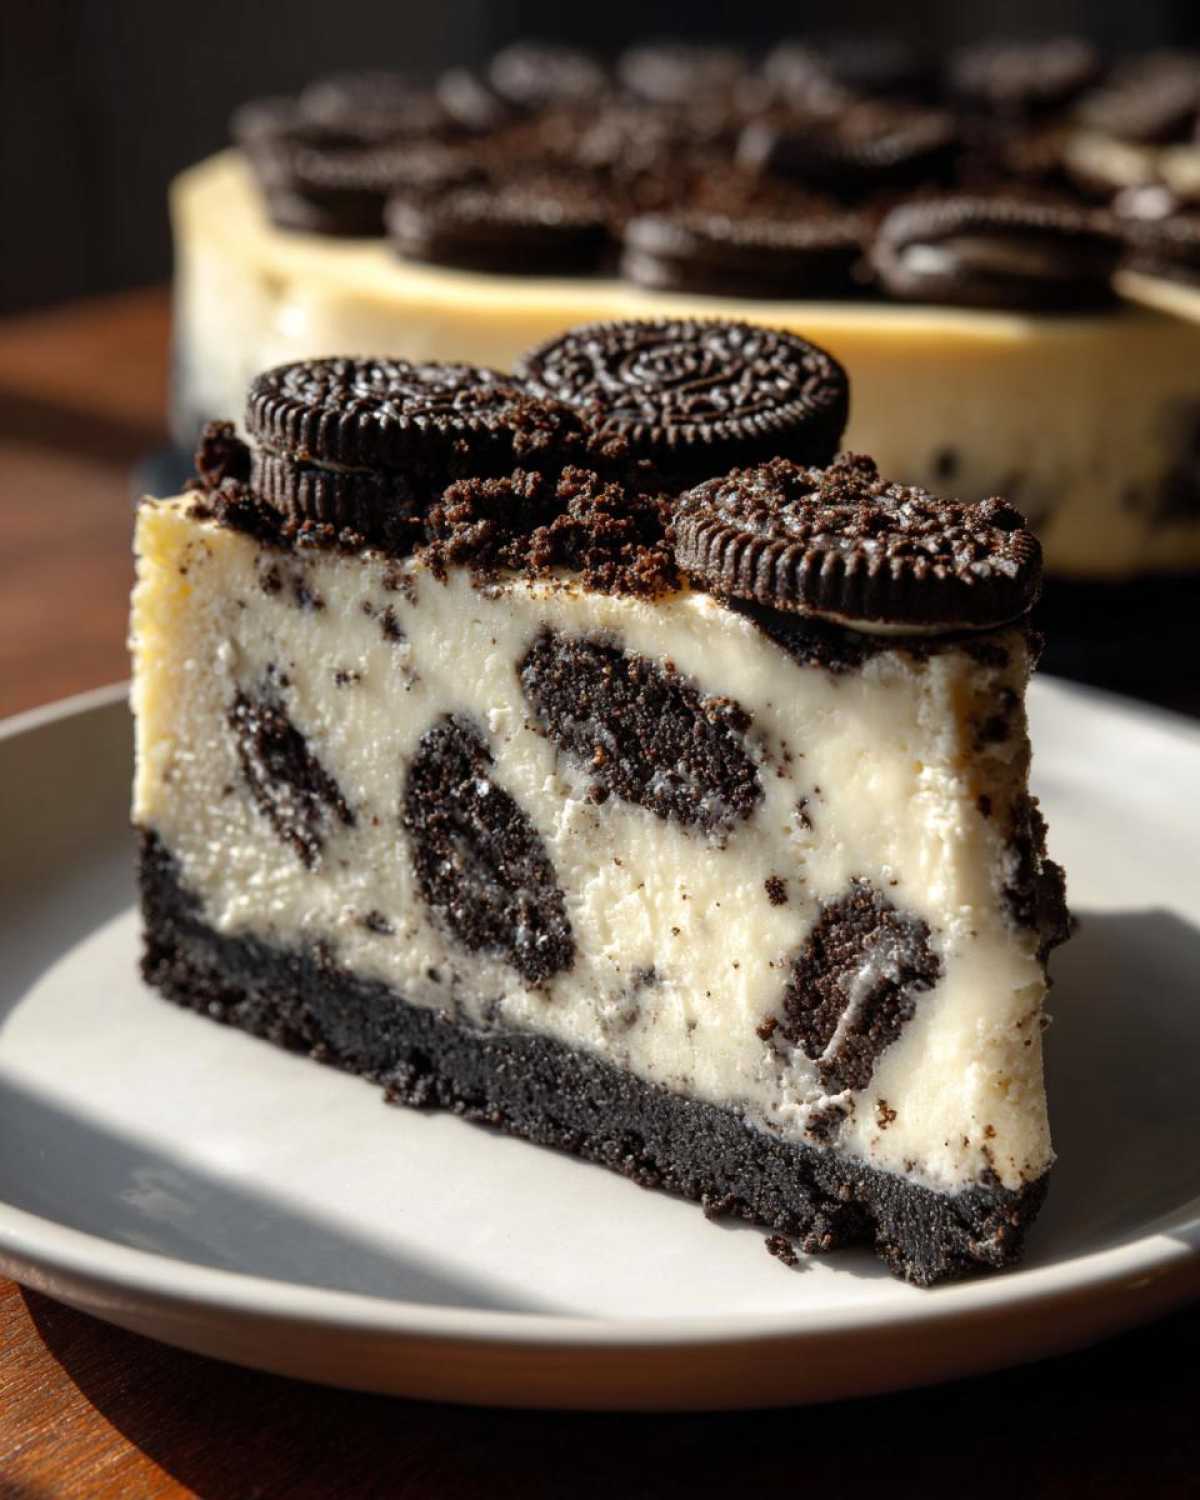
If you’re anything like me, sometimes you just need a dessert that screams pure, unadulterated indulgence. Forget subtle flavors—we want rich, we want creamy, and we definitely want Oreos involved! That’s why I spent way too many weekends perfecting this Foolproof Baked Oreo Cheesecake recipe. Seriously, I’ve cracked the code on getting that impossibly smooth texture without that awful crack right down the middle. I used to dread baking cheesecake, worried sick about the water bath and the temperature fluctuations. But trust me, after testing this method dozens of times, I’ve figured out the little secrets that guarantee a perfect, decadent oreo cheesecake every single time you pull it from the oven. This isn’t just another dessert; it’s the ultimate chocolate cookie dream!
I’m so happy to finally share this recipe with you. I want you to feel that confidence when you pull that foil off the springform pan! I learned that treating the cream cheese right—warm, but not warm enough to melt—is half the battle. If you follow my directions closely, especially about the slow cool-down, you’ll never have a cracked top again. For those days when you just can’t wait, I’ve put a little note in the variations section about a super quick no-bake Oreo option, but honestly, the baked version is worth every minute of the wait!
Why This Baked Oreo Cheesecake Recipe is Your New Favorite
I know what you’re thinking: another cheesecake recipe? But this one is different, I promise! We’re aiming for that rich, decadent Oreo dessert experience that sets the bar high but requires zero stress in the kitchen. This oreo cheesecake isn’t just tasty; it’s designed to work, even if you think you’re cursed when it comes to baking!
- It delivers that incredible, rich, creamy cheesecake texture that melts in your mouth.
- The fool-proof baking method virtually guarantees a completely crack-free top.
- It’s perfect for copying that famous indulgent style you find at those big chain restaurants.
Achieving the Ultimate Creamy Cheesecake Recipe Texture
The secret weapon for unbelievable smoothness is really about gentle handling. You absolutely must use room-temperature cream cheese, eggs, and sour cream. I usually pull mine out two hours before I plan to start mixing because cold cheese fights with volume in the mixer! When you beat the eggs, only mix until they disappear into the batter. If you whip air into that filling, that air expands while baking and then collapses when cooling, which is what causes those dreaded cracks. Keep your speed low, scrape the bowl a lot, and stay patient!
Essential Ingredients for Your Homemade Oreo Cheesecake
Okay, time to talk about what actually goes into this magnificent chocolate cookie cheesecake. I know ingredient lists can look intimidating, but honestly, most of this is just grabbing stuff out of your fridge and pantry! The main thing you absolutely cannot mess around with is the temperature. Remember what I said earlier? Cold ingredients are the enemy of creamy smoothness!
These are the exact amounts I use for my 9-inch springform pan. If you have your ingredients ready to go, the actual mixing goes super fast. I’ve linked my favorite French Toast Recipe here, just in case you need an amazing breakfast after inhaling this cheesecake!
- You need 1 1/2 cups of Oreos, crushed up super fine, for the crust—that’s about 25 of those beautiful cookies.
- For that crust, melt 1/4 cup of unsalted butter. Nothing fancy, just good old butter!
- For the filling, you have to use three whole 8-ounce packages of cream cheese. Make sure it’s full fat and really, really softened.
- Sweetener time: 1 1/2 cups of granulated sugar.
- A full teaspoon of vanilla extract—I cheat sometimes and use 1 1/2 teaspoons because vanilla makes everything better.
- Just a tiny pinch of salt, about 1/4 teaspoon, to really make the chocolate sing.
- Four large eggs. And I mean room temperature! If they are cold, they mess up that perfectly smooth batter.
- 1/2 cup of sour cream, also brought to room temperature. This adds the tang that keeps it from being too heavy.
- Finally, for those extra bursts of chocolate, grab 1 cup of whole Oreos, chopped up a bit roughly—these go right into the batter!
Seriously, the eggs and the cream cheese being properly softened are non-negotiable here. If your cheese has any hard lumps, you’ll spend forever mixing, and that usually means over-mixing the batter, which leads straight to cracks. So, plan ahead a little bit!
The Best Oreo Cheesecake Recipe: Step-by-Step Baking Instructions
Alright, deep breath! This is where the magic happens, and I’m going to walk you through every single step so this oreo cheesecake turns out perfectly creamy. Before you even touch the batter, you need to get your oven going to 350°F (175°C). Now, pay close attention here because the next part is essential for preventing cracks: wrap the outside bottom of your 9-inch springform pan really, really well with heavy-duty aluminum foil. I wrap mine twice—you want to make sure zero water from the bath can sneak in there. If water gets in, you’ll have a soggy crust, and nobody wants that!
If you want to check out my favorite chocolate chip cookie recipe for another time, feel free, but for now, we focus on this masterpiece!
Preparing the Oreo Crust Dessert Base
This is the easiest part! Take your very finely crushed Oreos—I mean fine, almost sand-like—and mix them with the 1/4 cup of melted butter. Once it looks like wet sand, press it down into the bottom of your foil-wrapped pan. Really use the bottom of a measuring cup or the heel of your hand to pack it down super firmly. A compact crust won’t crumble when you slice it later! Pop that into the oven and pre-bake it for exactly 8 minutes. This sets the butter and gives the crust a nice little head start before the heavy batter goes on top. Pull it out and let it chill slightly while you finish the filling.
Mastering the Water Bath for a Smooth Oreo Cheesecake
This water bath, which bakers sometimes call a *bain-marie*, is the single most important thing you can do for a smooth, crack-free result. Why do we do it? Because cheesecake needs gentle, steamy heat. Direct oven heat dries out the edges too fast, causing the center to puff up and then sink dramatically when it cools. The water bath insulates the pan and keeps the heat surrounding the cheesecake super humid and even.
Once your batter is mixed and poured over that cooled crust, set the entire foil-wrapped springform pan inside a larger, sturdy roasting pan. Then, carefully pour hot water—I mean hot, just off the boil—into the *roasting pan* until the water comes about halfway up the sides of the springform pan. Be careful not to splash water onto the foil seal!
The Crucial Slow Cooling Method for Your Oreo Cheesecake
This step is what separates the good cheesecakes from the *great* ones. When the baking time is up (usually around 55 to 65 minutes—the edges should look set but the middle needs that gentle wiggle), you do *not* pull it out.
Turn the oven completely off. Don’t touch the temperature dial! Now, prop the oven door open about two inches. I usually stick a wooden spoon handle in the door to keep it steady. Let that cheesecake sit in the gradually cooling oven for a full hour. No peeking! This slow descent in temperature eases the transition gradually, which prevents the final sudden temperature shock that always causes cracks. After that hour, *then* you take it out of the oven, remove the foil and water bath, let it finish cooling on the counter, and finally, it must chill overnight. Patience is truly the magic spice here!
Expert Tips for the Ultimate Oreo Dessert
Now that you’ve mastered the baking part of your amazing oreo cheesecake, let’s talk about making it truly unforgettable! These little tweaks are what push this from ‘homemade delicious’ to ‘I need the recipe right now’ status. Seriously, adding just one of these touches makes all the difference, especially if you’re trying to nail that restaurant-quality experience.
Don’t forget, if you decide you want an even simpler treat next time, check out my thoughts on the no-bake Oreo pie; quick desserts are a lifesaver!
Making a Copycat Cheesecake Factory Style Oreo Cheesecake Topping
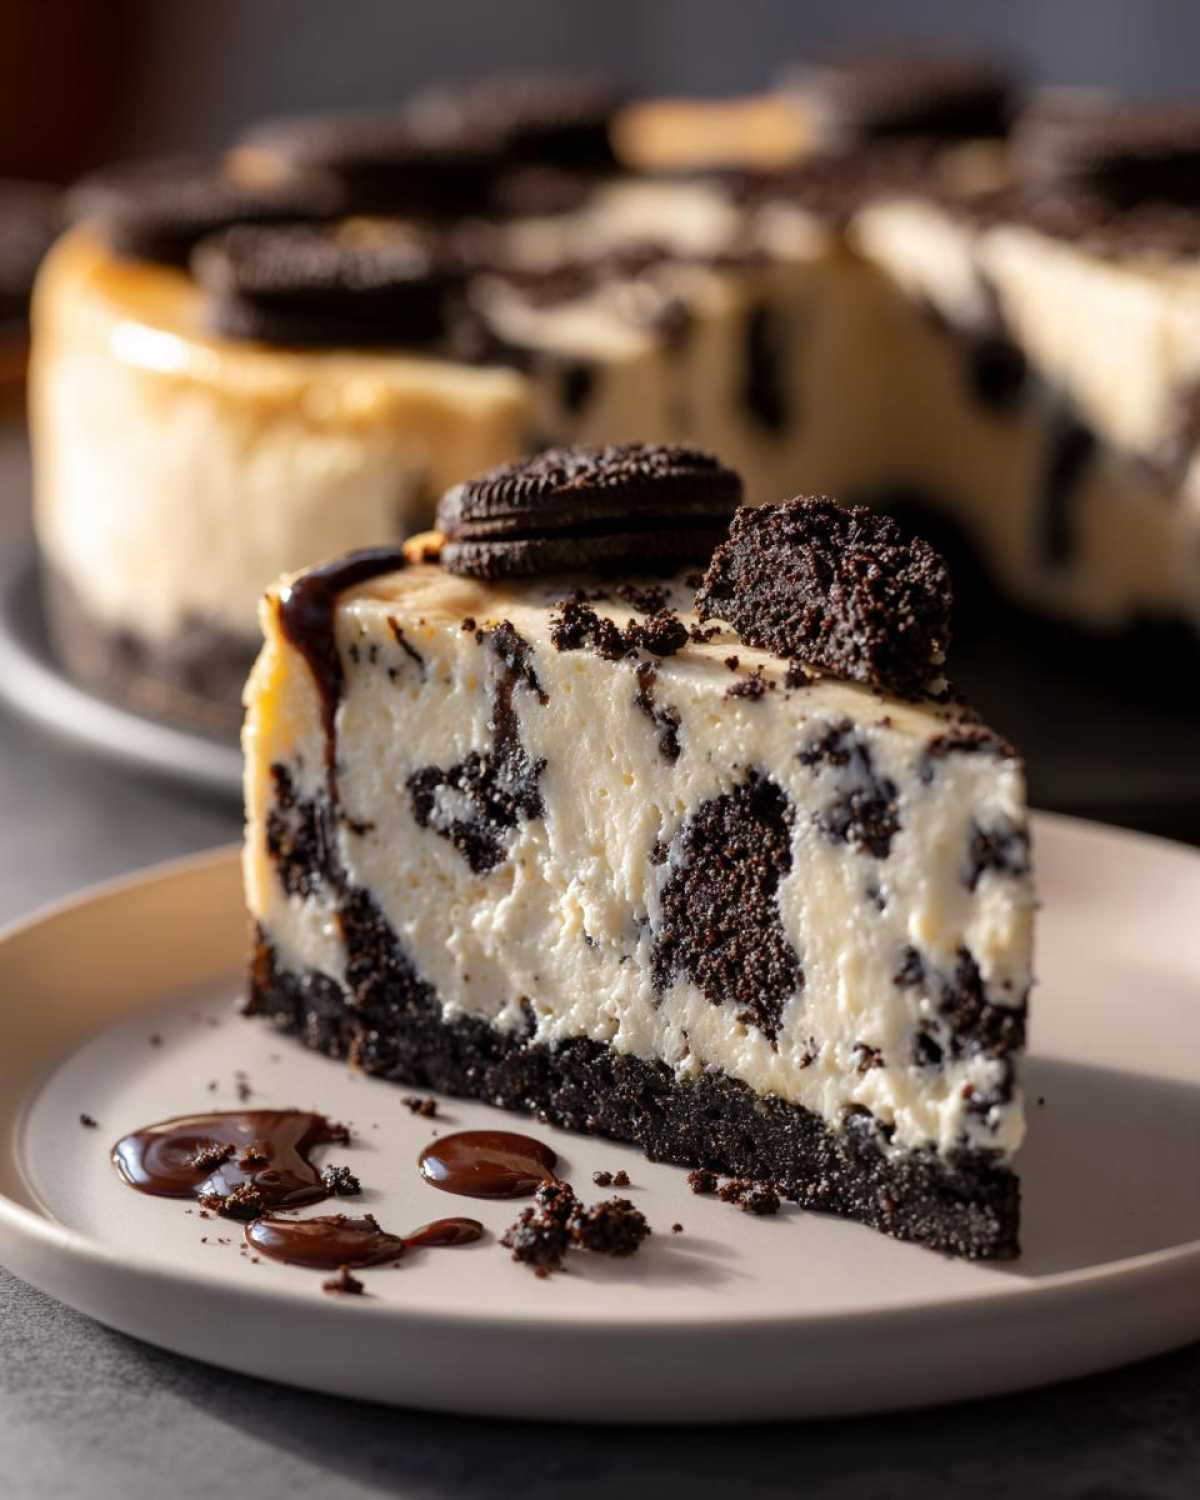
If you want that truly decadent, show-stopping look, you have to skip the simple dusting of powdered sugar and go for a chocolate topping. My favorite way to do this is by making a simple chocolate ganache, which is much easier than it sounds! Just heat up heavy cream until it’s steaming—not boiling—and pour it over your favorite quality chocolate chips (about a 1:1 ratio works well). Let it sit for five minutes, then whisk until it’s smooth, glossy, and perfect.
Let that ganache cool down just until it starts to thicken slightly—you don’t want it runny or it will just disappear into the top of the cheesecake. Then, drizzle it elegantly over the top of your chilled cake. If you want even more crunch, press a few extra crushed Oreos right onto the wet ganache immediately! It sets beautifully in the fridge, giving you that signature layered look.
Storage and Reheating Instructions for Leftover Oreo Cheesecake
Okay, so you managed to save some, which is honestly an accomplishment because this oreo cheesecake is dangerously delicious! Now we need to make sure that leftover cake stays perfect for your next craving session. The most important thing here is patience again. You absolutely cannot slice into this beauty right out of the oven, and you can’t just stick it in the fridge either.
Remember how carefully we cooled it down to prevent cracks? That slow stabilization continues in the fridge. You need to let it chill, covered, for a minimum of six hours, but honestly, overnight is the sweet spot. This allows the structure to firm up completely, making those clean slices possible—which is vital for showing off those beautiful layers of crust and filling!
When you store it, make sure the springform pan is either removed entirely, or if you’re keeping it whole, cover the top loosely with plastic wrap, or even better, a cake dome. If you’ve already cut slices, wrap each individual slice tightly with plastic wrap first, and then store them together in an airtight container. This prevents the cake from absorbing any weird fridge smells, which we definitely don’t want!
Now, about reheating? I know, it sounds wild to “reheat” a cold dessert, but hear me out. Cheesecake is best served chilled, but if you’ve left a slice out on the counter for thirty minutes, it tastes exponentially better! When the cream cheese warms up just slightly, it releases those complex vanilla and chocolate notes. So, my tip is this: if you grab a slice straight from the fridge, resist the urge to microwave it! Just let it sit on your plate for about 20 to 30 minutes before you dig in. It makes the texture softer and creamier again—almost like it was just made!

Variations on the Classic Oreo Cheesecake
I’ve given you the best baked oreo cheesecake recipe, but sometimes you just don’t have the oven time, or maybe you have a massive crowd, and carrying a huge 12-inch cheesecake feels like a marathon!
That’s why I wanted to include a few ideas that keep the spirit of this rich dessert alive while swapping out the method. If you’re looking for speedy results, you have to look into my no-bake Oreo cheesecake bars article. It’s super easy, perfect for summer, and you skip the whole water bath drama!
Even with the baked version, there are fun ways to switch things up to satisfy different needs. If you’re making this for a party or a bake sale, individual servings always feel a little fancier, don’t they?
Making Mini Oreo Cheesecakes for Parties
If you want to skip the slicing mess entirely—life saver!—baking these in muffin tins is the way to go. The baking time drops dramatically when you make mini Oreo cheesecakes. You still need that foil wrapper around the muffin pan tin if you want to use a water bath, though I find they manage without one if you watch them closely because they are so small.
Basically, you scale the crust mixture down for each liner and then fill them about 3/4 full with the batter. They usually take about 18 to 22 minutes at 350°F. They look adorable topped with a single perfect bite of chocolate cookie or a swirl of whipped cream. They’re the perfect portion-controlled bite!
Easy Oreo Cheesecake Bars Instead of a Full Cake
Want that same amazing flavor but in a tray that’s easier to cut and transport? Switch to a 9×13 inch baking dish! You’ll need slightly more crust mixture—I usually bump the crust up by about a quarter cup of butter and Oreos to make sure I get a good, solid layer across the whole bottom.
Since cheesecake bars have more surface area exposed to the heat, the baking time usually drops down closer to 45 minutes, sometimes less. Remember to keep checking that center wiggle! These are ideal for potlucks because they don’t require careful plating—just cut squares and let people grab them with a little spatula. Everyone loves an easy Oreo cheesecake bar!
The No-Bake Oreo Cheesecake Option
I mentioned this little trick over in the tips section, but I want to highlight it again for those who need a truly oven-free creamy cheesecake recipe. The filling ingredients are almost identical, but because you aren’t baking them, you change two things:
- You must skip the eggs! Eggs are what make it bake up firm.
- You need a setting agent, usually just letting the fat in the cream cheese and maybe a little extra sour cream do the work in the deep chill.
It won’t have that rich, velvety texture of the baked version—it’s a little lighter, almost like a fancy mousse—but it sets up beautifully in the fridge overnight. It’s surprisingly delicious and lightning fast to put together!
Frequently Asked Questions About Making Oreo Cheesecake
I know there are always a few burning questions when you tackle a rich dessert like this oreo cheesecake for the first time. Cheesecake baking has a reputation for being fussy, but trust me, most of the ‘fuss’ is really just about knowing the right technique. I’ve gathered up the questions I get asked most often about achieving that perfect, glorious slice!
If you’re looking for more simple dessert inspiration after mastering this one, you should definitely pop over and see my recipe for an easy no-bake peanut butter pie—sometimes you just need something fast!
Can I skip the water bath when making this Oreo Cheesecake?
Oh, I really, really wish I could tell you ‘Yes!’ because I know wrapping that springform pan is annoying. But honestly, for this creamy cheesecake recipe? No, you absolutely cannot skip the water bath. If you try to bake a cheesecake this rich, full of eggs and cream cheese, without that insulation, the edges will cook way too fast, puff up like a dome, and then collapse into a giant, cracked mess when it starts cooling down.
The water bath creates steam, which keeps the internal temperature perfectly even and humid enough so the cake cooks gently. Think of it like a cozy blanket for your cheesecake! Trust me, taking that extra ten minutes to wrap the pan securely saves you hours of heartache later.
What is the best way to cut a clean slice of cheesecake?
This is the final boss battle of any great cheesecake presentation! You’ve chilled it overnight, you’ve waited patiently for it to come up to room temperature for 20 minutes, and now you don’t want the knife dragging cream cheese all over the plate. I learned this trick from a bakery ages ago, and it works perfectly for getting those crisp edges on your homemade Oreo cheesecake.
Get a tall glass and fill it with very hot (or even boiling) water. Dip your favorite long, thin, non-serrated knife into that hot water for about ten seconds. Wipe the blade completely dry with a clean kitchen towel—it needs to be hot and dry! Then, make your first cut straight down. Before you make the next cut, dip, wipe, and dry the knife again.
It sounds like a lot, but doing this between *every single cut* ensures the knife glides cleanly through the cold, dense filling without sticking to the chocolate crust or dragging up the sides. It’s the secret to making your party desserts with Oreos look professionally done!
Why did my cheesecake batter look lumpy before I added the eggs?
This almost always comes down to temperature! If your cream cheese wasn’t fully softened—and I mean soft enough that it feels squashy and yields easily to a gentle poke—you’ll get little annoying pockets of hard cheese that your mixer just can’t smooth out properly.
Next time, make sure that cream cheese is sitting on the counter for at least two hours before you even think about turning on the mixer. If you’re in a massive rush, cut the blocks into smaller cubes. It dramatically helps them warm up faster!
Can I use cream cheese *light* or *whipped* products in this recipe?
Honestly, please don’t! For this recipe to achieve the rich texture you want—especially if you’re aiming for that density similar to the Cheesecake Factory style—you need full-fat, brick-style cream cheese. Light cream cheese has more water content, and when you bake it, that extra water evaporates differently, which ruins the structure we worked so hard to set up with the slow cooling!
Also, skip the whipped type entirely. Whipped versions have air already beaten into them, and we want *us* to gently beat the air in slowly. Too much pre-incorporated air leads straight back to cracking. Stick to the real deal for the best Oreo cheesecake!
Nutritional Information for This Rich Creamy Dessert
Okay, let’s be real for a second. This rich creamy dessert is an indulgence, not a health food! We use full-fat cream cheese, sugar, and lots of chocolate cookies, so these numbers reflect that decadent experience. I pulled these estimates based on my standard recipe measurements, but remember that how much you cut your slice makes a huge difference!
Here’s a quick rundown per slice, based on 12 servings:
- Serving Size: 1 slice
- Calories: About 450
- Sugar: 35g (That’s where the sweetness comes from!)
- Fat: 28g (Lots of that good, creamy fat from the cheese and butter)
- Carbohydrates: 45g
- Protein: 7g
Please treat this as an estimate! If you use a lower-sugar cookie for the crust, or swap white sugar for slightly less brown sugar, those numbers shift around. But hey, you earned this!
Share Your Best Oreo Cheesecake Creations
I’m so excited for you to try this recipe! Baking cheesecake can feel a little intimidating, but I truly believe this method removes all the guesswork. Once you serve up that perfect, crack-free, creamy slice, you’re going to feel like a total baking rockstar.
When you do pull that beautiful oreo cheesecake out of the fridge, please snap a photo! I absolutely love seeing your creations, whether you kept it simple or went all-out with a chocolate ganache topping. Tag me on social media or leave a star rating and a comment right here on the blog. Tell me how the slow cooling worked for you, or if you tried the mini version!
Happy baking, everyone! I can’t wait to hear how much you love this ultimate cheesecake jar recipe!
Print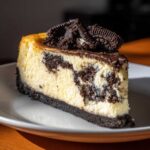
Foolproof Baked Oreo Cheesecake
- Total Time: 8 hr 30 min
- Yield: 12 servings
- Diet: Vegetarian
Description
Make a rich, creamy, baked Oreo cheesecake with a chocolate cookie crust. This recipe guides you to a smooth texture without cracks.
Ingredients
- 1 1/2 cups crushed Oreo cookies (about 25 cookies)
- 1/4 cup unsalted butter, melted
- 3 (8 ounce) packages cream cheese, softened
- 1 1/2 cups granulated sugar
- 1 teaspoon vanilla extract
- 1/4 teaspoon salt
- 4 large eggs, room temperature
- 1/2 cup sour cream, room temperature
- 1 cup chopped Oreo cookies, for batter
Instructions
- Preheat your oven to 350°F (175°C). Wrap the outside bottom of a 9-inch springform pan tightly with heavy-duty aluminum foil for a water bath.
- Combine the crushed Oreos and melted butter. Press the mixture firmly into the bottom of the prepared springform pan. Bake the crust for 8 minutes. Let it cool slightly.
- In a large bowl, beat the softened cream cheese with an electric mixer until smooth. Scrape down the sides.
- Gradually add the sugar, vanilla extract, and salt. Beat until just combined. Do not overmix.
- Add the eggs one at a time, beating on low speed after each addition until just incorporated. Mix in the sour cream.
- Gently fold in the chopped Oreos for the batter.
- Pour the batter over the cooled crust. Place the springform pan into a larger roasting pan. Carefully pour hot water into the roasting pan until the water reaches halfway up the sides of the springform pan (this is the water bath).
- Bake for 55 to 65 minutes, or until the edges are set but the center still jiggles slightly when gently shaken.
- Turn off the oven. Prop the oven door open slightly (about 2 inches) and let the cheesecake cool inside the oven for 1 hour. This slow cooling prevents cracking.
- Remove the cheesecake from the water bath and foil. Cool completely on a wire rack. Refrigerate for at least 6 hours, preferably overnight, before serving.
Notes
- For a no-bake version, chill the filling for 6 hours instead of baking.
- Use room temperature ingredients for the filling to prevent lumps.
- If you want a Cheesecake Factory style, top with a chocolate ganache layer before chilling.
- Prep Time: 25 min
- Cook Time: 65 min
- Category: Dessert
- Method: Baking
- Cuisine: American
Nutrition
- Serving Size: 1 slice
- Calories: 450
- Sugar: 35g
- Sodium: 320mg
- Fat: 28g
- Saturated Fat: 17g
- Unsaturated Fat: 5g
- Trans Fat: 0.5g
- Carbohydrates: 45g
- Fiber: 1g
- Protein: 7g
- Cholesterol: 95mg


Comments are closed.