

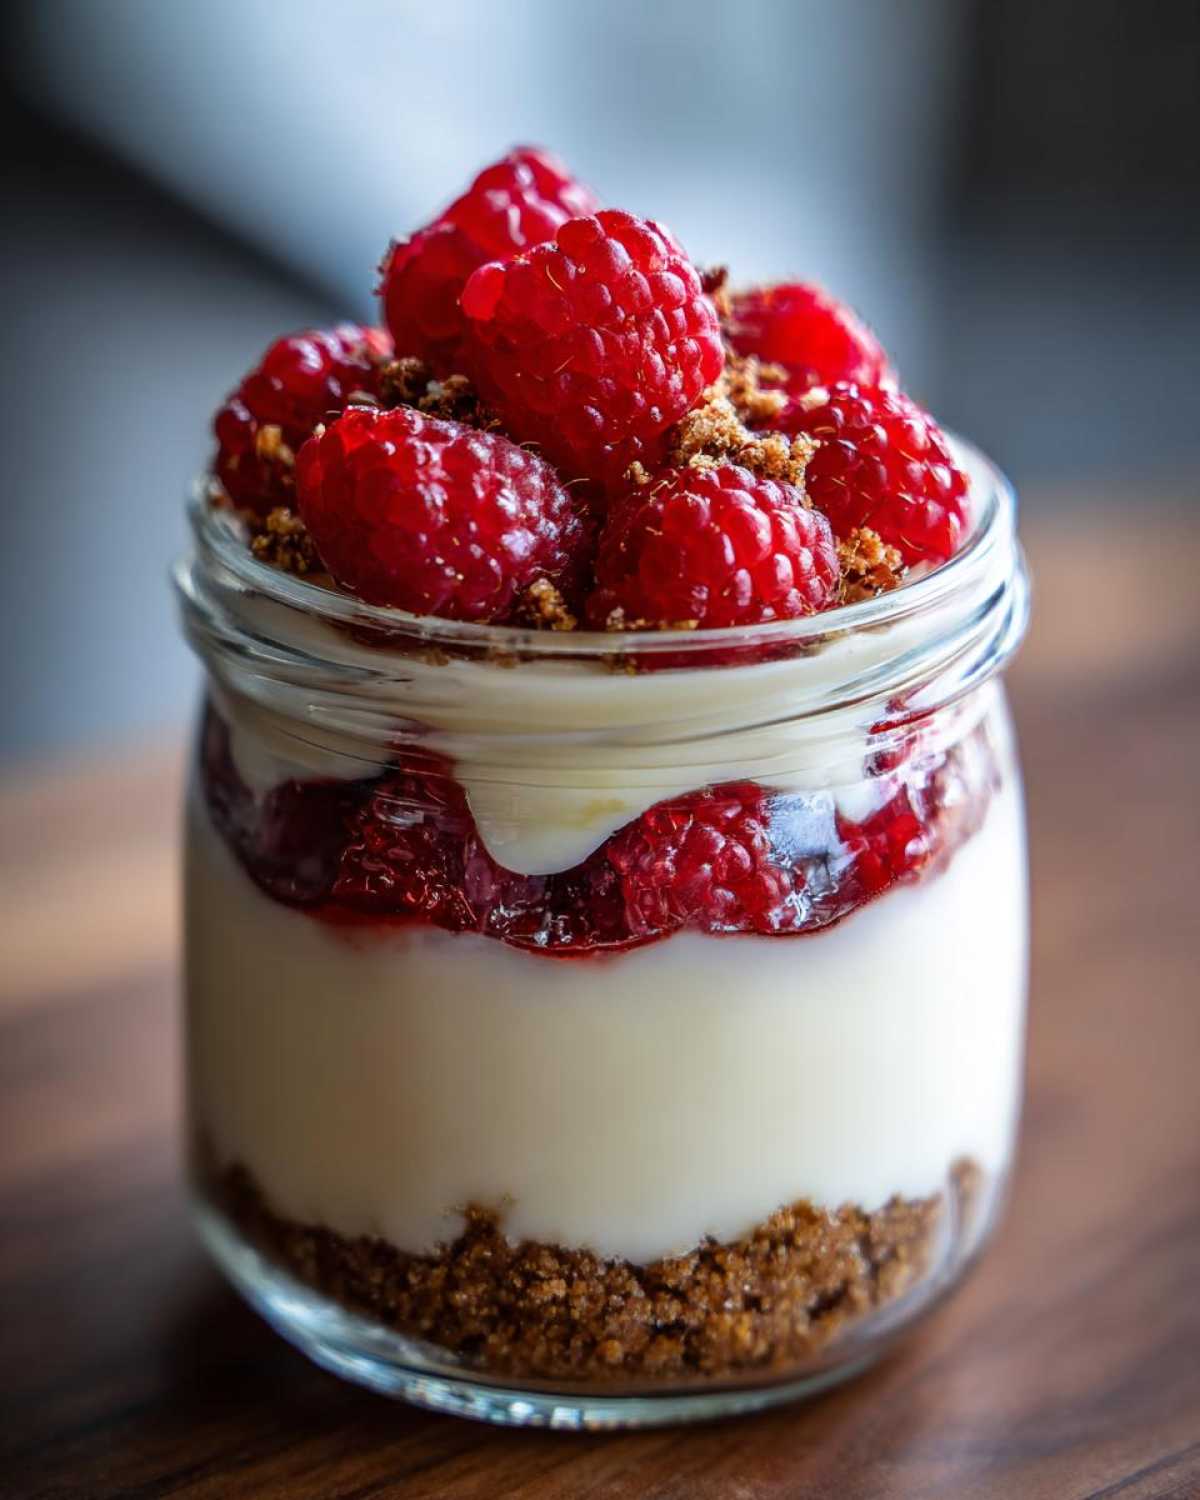
Oh, my friends, do I have a treat for you today! Sometimes, you just need that creamy, luxurious mouthful of cheesecake, right? But when we’re trying to stick to our fitness goals, that craving can feel like a real stumbling block. Well, I’ve spent countless hours in my kitchen, channeling that same passion my grandmother taught me, to create truly satisfying yet macro-friendly recipes. That’s why I’m so thrilled to share these Protein Cheesecake Jars with you! They are no-bake, intensely creamy, and packed with enough good stuff to feel like a genuine indulgence, perfect for snacking or meal prepping.
Forget everything you think you know about chalky, disappointing healthy desserts. These little jars are my secret weapon for those days when I need something truly comforting but still need to keep my macros in check. Trust me, when you taste this, you’ll understand why I put so much heart into making sure healthy eating never means sacrificing delicious flavor.
Since you’re here looking for the best way to make this happen, you should definitely check out my one-bowl banana protein muffins too! They solve that morning sweet craving beautifully!
Why This No-Bake Protein Cheesecake Jars Recipe Works for You
I know that when you’re busy, the last thing you want is a recipe that needs an hour of standing over a hot oven. My mission here is always to give you results that taste amazing without taking over your whole day. These jars meet that goal perfectly, making them a staple in my own house for quick snacking!
- These fall squarely into the Macro Friendly Dessert category. We’re keeping things light but powerful, so you feel satisfied long after you finish that last creamy spoonful.
- They are genuinely an Easy No Bake Dessert. Active time? Maybe 15 minutes, tops! Cleanup is minimal, which is always a win in my book.
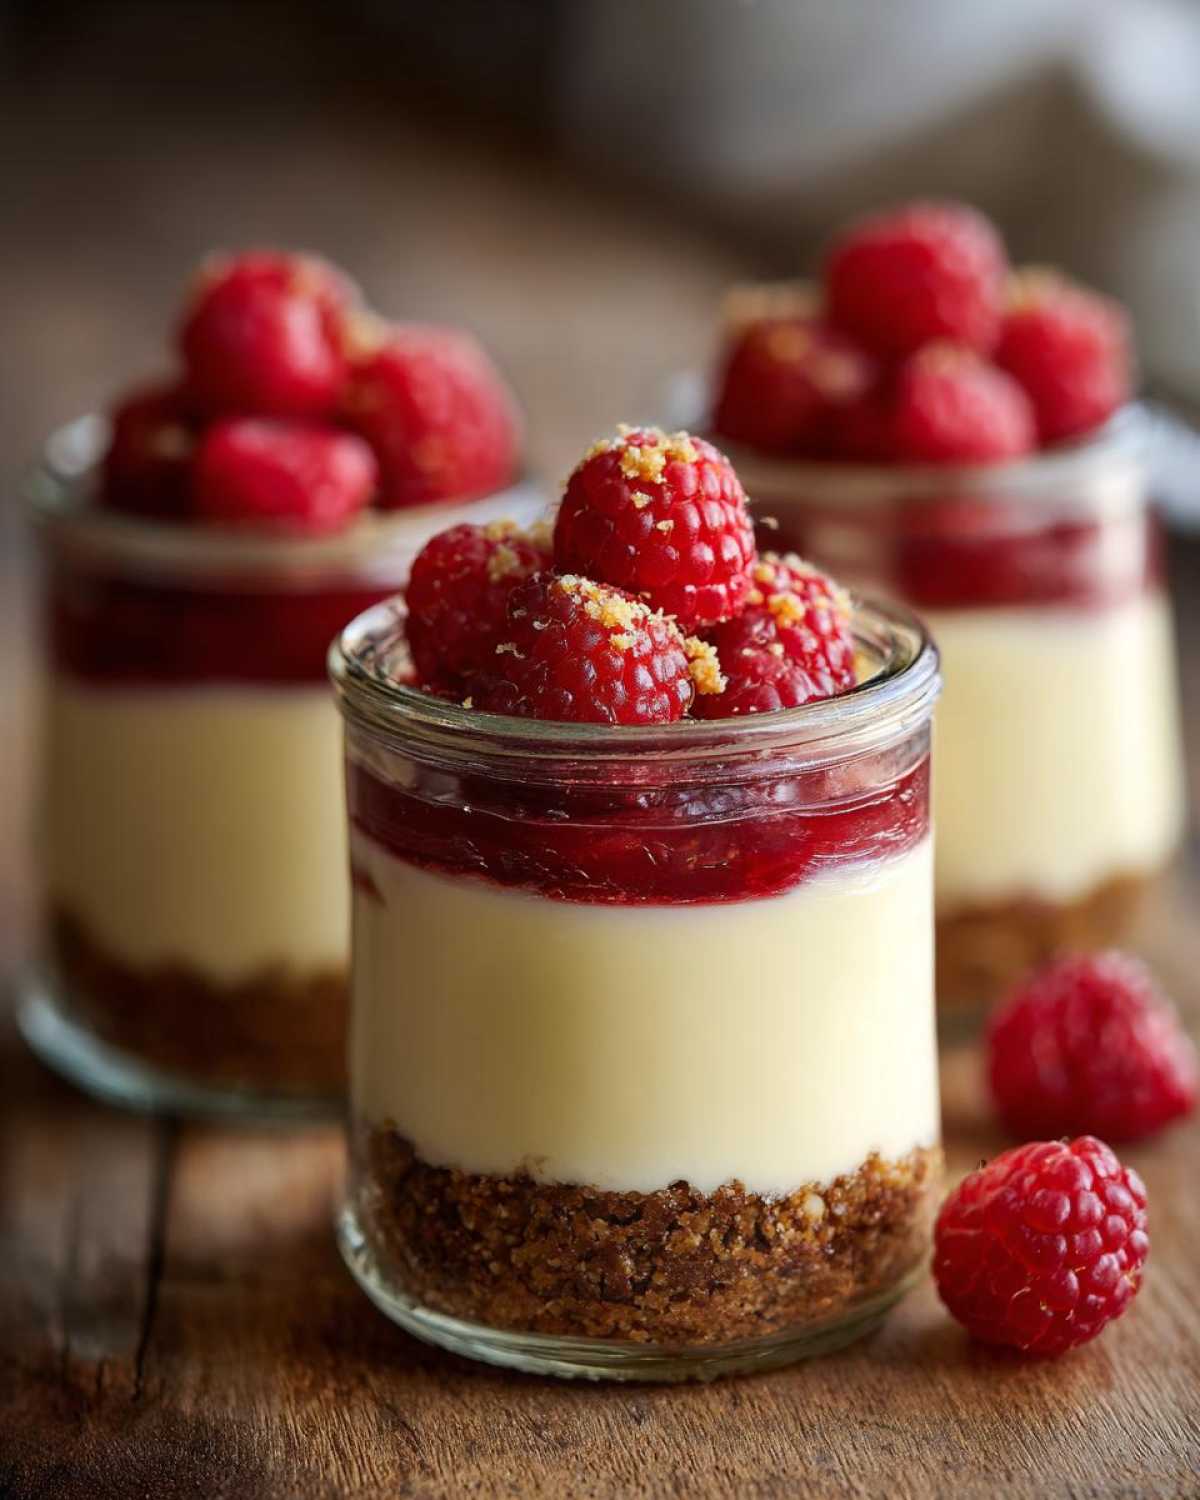
- They are the ultimate Meal Prep Dessert. Make four, stack them in the fridge, and you’ve got healthy indulgence sorted for days. I know you’ll love knowing exactly what you’re eating tomorrow.
If you’re looking for other great ways to pack in protein while keeping things fast, you must try my high-protein cottage cheese egg bites!
High Protein Dessert Recipes Ready in Minutes
Honestly, the best part is the speed. We are whipping up about 28 grams of muscle-supporting protein per jar here, and all that takes is a quick blend in the food processor. We are focusing only on assembly here; the oven stays off, which means more time enjoying your treat!
The Ultimate Creamy Protein Treat Without Baking
Texture is everything in a cheesecake, but sometimes baking risks turning that smooth creaminess into something a bit… grainy. Because this is a No Bake Protein Dessert, we rely on the blender to do the heavy lifting. That combination of Greek yogurt and cottage cheese blends into something so velvety, I promise you won’t believe it’s actually good for you!
Essential Ingredients for Your Protein Cheesecake
When we talk about making a truly great Protein Cheesecake, the ingredients we choose are non-negotiable. This recipe isn’t just about stuffing in powder; it’s about creating that classic, rich mouthfeel while keeping the fat and sugar way down. This is where using real ingredients that serve double duty really shines. We are ditching most of the heavy cream cheese and relying on a dynamic duo for our base: low-fat cottage cheese and plain non-fat Greek yogurt.
These two ingredients are the secret behind making this a spectacular Greek Yogurt Protein Dessert and a brilliant Cottage Cheese Cheesecake variation. They give you that satisfying tang and incredible creaminess. Then, we add vanilla protein powder—make sure yours is a brand you enjoy the taste of because it really comes through! We need just a touch of lemon juice for that authentic cheesecake ‘zing,’ balancing out the sweetness.
Notes on Sweeteners and Crust Options for Protein Cheesecake
Let’s talk sugar, or rather, the lack thereof! To keep this a genuine Sugar Free Dessert, I use powdered erythritol. Powdered is so important because we don’t want any gritty texture sneaking into our smooth filling. If you use granular, just pulse it in your blender first until it becomes fine dust, okay?
For the crust, I’ve stuck with the simple graham cracker route, but if you need a Gluten Free Cheesecake base, don’t worry—I included a simple swap in the notes! Instead of the crumbs, just use almond flour mixed with your melted butter substitute. It gives a lovely, nutty foundation. This attention to small details is what makes my recipes reliable, just like my creamy cottage cheese chicken salad!
Step-by-Step Instructions for Perfect Protein Cheesecake Jars
Following the steps precisely is key, especially when aiming for that perfect, scoopable texture in a Protein Cheesecake that hasn’t seen an oven! Don’t rush the chill time; that’s where the magic really happens and everything firms up just right. It’s really quite straightforward, but a little method goes a long way toward success.
Preparing the Crust Base for Your Cheesecake in a Jar
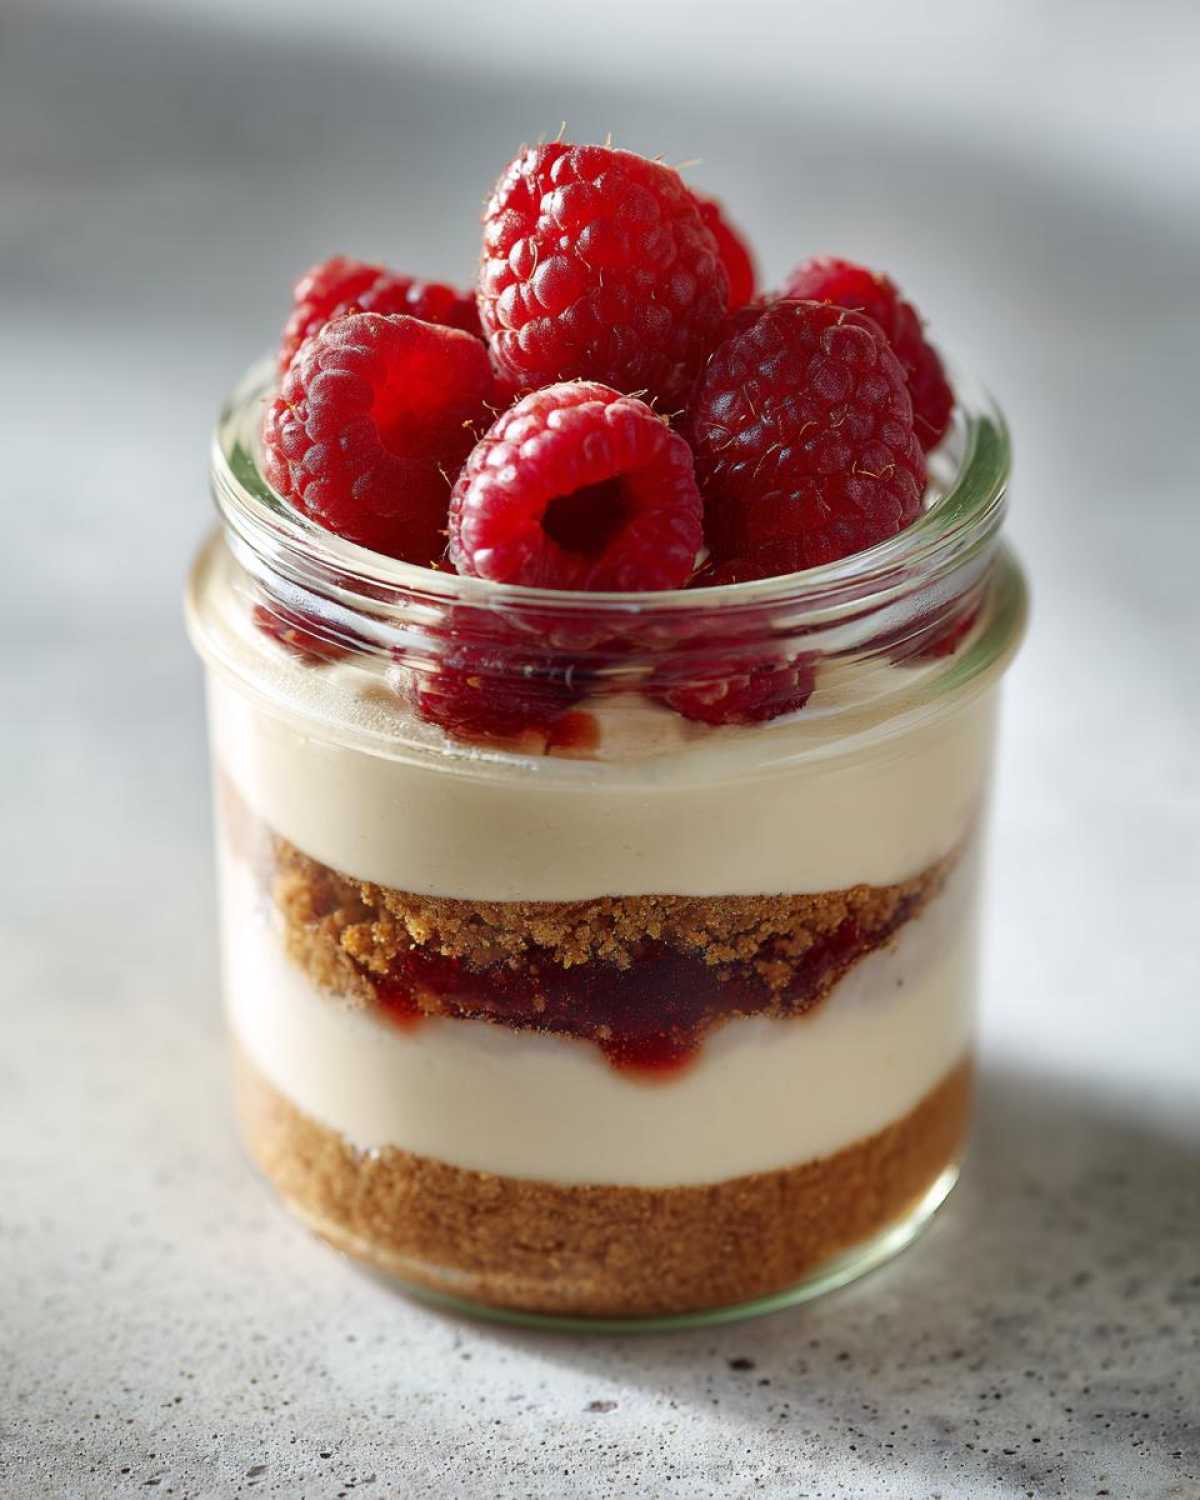
First things first, we start with the base! Grab your four small jars or ramekins that you plan to serve these in. In a little bowl, mix up your crushed crumbs—whether you used graham crackers or almond flour—with the melted butter or coconut oil. You want it to look like wet sand, you know, just barely sticking together. Now, press that little bit of mixture evenly into the bottom of each jar. Pop those jars into the fridge while you make the filling. This initial chill helps set the crust so it doesn’t mix into the creamy layer later!
Blending the High Protein Cheesecake Filling
Alright, now for the velvety part! Get your food processor or your very best high-speed blender ready. Into the machine go everything else: the cottage cheese, that beautiful non-fat Greek yogurt, your vanilla protein powder, the powdered sweetener, vanilla extract, and the lemon juice. You need to blend this until it is utterly, completely smooth. And I mean *smooth*. Don’t be shy about stopping the machine to scrape down the sides a couple of times! We are aiming for that incredibly rich, decadent texture you expect from a classic—this is what separates a good Low Calorie Cheesecake from a grainy one. Once it’s silky, you’re ready to assemble!

Once the filling is blended, spoon (or pipe, if you want to be fancy!) that glorious mixture right over your chilled crusts in each jar. Then, cover them up. Now here is the hardest part, my friends: patience! You must refrigerate these for at least four hours, though overnight is even better. That chilling time is what transforms the mix into firm, glorious cheesecake. If you try to eat them early, they’ll just be sweet yogurt soup!
If you’re looking for another recipe where precision matters, you have to check out my easy no-knead cranberry walnut bread; technique is everything there too!
Tips for the Best Creamy Protein Cheesecake Texture
Achieving that perfect, creamy mouthfeel in a Protein Cheesecake is really about two things: patience with your blender and not skimping on the chill time. I promise you, if you blend until there are zero little flecks of cottage cheese left, you’re halfway there! Sometimes, if the blender is working too hard, the mixture can warm up, which leads to a less firm result. If you notice that happening, just take a quick break and let the blades rest for a minute.
The biggest mistake I see people make? They pull them out after just two hours of chilling! That isn’t enough time for the protein powder and the dairy base to truly bind together and set properly. You need that minimum of four hours, but honestly, overnight makes them sliceable and unbelievably smooth—more like a luscious, creamy protein treat. If you made my creamy stovetop rice pudding, you know I value that slow setting time for the best texture!
Flavor Variations for Your Protein Cheesecake
The beauty of this Protein Cheesecake base is how wonderfully adaptable it is! Once you’ve mastered the vanilla version, you can pivot to all sorts of fun flavors without needing a whole new recipe. It’s all about playing with the add-ins. This is where we turn a simple base into a full lineup of Fitness Dessert Ideas!
I love making a batch of the vanilla base and then dividing it up right before chilling, so I can have a few different toppings ready to go. If you’re looking for something richer, we can easily tackle a Chocolate Protein Cheesecake. Or maybe you’re craving something bright and fruity? We can do that too!
Making Chocolate Protein Cheesecake
If you’re a chocolate lover like me—and who isn’t?—this variation is so simple, you won’t believe it. Remember those recipe notes where I mentioned adding unsweetened cocoa powder? That’s your cue! Right after you have successfully blended your filling until it’s completely smooth, stop the machine, and add about two tablespoons of good quality, unsweetened cocoa powder. You might need to pulse it a little longer just to incorporate it fully and make sure there aren’t any little dry pockets of cocoa powder hiding anywhere. It turns the whole mixture into the most decadent, dark, and utterly satisfying Chocolate Protein Cheesecake!
For a vibrant twist, you can also try creating a Strawberry Protein Cheesecake! Instead of cocoa, take about a quarter cup of strawberry puree—make sure it’s nicely thickened, maybe simmer it slightly to get rid of extra water—and blend that right in with the other wet ingredients. It gives you that perfect pink color and a lovely fruity tang that goes so well with that creamy texture. It’s delicious, and I actually have a recipe for a moist chocolate mug cake recipe that uses similar flavor profiles if you ever need a single-serving chocolate fix!
Storage and Meal Prep for Your Protein Cheesecake
Now, this is where these Protein Cheesecake Jars really shine for anyone juggling a busy schedule. Because we didn’t bake them, they are perfectly suited for making ahead! This is truly the ideal Meal Prep Dessert if you ask me. You can prepare the jars just as the recipe directs—crust, filling, and everything—cover them tightly with lids or cling wrap, and pop them right into the refrigerator.
I’ve tested this rigorously (because who doesn’t love having ready-made treats?), and they hold up beautifully for up to four days. Honestly, sometimes I think they taste even *better* on day two or three because those flavors have just melted together beautifully! Don’t leave them sitting out too long when serving; you want them cold for that firm texture we worked so hard to achieve.
When serving, all you have to do is pull one out, add your fresh berry topping or chocolate shavings if you haven’t added them yet, and enjoy! They are a wonderful Quick Protein Snack right out of the fridge. If you enjoy using Greek yogurt in your morning routines, you must check out my recipe for fluffy Greek yogurt pancakes—a fantastic way to start the day!
Frequently Asked Questions About High Protein Dessert Recipes
I love hearing from you all about how you’re adjusting recipes! It’s wonderful seeing this basic template for a Protein Cheesecake used in so many different ways. When you’re experimenting with these High Protein Dessert Recipes, you sometimes run into little bumps in the road. Don’t you worry, I’ve collected the most common cooking questions right here to make sure your next batch is absolutely perfect.
Can I use whey protein instead of vanilla in this Protein Cheesecake?
That’s a really common question, especially since protein powder types vary so much! Yes, you absolutely *can* use whey, but you must be careful. Whey protein tends to absorb liquid a little differently than the casein or whey/casein blend I usually recommend for baking because it settles differently. If you use pure whey, your filling might end up slightly softer than mine looked in the photos. My best advice? If you’re using whey isolate, I’d suggest either reducing the Greek yogurt liquid slightly or adding just a tiny bit more protein powder to compensate. For the best, thickest result, always aim for a blend if you can; it gives you that luxurious texture associated with a Guilt Free Cheesecake.
How do I make this recipe into Protein Cheesecake Bars?
Oh, making Protein Cheesecake Bars is a fantastic idea! Instead of dividing the batter into individual jars, you’ll use a square or rectangular baking dish instead—maybe an 8×8 inch pan works well. You need to press the crust mixture firmly across the bottom of the lined pan. When you pour the filling in, make sure it’s a relatively even layer. Since you’re going from small jars to one big container, you’ll need to adjust the chill time significantly. Instead of 4 hours, give your bars at least 6 to 8 hours, or honestly, just leave them overnight in the fridge so they are completely solid before you cut them into neat squares. This helps keep those edges clean!
Speaking of great make-ahead meals, if you need a savory option, my recipe for creamy tuna pasta salad is incredible for lunch packing!
Estimated Nutritional Snapshot for This Protein Cheesecake
Ciao, my fit friends! Now, I know that when we are making something delicious but focused on macros, having a good idea of what we are eating is super important. You want to know exactly how this Protein Cheesecake fits into your day without any guesswork. I ran the numbers based on the ingredients listed above, and I’m happy to share the estimate for one of these perfect jars!
Remember what I always say: these numbers are based on my preferred brands—especially the type of protein powder I use! Ingredients can vary, so if you swap out the sweetener or use a different type of yogurt, the final count might shift just a little bit. Think of this as an excellent guideline for your Fitness Dessert Ideas!
- Serving Size: 1 jar
- Calories: About 250! Can you believe that for something so creamy?
- Protein: A whopping 28 grams! That’s seriously fantastic for a dessert.
- Fat: Around 7 grams total. We kept the cheese low-fat to make this happen!
- Carbohydrates: Roughly 18 grams.
It’s such a relief to have a Macro Friendly Dessert that actually tastes like a treat, isn’t it? Knowing you are getting that much protein makes enjoying this Sugar Free Dessert so much easier on your goals! If you want another recipe that packs a morning punch, check out my energizing coffee smoothie!
Share Your Guilt Free Cheesecake Creations
Now that you have made these incredible Healthy Cheesecake Jars, I truly want to see what you’ve created! It brings me such joy when I see you enjoying these recipes that I’ve poured so much love into perfecting. Did you go classic vanilla? Or did you try that decadent chocolate variation we spoke about? Don’t be shy!
Please, if you loved this experience—if this Protein Cheesecake satisfied that mighty craving without derailing your progress—leave me a star rating right here on the recipe card. And if you are sharing photos online, please tag me! I always try to pop over and cheer you on. Leaving comments really helps other bakers know that this recipe is worth making, just like my easy chicken parmesan recipe has helped so many with weeknight dinners!
For even more inspiration, behind-the-scenes looks, and quick tips between my blog posts, you absolutely must follow along over on Pinterest. It’s where our community grows, sharing all our favorite sweet and savory ideas. You can also see other fantastic versions of this dessert, like this great example of high-protein cheesecake jars!
Thank you, from the bottom of my heart, for trying this one. Happy cooking, my friends. I hope these jars bring a little bit of sweet, guilt-free joy to your week!
Buon Appetito!
— Lina Kohn
Print
Creamy No-Bake High-Protein Cheesecake Jars
- Total Time: 4 hr 15 min
- Yield: 4 servings
- Diet: Low Fat
Description
Make these simple, creamy No-Bake High-Protein Cheesecake Jars. This recipe uses Greek yogurt for a macro-friendly dessert perfect for meal prep or a quick, satisfying snack.
Ingredients
- 1 cup low-fat cottage cheese
- 1 cup plain non-fat Greek yogurt
- 1/2 cup vanilla protein powder
- 1/4 cup powdered erythritol or preferred sweetener
- 1 teaspoon vanilla extract
- 1 tablespoon lemon juice
- 1/4 cup crushed graham crackers or low-carb cookie crumbs (for crust)
- 2 tablespoons melted light butter or coconut oil
- Optional topping: Fresh berries or sugar-free chocolate chips
Instructions
- Prepare the crust: Mix the crushed graham crackers or crumbs with the melted butter or coconut oil. Press this mixture evenly into the bottom of four small jars or ramekins. Chill for 10 minutes.
- Make the filling: In a food processor or high-speed blender, combine the cottage cheese, Greek yogurt, protein powder, sweetener, vanilla extract, and lemon juice. Blend until the mixture is completely smooth and creamy. Scrape down the sides as needed.
- Assemble the jars: Spoon or pipe the protein cheesecake filling evenly over the chilled crusts in the jars.
- Chill: Cover the jars and refrigerate for at least 4 hours, or until firm. This chilling time is essential for the best texture.
- Serve: Top with fresh berries or sugar-free chocolate chips just before serving. Store leftovers in the refrigerator.
Notes
- For a chocolate version, add 2 tablespoons of unsweetened cocoa powder to the filling mixture.
- If you prefer a thicker crust, use almond flour instead of graham crackers for a gluten free cheesecake base.
- This recipe is excellent for meal prep dessert planning; it keeps well for up to 4 days in the refrigerator.
- Prep Time: 15 min
- Cook Time: 0 min
- Category: Dessert
- Method: No Bake
- Cuisine: American
Nutrition
- Serving Size: 1 jar
- Calories: 250
- Sugar: 5
- Sodium: 250
- Fat: 7
- Saturated Fat: 3
- Unsaturated Fat: 4
- Trans Fat: 0
- Carbohydrates: 18
- Fiber: 2
- Protein: 28
- Cholesterol: 20


Comments are closed.