

Oh, there is just nothing—and I mean *nothing*—that compares to the smell of fresh bread hitting your cooling rack, is there? My heart swells just thinking about it! When I first moved here from Italy, I missed that smell most of all. But I finally perfected my family’s secret to making true, bakery-style crusty Italian bread right here in my home oven, and trust me, it’s easier than you think. This recipe is for the beginner baker—no fancy equipment, just simple pantry ingredients, and patience for two short rises. You are going to get that gorgeous, golden, crunchy exterior every single time. I promise! If you want to see how others achieved that perfect crust, check out this fantastic guide on Baking the Perfect Crust.
Why This Homemade Italian Bread Recipe Works for Everyone
I know baking yeast bread can feel intimidating, but this formula truly removes all the guesswork. We aren’t aiming for an overnight artisan loaf; we’re aiming for delicious, reliable Italian bread that your family will devour with dinner. It’s all about balancing simplicity with technique.
- We guarantee a deep, golden, crunchy crust thanks to a little trick involving oven steam—don’t worry, it’s super easy!
- Inside, you get that wonderfully soft, chewy texture that’s perfect for soaking up sauce or making sandwiches.
See other bakers loving their results using similar techniques here: Quick Italian Bread Success Stories.
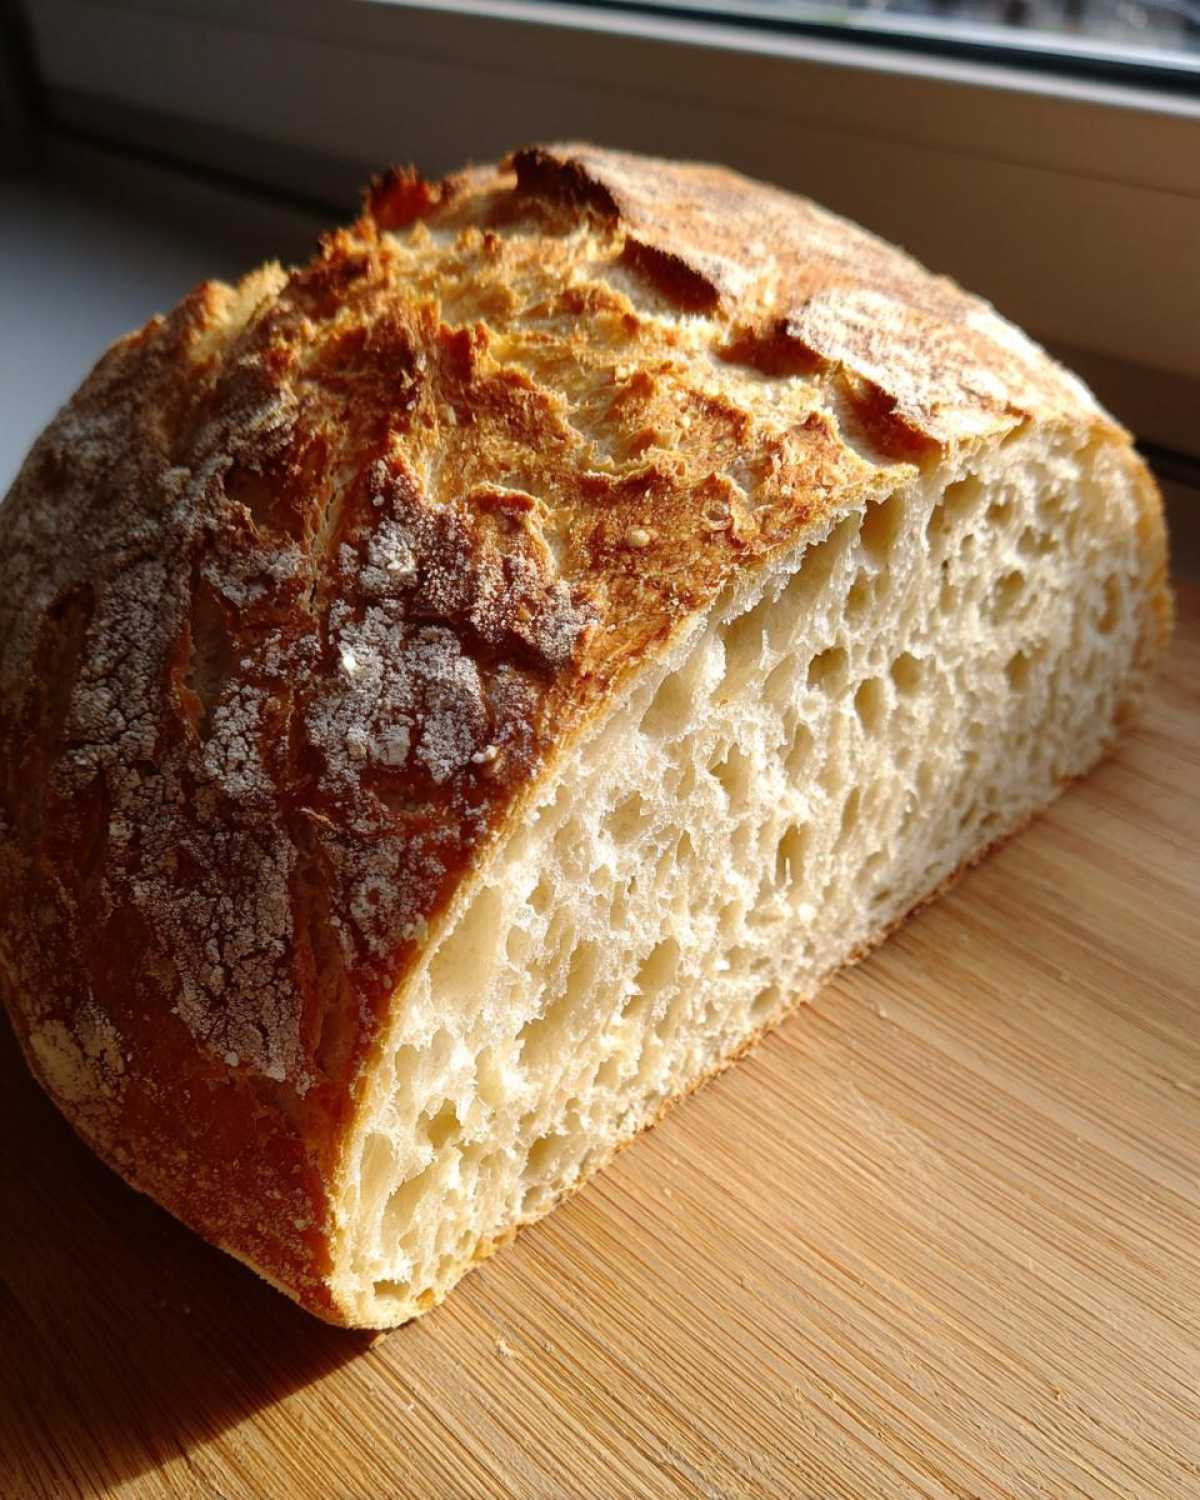
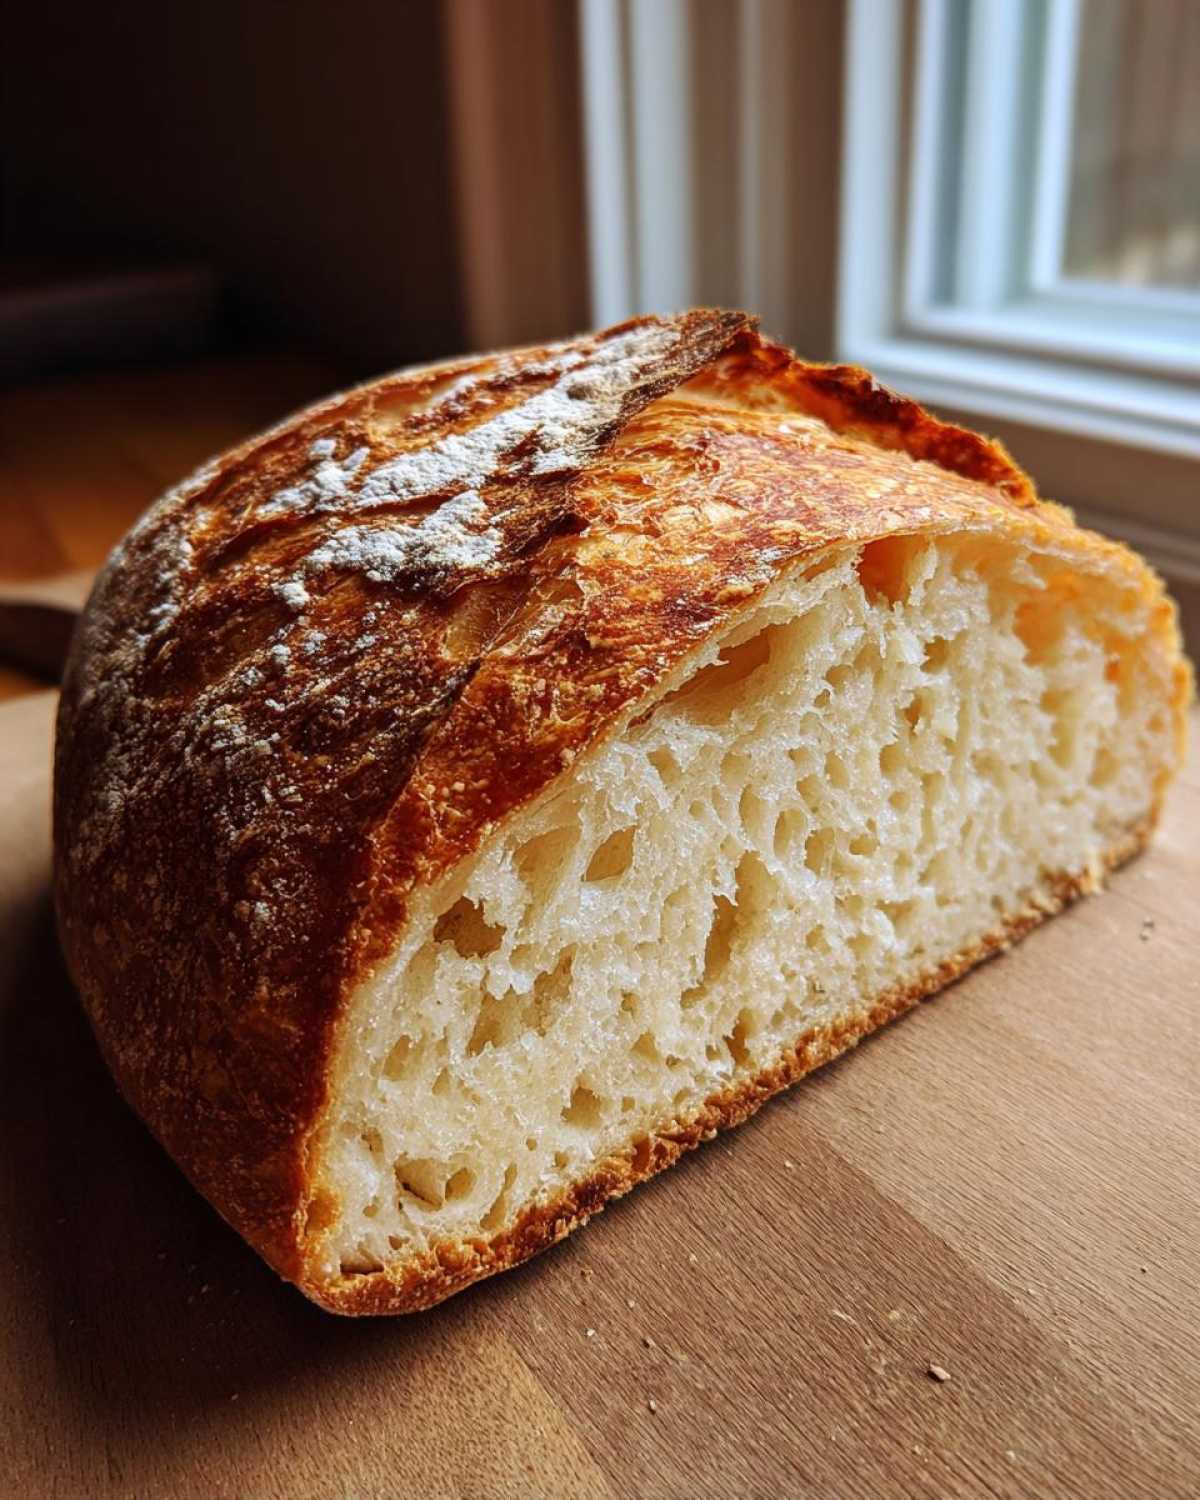
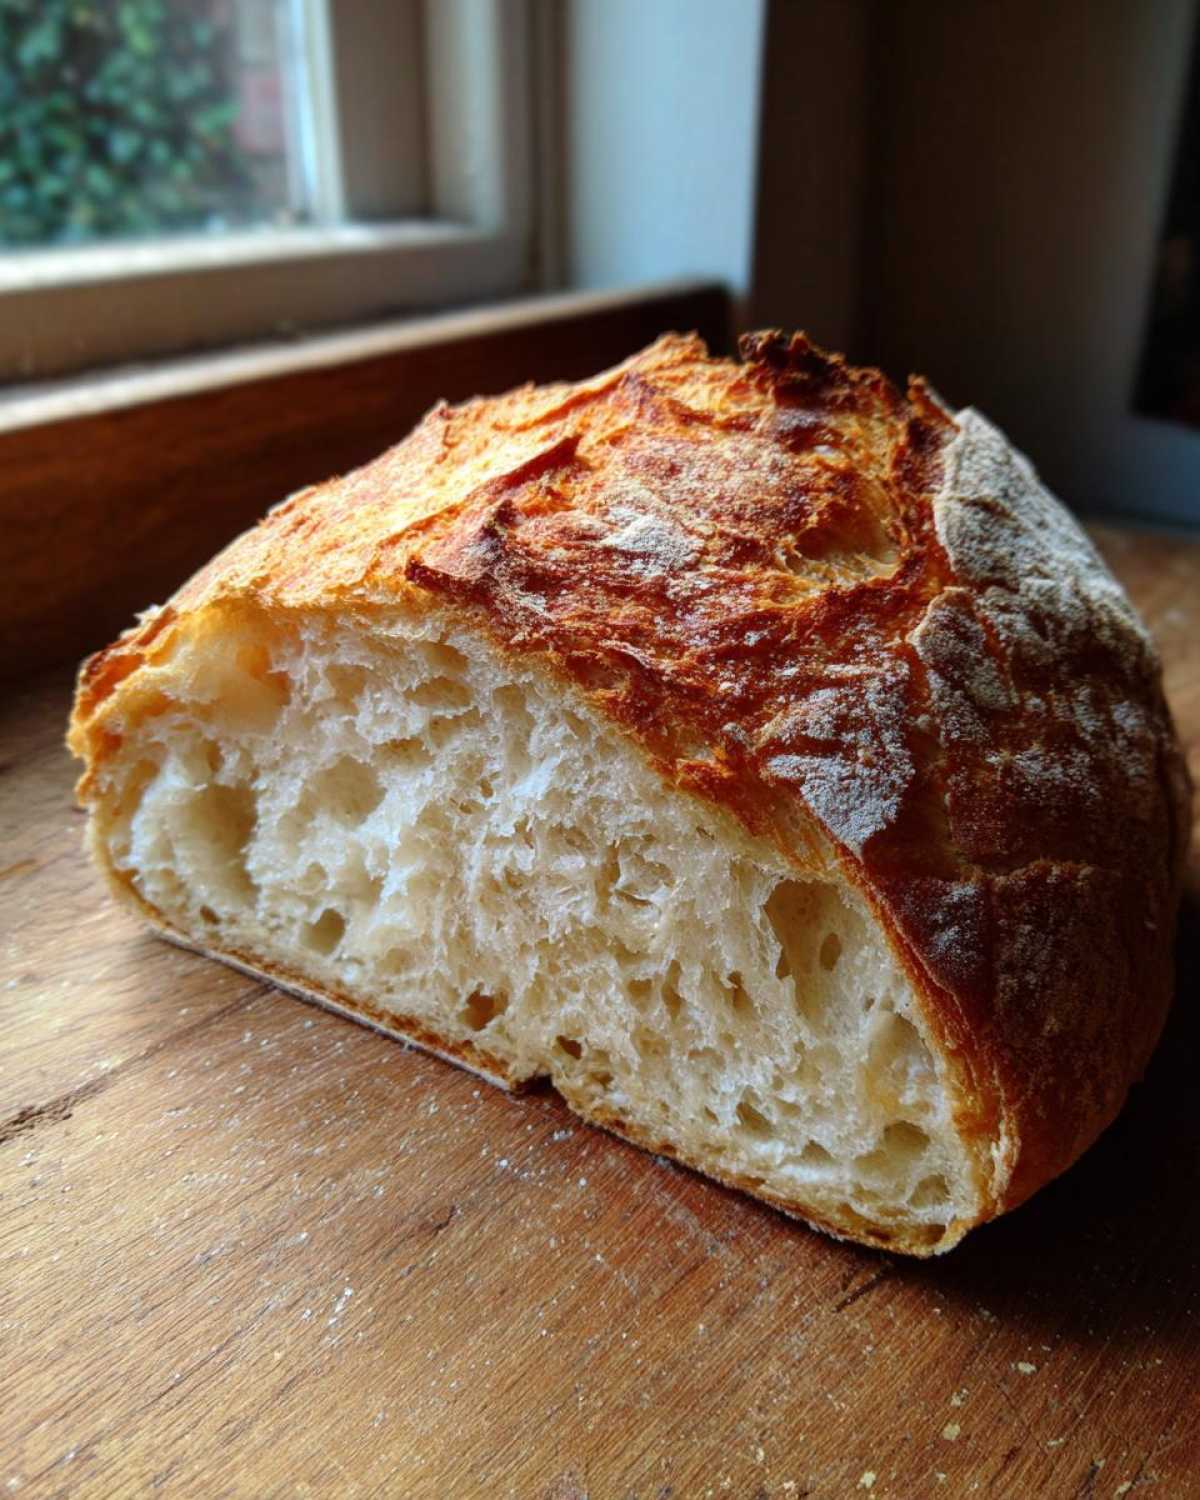
Achieving That Bakery-Style Crusty Italian Bread
Listen, the secret to that shatteringly crisp crust isn’t luck; it’s steam. The initial blast of high heat while the bread is surrounded by moisture is what sets the crust right away. When you use the high oven temperature and add that bit of extra water when you put the dough in, you mimic a professional steam-injected oven. It’s magic, but completely controllable!
Beginner-Friendly Steps for Perfect Italian Bread
This recipe is built for confidence. If you have never baked bread before, this is where you start. We use standard active dry yeast, and the kneading time is manageable—it’s great Beginner Bread Making practice. You don’t need a stand mixer; a sturdy wooden spoon and your hands are all you need to get started. Simple ingredients mean simple results!
Ingredients Needed for Your Easy Crusty Italian Bread
To make this incredible Italian bread, you truly just need the basics. I always keep these on hand because you never know when you’ll get the urge to bake! There is no fancy sourdough starter or expensive bread flour required. Just check out what you need:
- 3 1/2 cups all-purpose flour
- 1 1/2 teaspoons salt
- 1 teaspoon granulated sugar
- 2 1/4 teaspoons active dry yeast (that’s one standard packet!)
- 1 1/2 cups warm water (make sure it’s about 105–115°F; not too hot or you’ll kill the yeast!)
- 2 tablespoons olive oil, plus a little more just for oiling the bowl later
See? Perfectly simple ingredients that turn into the best loaf you’ve ever had at home. It’s wonderful for dipping!
Step-by-Step Instructions for Homemade Italian Bread Recipe
Ready to see the magic happen? Following these steps for this Homemade Italian Bread Recipe is critical, but honestly, it’s like a dance you learn quickly. It’s all about getting comfortable with the dough. Remember, we need that oven screaming hot when this loaf goes in, so make sure you start preheating while the dough is doing its final puff!
Activating Yeast and Mixing the Dough
First things first, we wake up the yeast. Take your warm—not hot!—water, sugar, and yeast, mix them gently, and just let them sit for about five minutes. If you see foam bubbling up on top, wonderful! That means your yeast is happy and alive, which is the first win for your loaf. If it doesn’t foam, you need to start over with fresh yeast, okay? Once it’s foamy, grab your big bowl, dump in the flour, salt, and the olive oil. Mix it all up with a solid spoon until it looks like a shaggy mess. Don’t fuss over it too much at this stage!
Kneading and First Rise for Chewy Italian Loaf
Now, we work the dough. Dump that shaggy mess onto a lightly floured surface and get kneading! You’ll need to work it for a solid eight to ten minutes. I know, it sounds long, but this is where you build the internal structure you want for that lovely Chewy Italian Loaf. When it feels smooth and stretchy, you’re done. Coat a clean bowl generously with olive oil, place your dough inside, roll it around so it’s covered, and then tuck it in under plastic wrap in a warm spot. Let it happily double in size—this usually takes 1 to 1.5 hours, and it’s where so much flavor develops!

Shaping, Second Rise, and Baking the Italian Bread
Once doubled, gently punch the air out—it’s very satisfying! Shape it into the loaf form you like, place it on your parchment-lined pan, cover it lightly, and give it another cozy 30 to 45 minutes to puff up again. During the last 15 minutes of that rise, you absolutely must preheat your oven to 400°F (200°C). Before it goes in, use a very sharp knife to slice two or three times across the top; this is scoring! It controls where the bread expands. For the crispiest Italian bread ever, follow my favorite trick: put a small, shallow pan on the bottom rack while preheating, and just before you slide the bread in, quickly pour a cup of hot water into that pan to create that necessary steam. Bake it for 30 to 35 minutes until deep gold brown, then get it straight onto a wire rack to cool. Don’t slice it too soon, or you’ll mess up the crumb!
I always use the inner thoughts of my Nonna when I’m baking, and she would always suggest you check out this great resource for homemade breadsticks if you need something quicker!
For visual guidance on getting that perfect bake, take a peek at this helpful tutorial: Baking Perfection Tips.
Tips for Success When Baking Artisan Bread at Home
A few little tweaks can take your loaf from ‘good’ to ‘I can’t believe I made this!’ These aren’t complicated changes; they are just things I learned over years of dealing with imperfect ovens and humidity.
The most important thing is understanding what you want the final texture to be. Do you need that thick, crackly shield or something softer for your kids’ sandwiches? We can totally adjust that!
If you want to experiment with other whole grains in your baking, I have a wonderful whole wheat recipe you might want to try next time!
Regarding the crust, remember that steam is your best friend. If that bubbling water pan works too well and you end up with a crust that feels too thick during the bake, just remove the pan after the first 15 minutes. That lets the steam escape and allows the crust to crisp up instead of softening.
Now, if you pull your bread out and the crust looks just a *little* pale for your liking, don’t panic! Brush a tiny bit of melted butter over the top right when it comes off the sheet and onto the cooling rack. It won’t make it greasy, but it gives it that warm, restaurant-quality glow and softens the exterior just slightly. It’s my favorite little secret for making it look absolutely perfect!
Serving Suggestions for Your Golden Brown Crust Bread
Wow, the hardest part is officially over! You have a beautiful loaf of Italian bread cooling down, and the *aroma* in your kitchen is probably making everyone hungry. Now, how do you serve this masterpiece? Oh, I have so many ideas for you!
Since we worked so hard to get that ultra-crispy crust, you’ll want to make sure this bread gets the spotlight it deserves. This loaf is absolutely essential for mopping up every last bit of sauce left on your plate. Seriously, pair this with my easy homemade Alfredo sauce, and you’ll never look at store-bought bread again.
If you’re looking for amazing ideas on pairing this with soups, salads, or just straight olive oil, you need to check out some excellent crusty bread pairings for inspiration!
Perfect for Dipping Bread Recipes
Forget those boring dinner rolls! This crusty loaf is the definition of excellent Dipping Bread Recipes. Slice it thick, warm it up for just five minutes before you serve, and place a little bowl of high-quality olive oil mixed with some coarse sea salt and maybe a dash of oregano right in the center. It’s simple, it’s elegant, and it vanishes instantly at any gathering.
The Ultimate Dinner Side Bread Recipes
Whenever we have a big, saucy lasagna or a hearty roast, this loaf is the only choice. It’s truly one of the best Dinner Side Bread Recipes because it has the structure to hold up to heavy braises without turning completely soggy. Plus, the slightly chewy interior is just heavenly when paired with rich tomato flavors.
Making Incredible Homemade Sandwiches
Don’t underestimate what a difference good bread makes! For sandwiches—whether it’s cured meats and fresh mozzarella or a simple turkey and tomato—using this Italian bread elevates everything. Make sure you slice it thinly so the crust doesn’t overwhelm the filling, but the slight resistance you get when you bite into that crusty exterior makes the sandwich twice as good!
Storage and Reheating Instructions for Leftover Italian Bread
Oh, the sad day when you have leftover bread! When it comes to keeping this beautiful loaf perfect, you have to protect that crust. Never, ever store your perfect Italian bread in the refrigerator; it makes it tough fast! Cool it completely, then wrap the leftover loaf loosely in a paper bag or a clean tea towel, not plastic. Keep it on the counter for up to three days. If it softens up slightly, don’t worry about it!
To bring back that glorious crisp, just spray the outside lightly with a little water and put it back in a 350°F oven for about five minutes. That steam wakes up the crust immediately. Now it’s good as new!
Frequently Asked Questions About This Quick Italian Bread Tutorial
Baking can sometimes make us second-guess ourselves, especially when yeast is involved! I get so many wonderful messages asking for clarification on a few points regarding this Quick Italian Bread Tutorial. Don’t you worry, I’ve gathered the most common ones to help set you up for success!
If you’re on the fence about trying it, check out this great step-by-step guide for more visual help: Making Authentic Crust at Home.
Can I make this Italian bread recipe without kneading?
While you *could* technically skip the kneading, I highly advise against it for this recipe. Remember, we want that soft, chewy interior that makes fantastic Italian bread so satisfying. Kneading is what develops the gluten structure. If you just mix it, you’ll end up with something more like a dense biscuit than a light loaf. A little hard work makes the final product so much better, trust me!
How can I get a softer crust on my Italian bread?
This is a great question if you aren’t serving it for dipping! If you prefer a softer exterior, especially if this will be used for simple sandwiches right away, grab a pastry brush and a small dish of melted butter. As soon as that loaf comes out of the oven, give the entire top a quick, light brush with the butter. It stops the external crust from hardening up as much when it cools, giving you that softer shield instead of the crackly one.
Need another quick recipe for your next bake? Stop by my thoughts on easy crusty bread sometime!
Estimated Nutritional Data for Simple Sandwich Bread
Okay, let’s talk about the numbers, just so you know what’s what! When you’re making things from scratch, the nutrients can hop around a bit depending on the exact brand of flour or how much oil you use versus what the recipe called for. So, please take these figures as a general guideline for one slice of this wonderful Simple Sandwich Bread.
I always try to keep things light and fresh here at Gourmet Gusto, and this loaf keeps things pretty reasonable for a fantastic slice of homemade goodness!
- Serving Size: 1 slice
- Calories: 160
- Sugar: 0.5g
- Sodium: 250mg
- Fat: 2.5g (Less than 1g is saturated fat, which is great!)
- Carbohydrates: 30g
- Fiber: 1.5g
- Protein: 5g
Now, here is my very important little disclaimer that my Mom always makes me add: These values are just estimates based on the base recipe. If you add a ton of olive oil for dipping (and who could blame you?), those numbers are going to change a little! Enjoy the bread, and don’t stress too much about the milligrams, okay?
Share Your Bakery Style Italian Loaf Experience
My heart is so full just thinking about you pulling this beautiful loaf out of your own oven! Baking is always better when we share the results, isn’t it? I truly hope this recipe unlocks that feeling of nostalgia and comfort for you, just like it does for me every time I make it.
When you successfully create your own Bakery Style Italian Loaf—and I know you will!—I want to hear all about it! It means the world to me when you come back and leave a star rating on the recipe. Let me know if the crust crackled just right or if it was the perfect sturdy bread for your weeknight dinner.
More importantly, come join our community over on Pinterest! It’s where I share little behind-the-scenes moments and extra inspiration for things to do with your fresh bake. You can see what other home bakers are trying over at Amusing Foodie’s Community Bakes. I love seeing your photos when you tag us!
Thank you so much for baking with me today through Gourmet Gusto. Don’t forget to tell me how your first slice tastes!
Print
Easy Homemade Crusty Italian Bread Recipe
- Total Time: 2 hours 5 minutes
- Yield: 1 loaf
- Diet: Vegetarian
Description
Bake bakery-style Italian bread at home! This simple recipe delivers a golden, crunchy crust and a soft, chewy interior. It is perfect for beginners and uses basic pantry ingredients for delicious results every time.
Ingredients
- 3 1/2 cups all-purpose flour
- 1 1/2 teaspoons salt
- 1 teaspoon granulated sugar
- 2 1/4 teaspoons active dry yeast (1 packet)
- 1 1/2 cups warm water (about 105-115°F)
- 2 tablespoons olive oil, plus more for the bowl
Instructions
- In a large bowl, mix the warm water, sugar, and yeast. Let it stand for 5 minutes until foamy. This shows your yeast is active.
- Add the flour, salt, and 2 tablespoons of olive oil to the yeast mixture. Mix with a wooden spoon until a shaggy dough forms.
- Turn the dough out onto a lightly floured surface. Knead for 8 to 10 minutes until the dough is smooth and elastic. This develops the gluten for a chewy texture.
- Lightly oil a clean bowl with olive oil. Place the dough in the bowl, turning it once to coat. Cover the bowl with plastic wrap or a clean kitchen towel.
- Let the dough rise in a warm place for 1 to 1.5 hours, or until it has doubled in size. This first rise is important for flavor.
- Gently punch down the dough. Shape it into a round or oval loaf. Place the loaf on a baking sheet lined with parchment paper or in a prepared loaf pan.
- Cover the loaf loosely and let it rise again for 30 to 45 minutes, or until puffy. Preheat your oven to 400°F (200°C) during the last 15 minutes of this second rise.
- Score the top of the loaf 2 or 3 times with a sharp knife to allow steam to escape. For extra crust, lightly spritz the loaf with water before baking.
- Bake for 30 to 35 minutes, or until the crust is deep golden brown and the internal temperature reaches 200-210°F.
- Remove the bread from the oven and transfer it to a wire rack to cool completely before slicing. Enjoy your homemade Italian bread!
Notes
- For an extra crispy crust, place a shallow pan on the bottom rack while preheating and pour 1 cup of hot water into it right before putting the bread in the oven to create steam.
- If you want a softer crust, brush the top of the loaf with melted butter immediately after it comes out of the oven.
- This bread is perfect for dipping in olive oil or serving alongside pasta dishes.
- Prep Time: 20 min
- Cook Time: 35 min
- Category: Bread
- Method: Baking
- Cuisine: Italian
Nutrition
- Serving Size: 1 slice
- Calories: 160
- Sugar: 0.5
- Sodium: 250
- Fat: 2.5
- Saturated Fat: 0.3
- Unsaturated Fat: 2.2
- Trans Fat: 0
- Carbohydrates: 30
- Fiber: 1.5
- Protein: 5
- Cholesterol: 0


Comments are closed.