

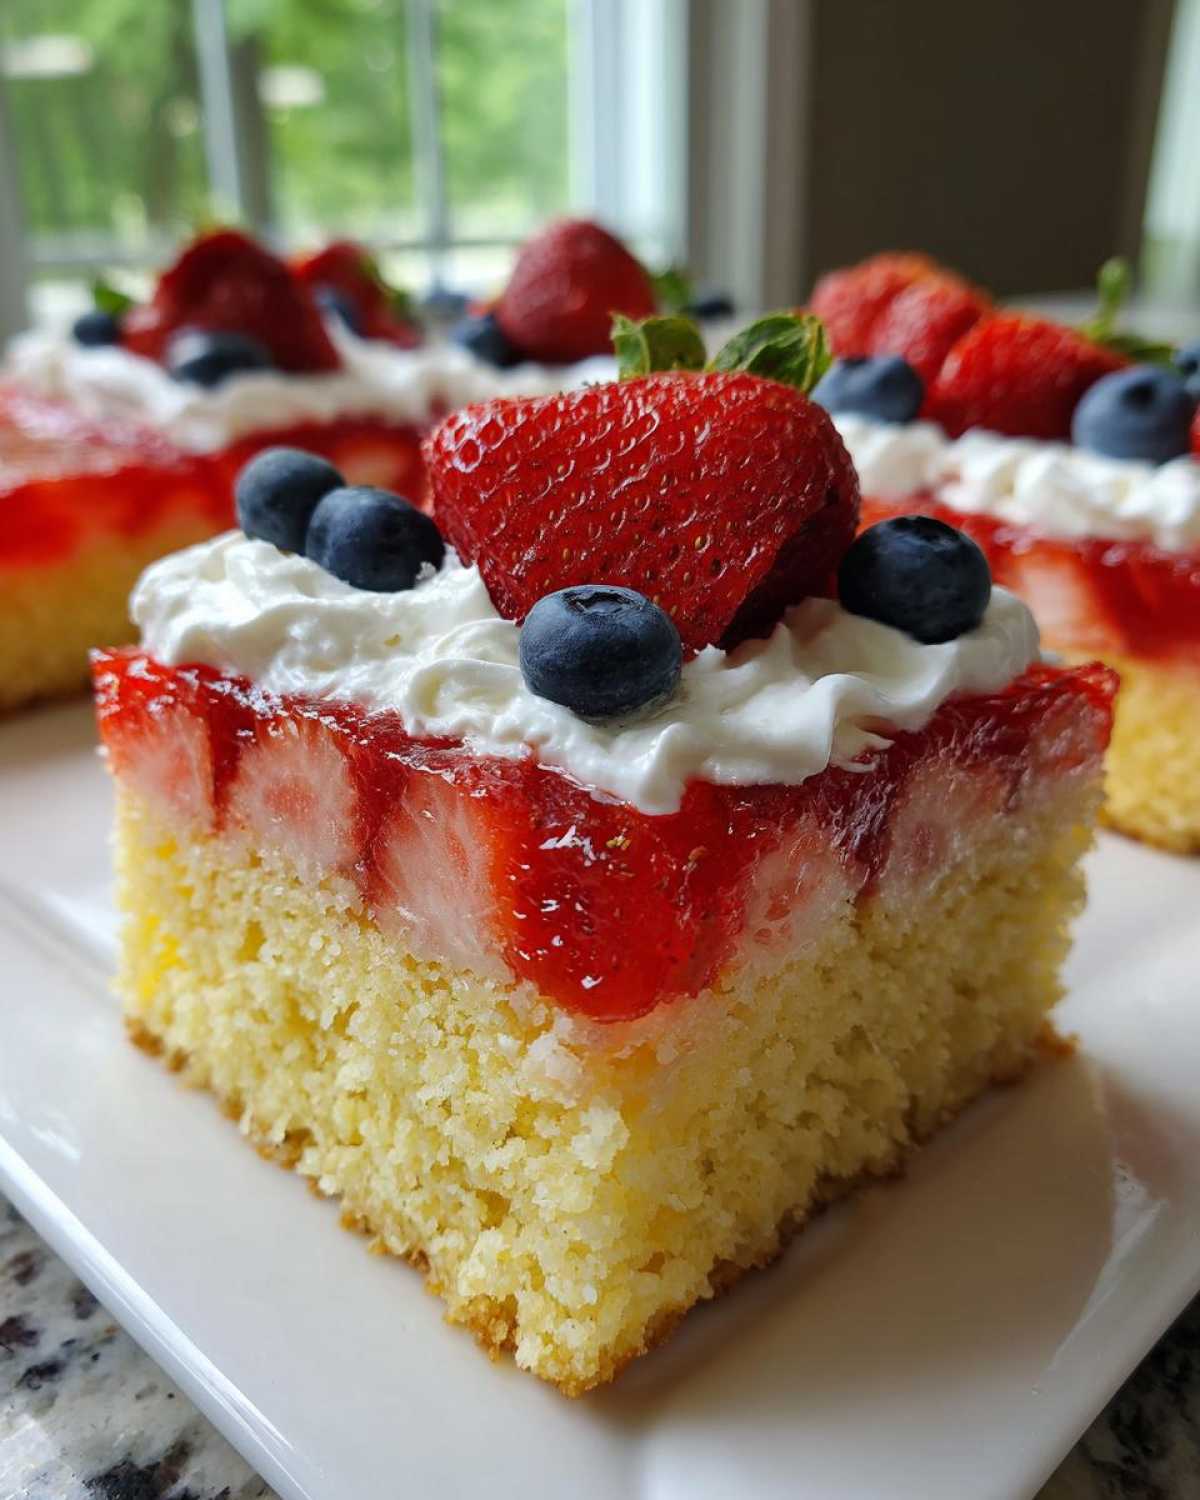
Oh my gosh, you know those summer holidays—Fourth of July, Memorial Day, or even just a big cookout—when you need a dessert that truly pops? Forget fussing with tiered cakes! I’ve figured out the absolute best way to celebrate: the **Strawberry Jello Poke Cake Flag**. Seriously, this recipe is my go-to patriotic treat every single year. It’s incredibly moist because we soak the warm cake in bright, sweet strawberry Jello, but the best part is how easy it is to decorate into a show-stopping American flag.
My first attempt was a total mess, I won’t lie! But I figured out the trick to keeping the whipped topping firm while getting that vibrant berry look. Trust me, once you see the perfectly set, wobbly, fruity layer peeking through those holes, you’ll understand why everyone asks for this recipe. We’re going from basic box mix to stunning holiday centerpiece in just a few easy steps!
Why This Strawberry Jello Poke Cake Flag is the Perfect Summer Dessert
Listen, when you’re hosting a summer party, you want something that looks amazing but doesn’t tie you down in the kitchen all day. This Jello poke cake is genius because it handles most of its work in the fridge! It’s designed to be a showstopper for any 4th of July Dessert crowd.
- The Jello soak means this cake stays impossibly moist for days—it practically melts in your mouth.
- It’s an incredibly easy flag cake! Decoration is simple layering, not complicated piping finesse.
- The vibrant red, white, and blue just jumps off the plate, making cleanup easy since it’s all contained in one sheet cake.
Key Features of the Strawberry Jello Poke Cake Flag
You’re going to love how colorful this turns out. It offers unbelievable visual impact for minimal effort! We get that vibrant color from the strawberry Jello, it’s fantastic for making a big batch, and you can totally make it the day before your cookout!
Gathering Ingredients for Your Strawberry Jello Poke Cake Flag
Okay, let’s talk supplies! This recipe is deceptively simple because it starts with a box mix, but the additions are what transform it into a show-stopping dessert. Gathering everything first makes assembly super smooth, especially since we need to move fast while the cake is still warm for the best soak.
First up is your base. You’ll grab one box of yellow cake mix—and remember, you have to add whatever the box tells you to—eggs, oil, whatever your brand requires!
For the amazing soak, you need that classic strawberry gelatin, which is usually a 3-ounce box. Make sure you have 1 cup of boiling water and 1/2 cup of cold water ready for mixing. I always throw in 1/2 cup of cold vodka or a clear soda like Sprite sometimes if I’m not serving kiddos; it keeps the crumb unbelievably tender. Don’t forget that 8-ounce container of thawed, frozen whipped topping for our ‘cloud’ base.
Then come the star decorations! We need 1 cup of fresh blueberries for that royal blue field, and 1 cup of sliced fresh strawberries for the perfect red stripes. See? A very manageable list for such a fun looking cake!
Step-by-Step Jello Poke Cake Instructions
This is where the magic happens! We’re taking that humble yellow cake and turning it into the perfect base for our Strawberry Jello Poke Cake Flag. The key here is timing—you need to work while the cake is still warm enough to absorb the liquid but not so hot that it melts the Jello instantly. Read everything first, and have your liquid ready to pour!
Baking and Poking the Cake Base
First things first: get that oven going to whatever temp your box mix calls for. You want to use a standard 9×13 inch pan—this size is perfect for getting those visible stripes later on. Mix up your batter, pour it in the greased and floured pan, and bake it until your toothpick comes out clean. Don’t overbake it; we want it tender!
Once it’s out of the oven, this step is non-negotiable: you must let it cool for about 15 minutes right there in the pan. Grab the handle end of a wooden spoon—or even a big fork if you don’t want to risk a hole that’s too big—and start poking! Make holes everywhere, about an inch apart, going all the way down to the bottom. This lets the gelatin soak deep into the sponge. If you’re using that optional vodka or clear soda for extra moisture, that liquid should go into your Jello mixture, not poured directly onto the warm cake!
Preparing and Pouring the Strawberry Gelatin
Time for the soak! In a separate bowl, mix your strawberry gelatin completely with 1 cup of boiling water. You must stir it until you can’t see any grains left—seriously, dissolve it totally! Then, stir in the cold water (plus any optional liquid mixer you chose). You want it smooth and well-combined before going anywhere near the cake.
Now, slowly, patiently, pour that beautiful pink liquid all over the top of the warm, poked cake. Make sure you pour evenly so every part of that cake gets its fill. It’ll look like it’s overflowing, but that’s exactly what you want so all those little holes get saturated!
Chilling the Jello Poke Cake Instructions
After pouring, cover the whole pan loosely with plastic wrap. Now we wait. You absolutely have to refrigerate this for at least 3 to 4 hours, or until that Jello is totally firm, almost like rubber. If you try to put the whipped topping on when it’s still wobbly, you’ll end up with a soupy mess, and nobody wants that!
Decorating Your Strawberry Jello Poke Cake Flag
This is the part where all that chilling pays off, and we turn this moist, fruity cake into true patriotic art! Once that Jello is firm as a rock, take the cake out of the fridge. The very first step for any of our flag cake decorations is to cover the entire surface evenly with that thawed whipped topping. Don’t spread too aggressively, or you risk pulling up the gelatin from the top layer of the cake—just be gentle and get an even, smooth white layer across the whole thing.
Now we need to visualize that flag layout! You’re essentially dividing that white canvas into two main sections: that top-left canton for the blue field, and the rest for the alternating stripes. Do this preparation in your mind first, or you might run out of time before the topping starts to get soft again!
Creating the Red and White Stripes
We need exactly 13 stripes, alternating red and white. Since the whipped topping is already white, we just need to focus on adding those brilliant red rows using our sliced strawberries. I like to lay the strawberry slices down slightly overlapping each other so you don’t see any gaps in the red color.
Start at the bottom edge of the cake and place your first strawberry row. Then, use a small offset spatula or even a butter knife to gently press down a thin line of whipped topping to serve as the next white stripe. I try to keep the stripe widths pretty consistent—maybe about an inch wide for both the red and white sections. Repeat this pattern all the way up the cake until you hit where the blue field should start.
Forming the Blue Field (Canton)
The canton goes in the top left corner. You need to measure out that space first! I usually make mine about seven stripes wide and five stripes tall, depending on the size of my 9×13 pan. This is where those beautiful fresh blueberries come in handy.
Gently place the blueberries close together inside that designated blue area. If you want really sharp, professional-looking lines instead of using the berries, you can always use some store-bought blue frosting and pipe the canton instead. But honestly? Using the blueberries makes it feel fresher, more colorful, and adds lovely texture to this summer berry cake!
Tips for the Most Moist Poke Cake Recipe
I’ve made this cake a million times for everything from Memorial Day picnics to just a random Tuesday craving, and I’ve learned a few shortcuts to guarantee that ultra-moist texture, which is the whole point of a Jello poke cake, right?
If you skip the chilling time, you’re missing out on the structural integrity and moisture infusion. The gelatin needs time to fully absorb and firm up; otherwise, it just runs off the sides instead of soaking in. Don’t rush that fridge!
Now, let’s talk about your base cake. While any yellow or white cake mix works great for color contrast with the Jello, make sure you don’t overbake it. It’s better if the cake finishes baking just slightly underdone than too hard, because the Jello is going to finish the cooking process for you! That slight underbake means the cake is porous and ready to soak up every drop of sweetness. This goes for pretty much any moist cake recipe, honestly.
Remember that optional liquid I mentioned? That’s your secret weapon against dryness! If you skip the vodka (which adds zero flavor once set, promise!), swap it out for clear soda, like a lemon-lime flavor, or even just plain club soda. Any carbonation adds tiny air pockets that keep the crumb light and help carry the Jello down into the sponge. It’s brilliant for ensuring this Strawberry Poke Cake Recipe stays springy the next day!
Also, when you’re pouring the Jello mixture over the holes, don’t just dump it in the center. Use a spoon to gently guide the liquid out towards the edges so it seeps evenly across that whole 9×13 surface. A little bit of patience with the pour makes a huge difference in the final result!
Storage and Serving Suggestions for This Patriotic Cake Ideas
So you’ve created this masterpiece—the Strawberry Jello Poke Cake Flag—and now you have leftovers (if that ever happens!). Because this cake is soaked in gelatin and topped with whipped ingredients, storage is pretty straightforward, but you definitely need to keep it cold.
You must store this cake covered tightly in the refrigerator. Seriously, cover it well! If you don’t cover it, that beautiful whipped topping is going to soak up all the weird smells from your fridge, and nobody wants a savory-tasting berry cake. It holds up really well, too! Because of that Jello soak, this cake actually tastes even better the next day. It stays perfectly moist for about three to four days when properly chilled.
When it comes time to serve, always serve it cold, straight from the fridge. That crisp, cool temperature enhances the wobble of the Jello and keeps the whipped topping firm. For serving, I usually cut it into neat squares right in the pan, but if you want to show off the layers, carefully slide a thin spatula underneath each piece before serving.
What goes well with this sweet, fruity holiday treat? Since it’s so rich and refreshing, you don’t need anything heavy. I love pairing slices of this Red White and Blue Desserts cake with something light and bubbly. A sparkling lemonade or maybe one of those wonderful mocktails, like a light pineapple coconut concoction, is just perfect for cooling down on a hot summer evening while watching the fireworks!
Frequently Asked Questions About Jello Poke Cake Instructions
I get tons of questions whenever I bring this beauty to a party, so I figured I’d just put the most common ones right here! It’s super helpful to know these little things before you dive into making your own version of this super fun Quick Patriotic Treat.
Can I make this Strawberry Poke Cake Recipe ahead of time?
Yes, absolutely! In fact, I highly recommend making the baking and Jello soaking part a day before your event. That allows the cake to absorb all that delicious moisture and lets the gelatin set up perfectly. However, you should wait to spread the whipped topping and decorate the flag until maybe 2 to 4 hours before you plan to serve it. Whipped topping doesn’t love sitting in the fridge uncovered for too long, and we want those berries looking their best!
What is the best cake mix to use for this dessert for cookout?
For the ultimate vibrant effect in this American Flag Cake Tutorial, you really want a light-colored base. I always stick with plain yellow cake mix or white cake mix. Those flavors are neutral enough that they won’t fight the strawberry Jello, and more importantly, they give you the best canvas! You want that bright red when the gelatin soaks through, and that bright white whipped topping needs to sit on a pale background—it just makes the whole flag presentation pop more dramatically for your Holiday Sheet Cake.
Can I use a different flavor, you ask? Of course! If you want a different fruit theme, cherry or raspberry Jello works wonderfully in place of the strawberry—just be aware that the color might be slightly darker. Just make sure whatever flavor you choose complements the yellow cake!
And please, please don’t skip the chilling step! If you think you can just poke it and immediately spread the topping, I promise you’ll regret it. The chilling is what turns this from a sloppy mess into a perfect, sliceable, Layered Jello Cake. It needs that full chilling time for the gelatin to set properly into that signature wobble.
Ingredient Notes and Substitutions for Your Flag Cake
I know sometimes you need to switch things up based on what’s in your pantry, especially when party time is fast approaching! Don’t panic if you don’t have exactly what’s listed. This recipe is pretty forgiving, but a few key substitutions can really make or break that perfect juicy texture we’re aiming for in our Simple Poke Cake with Fresh Fruit.
First, let’s talk berries. Fresh blueberries and strawberries are definitely my number one choice for the flag decoration because they hold their shape so nicely when cold. If you’re using frozen berries for the topping, just make sure you thaw them completely, drain off every bit of excess liquid, and maybe even pat them dry with a paper towel before you start arranging them into your stripes and canton. Soggy berries lead to sad stripes!
Now, about that optional moisture-booster liquid—that’s where I always play around. If you don’t want to use vodka (which, by the way, just dissolves without leaving a trace after baking and chilling, it’s just for moisture!), clear soda like Sprite or 7-Up works fantastically! It adds just a tiny bit of extra sweetness and fizz to the Jello soak. If you need a non-carbonated substitute, just use plain cold water, but I’d suggest adding a teaspoon of plain white vinegar to the cold water portion. It brightens the Jello flavor just a touch, making it taste less synthetic.
Remember, when it comes to the whipped topping, stick to the frozen whipped topping unless you are a frosting chemist! Stabilized whipped toppings handle the moisture from the Jello much better than fresh whipped cream, which tends to weep after a few hours in the fridge. Keep that topping cold until the absolute last second before you spread it over the set gelatin!
Estimated Nutritional Data for Strawberry Jello Poke Cake Flag
Okay, so I know we’re focused on fun and flavor here, especially when we’re talking about a sweet Dessert for Cookout like this, but I always feel like I need to give you a rough idea of what you’re digging into! Since this cake starts with a standard box mix and uses gelatin and whipped topping, the numbers aren’t too wild for a celebratory treat.
Please keep in mind that these figures are just estimates, you know? The actual count can swing depending on the exact brand of cake mix you grab, whether you added that optional vodka or soda, and how generously you slice those servings! But for a standard slice of this gorgeous Summer Berry Cake, here’s what the nutrition looks like:
- Serving Size: 1 slice
- Calories: Approximately 280
- Fat: About 10g (with 4g saturated)
- Carbohydrates: Roughly 45g
- Sugar: Hang tight—around 35g (That Jello and cake mix add up!)
- Protein: A meager 3g
- Sodium: Around 250mg
It’s a definite indulgence, but totally worth it for a holiday centerpiece! We are keeping our **Strawberry Jello Poke Cake Flag** cold, which helps keep the integrity of the topping and that sweet Jello layer intact until you serve it up!
Print
Strawberry Jello Poke Cake Flag
- Total Time: 4 hours 55 min
- Yield: 12 servings
- Diet: Vegetarian
Description
Make this moist Strawberry Jello Poke Cake decorated like a flag for a patriotic celebration.
Ingredients
- 1 box yellow cake mix (plus ingredients listed on box for preparation)
- 1 box (3 oz) strawberry gelatin (Jello)
- 1 cup boiling water
- 1/2 cup cold water
- 1/2 cup vodka or clear soda (optional, for extra moisture)
- 1 container (8 oz) frozen whipped topping, thawed
- 1 cup fresh blueberries
- 1 cup sliced fresh strawberries
Instructions
- Prepare the cake: Preheat your oven to the temperature specified on the cake mix box. Grease and flour a 9×13 inch baking pan. Prepare the cake batter according to the box directions and pour it into the prepared pan. Bake until a toothpick inserted into the center comes out clean. Let the cake cool in the pan for 15 minutes.
- Poke the cake: While the cake is still warm, use the handle end of a wooden spoon or a large fork to poke holes all over the surface of the cake, about 1 inch apart. Poke down to the bottom of the pan.
- Prepare the gelatin: In a medium bowl, dissolve the strawberry gelatin completely in 1 cup of boiling water. Stir for 2 minutes. Add 1/2 cup of cold water (and optional vodka/soda) and stir until combined.
- Pour the gelatin: Slowly pour the liquid gelatin mixture evenly over the entire surface of the warm cake, allowing it to seep into all the holes.
- Chill the cake: Cover the cake loosely with plastic wrap and refrigerate for at least 3 to 4 hours, or until the gelatin is fully set.
- Prepare for decoration: Once the cake is chilled and the Jello is firm, spread the thawed whipped topping evenly over the entire surface of the cake.
- Decorate the flag: To create the American flag design, divide the top surface into sections. Use the blueberries to cover a rectangular area in the upper left corner for the blue field (canton). Arrange the sliced strawberries in horizontal rows across the remaining cake surface to represent the red stripes. Use small dollops of whipped topping or thin strips of white frosting between the strawberry rows to represent the white stripes.
- Serve: Slice and serve the cake cold.
Notes
- For the best results, use a clear liquid like clear soda or water instead of vodka if serving to children.
- Make sure the cake is completely cool before applying the whipped topping to prevent melting.
- You can use blue frosting instead of blueberries for a more defined blue field.
- Prep Time: 20 min
- Cook Time: 35 min
- Category: Dessert
- Method: Baking and Chilling
- Cuisine: American
Nutrition
- Serving Size: 1 slice
- Calories: 280
- Sugar: 35
- Sodium: 250
- Fat: 10
- Saturated Fat: 4
- Unsaturated Fat: 6
- Trans Fat: 0
- Carbohydrates: 45
- Fiber: 1
- Protein: 3
- Cholesterol: 15


Comments are closed.