

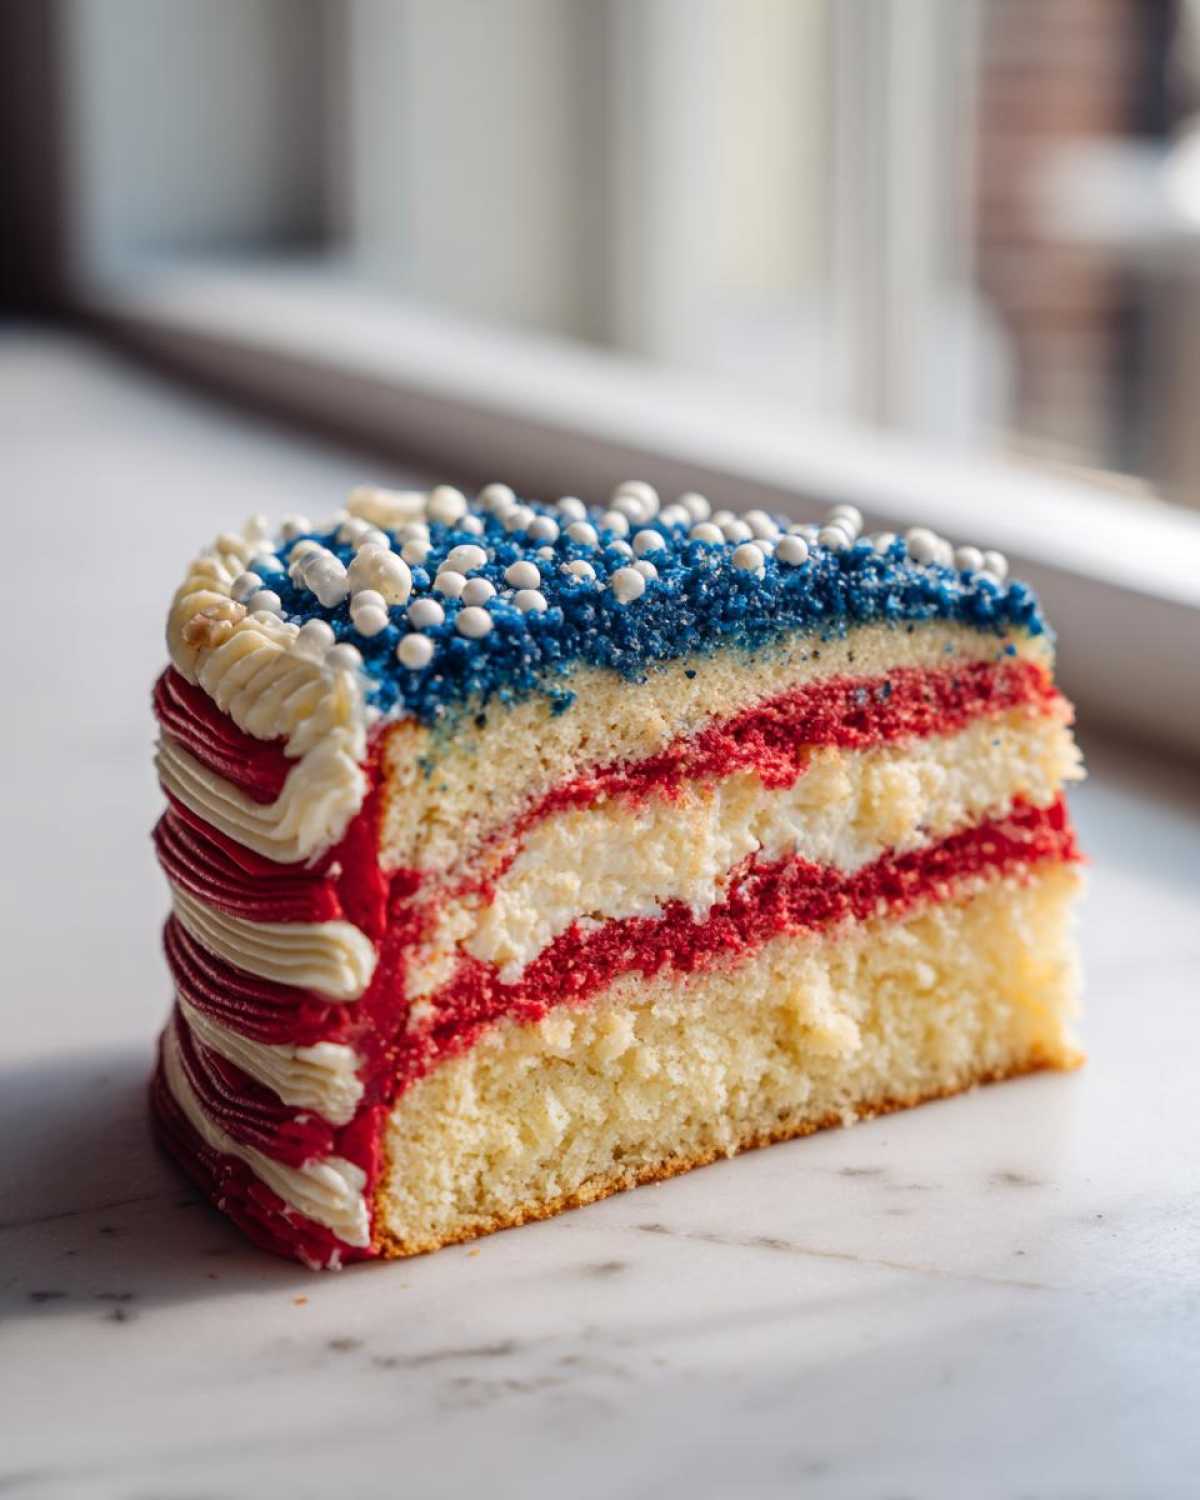
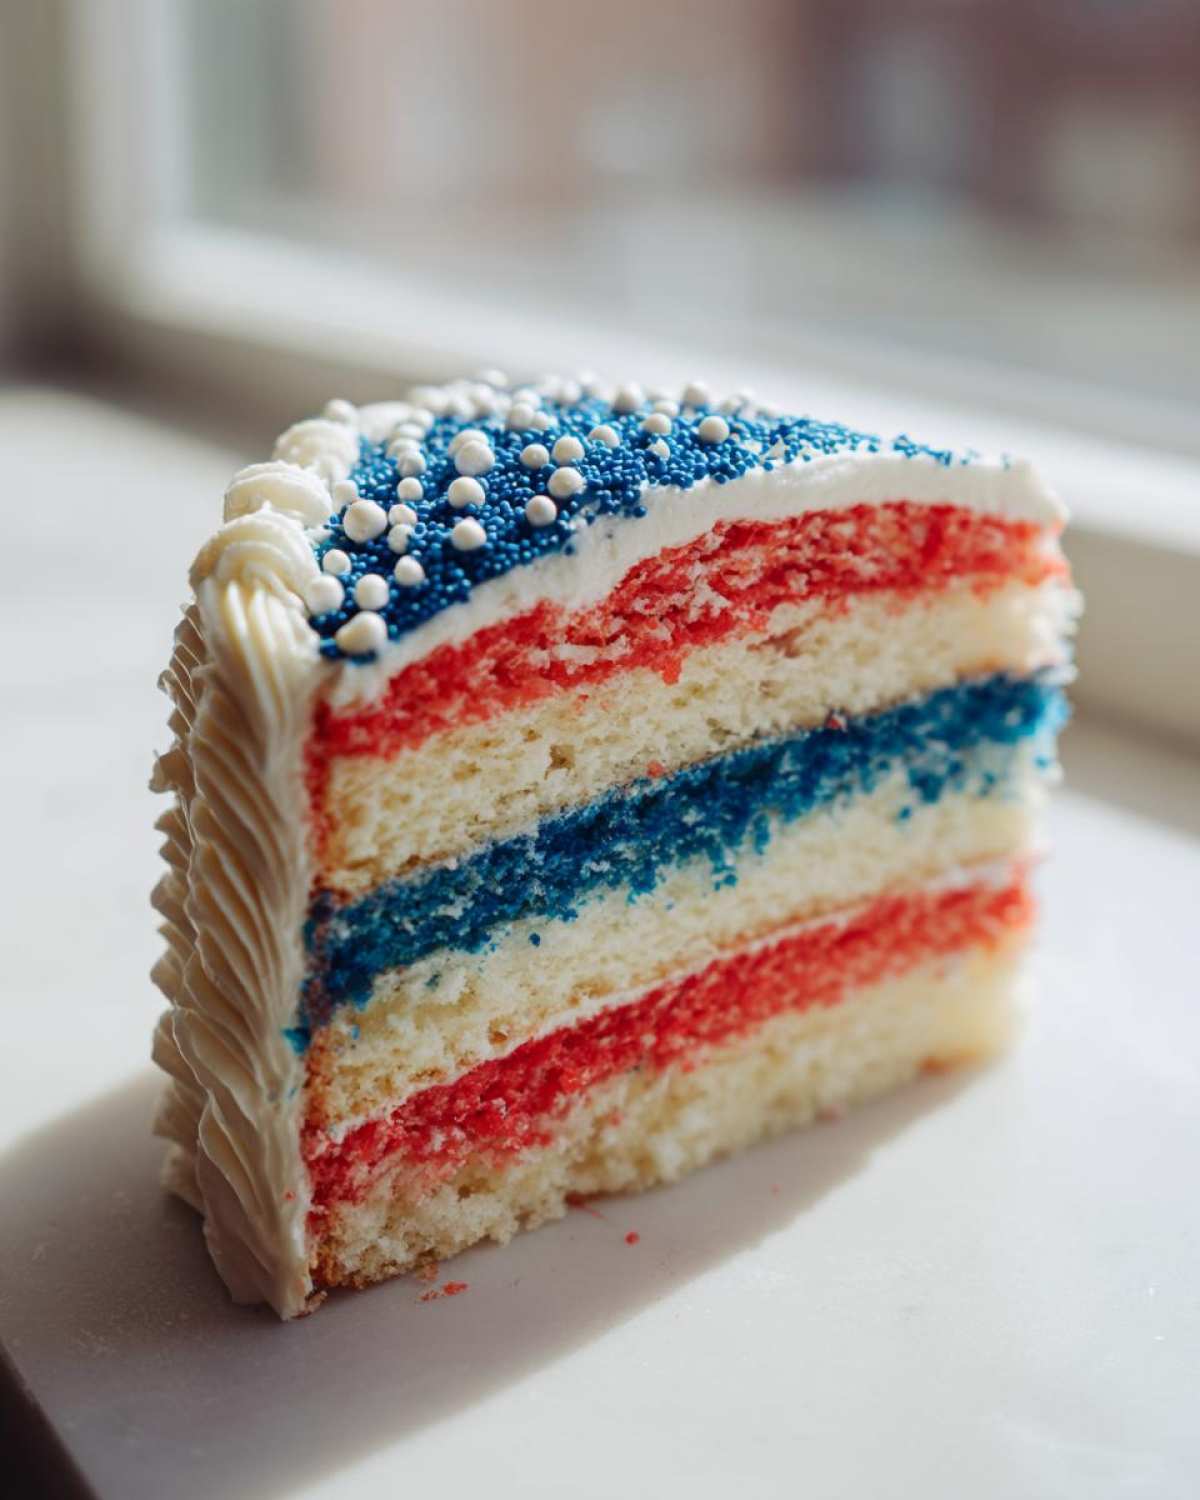
Oh, I absolutely love when the weather warms up because that means it’s time to pull out the recipe that always gets rave reviews: the flag cake! Forget those dry, sad sheet cakes you sometimes see at parties; this isn’t that. This is the Classic Buttermilk Flag Cake, and trust me, using buttermilk is the game-changer here. I’ve been making this specific scratch recipe for the Fourth of July ever since I learned how to properly cream butter. It truly makes the most incredibly moist buttermilk cake recipe you’ll ever taste, and it holds up beautifully even after sitting out during a backyard barbecue. It’s traditional, it’s stunning, and it tastes like summer!
Why This Classic Buttermilk Flag Cake is a Holiday Essential
When you’re baking for a crowd, you don’t want any drama, right? This buttermilk version is my go-to because it’s so dependable. It’s the best buttermilk cake recipe for patriotic holidays because it’s designed to stay moist for hours, making it a perfect summer sheet cake centerpiece. You can bake it the day before, frost it, and it still tastes fresh the next afternoon!
Moisture Guaranteed: The Buttermilk Difference
The magic really does come down to that tangy buttermilk. When it mixes with the baking soda, it creates a soft reaction that keeps the crumb unbelievably tender, not dry or tough. That’s why this ends up being such a genuinely moist buttermilk cake recipe. It just feels lighter than regular old layer cakes.
A Reliable Classic 4th of July Dessert for Crowds
Since it bakes up in that big 13×9 pan, you skip all the messy layering and stacking. It’s designed to feed a whole party! Plus, the decoration, while detailed, is really just stripes and some dots—it looks incredibly impressive without needing fancy piping skills. It’s the ultimate celebratory dessert.
Ingredients Needed for Your Classic Buttermilk Flag Cake
Okay, let’s talk ingredients! This is a cake where using quality stuff really pays off, especially since we are making everything scratch. It’s all about getting that rich, tangy flavor into the base, so make sure your buttermilk isn’t ancient! I always double-check that my butter is perfectly softened—not melted, just soft!
If you ever need an amazing substitute frosting recipe for other things, I have a copycat one that’s incredible, but for this cake, the homemade cream cheese version is absolutely mandatory. Here’s what you’ll need to gather before we start whipping things up.
For the Buttermilk Sheet Cake Batter
- 2 1/2 cups all-purpose flour
- 1 1/2 cups granulated sugar
- 1 teaspoon baking soda
- 1/2 teaspoon salt
- 1 cup unsalted butter, softened
- 4 large eggs
- 1 cup buttermilk
- 1 teaspoon vanilla extract
For the Homemade Cream Cheese Frosting
We need a sturdy but delicious frosting for this design, and cream cheese is the only way to go. If you want a really decadent cream cheese frosting for other projects, check out my recipe for copycat Cinnabon cream cheese frosting—it’s divine! But here are the exact things for this flag version:
- 8 ounces cream cheese, softened
- 1/2 cup unsalted butter, softened
- 4 cups powdered sugar, sifted
- 1 teaspoon vanilla extract
- 1/4 cup milk (or more as needed)
For Flag Decoration
- Blue food coloring
- Red food coloring
- White nonpareils or small candies (for stars)
Step-by-Step How to Make a Flag Cake From Scratch
Alright, let’s get this beautiful cake into the oven! Getting organized is half the battle when you’re aiming for that flaky, soft crumb we love. Remember, baking is chemistry mixed with a little bit of love, so taking your time during the mixing process really pays off here for the Classic Buttermilk Flag Cake.
Baking the Moist Buttermilk Cake Recipe Base
First things first: crank that oven up to 350 degrees F (175 degrees C) right away and make sure you’ve generously greased and floured your 13×9 inch pan. Don’t skip that prep; we don’t want any sticking later! In your big bowl, just whisk the flour, sugar, baking soda, and salt together. Now, add that softened butter, and start mixing on low—it’s going to look like sand, which is exactly what we want. Once it looks crumbly, beat in the eggs one by one. Keep scraping the sides! For the wet part, mix your buttermilk and vanilla separately, and then slowly stream that into the batter. Beat just until everything is incorporated. Seriously, stop mixing the second you stop seeing flour streaks. Pour it into your pan and bake it for about 30 to 35 minutes. Test it with a pick—if it comes out clean, it’s done! Let it cool completely in that pan on a rack before you even think about frosting it.
Preparing the Homemade Cream Cheese Frosting for Sheet Cake
While that cake is cooling down (which feels like forever, I know!), let’s make our frosting. Get that cream cheese and the butter—both softened, remember?—and whip them until they are silky smooth. Now, slowly start adding that powdered sugar that you sifted earlier. You need to beat it well after each addition so it doesn’t look like a powdered sugar explosion in your kitchen! Once it’s mostly combined, drop in the vanilla and the milk. Keep beating until it’s beautifully light and fluffy. If it seems too stiff to spread onto a big sheet cake, add milk just a teaspoon at a time until it’s perfectly spreadable.
Decorating a Flag Cake Step by Step
This is the fun part! You have to frost the entire cooled cake first with just a thin layer of the plain white frosting—that’s your crumb coat. Pop the whole thing into the fridge for about 15 minutes to set that up; this helps a ton later. Once it’s chilled, pull out your three piles of frosting: white, red, and blue. We need the blue field first. Take your larger portion of white frosting and cover all the stripes—or just leave the rest white for now and mask off the top-left corner where the blue goes. Color that top section deep blue. Now, stripe the remaining cake! You can pipe the red and white stripes directly with a piping bag for the sharpest look, or just carefully use an offset spatula to lay down thick bands of alternating red and white. Finish it off by placing those cute little white nonpareils all over the blue section to act as your stars. Wasn’t that easier than you thought?
Expert Tips for Your Classic Buttermilk Flag Cake Success
Even though this is a simple sheet cake meant for holidays, a few little tricks can take it from ‘pretty good’ to ‘absolutely show-stopping.’ You want those stripes to look crisp, and the cake underneath needs that perfect fluffy texture we worked so hard for. I’ve learned these small details over years of trying to make sure my cake looks as good as it tastes!
Achieving Clean Stripes and Stars
When it comes to laying down those precise red and white stripes, please, please use a piping bag fitted with a large round tip if you can. Piping the frosting makes those lines super nice and clean before you smooth them over with your spatula. Also, remember that step where we put that thin crumb coat on and chilled it? That brief chill is critical! It sets the base layer so when you start applying the color blocks, you aren’t dragging crumbs up into your beautiful design. If you’re worried about the white candies—the stars—slipping down the blue field, give the blue frosting the tiniest bit of extra time to firm up before you gently press those little guys into place.

Serving Suggestions for This Traditional American Flag Cake
This cake is pretty rich on its own, thanks to that cream cheese frosting! Because it’s such a showstopper often served outside in the summer heat, I like to keep the accompaniments light and fresh. It pairs perfectly with a big bowl of fresh blueberries and sliced strawberries on the side—it sort of reinforces the colors already on the cake, you know?
For a savory contrast? That’s unexpected but great! If you’re looking for a side dish that balances out the sweetness of this Perfect summer sheet cake, I always make a big spinach salad with feta. You can see my recipe for easy strawberry spinach pasta salad with feta if you need ideas! Otherwise, a simple glass of iced tea or coffee is just the ticket.
Storage and Reheating Instructions for Your Classic Buttermilk Flag Cake
Because we used that glorious cream cheese frosting, we absolutely have to keep this cake tucked safely in the fridge. Don’t try to leave it out all day at your picnic; it’ll sweat and slide right off those beautiful stripes! Cover the pan tightly with plastic wrap—gently, so you don’t smudge the stars—and it will stay perfect for three or four days.
The best way to serve it? Pull it out about 30 minutes before cutting into it. That lets the cold take the chill off the cake itself so you get that soft, moist texture we worked for, while the frosting firms up just enough to hold its shape when you slice into it. Honestly, reheating isn’t necessary; this cake is designed to be a cool, refreshing treat for those hot summer holiday gatherings!
Frequently Asked Questions About the Classic Buttermilk Flag Cake
I know when you’re tackling a big dessert like this, you end up with a few questions bubbling up. It’s totally normal! I’ve gathered the ones I hear the most often from folks trying out this Easy Flag Cake Recipe for the first time. Hopefully, this clears everything up so you can get baking!
Can I substitute the buttermilk in this Easy Flag Cake Recipe?
Oh, this comes up every time! I really wish I could tell you it’s fine, but for achieving that signature moistness and the right texture in this Classic Buttermilk Flag Cake, you really shouldn’t substitute it. That acidity reacting with the baking soda is what makes the crumb so tender. If you absolutely must, you can make a sour milk substitute by mixing one cup of regular milk with one tablespoon of white vinegar or lemon juice and letting it sit for five minutes. But honestly, it won’t be quite the same!
Can I decorate the Classic Buttermilk Flag Cake ahead of time?
Yes, you definitely can! That’s one of the best parts about this Buttermilk Sheet Cake Tutorial. You can bake the cake layer and let it cool completely, wrap it tightly, and keep it on the counter overnight. The frosting, since it has cream cheese, really needs to stay chilled. You can make the frosting the day before too! Then, on the day of your party, just bring the frosting out for about 30 minutes to soften slightly, and then assemble and decorate. It saves so much stress!
What is the best pan size for this Buttermilk Sheet Cake Tutorial?
This entire recipe is perfectly balanced for a standard 13×9 inch baking pan. That size gives us the ideal depth for both baking evenly and for having enough surface area to pull off those clean, bright stripes and the blue field of stars. If you try to squeeze it into a smaller pan, your cake will be way too thick and definitely won’t bake through correctly in the time specified!
Estimated Nutritional Data for a Serving
Now, I know that when you’re looking at a big, glorious slab of cake covered in cream cheese frosting, you aren’t exactly thinking about macros, but it’s good to have a ballpark idea!
Since this is a big, celebratory bake and we are using butter and cream cheese, it’s a delicious indulgence. Here is the estimated breakdown based on the ingredients we used for the Classic Buttermilk Flag Cake:
- Serving Size: 1 slice
- Calories: 450
- Sugar: 55g
- Sodium: 320mg
- Fat: 22g
- Saturated Fat: 13g
- Unsaturated Fat: 9g
- Trans Fat: 0.5g
- Carbohydrates: 60g
- Fiber: 1g
- Protein: 5g
- Cholesterol: 105mg

Just a tiny little reminder here: these numbers are based on my portioning and the specific brands I usually reach for. If you use extra frosting or different brands of butter, your final count is going to shift a little bit. Enjoy it for what it is—a fantastic, traditional, all-American treat!
Share Your All American Dessert Ideas!
I truly hope that this Classic Buttermilk Flag Cake becomes a firm favorite in your house, just like it is in mine for every single patriotic holiday. Seeing your beautiful creations out there on social media honestly makes my day! So, once you’ve had a chance to bake this, please come on back and drop me a star rating below—I always read every single review folks leave.
Tell me what you thought! Did the buttermilk work its magic and keep the cake super moist? Did your stripes turn out sharp? I’m always curious about how everyone adapts things, even if it’s just adding extra vanilla!
And hey, if you’re looking for some lighter ideas for breakfast before you tackle a *huge* dessert project like this one, you should check out my recipe for easy berry chia overnight oats—it’s the perfect light start to a busy holiday weekend! Happy baking, everyone, and I can’t wait to see those gorgeous flags!
Print
Classic Buttermilk Flag Cake
- Total Time: 60 min
- Yield: 12 servings
- Diet: Vegetarian
Description
A traditional recipe for a moist buttermilk sheet cake decorated to resemble the American flag, perfect for patriotic celebrations.
Ingredients
- 2 1/2 cups all-purpose flour
- 1 1/2 cups granulated sugar
- 1 teaspoon baking soda
- 1/2 teaspoon salt
- 1 cup unsalted butter, softened
- 4 large eggs
- 1 cup buttermilk
- 1 teaspoon vanilla extract
- For the Frosting: 8 ounces cream cheese, softened
- 1/2 cup unsalted butter, softened
- 4 cups powdered sugar, sifted
- 1 teaspoon vanilla extract
- 1/4 cup milk (or more as needed)
- For Decoration: Blue food coloring
- Red food coloring
- White nonpareils or small candies (for stars)
Instructions
- Preheat your oven to 350 degrees F (175 degrees C). Grease and flour a 13×9 inch baking pan.
- In a large bowl, whisk together the flour, sugar, baking soda, and salt.
- Add the softened butter to the dry ingredients and beat with an electric mixer on low speed until the mixture resembles coarse crumbs.
- Add the eggs one at a time, beating well after each addition.
- In a separate bowl, mix the buttermilk and vanilla extract. Gradually add the buttermilk mixture to the flour mixture, beating until just combined. Do not overmix.
- Pour the batter into the prepared pan and spread evenly.
- Bake for 30 to 35 minutes, or until a wooden pick inserted into the center comes out clean. Let the cake cool completely in the pan on a wire rack.
- Prepare the frosting: Beat the cream cheese and butter together until smooth. Gradually add the powdered sugar, beating until combined. Add the vanilla and milk, beating until the frosting is light and fluffy. Add more milk if needed to reach a spreadable consistency.
- Divide the frosting into three portions: one large portion for the white stripes, one medium portion for the blue field, and one portion for the red stripes.
- Tint the medium portion with blue food coloring. Tint the red stripe portion with red food coloring. Keep one portion white.
- Frost the entire cooled cake with a thin layer of white frosting (the crumb coat). Chill for 15 minutes.
- Apply the remaining white frosting to cover the cake, leaving a rectangular section in the upper left corner clear for the blue field. Create 7 horizontal stripes using the white and red frostings, alternating colors.
- Fill the reserved upper left rectangle with the blue frosting.
- Place the white candies or nonpareils on the blue section to represent stars.
Notes
- Buttermilk helps create a tender crumb; do not substitute with regular milk if possible.
- For the cleanest stripes, use a piping bag fitted with a large round tip to pipe the red and white stripes before smoothing them with an offset spatula.
- Chill the cake briefly after applying the blue field to help set the color before adding the stars.
- Prep Time: 25 min
- Cook Time: 35 min
- Category: Dessert
- Method: Baking
- Cuisine: American
Nutrition
- Serving Size: 1 slice
- Calories: 450
- Sugar: 55g
- Sodium: 320mg
- Fat: 22g
- Saturated Fat: 13g
- Unsaturated Fat: 9g
- Trans Fat: 0.5g
- Carbohydrates: 60g
- Fiber: 1g
- Protein: 5g
- Cholesterol: 105mg


Comments are closed.