
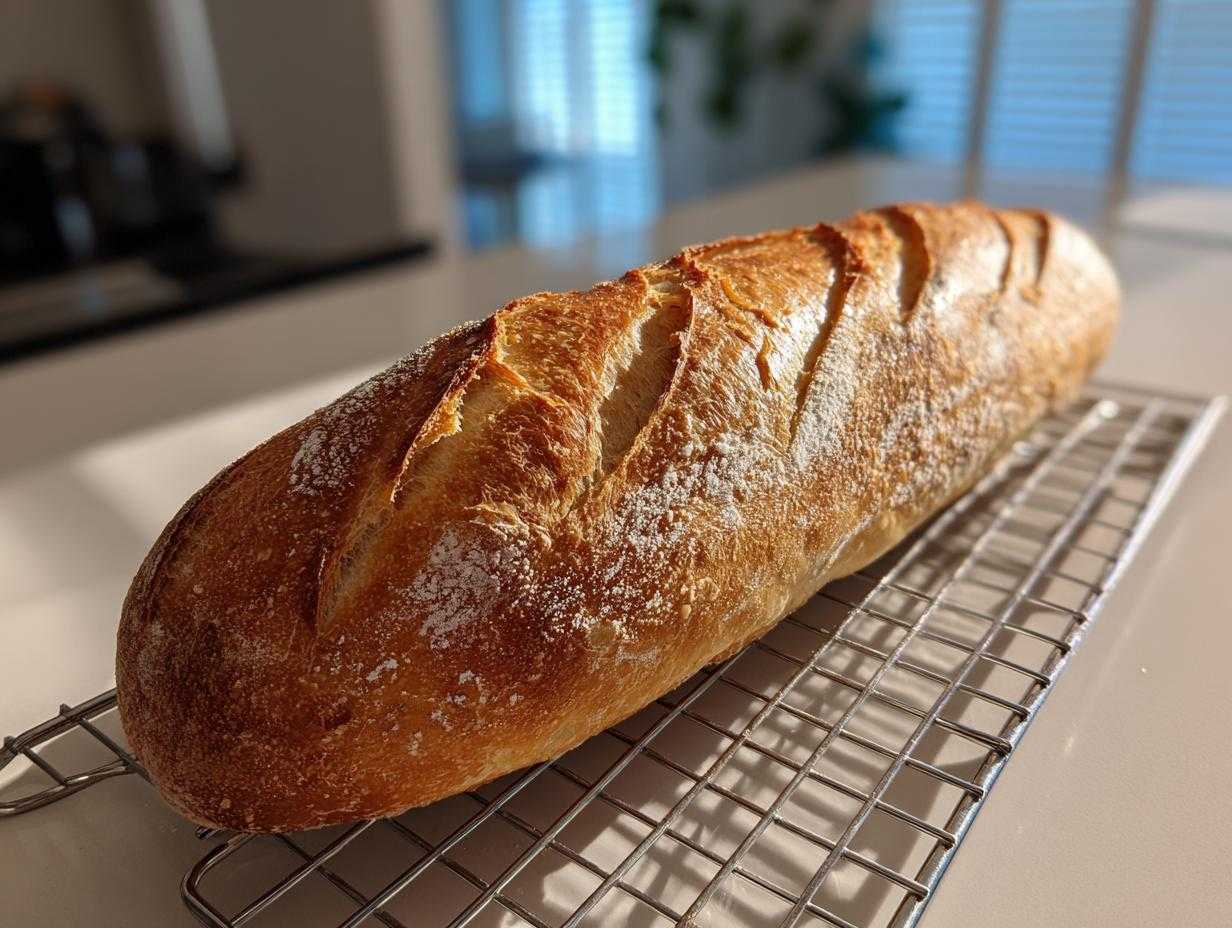
Oh, my friends, there is nothing quite like the sound of a fresh, crusty loaf cooling on the counter. That beautiful crackle when you press the crust? Magnifico! For years, I thought achieving that perfect, authentic bakery style bread at home was reserved for master bakers who had all day. But I’m here to tell you, that’s simply not true! This recipe for Homemade French Bread Recipe is my fast secret. We are talking about achieving that amazing, slightly chewy interior and deeply golden crust in about 90 minutes. It’s the epitome of simple, honest baking, and it brings me so much joy to share this easy french bread for beginners with you today!

Why You Will Love This Quick Homemade French Bread Recipe
I know you’re busy, so I made sure this recipe checks all the boxes for fantastic bread without keeping you waiting all day. Trust me, pulling these gorgeous loaves out of your own oven feels like winning the lottery!
- Speedy Baking: Yes, seriously! This recipe gets you fresh, warm bread on the table with a total time under 90 minutes. It’s the perfect Quick French Bread Recipe Under 2 Hours for busy weeknights.
- Bakery-Quality Crust: We nail that crucial crispy crust and that light, airy crumb that true French bread boasts. It’s the definition of Artisan Bread Baking made accessible.
- Beginner Friendly: If you’ve never touched yeast before, don’t worry! This is truly an Easy French Bread for Beginners. The steps are clear, and the dough is forgiving.
- Simple Ingredients: You only need four main pantry staples—flour, water, salt, and yeast. No complicated sourdough starters here!
- The Smell Factor: My kitchen fills with such an incredible aroma when this is baking. It’s pure happiness. Nothing beats that fresh, yeasty scent filling your home.
- Versatile Loaves: Whether you want long, thin baguettes or softer, shorter loaves, this base recipe does it all.
Ingredients for Classic Crusty Homemade french bread
Baking is chemistry, my darlings, so nailing the measurements is key, even for something as simple as french bread! Don’t swap out the yeast type unless you know exactly how to adjust the rising time. Keep everything simple, and you’ll be rewarded. This recipe proudly yields two excellent loaves, ready to grace your dinner table.
- 1 packet active dry yeast (that’s about 2 1/4 teaspoons, just so you know!)
- 1 1/2 cups warm water – and listen to me here, this needs to be between 105°F and 115°F. Too cool and the yeast sleeps; too hot and you kill it!
- 3 1/2 cups all-purpose flour (The standard kind works perfectly for this loaf.)
- 1 1/2 teaspoons salt (Essential for flavor balance!)
- 1 tablespoon olive oil (We just use this to grease the bowl so the dough doesn’t stick.)
Equipment Needed for Your french bread Baking
You don’t need a fancy stand mixer or a stone hearth to make truly delicious, bakery style bread at home. That’s the beauty of this recipe! For this crusty bread tutorial, you just need a few basic items that I assume are hanging around your kitchen already. Gather these things before you even wake up the yeast, okay? Organization is half the battle!
- A large mixing bowl: You need space for the dough to double in size, so don’t grab your smallest one!
- Baking sheet: This will hold your loaves while they rest and bake.
- Parchment paper: This is a lifesaver. It keeps the loaf from sticking and makes cleanup a breeze.
- A very sharp knife or a baker’s lame (razor blade): This is what we need for scoring the top. Don’t use a dull butter knife; it will just smash the loaf flat! A clean, sharp cut allows the bread to expand beautifully in the heat.
How to Prepare Authentic french bread: A Step-by-Step Tutorial
Now we get to the fun part! Follow these steps closely, and you’ll see that magic happens fast in the oven. This entire process moves quickly, making this recipe fantastic when you need a stunning, crusty bread tutorial result fast. If you love learning about dough structure, you can also check out my guide on making easy homemade breadsticks recipe for more yeasted dough fun!
Activating the Yeast and Mixing the french bread Dough
First things first: we need happy yeast! That warm water has to be just right—think of a cozy bath, not a hot tub. If it’s 110°F, it’s perfect. Once the yeast foams up nicely (that’s your sign it’s alive!), stir in the flour and salt. Mix it until it becomes a very rough, shaggy dough. Don’t worry about perfection yet; this is just the beginning!
Kneading and the Quick Rise for Your french bread Loaf
Turn that shaggy mess onto a floured surface and knead it like you mean it for about five to seven minutes. You’re looking for it to feel smooth and elastic, not sticky and clumsy! Then, we give it a quick nap. Cover the dough and let it rise for just 45 minutes. When the dough has doubled, the scent that fills the kitchen—oh, it reminds me so much of my mother helping my grandmother. It’s that honest, wonderful smell of real, homemade french bread recipe!

Shaping, Final Proof, and Achieving a Crispy Crust Tutorial
Gently punch the dough down—no aggression here!—and divide it into two portions. Shape each one into a long, slender loaf, like a small baguette. Let them rest for a quick 20 minutes while your oven gets screaming hot to 425°F. Here is the secret for that crispy crust: before the loaves go in, put a shallow pan on the bottom rack. When the bread is scored (three nice slashes on top), pour a cup of hot water into that pan and slide the loaves in immediately. That steam is what makes the crust sing!
Tips for Perfect Bakery Style Bread at Home
Even though this is a quick version, we still aim for that wonderful, professional quality. Getting that perfect result—that gorgeous look and heavenly texture—is all about handling the details just right. My grandmother always had little tricks up her sleeve, and these tips pulled straight from my notes guarantee you achieve that beautiful bakery style bread at home.
- Maximize that Crispness with Steam: Remember that step where we poured water into the pan? For truly professional results, try this extra trick, my friends. During the first 10 minutes of baking, quickly open the oven door (be careful of the steam!) and spray the inside walls of the oven with water a couple of times. This super-boost of humidity creates an incredibly shattering crust that will make you feel like a real artisan baker!
- The Soft Crust Option: Not everyone loves a deeply crackly exterior, especially if the french bread is destined for sandwiches or young kids. If you prefer a softer crust, simply skip the steam pan setup completely. Instead, the moment the loaves come out of the oven, brush the tops gently and quickly with a tablespoon of melted butter. It seals in moisture and keeps that top tender.
- No Substitutions for Yeast: This recipe relies on active dry yeast for our fast rise. If you use instant yeast, you can skip the proofing step (Step 1) and mix it right in with the dry ingredients, but I still suggest letting the dough rest for the full 45 minutes to develop flavor since we aren’t doing a long, overnight cold proof.
- Cooling is Crucial: Don’t let your gorgeous loaves sit on the hot baking sheet, or the bottoms will get soggy! Transfer them immediately to a wire rack. This allows air to circulate underneath, which keeps the bottom crust from steaming itself soft. This step is essential for that Homemade French Bread Recipe texture we are after.
- Flavor Boost Idea: If you want to add some flair, try mixing 1 teaspoon of dried Italian herbs or garlic powder right into the flour before mixing. It’s just a little way to customize your loaf! If you are interested in other quick savory bakes, check out my ideas for easy homemade breadsticks recipe!
Variations: Making Soft and Fluffy french bread or Artisan Bread Baking
One thing I love about this basic yeast dough is how adaptable it is! While my heart sings for that crackly, rustic French bread crust, I know you might be looking for something just a little more pillowy, maybe for soaking up a big bowl of tomato soup, or for easy sandwiches. You absolutely can shift the texture without changing the core recipe.
To get that wonderful Soft Fluffy French Bread texture everyone adores, it’s all about ditching the steam! Remember in the last section how we talked about adding hot water to the oven? For the soft version, just skip that part entirely! No steam means the crust won’t harden into that super crisp shell we love for baguettes. Once they come out of the oven, right away, brush the tops lightly with melted butter.
That little bit of fat locks in the moisture and prevents the crust from getting too tight. It results in a beautiful, tender loaf that’s perfect for slathering with butter or turning into garlic bread. See? Versatility! It’s not just about the quick loaf; you can even adapt this base if you ever want to try something more involved, like my recipe for easy no-knead cranberry walnut bread, for a richer, more artisan bread baking feel!
If you were making these into actual baguettes for that extra crunchy exterior, you’d want to shape them even thinner and use a baguette pan if you have one, but for this quick loaf recipe, treating them as softer rolls is just delicious!

Serving Suggestions for Your Homemade french bread
Now that you’ve poured your heart into making these beautiful loaves of french bread, the hard work is done! But what do you serve them with? Honestly, I think fresh bread needs almost nothing, but since you made the effort for bakery style bread at home, let’s celebrate it properly!
My absolute favorite way—and it’s so simple it feels silly to even write down—is just slicing a piece while it’s still slightly warm (don’t wait until it’s completely cool, shhh, that’s my little secret). Drizzle good quality olive oil—the bright green, peppery kind from Italy—right onto the plate and tear off pieces to dip. It’s heaven with zero fuss.
Of course, this bread is robust enough to handle heartier dishes too. It’s absolutely perfect for mopping up every last bit of sauce from a rich slow-cooked ragu or stew. If you’re looking for something creamy to pair it with on a chilly evening, you just must try dipping it into my recipe for creamy spinach soup recipe. That combination is unbeatable, I promise!
And let’s not forget the classics! Use the slices for incredible, crisp croutons, or make the best turkey and Swiss sandwiches you’ve ever had. Whatever you choose, enjoy that crunch!
Storage and Reheating Instructions for leftover french bread
Look, I know you probably think this french bread will vanish in one sitting—and honestly, I support that idea! But in the rare case that you actually have leftovers, you need to treat this bread right. Unlike soft sandwich loaves, these crusty numbers have a specific way they need to be stored so they don’t turn sad and gummy on you overnight. You want that wonderful crackle to return tomorrow, right?
The key is air circulation, my dear bakers. Never, ever put your fresh loaf into a plastic bag. Plastic traps moisture, and moisture is the sworn enemy of a crispy crust. This is what I do:
- Room Temperature Only: Keep it out on the counter, but wrap it loosely in a brown paper bag (like the kind you might take groceries home in). This lets the bread breathe while protecting it slightly from drying out too fast. Or, if you have one of those lovely bread boxes—use it!
- Freezing for Later: If you know you won’t eat it within two days, slice the loaf first! Then, wrap the slices tightly in plastic wrap and pop them into a freezer bag. This prevents freezer burn and lets you pull out just what you need later on.

When it comes time to reheat—and you MUST reheat it to experience the true joy of this dough—it requires a blast of dry heat. No microwaving, please! That makes it rubbery, and we spent all that effort getting that beautiful crust. Instead, preheat your oven to about 350°F (175°C). Pop the whole loaf (or just a few slices) directly onto the oven rack for about 5 to 7 minutes. It will crisp right back up! It smells almost as good as when it first came out. That’s how you keep your Homemade French Bread Recipe tasting spectacular!
Frequently Asked Questions About Making french bread
It’s so normal to have questions, especially when you are trying a new homemade french bread recipe that promises quick results! Baking is all about learning the feel of the dough, but knowing these little technical details beforehand saves so much baking anxiety. I’ve compiled the questions I get most often from my readers when they tackle this easy french bread for beginners!
Can I make this recipe into a true, long French Baguette?
Oh, I love that you are aiming high! Yes, you absolutely can! This recipe is fantastic for an authentic French baguette recipe base. The dough structure is perfect. For the real deal, instead of making two simple, short loaves on the baking sheet, you’ll want to divide the dough into three or four smaller, skinnier portions. You’ll need to place them on parchment paper, perhaps using a baguette pan or even aluminum foil strips to prop up the sides so they keep that classic long shape while they rest and bake. Remember, thinner means a shorter baking time, so watch that color!
What if I want to use Bread Flour instead of All-Purpose Flour?
That’s a brilliant question, hitting at the heart of Artisan Bread Baking! Bread flour has a higher protein content than all-purpose flour, which means it develops more gluten. If you swap it in, you will likely need just a splash or two more water—maybe an extra tablespoon or two—because bread flour absorbs liquid more readily. The resulting loaf will be chewier and slightly stronger, leaning more towards a rustic loaf than a super light one, but it is still delicious! Always try to use the flour type specified first, but substitutions are part of the adventure!
My yeast didn’t foam up after 10 minutes. Why didn’t my dough rise?
This is the number one reason a quick yeasted bread fails, and it almost always comes down to water temperature! If your yeast didn’t foam, it means the water was either too cold—in which case it’s just sleeping—or it was too hot and actually killed the delicate little organisms. For this quick french bread recipe, you need that warm water, 105°F to 115°F being the sweet spot. If it’s cold, try moving the bowl to a warmer spot for ten more minutes. If it’s lukewarm, start over with fresh water and yeast. It’s disappointing, but better to start fresh than to wait hours for a flat dough! If you want to explore other simple recipes later, check out my tips on making easy homemade breadsticks recipe.
Is there a way to get a chewier texture, like some French loaves have?
You are asking for a beautifully chewy interior! That texture, my friend, usually comes from hydration—how much water is in the dough compared to the flour. Because we use a slightly lower hydration for this no-fuss french loaf to keep the rise fast, you can increase the water slightly from 1 1/2 cups to maybe 1 5/8 cups. You’ll need to knead a bit longer because the dough will feel stickier. A longer knead develops that strong gluten network, which equals that satisfying chew we all love in classic French baking!
Nutritional Estimates for Homemade french bread
Now, since this is a recipe that emphasizes pure, simple ingredients—flour, water, yeast, salt—it’s wonderfully straightforward, which often means fewer mystery additives! That’s one of the reasons I adore making my own french bread; I control everything that goes into it.
I always want to be transparent with you, my dear bakers. The numbers below are our best effort based on standard USDA values for the ingredients listed. Since the type of flour or even the exact amount of salt absorbed can vary slightly brand to brand, please treat these figures as a good guideline for this Homemade French Bread Recipe, not a precise scientific measurement for a lab!
- Serving Size: 1 slice
- Calories: 140
- Sugar: 1g
- Sodium: 300mg
- Fat: 1g
- Saturated Fat: 0g
- Unsaturated Fat: 1g
- Trans Fat: 0g
- Carbohydrates: 29g
- Fiber: 1g
- Protein: 4g
- Cholesterol: 0mg
See? So few ingredients result in such clean nutrition! It showcases why learning these simple yeasted bread foundations is so worthwhile. Enjoy every slice, knowing exactly what went into creating that beautiful texture!
Share Your Homemade french bread Success
We’ve done it! You have created a beautiful, bakery-style loaf of french bread right there in your own kitchen, possibly in under 90 minutes! Doesn’t that feel wonderful? The smell alone is worth all the effort we put in. Now that the hard part is over—the kneading, the waiting for the rise, and creating that perfect steam in the oven—it’s time to celebrate your success!
I truly want to see what you created! Did you get that deep, golden color? Is your crust crackling just right? Please, please, please come back here and leave me a rating and a comment below. I love reading what worked best for you, especially if you experimented with the steam technique for that ultimate crispy crust!
If you snapped a picture of your stunning, fresh-from-the-oven loaves—maybe ready to be paired with my easy chicken parmesan recipe—share it on social media and tag me! Seeing your bakes makes my day brighter and reminds me that the joy of simple, honest cooking is alive and well.
Thank you again for coming along on this baking adventure with me. It’s moments like these, sharing a classic like this Homemade French Bread Recipe, that truly connects our little Gourmet Gusto community. If you’re looking for more inspiration, come find me over on Pinterest where I share tips daily and keep adding to our list of dishes that look gorgeous next to a slice of fresh bread. Until next time, happy baking, my friends!
Print
Classic Crusty Homemade French Bread (90-Minute Style)
- Total Time: 85 min
- Yield: 2 loaves
- Diet: Vegetarian
Description
Bake bakery-style French bread at home with this straightforward recipe. You achieve a wonderfully crisp crust and a soft interior, perfect for serving with dinner or making sandwiches. This version is designed to be quick, getting you fresh bread in about 90 minutes.
Ingredients
- 1 packet active dry yeast (about 2 1/4 teaspoons)
- 1 1/2 cups warm water (105-115°F)
- 3 1/2 cups all-purpose flour
- 1 1/2 teaspoons salt
- 1 tablespoon olive oil (for the bowl)
Instructions
- Activate the yeast: In a large bowl, dissolve the yeast in the warm water. Let it stand for 5 to 10 minutes until foamy.
- Mix the dough: Add the flour and salt to the yeast mixture. Mix with a wooden spoon until a shaggy dough forms.
- Knead: Turn the dough out onto a lightly floured surface. Knead for about 5 to 7 minutes until the dough is smooth and elastic.
- First Rise (Quick Method): Lightly oil a clean bowl. Place the dough in the bowl, turning to coat. Cover the bowl with plastic wrap or a clean kitchen towel. Let the dough rise in a warm place for 45 minutes, or until doubled in size.
- Shape the loaves: Gently punch down the dough. Divide it in half. Shape each half into a long, thin loaf, similar to a baguette shape.
- Second Rise: Place the shaped loaves on a baking sheet lined with parchment paper, leaving space between them. Cover loosely and let them rest for 20 minutes.
- Preheat and prepare steam: Preheat your oven to 425°F (220°C). Place a shallow pan on the bottom rack while the oven heats.
- Score and bake: Just before baking, use a sharp knife or razor blade to make three diagonal slashes across the top of each loaf. Carefully pour 1 cup of hot water into the preheated shallow pan to create steam, then quickly close the oven door.
- Bake for 20 to 25 minutes, or until the crust is deep golden brown and sounds hollow when tapped.
- Cool: Transfer the loaves to a wire rack to cool completely before slicing.
Notes
- For an extra crisp crust, spray the inside of the oven walls with water two or three times during the first 10 minutes of baking.
- If you prefer a softer crust loaf, skip the steam pan and brush the tops of the loaves lightly with melted butter immediately after they come out of the oven.
- This recipe uses simple ingredients, making it an easy French bread for beginners.
- Prep Time: 15 min
- Cook Time: 25 min
- Category: Baking
- Method: Baking
- Cuisine: French
Nutrition
- Serving Size: 1 slice
- Calories: 140
- Sugar: 1
- Sodium: 300
- Fat: 1
- Saturated Fat: 0
- Unsaturated Fat: 1
- Trans Fat: 0
- Carbohydrates: 29
- Fiber: 1
- Protein: 4
- Cholesterol: 0



Comments are closed.