

Oh, ditch those sad, pale, pre-packaged rounds from the store—I’m telling you right now, once you make these homemade English muffins, you’ll never look back! For years, I struggled trying to get that true, slightly chewy outside and that light, airy interior riddled with those famous valleys and peaks for the butter to melt into. Honestly, my first few batches were flat as pancakes. But folks, I cracked the code! This English muffin recipe from scratch ditches the oven entirely. We’re using a simple, gentle stovetop method that guarantees you get those spectacular nooks and crannies every single time. They’re fluffy, they’re absolutely bursting with flavor from the buttermilk, and they transform your breakfast game overnight. Trust me, it’s easier than you think!
Why This Homemade English Muffins Recipe Delivers the Best Results
Folks, this isn’t just another quick bread recipe. This method is specifically designed to cheat the system and give you bakery-quality results with minimal fuss. If you’ve been searching for the best homemade English muffins, stop scrolling, because here it is!
- They are genuinely fluffy—no dense, gummy bread here!
- We use buttermilk for that signature slight tang that balances the butter perfectly.
- We cook them low and slow on the griddle for maximum lift.
Achieving Perfect English Muffin Nooks and Crannies
The secret sauce is treating the dough like it’s made of spun sugar! We mix it just until combined; seriously, don’t overwork it! That shaggy texture traps all the yeast gases. Then, cooking them gently over medium-low heat on the griddle allows those pockets to gently expand and form those glorious air tunnels—those famous English muffin nooks and crannies you dream about.

Simple Stovetop English Muffins Technique
Forget about preheating your massive oven for something that’s essentially a flat, round bread product. Nope! We are using a heavy skillet or griddle. This controlled, dry heat cooks them evenly from both sides right on the stovetop, giving you that beautiful toasted crust while keeping the inside super soft. It’s just an incredibly straightforward way to make stovetop English muffins.
Essential Ingredients for Authentic English Muffin Recipe From Scratch
When you’re making an English muffin recipe from scratch, you don’t need a million fancy things. In fact, the list is pretty short! But those few ingredients need to be good quality, especially the dairy. I’ve laid out exactly what you need below. Pay close attention to the buttermilk; it’s key to getting that slightly tangy flavor that makes these taste authentic, not just like plain bread. If you want to eat these with homemade jam later, you should check out my recipe for easy raspberry jam!
- 3 cups all-purpose flour
- 1 tablespoon sugar
- 1 teaspoon salt
- 1 teaspoon baking soda
- 1 packet active dry yeast
- 1 1/2 cups buttermilk, lukewarm
- 2 tablespoons melted butter, plus more for greasing
- Extra flour for dusting
Ingredient Notes and Buttermilk Substitution Tips
Let’s talk yeast first. You need active dry yeast that’s still happy! If your yeast is old, your muffins won’t rise, and they’ll turn into heavy disks instead of fluffy English muffins. Make sure it’s lukewarm—not hot! Too hot kills it dead. Now, the buttermilk trick is essential. If you don’t have any on hand (which happens to me all the time!), you can quickly make your own. Just take your 1 1/2 cups of regular milk and stir in 1 1/2 tablespoons of white vinegar or fresh lemon juice. Let that sit on the counter for about ten minutes. It’ll curdle slightly, and boom—you’ve got perfect homemade buttermilk for your dough!
Step-by-Step Instructions for Fluffy English Muffins
Alright, let’s get baking! I know what you’re thinking—bread usually means kneading, right? Nope! This is one of those miraculously easy recipes where the most active work you do is stirring. We need to respect the yeast and the gluten development, which means a little patience during the resting stages but very little elbow grease overall. Get your biggest bowl out, because we’re going straight in!
Mixing the Shaggy Dough for Your English Muffin
First up, whisk all those dry guys together: the flour, the sugar, the salt, baking soda, and yeast. Make sure that yeast gets a good toss around in there. Once it looks uniform, pour in the lukewarm buttermilk and your melted butter. Now, grab a wooden spoon—no mixer needed! You’re just mixing until everything comes together into what looks like a lumpy, messy ball. Seriously, stop mixing as soon as you can’t see any more wisps of dry flour. If you overmix this, you start developing gluten too much, and guess what disappears? Those vital air pockets we need for the perfect texture! Cover it up and tuck it into a warm spot for a full hour. Watch it grow—it doubles up, which is always so satisfying.
Cooking the English Muffin on the Griddle
Once rested, gently turn that dough out onto a surface you’ve dusted well with flour. Don’t punch it down! We want to keep the air! Pat it gently with floured hands until it’s about 3/4 of an inch thick. Use that 3-inch cutter and press straight down—no twisting! Place those rounds onto a lightly floured baking sheet and let them just hang out for another 30 minutes while you heat up your cooking surface. This second rest is crucial for that final puff!

Here’s the big moment: Get your heaviest skillet or griddle ready. Turn the heat to medium-low. I cannot stress this enough: you cook these on a DRY surface! No butter, no oil, nothing. You want that slow, gentle heat. Lay your rounds down, giving them some space, and let them teach you how to cook. They need 8 to 10 minutes on the first side until they look golden brown and feel cooked through. Then, flip them gently and do the other side for another 8 to 10 minutes. If your muffins are browning too fast, your heat is too high! Slide them over to your cooling rack, and consider pouring yourself a cup of coffee—you just made amazing bread! If you’re thinking about a brunch spread later, these go perfectly next to my recipe for best classic French toast.
Tips for Success When Making Homemade English Muffins
You’ve cooked your muffins, and they look fantastic! But we still have a couple of major steps left to ensure you get the most satisfying breakfast experience possible. Remember, the goal here isn’t just bread; it’s that craggy surface that traps melting butter. These little tips are what separate the good muffins from the absolutely legendary fluffy English muffins.
The Secret to Maximizing English Muffin Nooks and Crannies
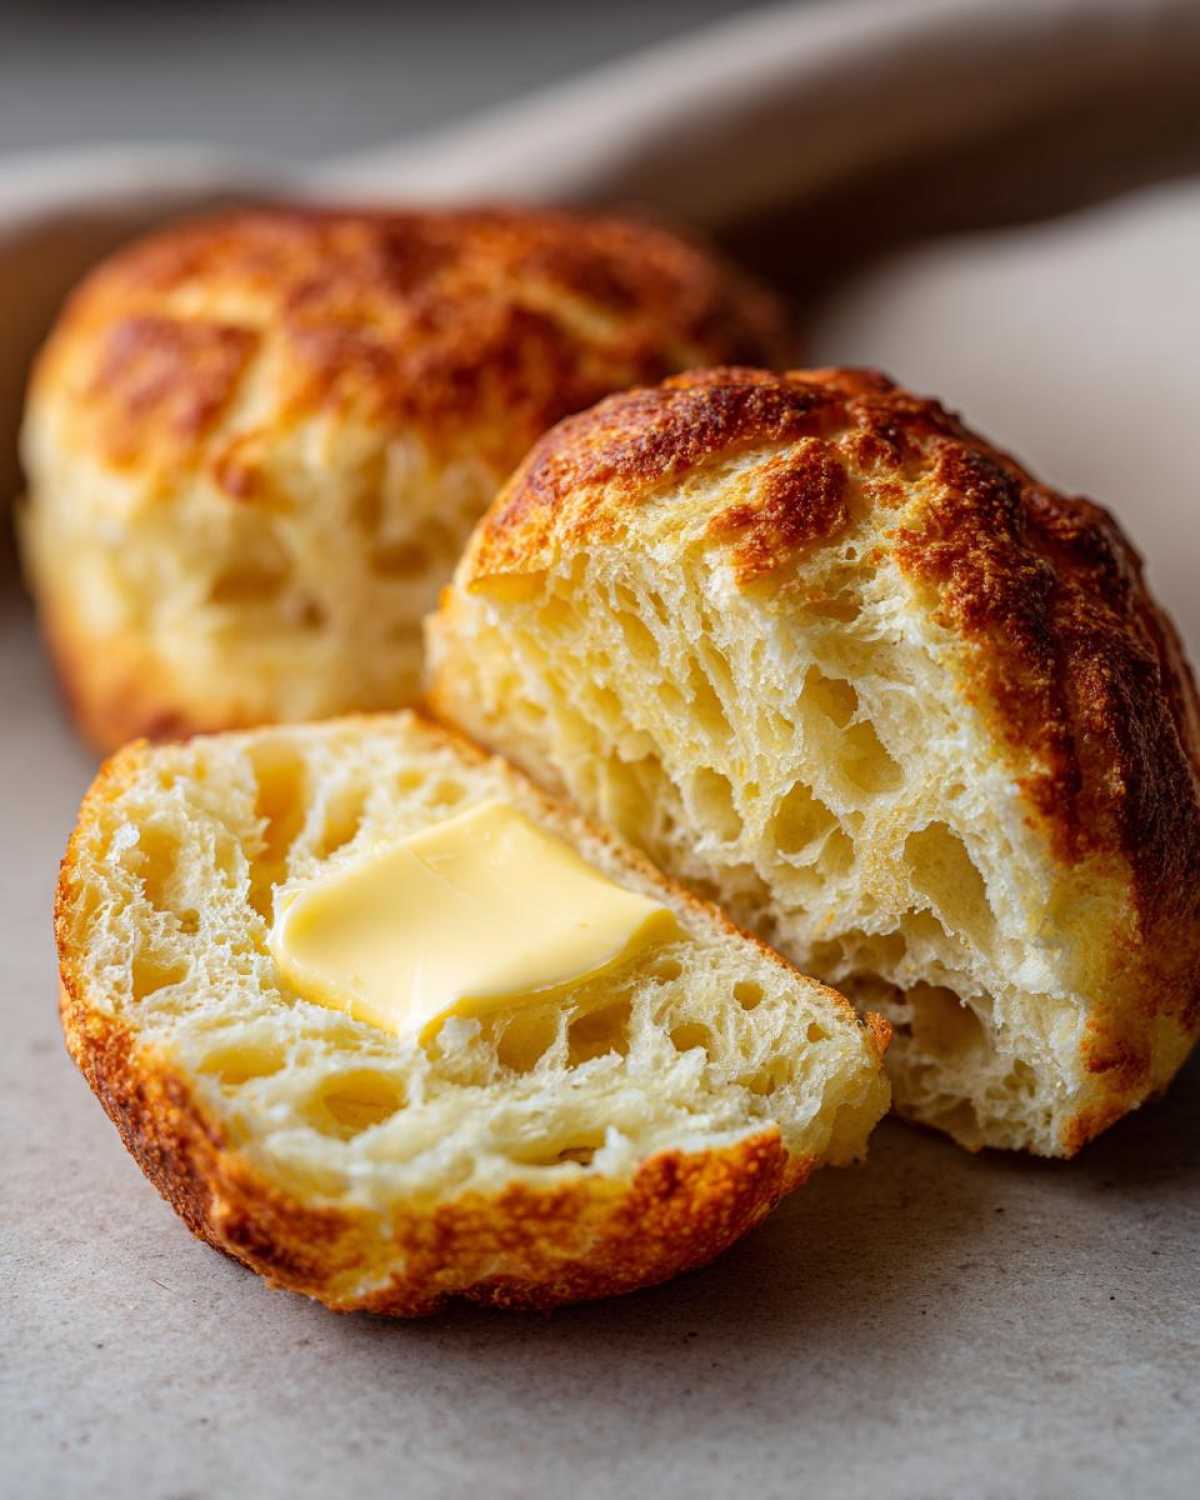
Listen up, this is non-negotiable for true success! Once these babies are totally cooled—and I mean completely cool—you absolutely cannot slice them with a knife. A knife squishes those beautiful air pockets right out from the center! Instead, take a regular dinner fork and gently pierce the perimeter all the way around the edge. Then, twist the fork gently until the muffin splits open. You will see the stunning inner topography of perfect English muffin nooks and crannies staring back at you. That texture is what we worked so hard for, so please, honor the fork!
Make Ahead Breakfast: Storing and Freezing Your English Muffins
One of the absolute best things about making a big batch of homemade English muffins is that you get to enjoy them all week long! Seriously, the smell of them toasted on a Tuesday morning feels like cheating because it feels like a weekend treat. These reheat beautifully, which means you can totally knock out a batch on Sunday and have your morning sorted for days. It’s the perfect example of a great make ahead breakfast staple.
The main rule, which I learned the hard way after trying to bag up a still-warm muffin once (disaster!), is cooling. They must be 100% cooled down. If you wrap them up warm, they’ll steam, and that steam ruins the exterior texture we worked so hard to achieve. Let them sit on that wire rack until they reach room temperature.

Once they’re cool, pop them into a sturdy, zip-top freezer bag. Squeeze out as much air as you can before sealing. I’ve kept these perfectly good in the freezer for up to three months—they’re practically immortal! If you want to check out some other great ways to streamline your morning routine, I’ve got a whole section on make ahead breakfast ideas.
The best part? You don’t even have to thaw them when you’re ready to eat! Just take them straight from the freezer, split them open with your fork (remember the fork!), and pop them right into the toaster or under the broiler. They toast up perfectly crisp on the outside while still remaining soft in the middle. It’s magic, plain and simple!
Serving Suggestions for Your Fresh English Muffin
Okay, you’ve achieved the holy grail of homemade bread—perfectly craggy, warm, and chewy English muffins. You could just slather them with butter and call it a day, and honestly, I wouldn’t blame you! But these deserve more than just a quick spread. Since we put in all this effort, let’s treat them right. They make the perfect base for so many other wonderful things, whether it’s a fancy brunch spread or just making your weekday breakfast feel special.
I love seeing what everyone uses them for! If you need some inspiration to elevate your morning meal, head over and check out my general guide to all things breakfast delights for more ideas!
Building the Ultimate Breakfast Sandwich Buns
Forget those drive-thru versions—a freshly toasted English muffin is the foundation of the world’s greatest sandwich. You have to try making a homemade version of that classic breakfast sandwich. Toast your muffin halves well—we want them firm enough to handle the fillings! I like to fry up an egg quickly in a tiny bit of oil, maybe add a slice of sharp cheddar cheese while it’s still warm to get it melty, and stack it high. A little smear of spicy mustard or a dash of hot sauce takes it right over the top.
If you’re looking for a high-protein sidekick to go with that sandwich, you should totally try my recipe for easy egg bites! They reheat beautifully and pile right onto the muffin with the egg and cheese without making everything slide out the sides. Remember, because your muffin is thick and structured, it holds up way better than regular toast!
Frequently Asked Questions About English Muffin Baking
I know sometimes when you try a brand new recipe, questions pop up right when you’re ready to start, or worse, halfway through! Don’t panic! Here are a few things I hear most often when people are tackling their first batch of homemade English muffins. We’re going to clear up any texture confusion right now so you can enjoy the results of our English muffin recipe from scratch!
Can I use regular milk instead of buttermilk in this English Muffin Recipe From Scratch?
Yes, you absolutely can! Buttermilk is truly the champion here because that acid reacts beautifully with the baking soda, giving you an extra bit of lift and that classic tang. However, if your fridge is bare, you can easily make your own substitute. Just take 1 1/2 cups of regular milk—any kind works, 2% or whole is best—and stir in 1 1/2 tablespoons of white vinegar or fresh lemon juice. Let it sit on your counter for about ten minutes until it looks slightly curdled. That’s your homemade buttermilk, and it works perfectly for these fluffy English muffins!
Why are my homemade English muffins not getting nooks and crannies?
This is the big one! If you’re disappointed by a flat surface, there are usually three culprits hiding in plain sight. First, check your heat. If the skillet or griddle is too high, they brown instantly on the outside before the inside has time to puff up properly. You need it medium-low! Second, did you over-mix the dough? If you mixed it until it was smooth and elastic, you fought against the gluten, and it won’t rise right. Remember, we want shaggy! Third, and this is a guaranteed error: Did you slice the cooled muffin with a knife? If you did, you sealed the internal pores closed. Always use a fork to gently split them open!
What is the proper internal temperature for a cooked English Muffin?
We aren’t just relying on color for these stovetop English muffins; we want to make sure the dough is actually done all the way to the center so it doesn’t deflate later. When checking for doneness while cooking on the griddle, you should aim for an internal temperature of 200 degrees Fahrenheit. If you’re using an instant-read thermometer, stick it right into the center of a muffin that has just finished cooking on both sides. If it hits 200°F, you’ve nailed it!
Estimated Nutritional Data for This Classic English Muffin Recipe
I always include the nutritional breakdown because, bless my heart, sometimes I just need to know what I’m eating when I devour three of these fresh off the griddle! Remember, these numbers are pretty basic since we aren’t adding butter, jam, or bacon. This data is based on dividing the whole recipe batch into 10 servings, so keep that in mind when you calculate your breakfast!
- Serving Size: 1 muffin
- Calories: 180
- Sugar: 2g
- Sodium: 250mg
- Fat: 4g
- Carbohydrates: 32g
- Protein: 6g
Please treat these figures as rough estimates, though! Because every kitchen handles ingredients slightly differently, your real numbers might fluctuate, but it gives you a nice starting point for your make ahead breakfast planning!
Share Your Best Homemade English Muffins Experience
Whew! We did it! You have officially graduated from store-bought mediocrity to making legendary homemade English muffins right on your own stovetop. Now comes my favorite part: hearing what you think! I put my heart and soul into perfecting that airy, craggy texture, and I genuinely want to know if you achieved those incredible peaks and valleys in your own kitchen.
Did you split them with a fork? Did they taste better than anything you could buy? Please, please, leave a rating down below! Five stars if your butter melted perfectly into those craters! And if you snapped a picture of your beautiful, golden-brown griddle baked bread, tag me on social media, or feel free to reach out via my contact page. I absolutely love seeing your baking successes. Happy toasting!
Print
The Best Homemade English Muffins with Perfect Nooks and Crannies
- Total Time: 1 hour 35 min
- Yield: 10 servings
- Diet: Vegetarian
Description
Make authentic, fluffy English muffins at home using a simple stovetop cooking method to achieve ideal nooks and crannies for butter.
Ingredients
- 3 cups all-purpose flour
- 1 tablespoon sugar
- 1 teaspoon salt
- 1 teaspoon baking soda
- 1 packet active dry yeast
- 1 1/2 cups buttermilk, lukewarm
- 2 tablespoons melted butter, plus more for greasing
- Extra flour for dusting
Instructions
- In a large bowl, whisk together the flour, sugar, salt, baking soda, and yeast.
- Add the lukewarm buttermilk and melted butter to the dry ingredients. Mix with a wooden spoon until just combined into a shaggy dough. Do not overmix.
- Cover the bowl with plastic wrap and let the dough rest in a warm place for 1 hour until it has doubled in size.
- Lightly flour a clean work surface. Gently turn the dough out onto the surface. Dust the top of the dough lightly with flour.
- Pat the dough out gently to about 3/4 inch thickness. Avoid punching down the dough completely.
- Use a 3-inch round cutter to cut out the muffins. Reroll scraps once to cut more if needed.
- Lightly dust a baking sheet or large platter with flour or cornmeal and place the cut rounds on top, leaving space between them. Cover loosely and let them rest for 30 minutes.
- Heat a dry, heavy-bottomed skillet or griddle over medium-low heat.
- Carefully place the dough rounds onto the warm griddle, working in batches. Do not add oil or butter to the griddle.
- Cook for 8 to 10 minutes per side, until golden brown. The internal temperature should reach 200 degrees Fahrenheit.
- Remove from the griddle and cool completely on a wire rack.
- To serve, split the muffins using a fork to preserve the nooks and crannies, then toast lightly.
Notes
- For best results and maximum nooks and crannies, split the cooled muffins with a fork rather than slicing with a knife.
- These muffins freeze well. Cool completely, then place them in a freezer-safe bag for up to 3 months. Thaw overnight or toast directly from frozen.
- If you do not have buttermilk, mix 1 1/2 cups of regular milk with 1 1/2 tablespoons of white vinegar or lemon juice and let it sit for 10 minutes before using.
- Prep Time: 15 min
- Cook Time: 20 min
- Category: Breakfast
- Method: Griddle Cooking
- Cuisine: American
Nutrition
- Serving Size: 1 muffin
- Calories: 180
- Sugar: 2
- Sodium: 250
- Fat: 4
- Saturated Fat: 2
- Unsaturated Fat: 2
- Trans Fat: 0
- Carbohydrates: 32
- Fiber: 1
- Protein: 6
- Cholesterol: 10


Comments are closed.