
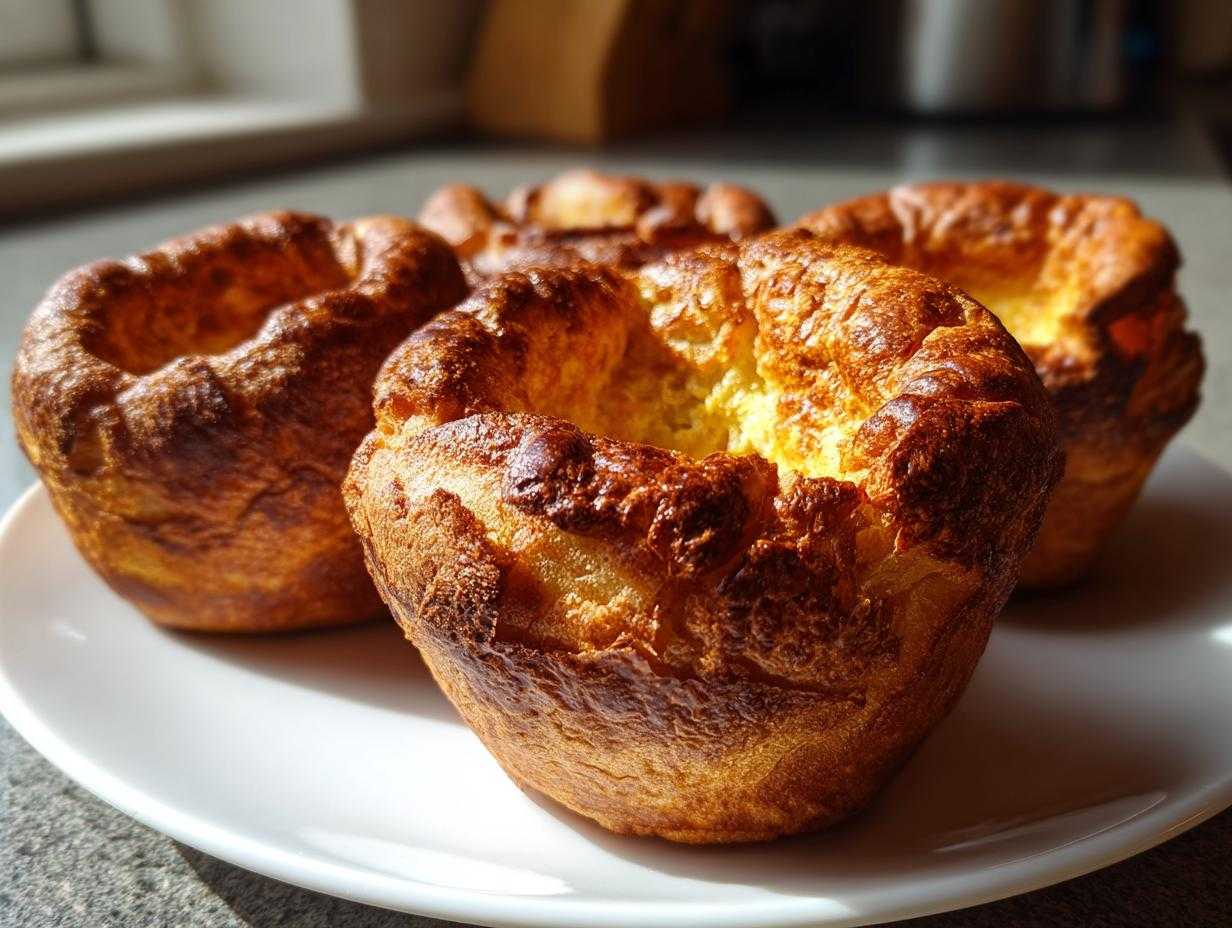
Oh, the heartbreak! There is nothing sadder on a Sunday than serving up those flat, sad little puddings that looked more like pancakes than proud, towering giants. I wasted so many good ingredients trying to get that perfect rise until I finally cracked the code. Forget the complicated chef videos; this, my friend, is the **Yorkshire pudding** recipe that actually works every single time. It’s the secret weapon I keep close for any proper roast dinner. We failed together for years, but trust me, we mastered this **Traditional British Side Dish**, and now you will too!
Why This is the Best Yorkshire Pudding Recipe for a Perfect Rise
It sometimes feels like magic, that moment when the batter hits the fat and just… whoosh! It leaps up the side of the tin. But honestly, it’s just science done right. This **Yorkshire pudding** recipe is foolproof because we focus on temperature shock and patience. You can have the best ingredients in the world, but if the fat isn’t screaming hot, you’ll get a flat disc, guaranteed.
I learned the hard way that the batter must rest. Giving that flour time to fully hydrate is non-negotiable for the best structure. Plus, the contrast between the cold batter and the smoking hot fat is what gives you that instant, dramatic puff. Seriously, if you check out how important this pairing is for a great roast dinner, you’ll understand why we stick to the rules here.
The Secrets to Fluffy Yorkshire Puddings
Don’t cheat these three crucial steps. If you want those tall, crispy sides and that airy cloud inside, these rules are everything:
- Smoking Hot Fat is King: Your fat (oil or dripping) has to be shimmering and just beginning to smoke before the batter goes in. If you pour batter into lukewarm fat, it soaks in instead of frying instantly, leading to denseness.
- Hot Fat Meets Cold Batter: I always keep the batter in the fridge until the absolute last second, even if I let it rest on the counter for an hour. That thermal shock is responsible for 90% of the rise.
- DO NOT Open the Door Early: Resist the urge! Opening the oven during the first 20 minutes lets cool air rush in. The rising process is delicate; cool air will cause them to deflate instantly, and they won’t recover. You’ve got this!
Gathering Ingredients for Your Yorkshire Pudding
You often hear people stress about complicated ingredients, but for the **Best Yorkshire Pudding**, simplicity wins! We are sticking to the classic four main components, plus fat for the tin. You’ll need 140g of plain flour, four large eggs, 200ml of milk, and just a tiny pinch of salt. Honestly, that’s it for the batter itself.
When it comes to the cooking fat, try to get your hands on some beef dripping if you can. My mum always insisted on it for her Sunday Roast Recipes; it just gives that deep, savory flavor that oil can’t match. However, if you don’t have any, a neutral, high smoke point vegetable oil works like a charm too. Just make sure whatever you choose can handle the oven’s heat!
Ingredient Notes and Substitutions
Whole milk is my absolute go-to here. Why? Because the fat content in whole milk helps the puddings brown beautifully and keeps the crumb tenderer than skimmed. I’ve tried water years ago, and while people claim it works, you miss out on so much flavor and structure.
If you are aiming for that truly authentic taste—the kind you get in Yorkshire pubs—beef dripping is the way to go. It adds richness that elevates these from simple puffy sides to a truly magnificent **Roast Dinner Accompaniment**. Don’t worry if you can’t find it, though; the technique matters more than the type of fat!
How to Make Yorkshire Puddings: Step-by-Step Instructions
Alright, let’s get this batter mixed! This is where we build the potential for those magnificent, airy clouds. First things first, grab a big bowl and sift your 140g of plain flour and that pinch of salt. Sifting is important, it stops those annoying lumps from forming later on. Make a nice dip right in the middle—a little well!
Crack your four lovely cold eggs right into that hole. Now, take a whisk and start slowly incorporating the flour from the edges into the eggs. Don’t just start whipping wildly! Once you’ve got a thick paste, you start pouring in your milk, just a splash at a time, whisking as you go. Keep drizzling in that milk until it’s all incorporated and you have a smooth, thin batter. It shouldn’t be thick like pancake batter; it should move like single cream on the spoon. And please, don’t over-whisk it! Just smooth, no aggression.
Now, this is non-negotiable for a perfect **Yorkshire pudding recipe**: you MUST rest the batter. Cover it up and let it chill out for at least 30 minutes on the counter, or even pop it in the fridge for a few hours if you have time. Give it time to relax!
Mixing the Easy Yorkshire Pudding Batter
Honestly, the key to the gravy later is making sure the batter itself is perfect now. You are aiming for totally smooth. If you see any dry flour streaks hiding at the bottom, keep whisking gently until they disappear. If you see tiny bubbles forming all over the surface, you’ve whisked enough—stop before you develop too much gluten and end up with tough puddings instead of those delightfully soft interiors.
The Crucial Preheating Phase for Maximum Puffy Yorkshire Puddings
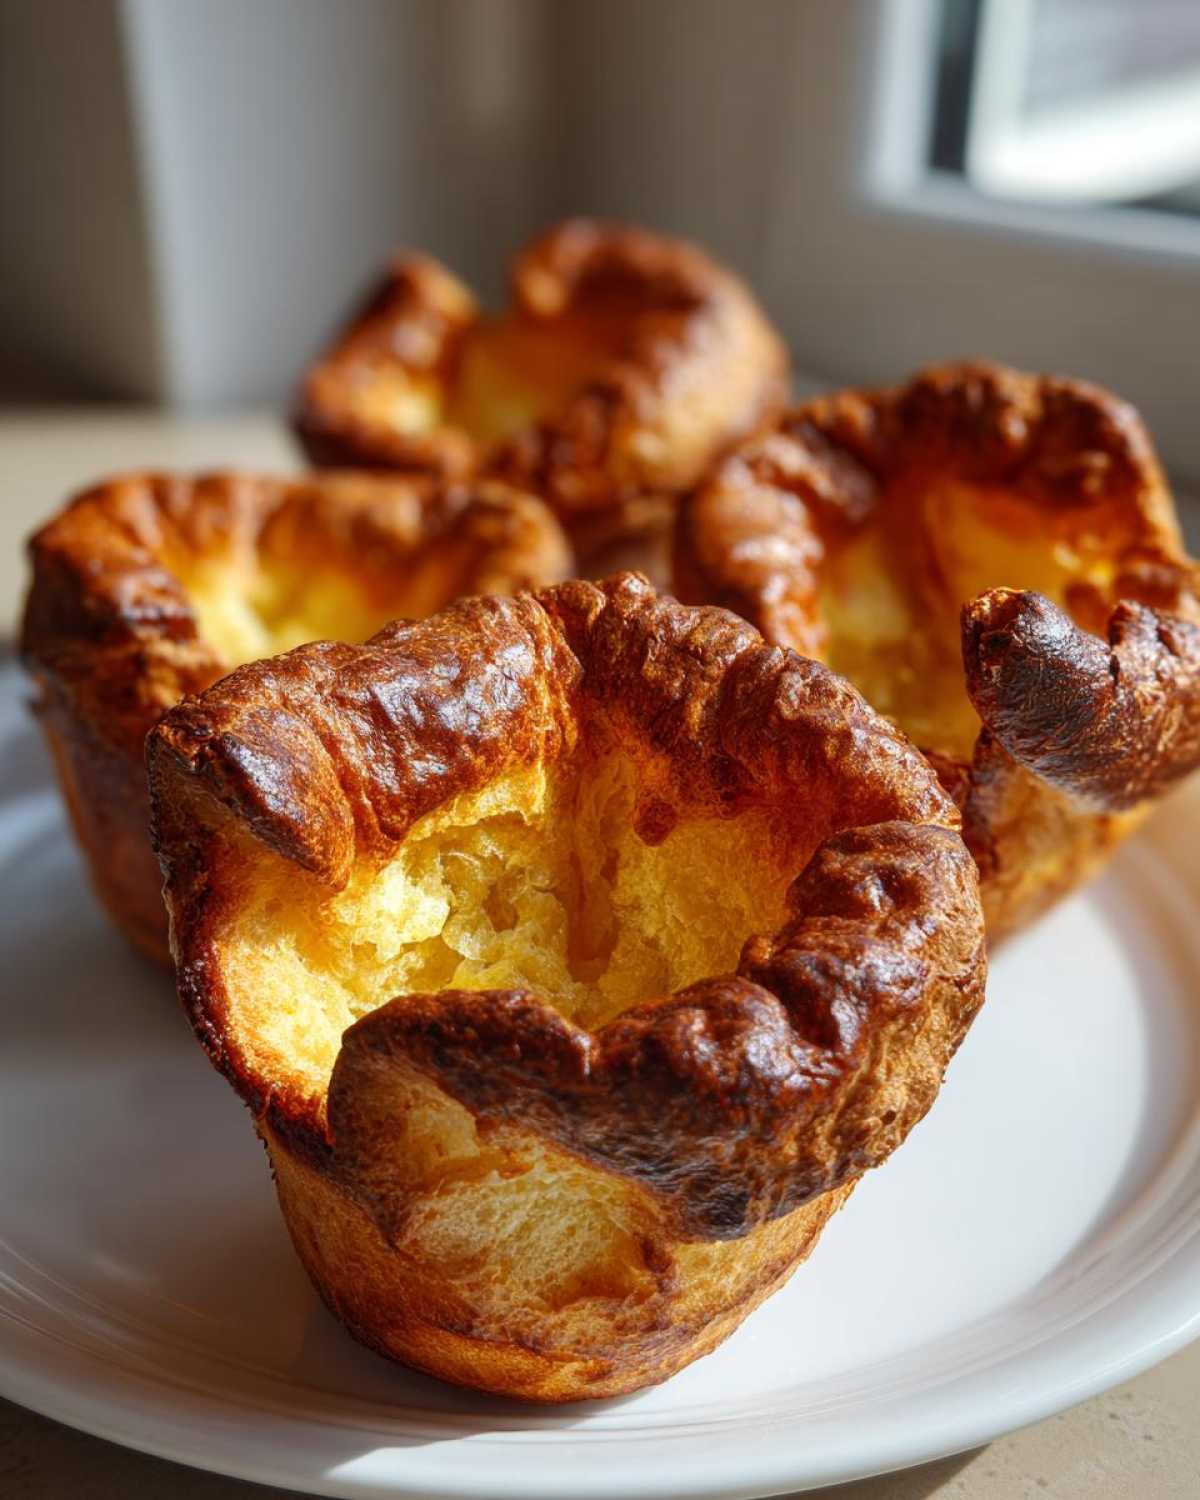
This is the moment of truth for achieving **Crispy Yorkshire Puddings**! Get your oven cranked up to 220°C. Put about a teaspoon of your chosen fat—oil or dripping—into each hole of your muffin tin (if you’re making individual ones). Now, slide that tin into the oven and leave it there for a solid 10 minutes. I mean ten full minutes! That fat needs to be absolutely scorching hot—it should be shimmering, maybe even starting to smoke a little bit. Only then will that cold batter hit the fat with the thermal shock needed to make them balloon up huge!
Troubleshooting Common Yorkshire Pudding Failures
We’ve all been there. You follow every step, you think you nailed the **Yorkshire Pudding Recipe**, and yet… they sit flat. Don’t toss the tin in frustration! Sinking puddings usually boil down to one of three things, and none of them are your fault! It’s just about knowing what to look for.
If your puddings haven’t risen at all, nine times out of ten, your fat wasn’t hot enough. I try to warn people constantly, but until you see that fat smoking, you need to wait longer! If they rise beautifully and then collapse the second you pull them out, that usually means you peeked too early when they were still setting. They need that consistent high heat until they are truly cooked through.
If they rise but end up dense and heavy rather than light and airy, check your batter consistency. Was it too thick? Like thick cream instead of single cream? If so, they cook slower and don’t get that signature puff. Adjust your milk next time, and you’ll have perfectly **Fluffy Yorkshire Puddings** in no time!
Variations: Beyond the Traditional British Side Dish
While this classic recipe is designed for the generous, deep rise you get when baking in a roasting tin for one big pudding to share, I know most people prefer making **Individual Yorkshire Puddings**. And honestly? They are much easier for portion control, especially when serving up a big crowd for the Sunday roast!
If you’re using a standard 12-hole muffin tin, just make sure you follow that instruction about filling them only one-third full. They expand so much that overfilling guarantees spills and sad, deformed edges. They’re great for dipping straight into the gravy if you ask me!
Now for those who need dietary adaptations. While this recipe is standard, many of you have asked about a **Gluten Free Yorkshire Pudding** version. You can definitely make a great one! You’ll need to swap out the plain flour for a good quality 1:1 gluten-free blend. Make sure the blend contains xanthan gum, or add a tiny pinch yourself, as you need that structure when that gluten is missing. The rest of the technique remains the same, because temperature is still king!
Also, some health food bloggers focus heavily on making healthier sides, but honestly, you can’t really make a low-fat Yorkshire pudding without destroying its entire purpose. It’s a treat! It should be crisp and fluffy. If you’re looking for other bread options, maybe try these sweet potato biscuits instead of messing with the pudding science!
Serving Suggestions for Your Golden Brown Puddings
Now that you have these perfect, towering monuments of crisp deliciousness, you need to know what to do with them! They aren’t really meant for anything other than a proper centerpiece moment. The absolute classic pairing, the one they were born for, is serving them alongside a stunning roast beef dinner.
When I pull mine out, piping hot, they go straight onto the platter. The key is getting them loaded up with rich, thick gravy instantly. I always make sure I have a fantastic beef meat pie recipe tucked away for those nights when we don’t have a full roast on the go, but we still need that savory feeling. These puddings really shine when drenched. They soak up the juices perfectly, which is why they are such a beloved **Roast Dinner Accompaniment**!
Storage and Reheating Instructions for Yorkshire Pudding
Look, I’m going to be honest: nothing beats a truly fresh Yorkshire pudding straight from the oven, screaming hot with that beautiful crisp texture. They are meant to be eaten immediately with your dinner! But hey, sometimes you have leftovers, or maybe you’re just planning ahead, which is smart thinking.
If you must store them, let them cool down completely first—don’t seal a hot pudding in a container, or the steam turns the lovely crispy shell soggy! Pop the cooled ones into a sealed container and they should be fine on the counter for maybe half a day, or in the fridge for up to two days. Don’t freeze them; the texture just doesn’t survive the thawing process well.
To bring them back to life and restore that incredible height and crispness, high heat is your only friend. Don’t microwave them—you’ll just end up with rubbery sponges. You want to pop them back into a 200°C (400°F) oven for about 5 to 7 minutes. Keep an eye on them, but that quick blast of dry heat will dry out any residual moisture and make them brittle and golden again. It’s almost like making a fresh batch of **Yorkshire Pudding**!
Frequently Asked Questions About Yorkshire Puddings
I get asked these questions all the time, especially when people are trying to perfect their **Yorkshire Pudding Recipe**. It’s great that everyone wants to get them perfect! Here are the few things that pop up most often when folks are trying to achieve that famous height.
Can I use water instead of milk in my Yorkshire Pudding batter?
You technically *can*, but oh heavens, please don’t if you want the proper result! Milk is essential here because the fat and protein content in the milk help the pudding brown beautifully and build that sturdy yet tender structure we love. If you only use water, you lose out on flavor, and frankly, the rise tends to be a lot less reliable. Stick to whole milk for the fluffiest results.
How long can the Easy Yorkshire Pudding Batter sit before baking?
This is one of the secrets I mentioned earlier! You must let the batter rest. I always aim for at least 30 minutes sitting right on the counter to let the flour hydrate perfectly. If I’m prepping ahead for a big dinner, I’ve left my **Easy Yorkshire Pudding Batter** covered in the fridge for almost 24 hours, and it usually rises even better the next day! Just make sure you let it warm up slightly before hitting that smoking hot fat.
Is beef dripping necessary for the Best Yorkshire Pudding?
Many people think you absolutely must use beef dripping to get the very **Best Yorkshire Pudding**, and tradition certainly supports that! Dripping imparts a deeper, richer, more savory flavor that nothing else matches—it’s what you’d find in any proper old-school pub serving Sunday lunch. However, if you use a neutral oil like vegetable or sunflower oil, as long as that oil is blazing hot, you will still achieve that incredible puff and height. Don’t stress if you can’t get dripping; technique beats tradition when it comes to height!
Estimated Nutritional Data for This Recipe
I know some of you are tracking everything, and even though this is comfort food territory, it’s good to know what you’re putting into your body! Remember, this is just an estimate because your flour brand or the exact amount of fat absorbed can change things slightly. These numbers are based on one single, glorious, puffy pudding from the batch of 12 we made.
For one standard pudding serving, here’s the general breakdown:
- Calories: Around 130 calories. Not bad for something so incredibly satisfying!
- Fat: Roughly 7g total fat. A good chunk of that happens when the pudding soaks up just the right amount of that smoking hot oil, which is what keeps it crispy!
- Protein: We get about 5g of protein, mostly thanks to the lovely eggs and milk in the mix.
- Carbohydrates: You’re looking at about 14g of carbs here, mainly from the flour.
So, while they look heavy and indulgent, if you stick to one or two alongside your roast beef and veggies, they really fit quite nicely into a balanced meal. They are definitely a worthwhile treat!
Print
The Perfect Foolproof Yorkshire Pudding
- Total Time: 35 min
- Yield: 12 small puddings
- Diet: Vegetarian
Description
Follow this simple recipe to make classic British Yorkshire puddings that are crispy on the outside and light and fluffy inside, perfect for your roast dinner.
Ingredients
- 140g plain flour
- 4 large eggs
- 200ml milk (whole milk works best)
- Pinch of salt
- Vegetable oil or beef dripping, for cooking
Instructions
- Sift the flour and salt into a large bowl. Make a well in the center.
- Crack the eggs into the well. Begin whisking the eggs, gradually incorporating the flour from the sides.
- Slowly pour in the milk while continuously whisking until you have a smooth, thin batter, similar in consistency to single cream. Do not over-whisk.
- Cover the bowl and let the batter rest at room temperature for at least 30 minutes, or up to several hours in the refrigerator. This resting time helps achieve a better rise.
- Preheat your oven to 220°C (425°F / Gas Mark 7). Place a 12-hole muffin tin or a large roasting tin into the oven. Add about 1 teaspoon of oil or dripping to each hole.
- Heat the tin with the oil in the hot oven for at least 10 minutes until the fat is smoking hot. This step is crucial for a good rise.
- Carefully remove the hot tin from the oven. Quickly and carefully pour the batter evenly into the holes, filling each about one-third full.
- Immediately return the tin to the hot oven. Do not open the oven door for the first 20 minutes of cooking.
- Bake for 20 to 25 minutes, or until the puddings are well-risen, deep golden brown, and crisp. Serve immediately.
Notes
- Use cold milk and eggs for the best temperature contrast when hitting the hot fat.
- Ensure your fat is smoking hot before adding the batter; this shock causes the dramatic rise.
- For individual puddings, use a muffin tin. For one large pudding, use a small roasting tin.
- Prep Time: 10 min
- Cook Time: 25 min
- Category: Side Dish
- Method: Baking
- Cuisine: British
Nutrition
- Serving Size: 1 pudding
- Calories: 130
- Sugar: 1
- Sodium: 50
- Fat: 7
- Saturated Fat: 2
- Unsaturated Fat: 5
- Trans Fat: 0
- Carbohydrates: 14
- Fiber: 0
- Protein: 5
- Cholesterol: 60



Comments are closed.