

Oh, the heartbreak of pulling out perfectly baked, beautifully cut sugar cookies only to ruin them with icing that just… won’t… cooperate! If you’ve ever spent an hour piping an outline only to watch it blob into a shapeless puddle, I see you. Seriously, I used to feel like I was fighting a losing battle every Christmas with runny, dull frosting.
But that stops today, my friend. I finally cracked the code on the absolute best sugar cookie icing recipe that gives you that high-gloss, professional look and actually dries firm enough to stack them up without squishing! Mastering this specific sugar cookie icing isn’t just about pretty holiday cookies; it’s about confidence. Once you nail this texture, you won’t go back, trust me.
Why This Is the Best sugar cookie icing recipe You Need
I get it—you want the Pinterest-perfect cookies without the kitchen headache. This isn’t some fussy, traditional royal icing that needs special tools or hours of whipping. This particular sugar cookie icing recipe is my secret weapon for holiday baking blitzes because it checks every single box you need:
- It Dries Rock Hard: Seriously, you can stack these cookies in a tin, and they won’t smudge. That’s because of the magic ingredient we’re adding!
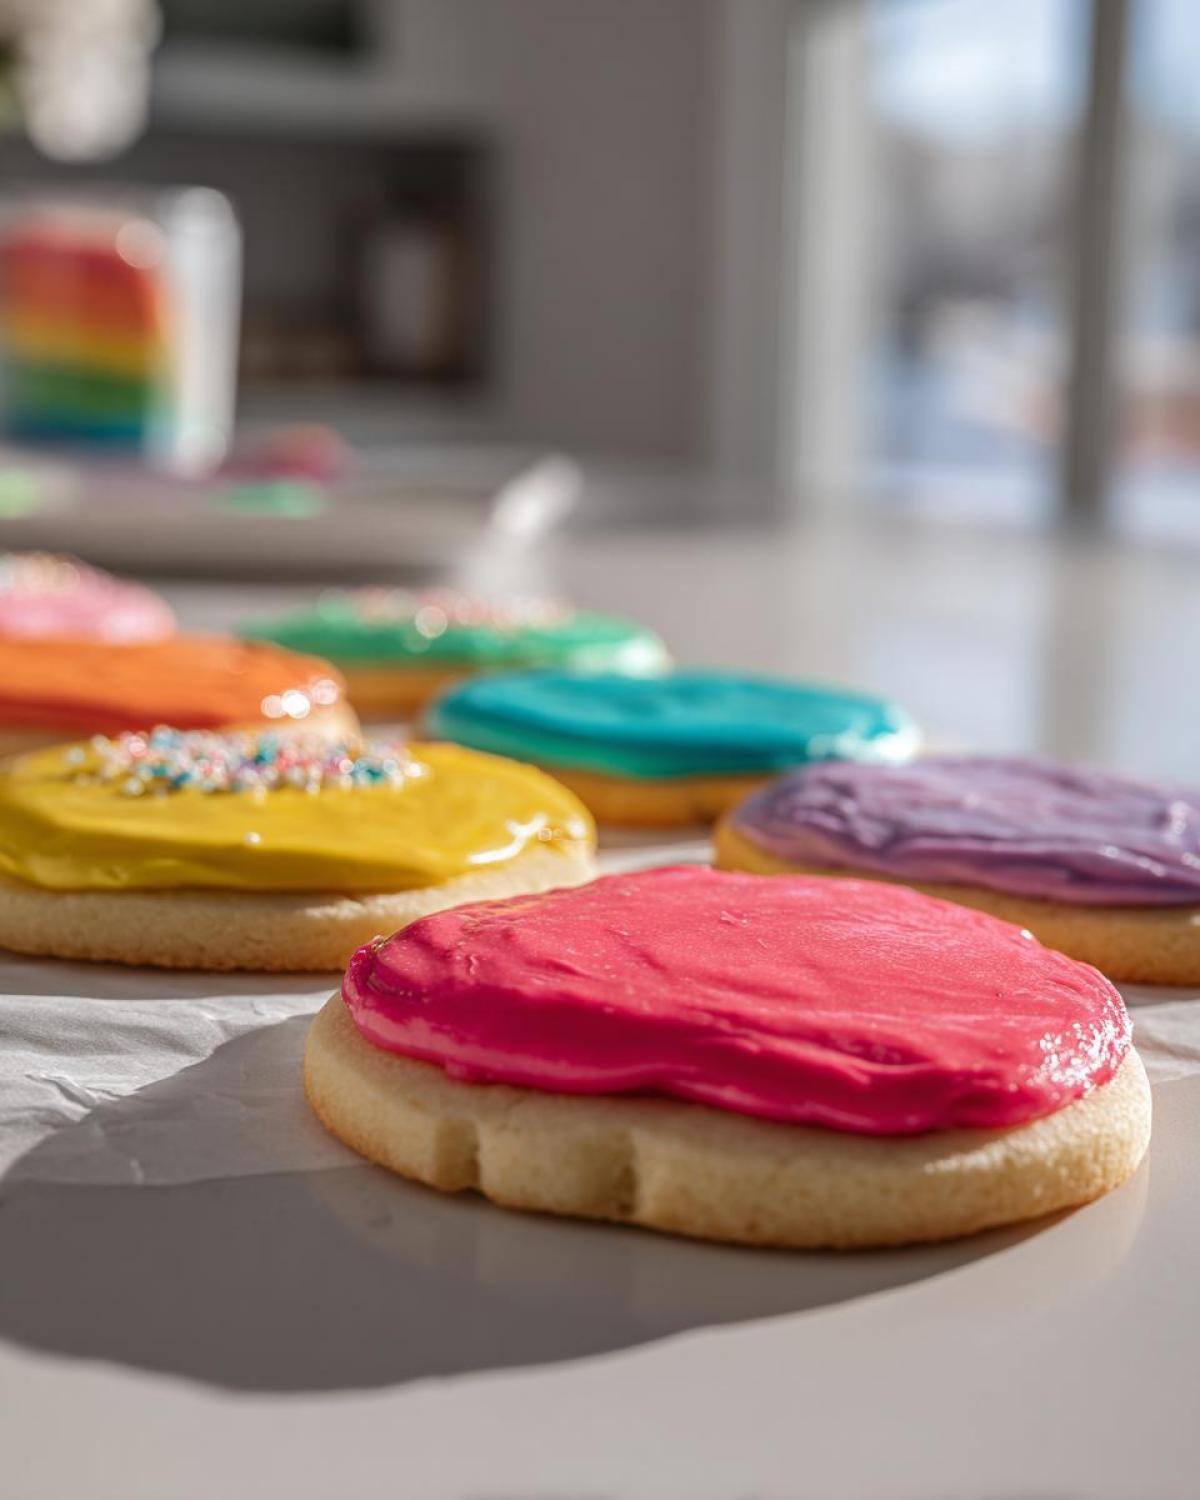
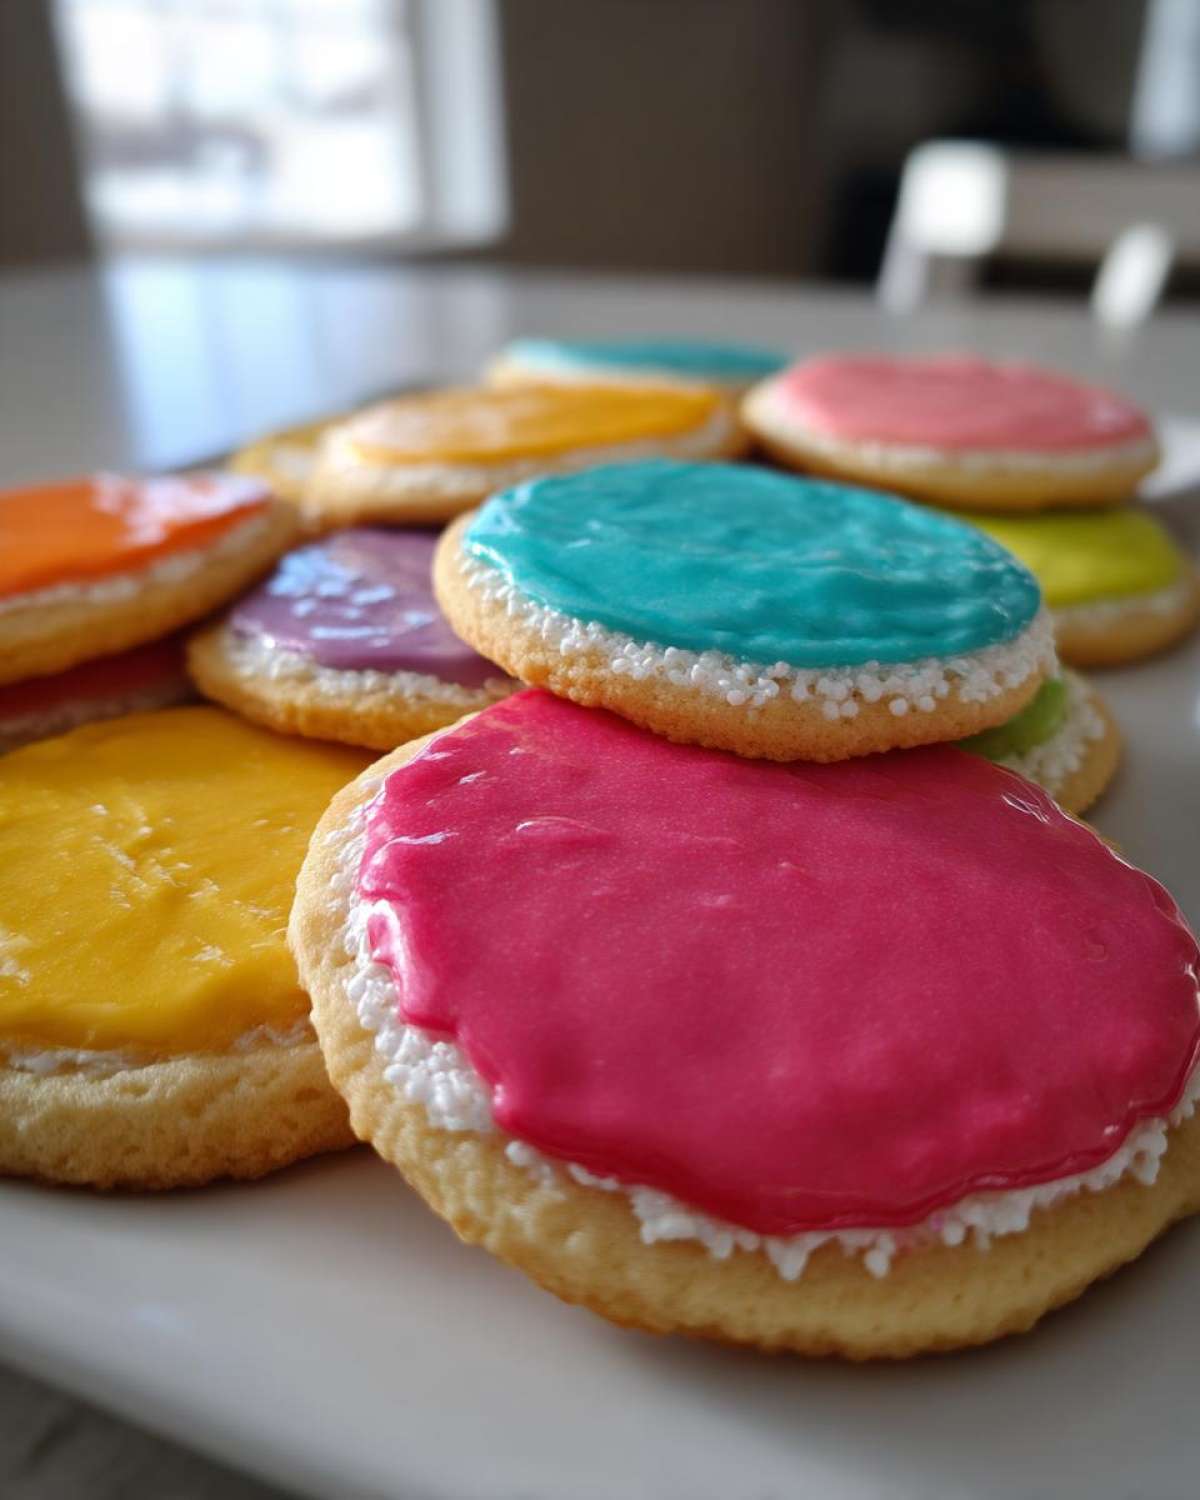
- Super Glossy Finish: Forget dull, chalky frosting. This gives you that smooth, shiny cookie icing look that makes people ask who decorated them.
- Super Easy to Mix: If you can measure, you can make this. It comes together in about ten minutes flat, giving you heaps of time left for the fun part—coloring and decorating.
- Perfect for Cut-Outs: Whether you’re making simple shapes or detailed holiday designs, this icing holds its form beautifully.
Ingredients for Foolproof Glossy sugar cookie icing
Okay, ingredient quality matters here, but honestly, the list is shockingly short! We aren’t messing around with cracked egg whites that can cause food safety scares; we are using meringue powder. Trust me, meringue powder is your new best friend for that hard, stable finish, and it keeps things clean.
You’ll need:
- 4 cups powdered sugar, sifted (Please, please sift it! It saves you from tiny lumps later.)
- 1/2 cup meringue powder (This is the backbone that lets the icing dry firm.)
- 1/2 cup warm water (Not hot, just nicely warm to help everything dissolve.)
- 1 teaspoon clear vanilla extract (I specify clear because we want the pure white base color, not that slightly beige tint regular vanilla sometimes leaves.)
- 1 tablespoon light corn syrup (This is the secret sauce for that incredible shine. Don’t skip the corn syrup in a hard setting icing for sugar cookies—it makes all the difference to the gloss!)
That’s it! Four cups of sugar mixed with these other players creates enough cutout cookie topping recipe to cover a couple of dozen cookies beautifully. See? Authority building through simplicity!
Step-by-Step Instructions for Perfect sugar cookie icing
This is where the magic happens! Don’t rush these steps, especially the mixing time. If you want that professional, hard-setting icing for sugar cookies, you need to give your mixer time to work its wonders. But even with a stand mixer, this whole batch comes together in about ten minutes.
Mixing the Base sugar cookie icing
First things first, get your dry crew combined. In a nice big bowl—you need room for this to fluff up—whisk that sifted powdered sugar together with your meringue powder. Make sure they are totally homogenous before the liquid goes in. Once they are happy together, add in the warm water slowly while you mix everything on low speed. You are just trying to bring it together into a thick, somewhat sticky paste at this stage. Don’t go fast yet!
Achieving the Glossy sugar cookie icing Texture
Now, this is your moment to build that beautiful shine. Ramp that mixer up to medium-high speed. Toss in your clear vanilla extract and, most importantly, the light corn syrup. The corn syrup is what gives you that super satisfying sheen. You need to beat this for a full five to seven minutes, no less! When it’s right, it won’t look pale and matte anymore. It’ll be whipping into an incredibly smooth and glossy smooth shiny cookie icing. If you stop early, it’ll look dull, so stick with it!
Adjusting Consistency for Piping and Flooding
This one bowl is going to make two kinds of icing for you, so we have to talk consistency! If you’re doing borders or writing details, you want it stiff enough to hold its shape right off the whisk—that’s a stiff peak. This is great for outlining your shapes first. But for filling in the middle (the “flood” stage), you need it thinner.
To get the flood consistency right, add water just one teaspoon at a time until you can lift your whisk and the icing that drips back into the bowl disappears smoothly in about ten seconds. That ten-second rule is key for the best flood consistency icing! Once you’ve got it perfect, divide it up, color it if you want, and don’t forget to press plastic wrap right onto the surface so it doesn’t form that dreadful crust.
Tips for Success with Your sugar cookie icing
Baking is forgiving, but decorating can be finicky! Since this is a high-sugar, fast-setting sugar cookie icing, you need to be ready to troubleshoot on the fly. My biggest piece of advice is to trust the corn syrup. I know it seems weird in icing, but it’s absolutely necessary if you want that glass-like shine and that firm set. If you try to leave it out, you’ll end up with a dull, soft crust, and nobody wants that!
If you’re working away and notice your piping icing is getting tighter and harder to squeeze out of the bag—which happens as the air dries the surface—don’t panic! Just stir in a few drops of plain water until it loosens back up to where you need it. Conversely, if your flood consistency starts looking too watery or bleeding over the edges of your cookies, quickly whisk in just a tablespoon of sifted powdered sugar until it stiffens up slightly.

Here’s my little pro trick for when you’re coloring batches for a big holiday project: Don’t just put a lid on the bowl when you switch colors. Take a small piece of plastic wrap and press it directly onto the surface of the icing in that bowl. This keeps air from hitting it, and I promise, when you come back to that deep red or royal blue icing half an hour later, it’ll be just as smooth as when you mixed it.
Decorating Techniques Using This sugar cookie icing
Once you have your colors mixed, the fun really starts, and understanding consistency is everything! Remember how we talked about texture adjustments? That’s because you need two main types of icing finish for professional-looking cookies.
For outlining—that’s drawing the edges of your design—you need the stiff consistency we discussed earlier, the one that holds a stiff peak. This acts like a dam, keeping your inner color contained. You can actually use this stiff glossy cookie icing tutorial for neat lettering too, especially if you keep the tip of your piping bag small!
Then you have the flood consistency, which is runnier (the ten-second rule). You use this to carefully fill in the area inside your outline. Since we used meringue powder and corn syrup, this thinner icing still flows beautifully and dries incredibly smooth. It’s perfect for intricate designs because when it levels out, it creates that stunning, tight, shiny surface every time.
Storage and Reheating Your sugar cookie icing
So, what happens if you mix up a giant batch of this amazing sugar cookie icing and you don’t use it all right away? Don’t you dare toss it! Because we used meringue powder instead of raw eggs, this icing is much more stable.
You can certainly keep any leftover colored icing airtight at room temperature for up to three days. Keep that plastic wrap pressed right onto the surface, just like I mentioned—that’s your insurance policy against a crust forming. When you pull it out later, it might look a little stiff or deflated. That’s totally normal!

Just stir it gently with a spoon or spatula until it comes back together. If you used a lot of color, you might need to add just one or two drops of water to get that perfect flow back, but that’s usually all it takes. Seriously, reviving stiff icing is so easy with this recipe, which is another reason I love it so much!
Common Questions About sugar cookie icing (FAQ)
How long does this sugar cookie icing take to dry completely?
This is the million-dollar question, right? Because we are aiming for a hard-setting icing that lets you stack your creations, it needs time. If you just let them sit out on a rack, you’ll usually find the surface is dry enough to touch within about four to six hours, especially in low humidity. However, if you want to pack them tightly into a container or move them around, give them a full overnight rest. That guarantees they are firm enough for safe travel and stacking! This is where the corn syrup and meringue powder really earn their keep.
Can I substitute the meringue powder in this sugar cookie icing recipe?
You technically *can* swap it out for real egg whites, but honestly, I wouldn’t recommend it for this recipe, especially for beginners looking for that “foolproof” result. Meringue powder gives you such a consistent, clean, shelf-stable base. If you use raw egg whites, you have to worry about temperature and potential bacteria risks, plus the texture can vary wildly depending on the size of the egg. Meringue powder just mixes up the same dense, stable, glossy texture every single time. For the best royal icing alternative, stick to the powder!
Is this thick sugar cookie glaze recipe suitable for writing fine details?
Yes, absolutely! But here’s the trick: you have to separate your batch before you add that very last bit of water. The icing right after the 5–7 minute whip (before you thin it for flooding) is actually a thick piping consistency. If you put that straight into a piping bag fitted with a small tip, it will hold the sharp lines you draw—perfect for outlining cookies or writing a little “Happy Birthday.” If you thin it down too much, it will act like a thick sugar cookie glaze recipe that runs everywhere, which is great for flooding but useless for fine writing!
Estimated Nutritional Data for sugar cookie icing
Okay, let’s talk numbers for a second. Whenever I share a recipe this sweet—and trust me, this is pure sugar magic—I always want to be transparent about what’s going into the cookies. Since this is just the icing itself and not the whole cookie, the numbers are pretty high on the sugar front, which is expected for this type of shiny frosting!
Keep in mind, this is just a guideline and these figures are estimates based on the exact ingredients listed above:
- Serving Size: About 1/4 cup of icing
- Calories: Roughly 420 per serving
- Sugar: 105 grams (Whew! Told you it was sweet!)
- Fat: 0 grams (Yes, zero! Since we aren’t using butter here, it keeps the fat content low.)
- Protein: About 2 grams
- Sodium: Very low, around 15mg
Now, before you stress about that sugar count, remember you use this sparingly! Icing is like the jewelry for your cookie—a little goes a long way. And because this recipe makes enough to cover about two dozen medium cookies, you likely won’t eat a quarter cup of just icing in one go. This information is just to give you a full picture of what you are working with when you make this fantastic glossy cookie icing tutorial batch.
Also, as a little note of trust between us bakers: these values are calculated based on standard averages for powdered sugar and corn syrup. If you use a different brand of meringue powder, the exact values might shift slightly, but this gives you a really solid baseline estimate!
Ready to Decorate Your Next Batch of Cookies?
Now you have the master key to beautiful, hard-setting, gloriously shiny sugar cookie icing! Seriously, go try this batch right now. Even if you’re just making a small test batch of white icing, paying attention to those mixing times and that ten-second flood rule will change your decorating game forever.
I’m so excited to see what you create! Whether you’re tackling intricate holiday designs or just making a few colorful squares for the kiddos, snap a picture and tag me or tell me all about it in the comments below. Did the corn syrup really make a difference in your shine? Did you find the perfect color combo? Let me know what questions you still have about getting that icing that dries firm for stacking!
Print
Foolproof Glossy Sugar Cookie Icing That Dries Hard
- Total Time: 10 min
- Yield: Covers approximately 2 dozen medium cookies
- Diet: Vegetarian
Description
Make a simple, glossy sugar cookie icing that sets firm, perfect for detailed decorating and stacking cut-out cookies. This recipe uses corn syrup for a smooth finish.
Ingredients
- 4 cups powdered sugar, sifted
- 1/2 cup meringue powder
- 1/2 cup warm water
- 1 teaspoon clear vanilla extract
- 1 tablespoon light corn syrup
Instructions
- In a large bowl, whisk together the sifted powdered sugar and meringue powder until combined.
- Slowly add the warm water while mixing on low speed with an electric mixer until the mixture forms a thick paste.
- Add the clear vanilla extract and light corn syrup. Beat on medium-high speed for 5 to 7 minutes until the icing is very smooth and glossy.
- Check the consistency. For piping details (outline icing), the icing should hold a stiff peak. For flooding, add water one teaspoon at a time until the icing flows smoothly off the whisk and the trail disappears into the bowl within 10 seconds.
- Divide the icing into bowls for coloring, if desired. Cover bowls with plastic wrap pressed directly onto the surface of the icing to prevent drying.
- Use immediately to decorate cookies. Allow cookies to dry completely (several hours or overnight) before stacking or handling intricate designs.
Notes
- For a hard, shiny finish, the corn syrup is necessary. Do not substitute it.
- If the icing becomes too thick while decorating, stir in a few drops of water. If it is too thin, mix in a tablespoon of sifted powdered sugar.
- Store unused icing in an airtight container at room temperature for up to three days; stir well before reuse.
- Prep Time: 10 min
- Cook Time: 0 min
- Category: Baking Component
- Method: Mixing
- Cuisine: American
Nutrition
- Serving Size: 1/4 cup
- Calories: 420
- Sugar: 105
- Sodium: 15
- Fat: 0
- Saturated Fat: 0
- Unsaturated Fat: 0
- Trans Fat: 0
- Carbohydrates: 107
- Fiber: 0
- Protein: 2
- Cholesterol: 0
Comments are closed.