

You know that moment, right? You’re watching TV, or maybe you’re just scrolling through pictures of food, and suddenly, one craving hits you like a ton of bricks: soft, pillowy, restaurant-style Breadsticks dripping with garlic butter. I used to just cave and order takeout, but honestly, those store-bought ones never cut it—they’re usually too crunchy or just taste like plain bread!
Trust me when I say mastering the *Soft Garlic Butter Breadsticks* recipe was a journey. I must have killed three packets of yeast before I figured out that sweet spot for the water temperature. That yeast activation step is absolutely everything for making sure these come out fluffy, not dense little dough logs. Once I nailed that, and then hit the right balance with that garlicky glaze, I knew I had something seriously special to share.
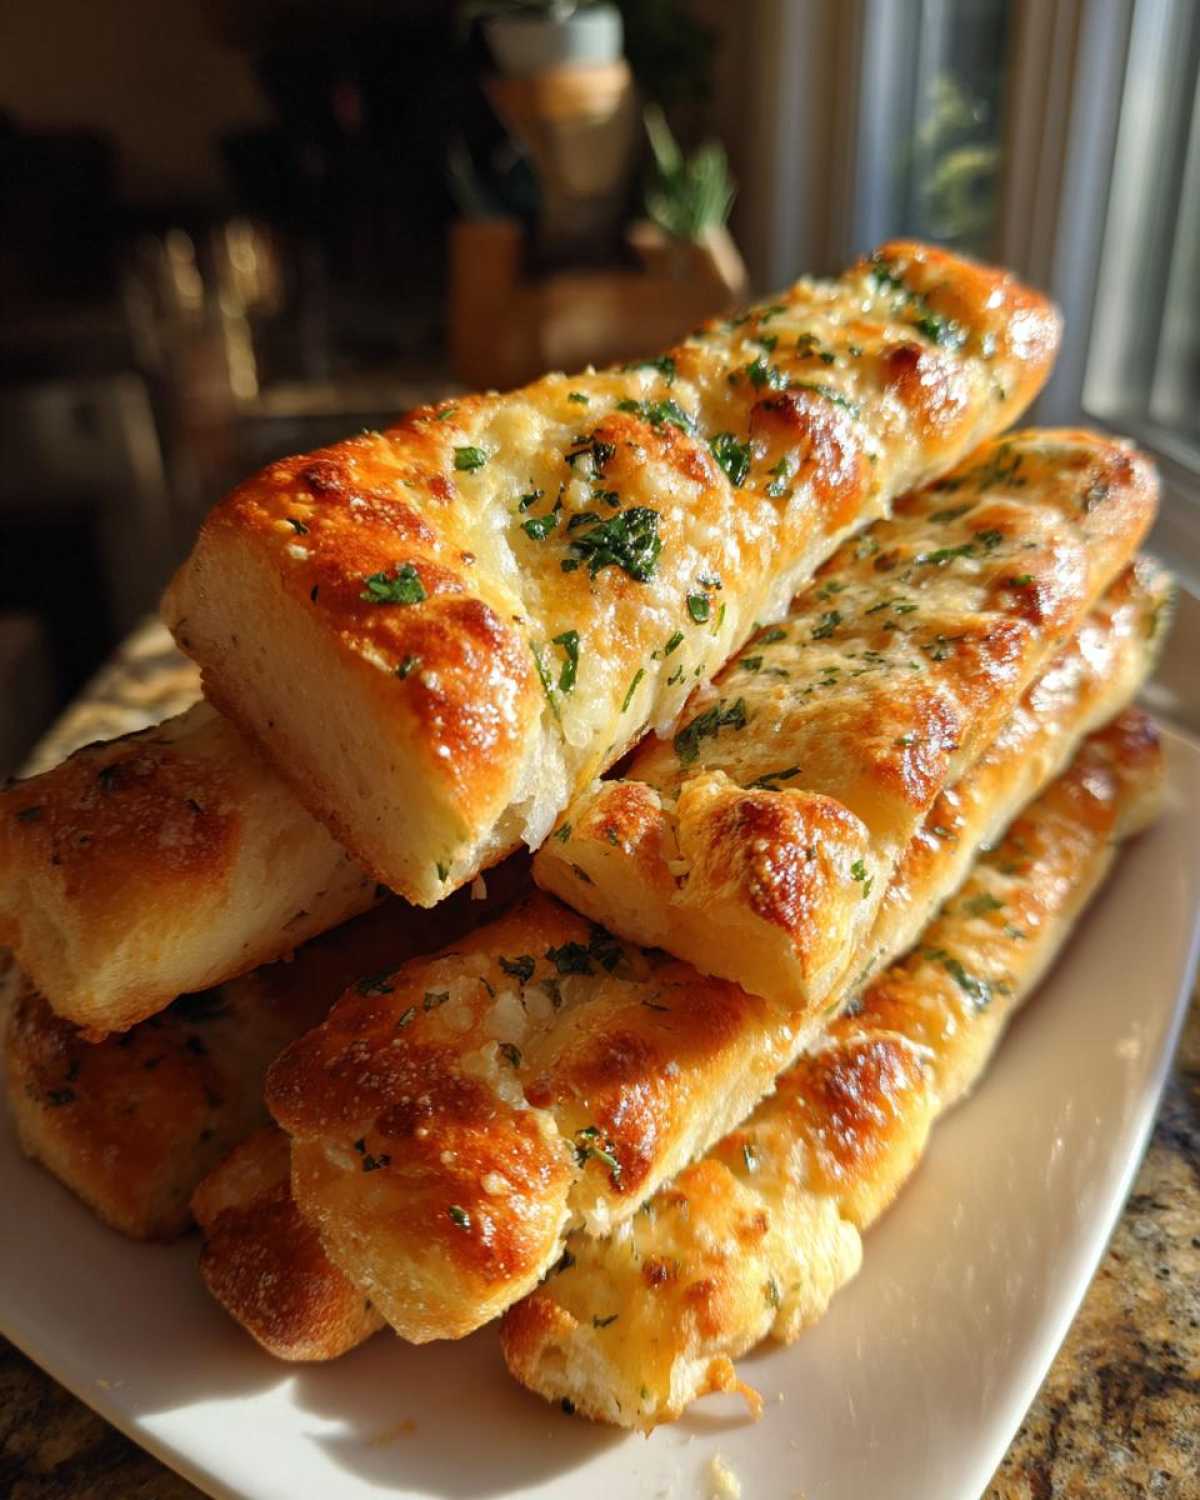
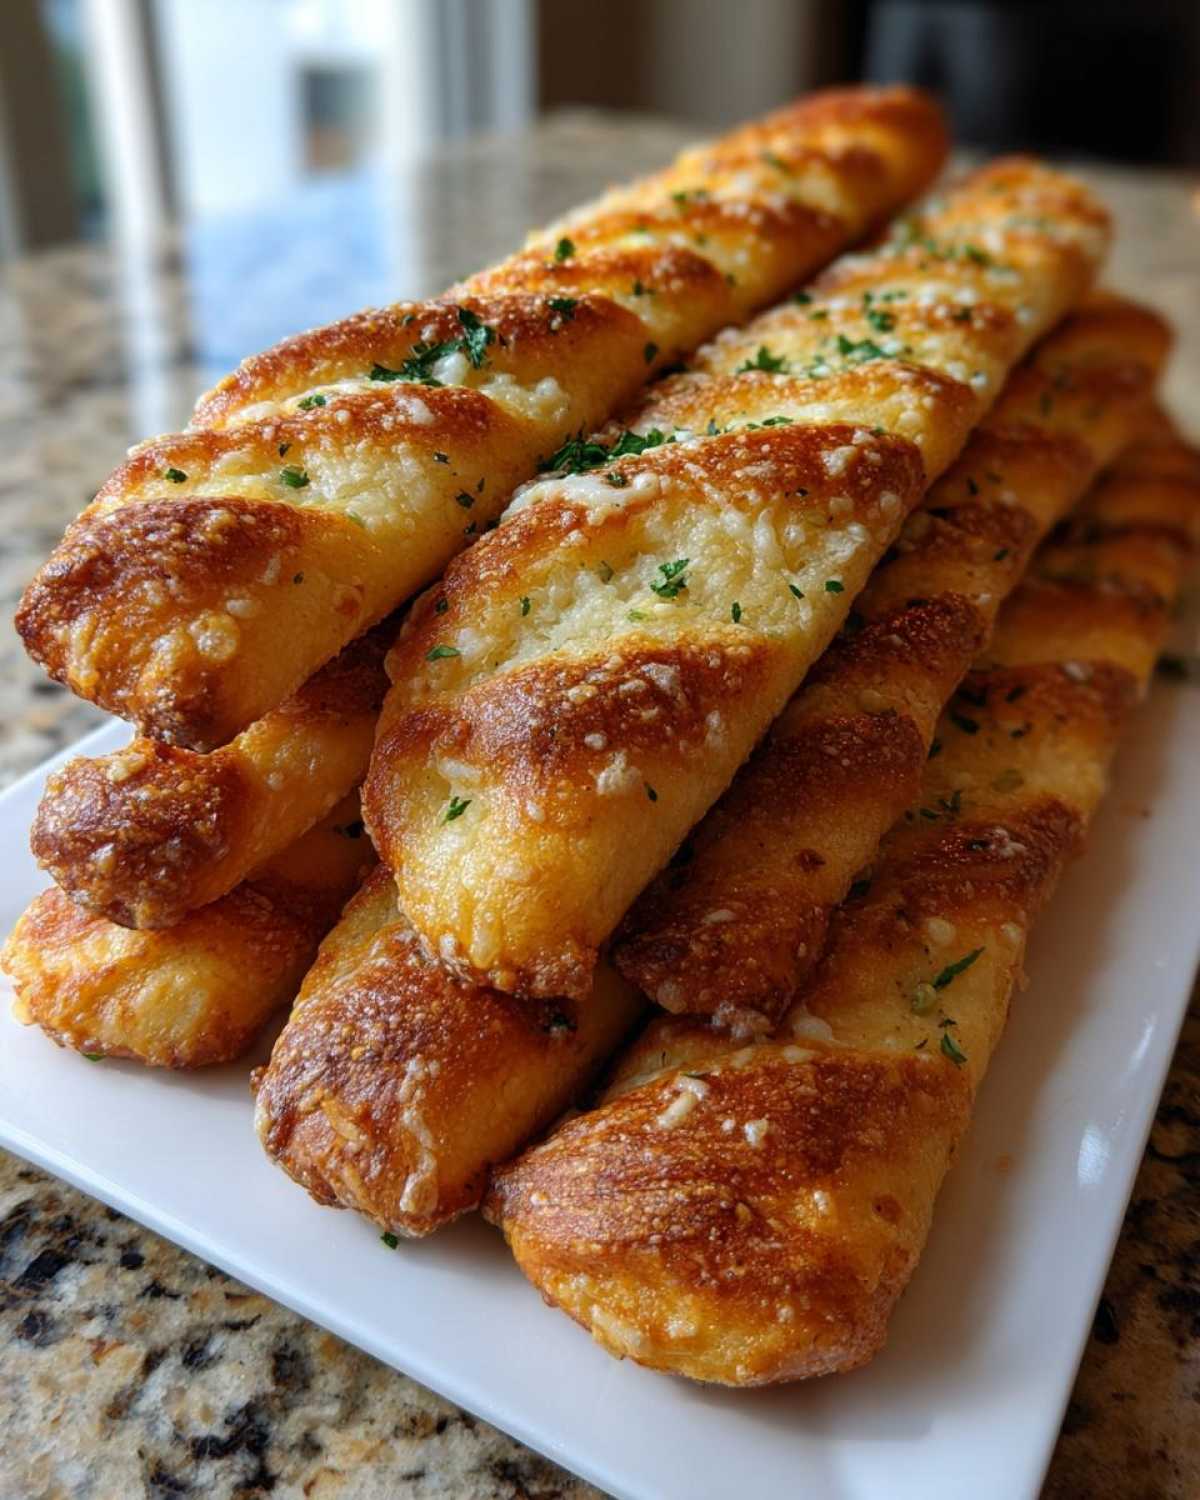
This recipe is all about the texture—it’s fluffy, it’s tender, and the outside gets that perfect, rich coating of melted butter, garlic, and just a hint of parsley. If you’re looking for the ultimate appetizer that disappears the second you put it on the table, stick with me. We’re going to make the best breadsticks you’ve ever had right in your own kitchen. If you want to see a version that’s extremely similar, check out my thoughts on the Copycat Olive Garden Breadsticks Recipe!
Why You Will Love These Soft Garlic Butter Breadsticks
There are lots of recipes out there, but these *Breadsticks* hit differently. I promise these will be your go-to appetizer from now on. Seriously, why would you ever settle for store-bought again?
- Incredible Texture: They aren’t tough or dry! We manage a texture that is genuinely soft and fluffy inside, thanks to a good, patient rise.
- That Garlic Butter Factor: The glaze is intense. It’s rich, garlicky, and melts perfectly into every crevice right out of the oven.
- Easy to Make From Scratch: Even if you’re nervous about yeast, this dough is forgiving. It’s our best soft breadsticks recipe for beginners!
- Perfect Appetizer: They bake up quickly once the dough is proved, making them ideal for last-minute guests or game night snacking.
Essential Ingredients for Perfect Homemade Breadsticks Recipe
You don’t need a ton of fancy stuff for this, which I love! It’s mostly pantry staples, but we need to be precise about a few things if we want those heavenly soft results. If you’re grabbing ingredients, make sure your yeast is fresh. I cannot stress this enough for homemade *Breadsticks*! Dead yeast means flat breadsticks, sad face.
We have two main groups here: the dough ingredients and the glaze ingredients. Grab everything before you start because once that yeast is activated, things move pretty fast!
- For the Dough: We need 1 cup of warm water. Now, the temp is crucial—it has to be between 105–115°F. If it’s too cold, the yeast won’t wake up. Too hot, and you’ve cooked it!
- Active dry yeast (2 1/4 teaspoons) and 1 teaspoon of sugar to feed that yeast.
- Flour (about 2 3/4 cups of all-purpose flour) and 1 1/2 teaspoons of salt for flavor.
- Just a splash of olive oil (2 tablespoons) goes into the main mix to help with texture later on.
For the part that makes these truly amazing—the glaze—you’ll want:
- Half a cup of unsalted butter, melted down completely.
- Two cloves of garlic that you’ve minced yourself. Don’t use the pre-minced stuff in the jar; it’s too harsh!
- One teaspoon of dried parsley for that pretty green fleck.
- And if you want to go full cheese-bomb mode, 1/4 cup of grated Parmesan cheese to sprinkle on top when they are glistening.
If you want to read more about making bread from scratch, I have a great guide on Easy Homemade Breadsticks Recipe if you’re sticking to the basic dough!
Step-by-Step Garlic Breadsticks Tutorial: From Dough to Glaze
This is where the magic starts! Don’t rush through the dough steps, because that first rise is what gives us that fluffy, melt-in-your-mouth texture we’re aiming for in these *Breadsticks*. We’re going all the way from wet ingredients to that beautiful garlic butter finish in a few key stages.
Activating the Yeast and Mixing the Dough
First things first: we wake up the yeast! In a big bowl, gently mix your warm water—remember, 105 to 115 degrees—with the yeast and the sugar. You have to wait about five to ten minutes until it looks foamy on top. If nothing happens, toss it and start over with warmer water! Once it’s frothy, toss in your flour, salt, and the 2 tablespoons of olive oil. Mix it up until it just starts coming together into a shaggy ball. It won’t be pretty yet, I promise.
Kneading and Rising the Breadstick Dough
Now, turn that messy thing out onto a lightly floured surface. This is the workout part! You need to knead it for a solid five to seven minutes. I always tell people, keep kneading until the dough stops feeling sticky and starts feeling smooth and elastic, like a good balloon. That’s your gluten developing, which is what makes these incredible fluffy breadsticks so light!
Once it’s all smooth, lightly grease a clean bowl, toss the dough in there, and turn it once so it’s coated in oil. Cover it up tightly. Now, you wait. You need to let this dough hang out in a warm spot for an hour to an hour and a half. It needs to double in size—you’ll know it’s ready when it looks puffy and pillows up over the side of the bowl. Patience, my friends!
Shaping, Proofing, and Baking Your Breadsticks
While the oven is warming up to 400°F (which you need to do while the dough is finishing its rise!), take that beautiful dough and gently punch the air out. Cut it into 12 equal pieces. I like to roll mine into sticks about 8 to 10 inches long—it gives you that iconic look. Lay them out on a baking sheet lined with parchment paper, leaving a little space between them. Give them 15 minutes to rest again before they go into the heat. Bake them for just 12 to 15 minutes until they hit that perfect light golden brown color. Don’t walk away; these bake fast!
If you want to dive deeper into making the dough, take a look at my guide on Easy Breadsticks from Scratch for extra guidance!
The Signature Garlic Butter Glaze for Breadsticks
This is the grand finale! While those breadsticks are baking, melt down that half-cup of butter. Mix in your freshly minced garlic and that teaspoon of dried parsley right into the melted butter. The second they come out of the oven—and I mean immediately—brush that garlic butter mixture all over them. Really load it on! If you want that extra savory punch, sprinkle the Parmesan cheese over the top while the butter is still hot so it adheres. Serve them instantly while they are sizzling!
Tips for Achieving the Best Soft Breadsticks Texture
Okay, we’ve covered the basics, but the difference between good *Breadsticks* and mind-blowing ones always comes down to a few tiny details that pro bakers know. If you followed the steps, you’re probably already close, but here are my secrets for that pillowy softness.
First, don’t just scoop your flour out of the bag with the measuring cup! That compacts it, and you end up adding way too much flour to the dough, which guarantees a tougher stick. Always use the spoon-and-level method for measuring, or even better, use a kitchen scale if you have one.
Second, don’t over-knead past that smooth stage. Once the dough feels elastic, stop. Overworking the gluten at the end stages makes them springy rather than tender. For maximum fluffiness, make sure your rising environment is warm—a turned-off oven with the light on works wonders to give your dough the best start.
Also, make sure you use the full time for the second rise, even though it seems short. That 15-minute rest right before they hit the hot oven lets the shaped dough relax. This prevents them from snapping back and keeps them wonderfully soft. If you want more insight into fluffy doughs in general, check out how I handle Soft Fluffy Garlic Naan Bread; the principles overlap!
Variations: Beyond Classic Garlic Breadsticks
While I stand by this garlic butter version as the absolute best way to enjoy homemade *Breadsticks*, sometimes you just need to change things up! The beauty of this quick breadstick dough is how wonderfully it accepts new toppings and flavors. You need variety for game day, right?
My favorite tweak is turning these into a full-on cheesy experience. We already talked about sprinkling Parmesan on top, but for that full Cheesy Breadsticks Recipe experience, try this:
- Mozzarella & Herb: After you brush on the garlic butter, sprinkle a layer of low-moisture mozzarella cheese over the tops before baking. It melts into this gorgeous, bubbly blanket. When they come out, give them a quick hit of garlic butter again, but skip the Parmesan topping so it doesn’t burn.
- Spicy Kick: If your family likes a little heat, add 1/2 teaspoon of crushed red pepper flakes right into your melted butter mixture for the glaze. It gives them a nice little warmth that cuts right through the richness of the butter.
- Cinnamon Sugar Treat: Okay, totally different direction, but hear me out for dessert! Skip the garlic butter entirely. Instead, mix 1/2 cup sugar with 1 tablespoon of ground cinnamon. Brush the baked breadsticks lightly with melted plain butter and toss them gently in the sugar mix. They become amazing sweet breadsticks!
See? It’s so easy to adapt the base dough for whatever mood strikes. You don’t need a whole new recipe; just switch up that glorious coating!
Serving Suggestions and Breadsticks Dipping Sauces
Having perfectly soft garlic *Breadsticks* is amazing on its own, but let’s be honest—they really reach their peak when they have something glorious to dive into. These are the perfect savory appetizer, and the dipping sauce lineup is endless.
First, you absolutely must have a good marinara sauce ready to go. It’s the classic pairing, and the bright tomato flavor is perfect against all that earthy garlic butter. If you’re feeling fancy, you can whip up my amazing rich Homemade Alfredo Sauce. It makes these breadsticks feel incredibly indulgent!
Personally, my favorite way to serve them—especially if I make the cheesy variation—is with a warm, slightly spicy queso dip. It’s so easy to make, and dipping those soft sticks into thick cheese sauce is just pure comfort food. Have a few sauce options out, and watch your guests abandon everything else on the table!
Storage and Reheating Instructions for Leftover Breadsticks
The eternal struggle: you made too many incredible garlic butter *Breadsticks*, and now you have to figure out how to keep them tasting fresh the next day. If you’re lucky enough to have any left over, don’t worry about them going stale overnight!
The key to keeping bread fresh is controlling air exposure. You really don’t want to put these in the fridge. I know that sounds counterintuitive sometimes, but I’ve learned the hard way that cold air actually dries out the bread faster. Just store them tightly wrapped in plastic wrap or tucked into a sturdy, airtight container at room temperature. Honestly, they are usually fine like this for about two days.
Now, reheating them is where you bring them back to life! Forget the microwave; that just makes them chewy and rubbery. The best method is always the oven. You want that quick blast of dry heat to wake up the internal texture.
Wrap the breadsticks loosely in foil—just enough to trap a little steam but not too much—and pop them into a moderate oven, maybe 300°F, for about five to seven minutes. They’ll warm right through, and when you pull them out, the inside will be soft again, and the garlic butter coating will feel fresh. If you didn’t use all the garlic butter glaze, you can brush a tiny extra bit on before reheating for maximum flavor!
Frequently Asked Questions About Making Breadsticks
I get so many messages asking for clarifications on tricky spots, and honestly, it’s usually the yeast or the texture that trips people up first. If you’re working with this dough for the first time, here are the things I always get asked about when people are trying to make the **Best Soft Breadsticks**!
Can I just use cold water when I activate the yeast?
Oh, honey, please don’t! If you use cold water, the yeast just wakes up really grumpy and slow, and your dough won’t rise properly. You need that warm water between 105 and 115°F—think bathwater temperature, not scorching hot. If it doesn’t foam up after ten minutes, it means your yeast is dead (or the water was too hot), and you need to start over. That initial, foamy proofing is our insurance policy for fluffy **Breadsticks**!
Can I skip the first long rise and just bake them?
You technically *can*, but you really shouldn’t if you want that amazing texture. Skipping the first rise is what turns these into dense rolls instead of soft, fluffy sticks. That long rest is where the yeast develops the air pockets that make them light. You can try my guide on Quick Breadstick Dough if you’re super pressed for time, but for *this* recipe, that hour and a half is non-negotiable for true softness.
My dough keeps sticking to my hands while kneading. What am I doing wrong?
That usually means it’s a little too wet, which often happens because we measured the flour incorrectly! Remember I said to spoon and level your flour? If you just dipped your cup right into the bag, you added too much flour, making the dough sticky. If it’s just slightly sticky during kneading, add a tiny, tiny sprinkle of flour to the surface, but don’t add too much, or you’ll lose that tender crumb. If you’re struggling to get the kneading right, work on a slightly floured surface and oil your hands a little bit.
Can I use milk instead of water for this Homemade Breadsticks Recipe?
You absolutely can! Replacing the water with milk is a fantastic tip for achieving a slightly richer flavor and an even softer crumb. Milk has fat and proteins that tenderize the dough beautifully. Just make sure the milk is warmed to the right temperature (105–115°F) just like the water would be. It’s a simple swap that really elevates the final product!
Estimated Nutritional Data for Homemade Breadsticks Recipe
Look, I’m a cook, not a nutritionist, so please take these numbers with a grain of salt—or maybe a grain of flaky sea salt sprinkled on top! But since so many of you ask about the macros when you’re making a batch of these addictive garlic butter *Breadsticks*, I pulled the general estimates for you based on the ingredients list.
Remember, your final numbers are going to change based on how much butter you brush on (and let’s be real, I use more than the recipe calls for!) and whether or not you skip that optional Parmesan cheese. These estimates are based on 12 breadsticks, lightly coated in the glaze.
- Serving Size: 1 breadstick
- Calories: 180
- Fat: 7g (Watch that Saturated Fat at 4g!)
- Carbohydrates: 26g
- Protein: 4g
- Sugar: 1g
- Fiber: 1g
- Sodium: 350mg
- Cholesterol: 15mg
There you have it! They’re totally worth the calories, especially when you consider they are made with whole ingredients and no weird preservatives. But seriously, because the amount of butter glaze can really sway the final count, treat this as a friendly guideline rather than a strict label!
Print
Soft Garlic Butter Breadsticks
- Total Time: 1 hour 50 min
- Yield: 12 breadsticks
- Diet: Vegetarian
Description
A recipe for making soft, fluffy breadsticks coated in a rich garlic butter glaze, similar to popular restaurant versions.
Ingredients
- 1 cup warm water (105-115°F)
- 2 1/4 teaspoons active dry yeast
- 1 teaspoon granulated sugar
- 2 3/4 cups all-purpose flour, plus more for dusting
- 1 1/2 teaspoons salt
- 2 tablespoons olive oil, plus more for greasing
- 1/2 cup (1 stick) unsalted butter, melted
- 2 cloves garlic, minced
- 1 teaspoon dried parsley
- 1/4 cup grated Parmesan cheese (optional)
Instructions
- Activate the yeast: In a large bowl, combine the warm water, yeast, and sugar. Let stand for 5 to 10 minutes until foamy.
- Mix the dough: Add the flour, salt, and 2 tablespoons of olive oil to the yeast mixture. Mix until a shaggy dough forms.
- Knead: Turn the dough out onto a lightly floured surface. Knead for 5 to 7 minutes until the dough is smooth and elastic.
- First rise: Lightly oil a clean bowl. Place the dough in the bowl, turning to coat. Cover the bowl with plastic wrap or a clean towel. Let the dough rise in a warm place for 1 to 1 1/2 hours, or until doubled in size.
- Shape the breadsticks: Preheat your oven to 400°F (200°C). Line a baking sheet with parchment paper. Punch down the risen dough gently. Divide the dough into 12 equal pieces. Roll each piece into a stick about 8 to 10 inches long. Place the sticks on the prepared baking sheet, leaving a little space between them.
- Second rise: Cover the shaped breadsticks loosely and let them rest for 15 minutes while the oven finishes preheating.
- Bake: Bake for 12 to 15 minutes, or until the breadsticks are lightly golden brown.
- Prepare the glaze: While the breadsticks bake, combine the melted butter, minced garlic, and dried parsley in a small bowl.
- Glaze and serve: Immediately after removing the breadsticks from the oven, brush them generously with the garlic butter mixture. Sprinkle with Parmesan cheese, if using. Serve warm.
Notes
- For extra soft breadsticks, ensure your water temperature is correct for activating the yeast. Too hot will kill the yeast.
- If you prefer a crispier exterior, bake them for a few minutes longer until they achieve a deeper golden color.
- Serve these breadsticks with marinara sauce or Alfredo sauce for dipping.
- Prep Time: 20 min
- Cook Time: 15 min
- Category: Appetizer
- Method: Baking
- Cuisine: American
Nutrition
- Serving Size: 1 breadstick
- Calories: 180
- Sugar: 1
- Sodium: 350
- Fat: 7
- Saturated Fat: 4
- Unsaturated Fat: 3
- Trans Fat: 0
- Carbohydrates: 26
- Fiber: 1
- Protein: 4
- Cholesterol: 15
Comments are closed.