

There’s something truly magical about a simple treat that bursts with flavor. That’s exactly what these homemade Oreo balls are! They’re a little bite of pure happiness. You know, sometimes the best desserts are the ones that don’t need a lot of fuss. My kitchen often fills with the sweet scent of these little gems. They remind me of cozy afternoons and happy gatherings. Making Oreo balls is an experience I love sharing with you. They’re so easy, even the little ones can help. And the taste? Absolutely divine!
Why You’ll Love These Easy Oreo Balls
These delightful little bites are a dream for any home cook. You’ll adore them because:
- They are completely no-bake!
- You can whip them up in a flash.
- They are a guaranteed hit at parties.
- They are incredibly simple to make.
- Everyone loves a good Oreo ball.
Lina’s Kitchen Secrets for Perfect Oreo Balls
Growing up in Italy, my grandmother taught me the beauty of simple ingredients. She’d say the best flavors come from the heart. That’s how I feel about these Oreo balls. They use just a few things, but the result is pure joy. I remember once making a batch for a neighborhood potluck. Everyone raved about them! It wasn’t about fancy techniques. It was about the love poured into them. These simple treats carry that same warmth. They are a little piece of my family’s tradition. I hope they bring that same comfort to your home.
Gathering Your Ingredients for Oreo Balls
To create these delightful Oreo balls, you’ll need just a few simple ingredients. Having everything ready makes the process so much smoother. I always lay out my ingredients before I start. It’s a little trick I learned long ago.
Here’s what you’ll need for your delicious Oreo balls:
- 24 Oreo cookies: Make sure they are crushed into very fine crumbs. You want them almost like flour.
- 1 package (8 ounces) cream cheese: It’s important that it’s softened. Let it sit on the counter for about an hour.
- 1 cup semi-sweet chocolate chips: These will coat your little balls in chocolatey goodness.
- 1 tablespoon vegetable shortening (optional): This helps the chocolate melt super smoothly. It’s a nice little helper for that glossy finish.
That’s it! Simple, right? These few items come together to make something truly special.
Step-by-Step Guide to Making Oreo Balls
Now for the fun part! Making these Oreo balls is a joy. It’s a straightforward process. Follow these steps for perfect results every time. I find that breaking it down makes it even easier.
Preparing the Oreo Ball Mixture
First, let’s get those Oreos ready. Crush them into fine crumbs. A food processor works wonders. Or, simply pop them into a zip-top bag. Use a rolling pin to crush them finely. You want a texture like sand. Next, in a bowl, combine the Oreo crumbs with your softened cream cheese. Mix it well. It should form a nice, cohesive dough. Then, roll this mixture into small balls. Aim for about one inch in diameter. Place them on a baking sheet. Line the sheet with parchment paper first. This stops them from sticking.
Chilling and Melting for Perfect Oreo Balls
Now, these little balls need to firm up. Pop the baking sheet into the refrigerator. Let them chill for at least 30 minutes. This makes them easier to handle. While they chill, melt your chocolate chips. You can add a touch of vegetable shortening here. It makes the chocolate extra smooth. Melt them in a microwave-safe bowl. Use short bursts of 30 seconds. Stir between each burst. Keep going until it’s smooth and glossy. A double boiler also works perfectly for this. Your melted chocolate should be pourable and lovely.
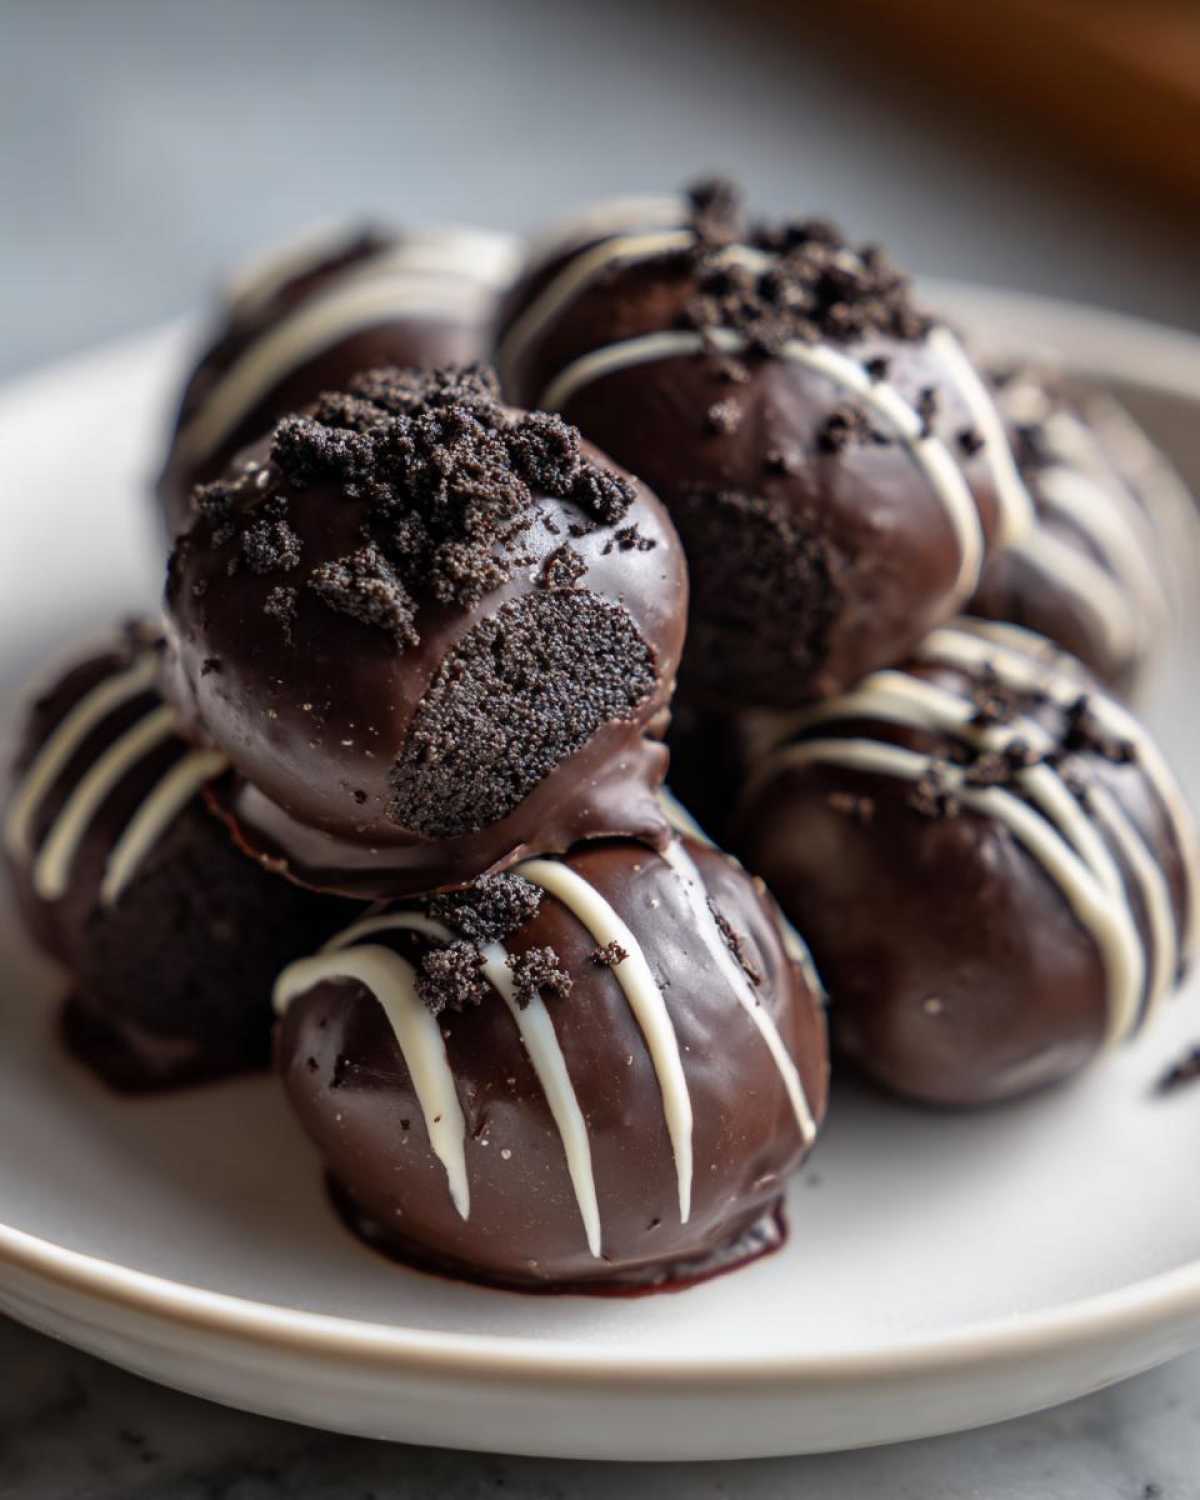
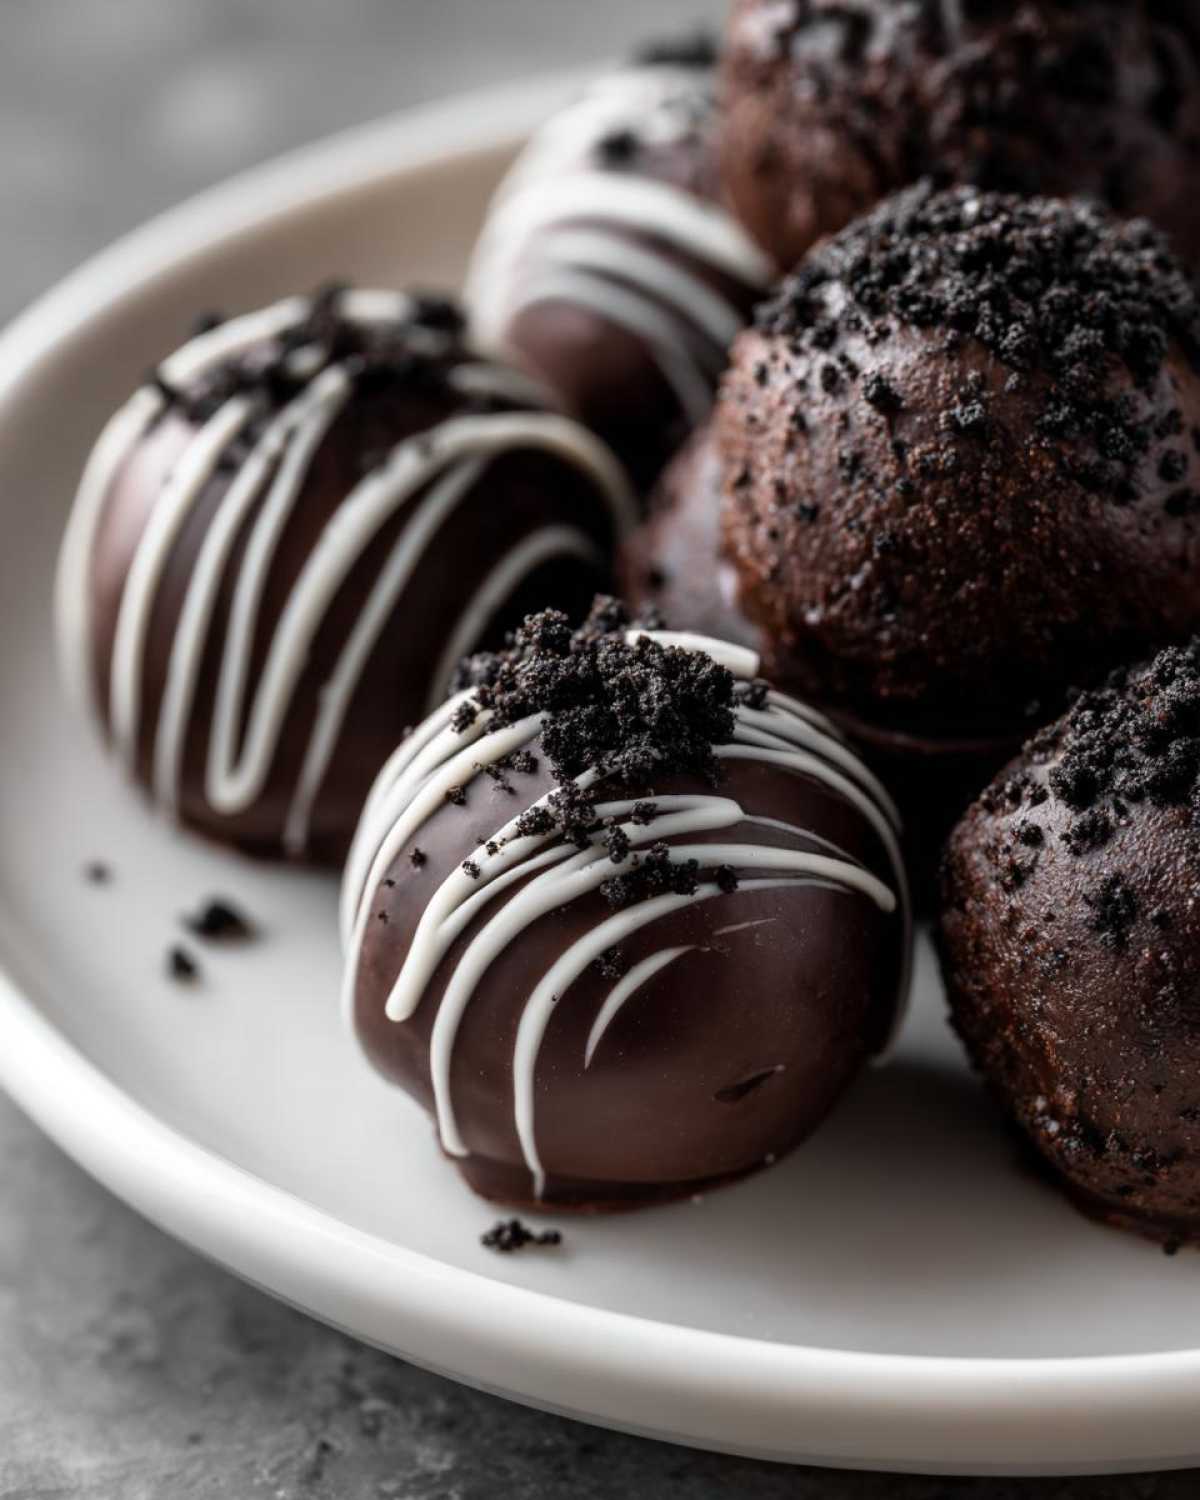
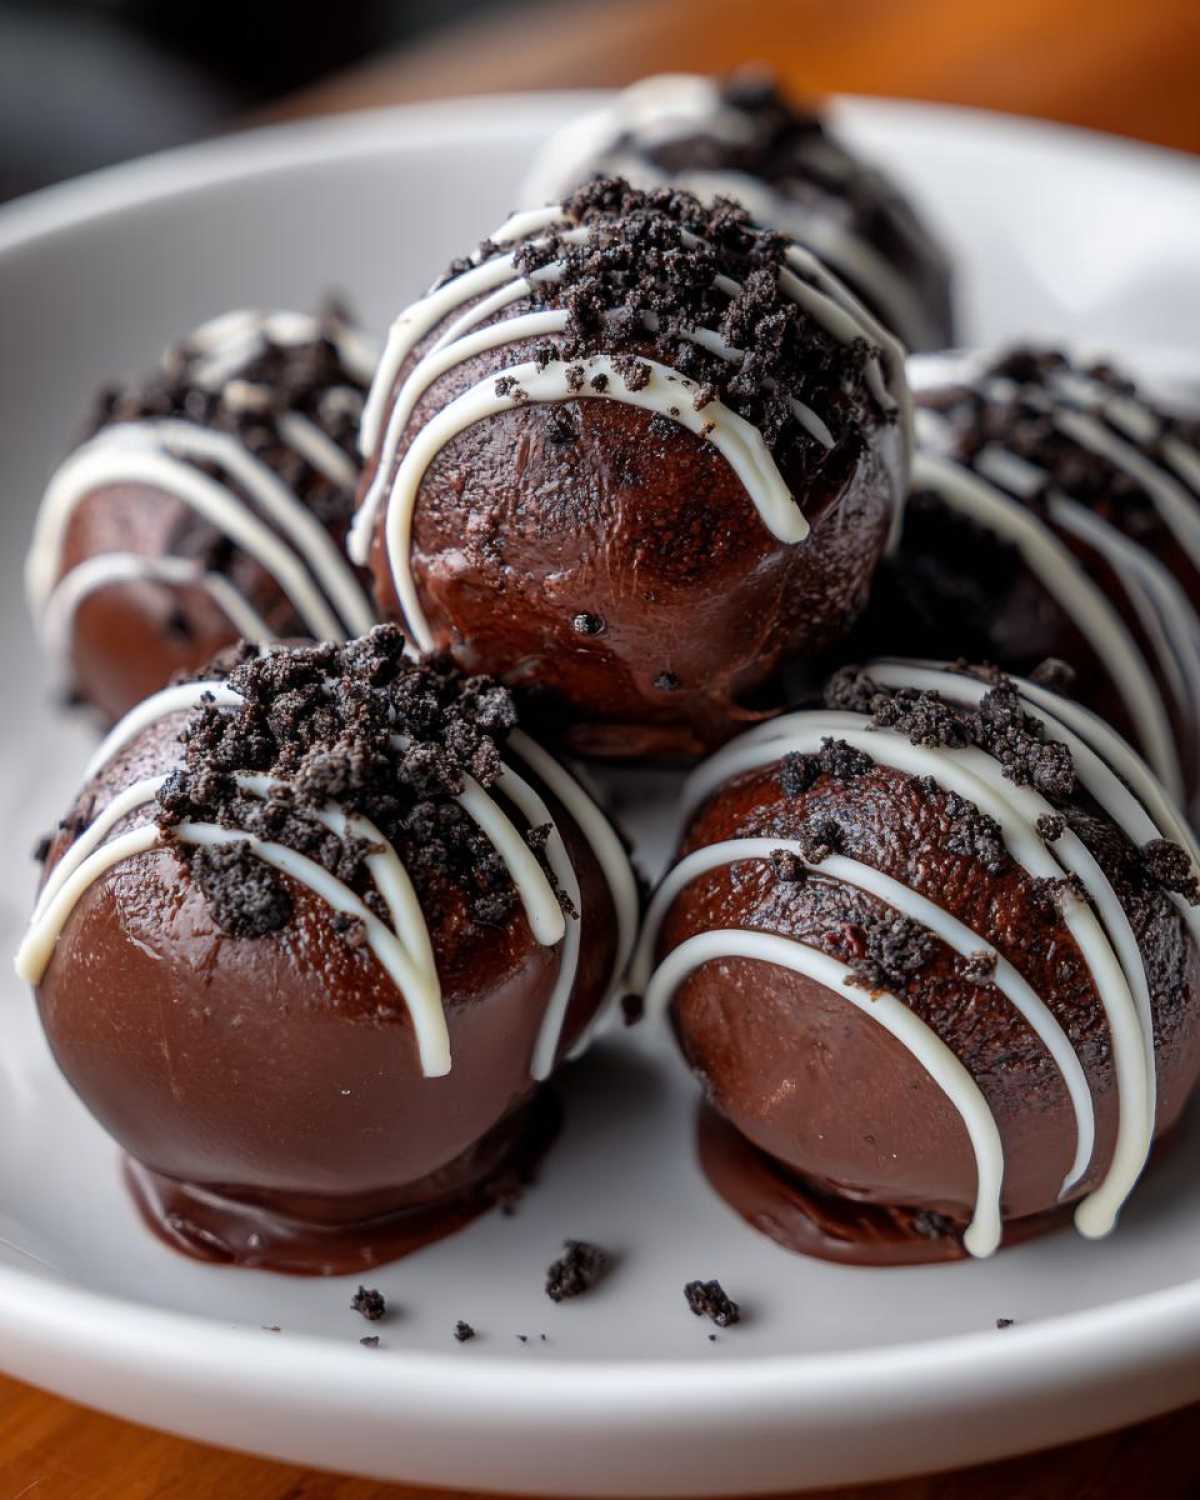
Coating and Setting Your Delightful Oreo Balls
With your balls chilled and chocolate melted, it’s time to coat them. Take one chilled Oreo ball at a time. Dip it into the melted chocolate. Use a fork or a toothpick. Make sure it’s completely covered. Let any extra chocolate drip off. Place the coated ball back onto the parchment-lined baking sheet. Repeat with all your balls. Once they are all dipped, put them back in the fridge. Chill them for another 15-20 minutes. This lets the chocolate set nicely. Then, your delicious Oreo balls are ready to enjoy!

Tips for the Best Oreo Balls Every Time
Want to guarantee your Oreo balls are a showstopper? I’ve picked up a few tricks over the years. These simple tips make all the difference. They help ensure your treats are perfectly formed and delicious. Following these will elevate your homemade Oreo balls.
Ingredient Notes and Substitutions for Oreo Balls
For an even richer flavor, try using double-stuffed Oreos. They add extra creaminess. If you like, a tiny splash of vanilla extract in the cream cheese mix is lovely. It adds a subtle, warm note. These little additions make your Oreo balls extra special. They are simple ways to boost the taste.
Variations to Elevate Your Oreo Balls
Ready to get creative with your Oreo balls? You can easily make them even more special! Try adding colorful sprinkles right after dipping them in chocolate. They add a fun pop! Or, melt some white chocolate chips separately. Drizzle this over the dark chocolate coating. It looks so pretty! You can also mix in some chopped nuts for a little crunch. These little touches make your homemade Oreo balls uniquely yours. They turn a simple treat into a work of art!
Serving and Storing Your Delicious Oreo Balls
Your beautiful Oreo balls are ready to be enjoyed! For the best flavor and texture, I like to serve them chilled. They are perfect as a small dessert after a meal. They also make a wonderful addition to a cookie platter. You can arrange them on a pretty plate. They look so inviting!
Got leftovers? No problem! Store any remaining Oreo balls in an airtight container. Keep them in the refrigerator. This keeps them fresh for up to a week. They are a great grab-and-go snack too. Just be sure they are in a container that seals well. This prevents them from drying out.
Frequently Asked Questions About Oreo Balls
Got questions about making these yummy Oreo balls? I’m happy to help! People often ask about the best way to get them just right. Here are some common queries and my best answers.
Can I use different types of Oreos?
Absolutely! While classic Oreos work great, feel free to experiment. Double-stuffed Oreos will give you a richer, creamier ball. Mint Oreos or peanut butter Oreos can also add exciting new flavors. Just crush them up the same way!
How do I get a smooth chocolate coating?
The key is to melt the chocolate slowly and evenly. Using a little vegetable shortening helps a lot. It makes the chocolate silkier. Make sure your bowl and utensils are completely dry, too. Water can make chocolate seize up. For more tips on chocolate tempering, you can check out King Arthur Baking’s guide.
Can I freeze Oreo balls?
Yes, you can freeze them! It’s a great way to have these treats on hand. Place the finished Oreo balls in a single layer on a baking sheet. Freeze until solid. Then, transfer them to an airtight container or freezer bag. They should last for about two months.
Why are my Oreo balls crumbly?
If the mixture is too crumbly, it might mean you didn’t use enough cream cheese. Or, the cream cheese wasn’t soft enough. Try adding a tiny bit more softened cream cheese. Mix it in until it holds together. Don’t overmix, though!
Nutritional Estimate for Oreo Balls
Please remember that the nutritional information for these delicious Oreo balls is an estimate. It can vary quite a bit. This depends on the specific ingredients and brands you use. For example, using double-stuffed Oreos will change the numbers. Always consider your own ingredients for the most accurate picture.
Print
Amazing 2-Ingredient Oreo Balls
- Total Time: 1 hour 10 minutes (including chilling)
- Yield: Approximately 24 balls
- Diet: Vegetarian
Description
Create delightful Oreo balls, a no-bake treat perfect for any occasion. These simple dessert bites are sure to impress!
Ingredients
- 24 Oreo cookies
- 1 package (8 ounces) cream cheese, softened
- 1 cup semi-sweet chocolate chips
- 1 tablespoon vegetable shortening (optional, for smoother melting)
Instructions
- Crush the Oreo cookies into fine crumbs. You can do this in a food processor or by placing them in a zip-top bag and crushing them with a rolling pin.
- In a medium bowl, mix the Oreo crumbs with the softened cream cheese until well combined.
- Roll the mixture into small balls, about 1 inch in diameter. Place them on a baking sheet lined with parchment paper.
- Chill the Oreo balls in the refrigerator for at least 30 minutes to firm up.
- Melt the chocolate chips with the vegetable shortening (if using) in a microwave-safe bowl in 30-second intervals, stirring in between, until smooth. Alternatively, melt them in a double boiler.
- Dip each chilled Oreo ball into the melted chocolate, ensuring it’s fully coated.
- Place the coated Oreo balls back on the parchment-lined baking sheet.
- Refrigerate the Oreo balls for at least 15-20 minutes, or until the chocolate has set.
- Enjoy your delicious homemade Oreo balls!
Notes
- For a richer flavor, use double stuffed Oreos.
- You can add a touch of vanilla extract to the cream cheese mixture for extra flavor.
- Decorate with sprinkles or drizzles of white chocolate before the coating sets.
- Store leftover Oreo balls in an airtight container in the refrigerator.
- Prep Time: 20 minutes
- Cook Time: 10 minutes (for melting chocolate)
- Category: Dessert
- Method: No-bake
- Cuisine: American
Nutrition
- Serving Size: 1 ball
- Calories: Approximately 100-120 (will vary based on exact ingredients)
- Sugar: Approximately 10-12g
- Sodium: Approximately 30-40mg
- Fat: Approximately 6-8g
- Saturated Fat: Approximately 3-4g
- Unsaturated Fat: Approximately 3-4g
- Trans Fat: 0g
- Carbohydrates: Approximately 10-12g
- Fiber: Less than 1g
- Protein: Approximately 1-2g
- Cholesterol: Approximately 10-15mg


Comments are closed.