
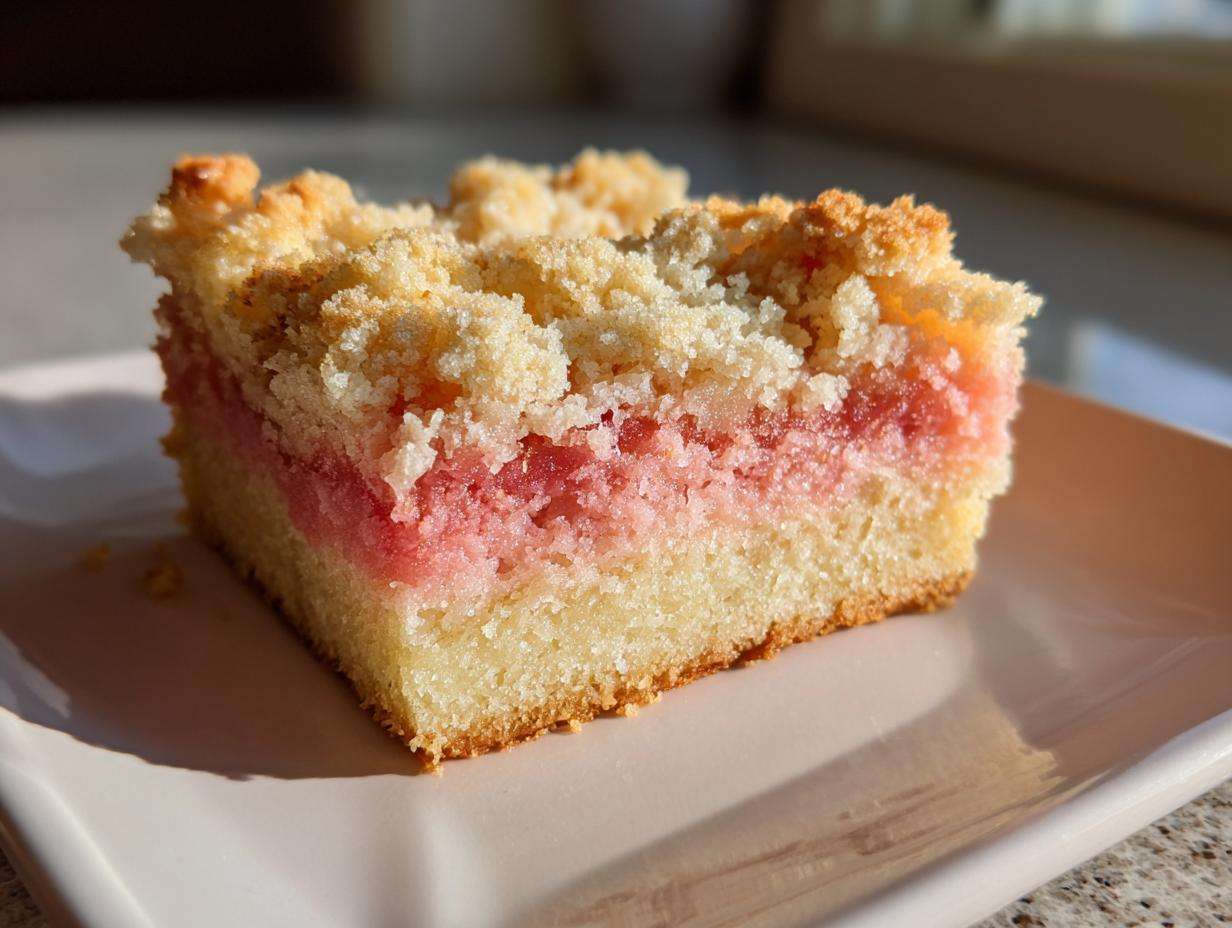
Oh my gosh, spring is finally here, and you know what that means? It means it’s time to get those tart, beautiful stalks of rhubarb out of the garden and into the oven! Forget soggy crumble toppings; we’re making something truly special today: incredible Ombre Rhubarb Picnic Bars.
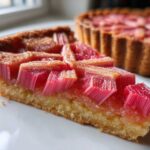
The secret to making these bars picnic perfection is nailing that sturdy, buttery shortbread base. Trust me, I spent a whole weekend ensuring that crust was dense enough not to turn into crumbs the second it met the grass at the park. These aren’t just simple squares; they feature a gorgeous, three-layer filling that fades from pale pink to deep pink—that’s the ombre magic!
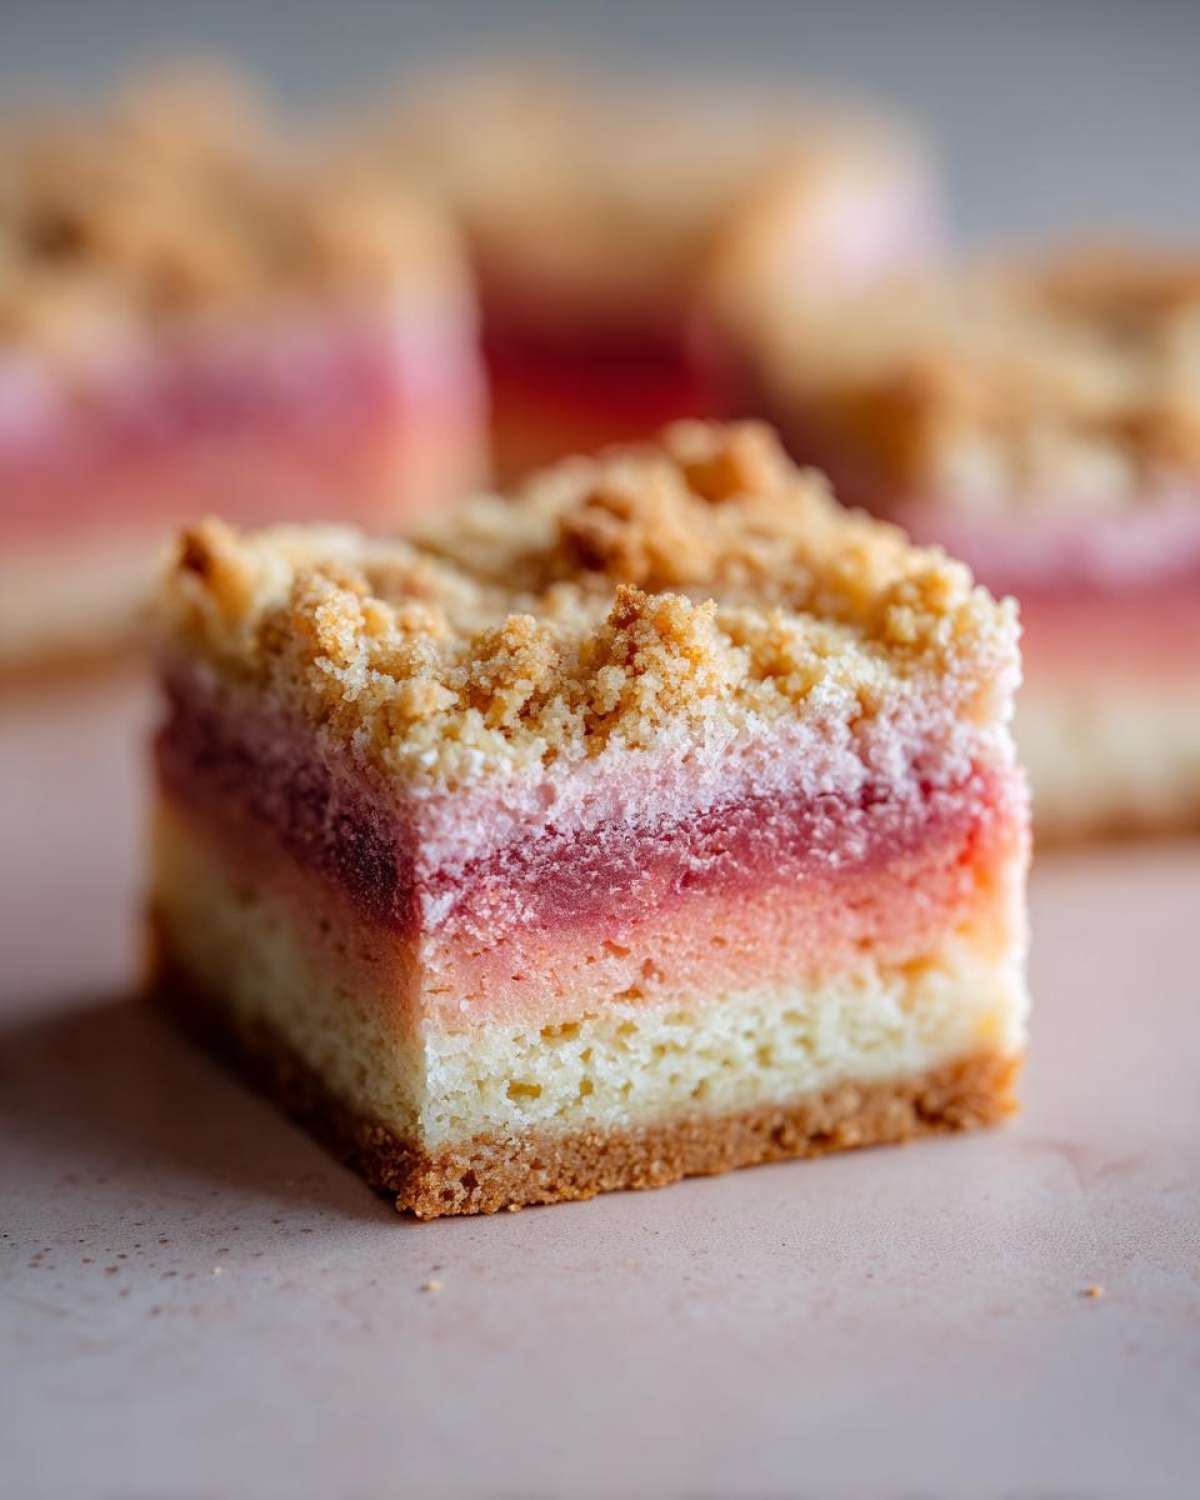
They cut cleanly, they travel like a dream, and the sharp rhubarb flavor cuts right through the sweet shortbread. You are going to absolutely adore how easy they are to assemble once you see the technique for the filling.
Why You Will Love These Ombre Rhubarb Picnic Bars
Honestly, these bars tick every single box I have when I’m baking for an event or just packing lunch. They are just gorgeous, but they actually hold up, which is half the battle with fruit desserts, right?
- They survive transport! Seriously, I’ve packed these in hot cars, and they come out looking almost as perfect as when they went in.
- The flavor is just peak springtime—that wonderful, tart punch from the rhubarb that everyone expects.
- They are simple, elegant square shapes, so no fussy frosting or unstable dollops needed.
- The buttery shortbread base is chewy on the bottom and crisp on top. It’s the best contrast!
- Honestly, they look fancy without demanding fancy work. That color gradient just screams, “I spent all day on this,” even if I didn’t!
Perfectly Picnic Friendly Desserts
Listen, if you’re taking dessert outside, it needs to be sturdy. That’s why I made sure the shortbread base is packed down well before that first little 15-minute blind bake. That pre-bake sets the foundation. A soggy bottom ruins everything, especially when you’re eating off a blanket! These Picnic Friendly Desserts are stable enough to stack in a container without sticking together, provided you let them cool completely, of course.
Visually Stunning Desserts with Pink Gradient
This is the fun part—the ombre! Getting that beautiful, fading pink gradient makes these Visually Stunning Desserts. We aren’t using harsh, artificial dyes; we’re using a little bit of strawberry puree, which complements the rhubarb so beautifully. When you cut into them, you get this wonderful progression of color through the filling layers. It’s so much more interesting than just a single layer of pink filling!
Ingredients for Buttery Shortbread Bars and Rhubarb Filling
Okay, you need to have everything measured out before you even touch the mixer, especially because we’re dealing with three different filling portions! Organization is key when you’re layering things, otherwise, we end up with a messy square instead of those beautiful Layered Rhubarb Squares.
I want you to make sure your butter is truly cold for the crust; that’s the non-negotiable step if you want that perfect, crumbly, yet stable shortbread texture. We want these to remind you of the best rhubarb bar recipe you’ve ever had, just fancier!
For the Buttery Shortbread Crust and Topping
This dough makes up our base, our crumble topping, and the little bit that holds everything together. It’s a classic, reliable dough for Buttery Shortbread Bars:
- 1 1/2 cups all-purpose flour
- 1/2 cup granulated sugar
- 1/4 teaspoon salt
- 1/2 cup cold unsalted butter, cut into small cubes (don’t melt it!)
- 1 large egg yolk
- 2 tablespoons ice water
For the Layered Ombre Rhubarb Filling
This is where the magic happens—the rhubarb filling needs to cook down perfectly before we start dividing it for the ombre effect. We need the cornstarch to make sure it sets up nicely for transport!
- 3 cups chopped fresh rhubarb (about half an inch chunks is perfect)
- 1/2 cup granulated sugar (for filling)
- 2 tablespoons cornstarch
- 1/4 cup water (for thickening)
- 1/4 teaspoon vanilla extract
- 1/4 cup strawberry puree (this is for our color gradient, see below!)
- 1 large egg white, lightly beaten (we use this later to brush the topping)
How to Achieve the Ombre Rhubarb Picnic Bars Look
Okay, pulling off the visual part of the recipe—the gorgeous pink fading—is surprisingly easy once you understand the steps. This is the main technique that turns a normal rhubarb bar into one of those show-stopping Ombre Rhubarb Picnic Bars. It’s all about dividing the filling before you start adding color!
Preparing the Rhubarb Base Filling
First, you have to cook the rhubarb down. It’s going to look like a lot of volume at first, but it shrinks down fast. Toss your chopped rhubarb, the sugar for the filling, the cornstarch, and the 1/4 cup of water into a saucepan. Heat this over medium heat, but stir constantly. You’ll see it start to bubble and thicken up really fast, probably in about five to seven minutes. That cornstarch is doing its job! Once it looks like a thick, shiny fruit sauce, pull it right off the heat and stir in that vanilla. Now for the fun part!
Creating the Pink Gradient (Ombre Effect)
This is where the How to Make Ombre Baking actually comes into play. Immediately take that hot, thickened filling and divide it equally into three separate bowls. You’ll have three piles of about the same amount.
Bowl one? Leave it completely plain. That’s our lightest layer, the natural pale pink color the rhubarb already has.
For bowl two, take about half of your strawberry puree and gently fold it in until you get a nice, light pink hue. Don’t blitz it, just fold until it’s mixed!
Now, take the rest of that gorgeous strawberry puree and mix it into bowl three. This one should be your deepest pink color—the anchor color for the ombre. Make sure you are gentle when mixing; we don’t want to whip air into it now that it’s thickened up!
Step-by-Step Instructions for Perfect Ombre Rhubarb Picnic Bars
Alright, now that we have our components ready—the crust dough set aside and the three glorious shades of filling waiting—it’s assembly time! Following these steps carefully ensures you get those perfect, portable Layered Rhubarb Squares that look professional but taste like home baking. I’m so excited for you to see them come together!
Making and Pre-Baking the Shortbread Crust
First things first, get that oven preheated to 350°F (175°C). You need to line an 8×8 inch pan with parchment paper that hangs over the sides—this is your handle for easy removal later, so don’t skip it! Parchment paper is a lifesaver, trust me.
Take about two-thirds of the shortbread dough you made earlier. You want to press this firmly and evenly right into the bottom of your prepared pan. It needs to be tight so it holds up! Then, pop that crust into the oven and blind bake it for 15 minutes. This step is so important; it sets the base so the wet filling doesn’t soak through. While that’s happening, you should finish up your rhubarb cooking!
Assembling and Topping the Ombre Rhubarb Filling
Once the crust is slightly cooled but still warm, it’s time to layer those colors. Remember, we divided the filling into three equal bowls: plain, light pink, and deep pink. Spread the plain filling evenly over that pre-baked crust first. Don’t press too hard; just gently nudge it into place to keep the layers distinct.
Next, take your lightly pink portion and spread it carefully over the plain layer. Then, lovingly spread that deepest pink filling right on top. You should clearly see the gradient forming!
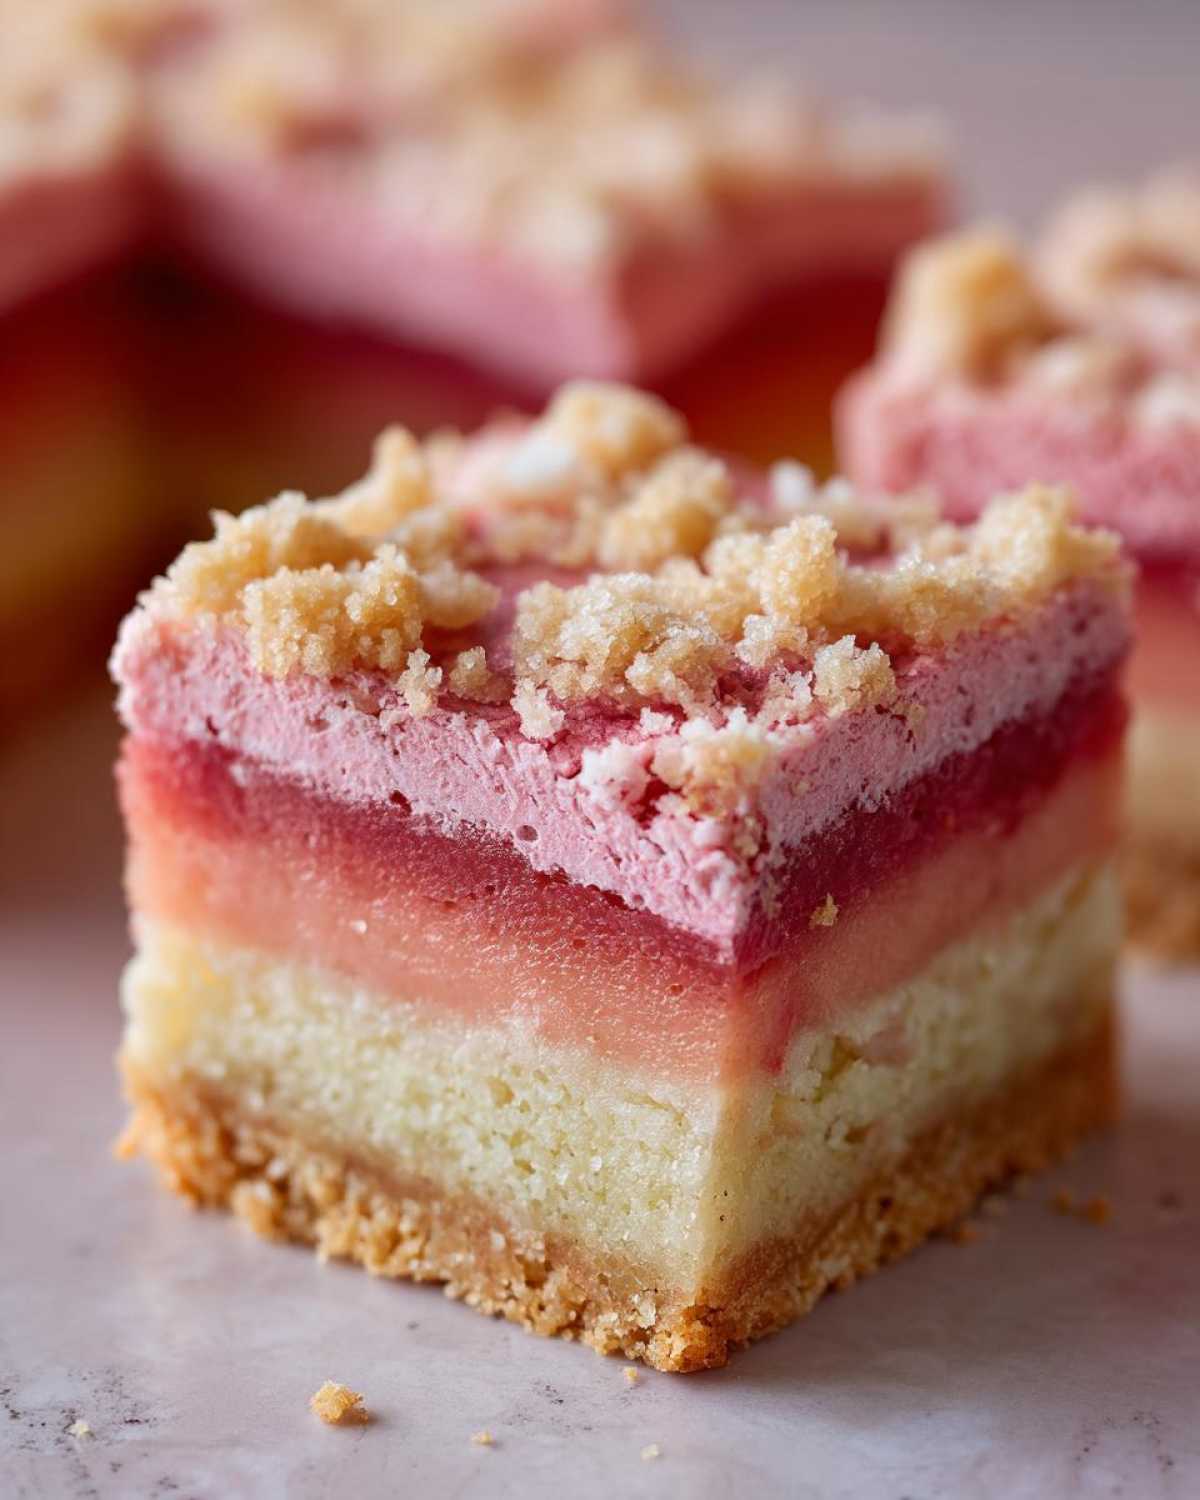
Now for the topping! Take that remaining one-third of your shortbread dough—the part you saved from the beginning—and crumble it lightly over the top of the pink layers. Try to get an even crumble, don’t leave big clumps.
For that beautiful, inviting golden shine, take the beaten egg white and lightly brush it over the crumbled topping. This little step makes such a difference! Then, back into the 350°F oven it goes for about 35 to 40 minutes. You’re looking for a bubbly filling and a golden-brown top. You can check out how I handle similar square recipes needing that sturdy base right here—it uses the exact same principle!
Tips for Success Making Ombre Rhubarb Picnic Bars
We’ve got the layers set, we’ve got the shine from the egg white, but trust me, there are two more things you absolutely must do to ensure these Ombre Rhubarb Picnic Bars live up to their name when you serve them. Baking is fun, but the cooling and cutting is where the real patience comes in—especially with layered bars like these!
Achieving Clean Cuts for Your Ombre Dessert Bars
This is my biggest, most important piece of advice for any bar dessert you plan to transport: YOU MUST CHILL THEM.
Once they come out of the oven, let them cool on the counter for about an hour until they are just warm. Then, using that parchment paper overhang we left, lift the entire slab out onto a cutting board. Seriously, don’t even *think* about cutting them yet. If you try to slice them warm, the filling will squish out, and your beautiful pink gradient will turn into one big, sad, sugary blur of color. We want clean lines!
Wrap the whole cooled square tightly in plastic wrap (I always double wrap) and pop it into the fridge for at least two hours—preferably four! That chilling time solidifies the filling and helps the crust set up tight. When it’s ice cold, grab a long, sharp knife, wipe it down between cuts, and you’ll get those immaculate slices. These perfectly clean cuts are what make them the ultimate Ombre Dessert Bars.
Rhubarb Substitution Guidance
What if the rhubarb patch hasn’t caught up yet, or you just can’t find fresh stalks today? Don’t panic! You can absolutely use frozen rhubarb in these bars. If you use frozen rhubarb, you don’t need to thaw it first, but you should bump up the cornstarch by just one extra teaspoon, because frozen fruit releases more water when it cooks. If you want to explore other fruit bars that use a similar buttery base, you should check out my recipe for apple pie bars; the technique for the crust is identical.
If rhubarb is completely out of season, go for tart cherries or firm raspberries. Just make sure to adjust the sugar slightly based on how tart your chosen fruit is. Using seasonal swaps keeps us enjoying these gorgeous squares all year long!
Storage and Transport for Your Fruit Bar Recipes for Outdoors
Now that you’ve gone to all that beautiful trouble creating those distinct ombre layers, the last barrier is actually getting them to the picnic spot without them turning into a single, sad mush pile. I’ve learned the hard way that simply tossing them in a Tupperware isn’t always enough for nice transportable baked goods like these!
Because we chilled the bars until they were rock solid, we need to keep them cool until serving time. These are definitely best served cool or at room temperature, not hot, which is perfect for outdoor eating. They are meant to be easy grab-and-go squares for your next outdoor adventure.
Keeping Ombre Rhubarb Picnic Bars Fresh
If you are eating them the same day, you can keep them wrapped tightly in the plastic wrap they were chilling in, placed into a rigid container. Do not stack them directly on top of each other. Instead, I like to use parchment paper as a divider between the layers of bars inside the container. You should get about two to three layers this way.
If you need to make them a day ahead—and trust me, chilling overnight helps the flavor meld—keep them wrapped tightly in the fridge. They stay perfectly fresh for four, maybe even five days stored this way! Just pull them out about 30 minutes before you leave for the picnic so they aren’t fridge-cold when you eat them. This keeps them firm, prevents that frustrating sogginess that ruins so many Fruit Bar Recipes for Outdoors, and keeps that beautiful ombre filling right where it belongs: between the crust layers!
Serving Suggestions for These Layered Rhubarb Squares
Even though these Ombre Rhubarb Picnic Bars are perfect all on their own—a complete, self-contained dessert package—we can’t stop there, can we? When I bring these to a gathering, I like to offer a little something extra on the side to complement that fantastic tartness from the rhubarb and play up the buttery shortbread. These are some of my favorite ways to serve these Homemade Fruit Squares, especially when I’m thinking about what else I’m packing for the trip!
Since these bars are already quite rich from that shortbread base, you don’t want anything too heavy next to them. Think light, cool, and complementary! I love taking a small container of whipped cream—the kind you can just dollop on with a spoon, nothing too fussy. The lightness cuts through the density of the bar beautifully. If you’re making a big spread, check out some of my favorite Best Picnic Food Ideas that pair well with these kinds of baked goods.
Another easy win is a simple scoop of vanilla bean ice cream if you happen to have a cooler bag handy. Honestly, though, if you’re truly focused on portability, skip the sides and just make sure you have plenty of napkins! These Layered Rhubarb Squares are strong enough to stand up to a cup of coffee or a glass of iced tea without needing any extras.
Frequently Asked Questions About Ombre Rhubarb Picnic Bars
I always get so many questions once people see photos of these bars because that color is just mesmerizing! People want to know if they *have* to use strawberry, or if they can just eat them right out of the oven. I’ve gathered the most common things I hear after baking a fresh batch!
Can I make the ombre effect without strawberry puree?
Oh, absolutely! The strawberry puree is just my go-to because I love that subtle sweetness it adds to balance the rhubarb’s tartness, but you do not have to use it. If you skip the puree, you’ll still get a nice, pale pink because rhubarb is naturally pinkish when cooked. If you really want that stronger, deeper color in the third layer, a tiny drop or two of concentrated beet juice works wonders for a natural color boost, or if you aren’t fussed about keeping it all-natural, just use a few drops of good quality red food coloring!
Are Ombre Rhubarb Picnic Bars best served warm or cold?
This is a big one, especially since they are called Picnic Friendly Desserts! If you eat them warm, the filling will be gooey, and the shortbread will be soft. That makes them fantastic for eating right out of the pan on your couch, but it makes them impossible to cut cleanly for packing. For the best structure, transport, and those gorgeous clean lines we worked so hard for, you must chill them until they are cold. Room temperature is fine for serving once you get to your picnic, but never serve them warm if you want them to hold that beautiful, layered look!
What makes this a good Spring Baking Recipe?
It all comes back to the star ingredient: fresh rhubarb! Rhubarb is one of the very first things that springs up in the garden, usually around April or May, depending on where you live. Harvesting it when it’s fresh and bright green and pink just tastes so much better than anything frozen. Making these bars is my personal signal that the heavy winter baking is over and we can switch to light, bright, tart flavors. They are the perfect example of those wonderful Spring Baking Recipes!
Rate This Ombre Rhubarb Picnic Bars Recipe
Well, friend, that’s my entire process for creating these incredibly portable, stunning Ombre Rhubarb Picnic Bars! I really hope you give them a try. When I make these, I feel like I’m bringing a little piece of edible art to whatever gathering I’m heading to. That gradient filling is just too satisfying!
I’ve tried to make the instructions as clear as possible, especially around dividing and coloring that filling, because achieving that perfect pink fade is the key differentiator here. So, now it’s your turn!
I would absolutely love it if you took a minute after you bake them to come back here and leave me a rating. Did the shortbread hold up perfectly? Were your layers distinct? Let me know in the comments how your Layered Rhubarb Squares turned out. Did you stick with the strawberry puree, or did you try a different coloring trick for your stunning Easy Rhubarb Dessert?
Every comment helps me know what you love and what I should tweak next time. Happy baking, and enjoy that perfect picnic bite!
Print
Ombre Rhubarb Picnic Bars
- Total Time: 80 min
- Yield: 16 bars
- Diet: Vegetarian
Description
Make these portable, layered rhubarb bars featuring a visual ombre effect in the filling, perfect for outdoor eating.
Ingredients
- 1 1/2 cups all-purpose flour
- 1/2 cup granulated sugar
- 1/4 teaspoon salt
- 1/2 cup cold unsalted butter, cubed
- 1 large egg yolk
- 2 tablespoons ice water
- 3 cups chopped fresh rhubarb
- 1/2 cup granulated sugar (for filling)
- 2 tablespoons cornstarch
- 1/4 cup water (for filling)
- 1/4 teaspoon vanilla extract
- 1/4 cup strawberry puree (for color gradient)
- 1 large egg white, lightly beaten (for brushing)
Instructions
- Preheat your oven to 350°F (175°C). Line an 8×8 inch baking pan with parchment paper, leaving an overhang for easy removal.
- Prepare the crust: In a bowl, combine flour, 1/2 cup sugar, and salt. Cut in the cold butter until the mixture resembles coarse crumbs. Mix in the egg yolk and ice water until a dough forms. Press two-thirds of the dough evenly into the bottom of the prepared pan. Bake the crust for 15 minutes.
- Prepare the rhubarb filling: In a saucepan, combine chopped rhubarb, 1/2 cup sugar, cornstarch, and 1/4 cup water. Cook over medium heat, stirring constantly, until the mixture thickens, about 5 to 7 minutes. Remove from heat and stir in vanilla extract.
- Create the ombre effect: Divide the thickened rhubarb filling into three equal portions. Leave the first portion plain. Gently stir the strawberry puree into the second portion until lightly pink. Stir the remaining strawberry puree into the third portion until it is a deeper pink color.
- Assemble the bars: Carefully spread the plain rhubarb filling over the pre-baked crust. Next, spread the lightly pink filling over the plain layer. Finally, spread the deep pink filling over the top layer.
- Create the topping: Crumble the remaining one-third of the crust dough evenly over the top of the filling layers. Brush the topping lightly with the beaten egg white for shine.
- Bake for 35 to 40 minutes, or until the topping is golden brown and the filling is bubbly.
- Let the bars cool completely in the pan on a wire rack before lifting out using the parchment overhang and cutting into squares.
Notes
- Chill the bars for at least 2 hours before cutting for clean slices suitable for picnics.
- If you do not have strawberry puree, you can use a few drops of red food coloring mixed into one portion of the filling to achieve the color gradient.
- Wrap individual bars tightly in plastic wrap for easy transport and to maintain freshness.
- Prep Time: 25 min
- Cook Time: 55 min
- Category: Dessert
- Method: Baking
- Cuisine: American
Nutrition
- Serving Size: 1 bar
- Calories: 210
- Sugar: 18
- Sodium: 55
- Fat: 11
- Saturated Fat: 6
- Unsaturated Fat: 5
- Trans Fat: 0
- Carbohydrates: 27
- Fiber: 2
- Protein: 3
- Cholesterol: 35

Comments are closed.