

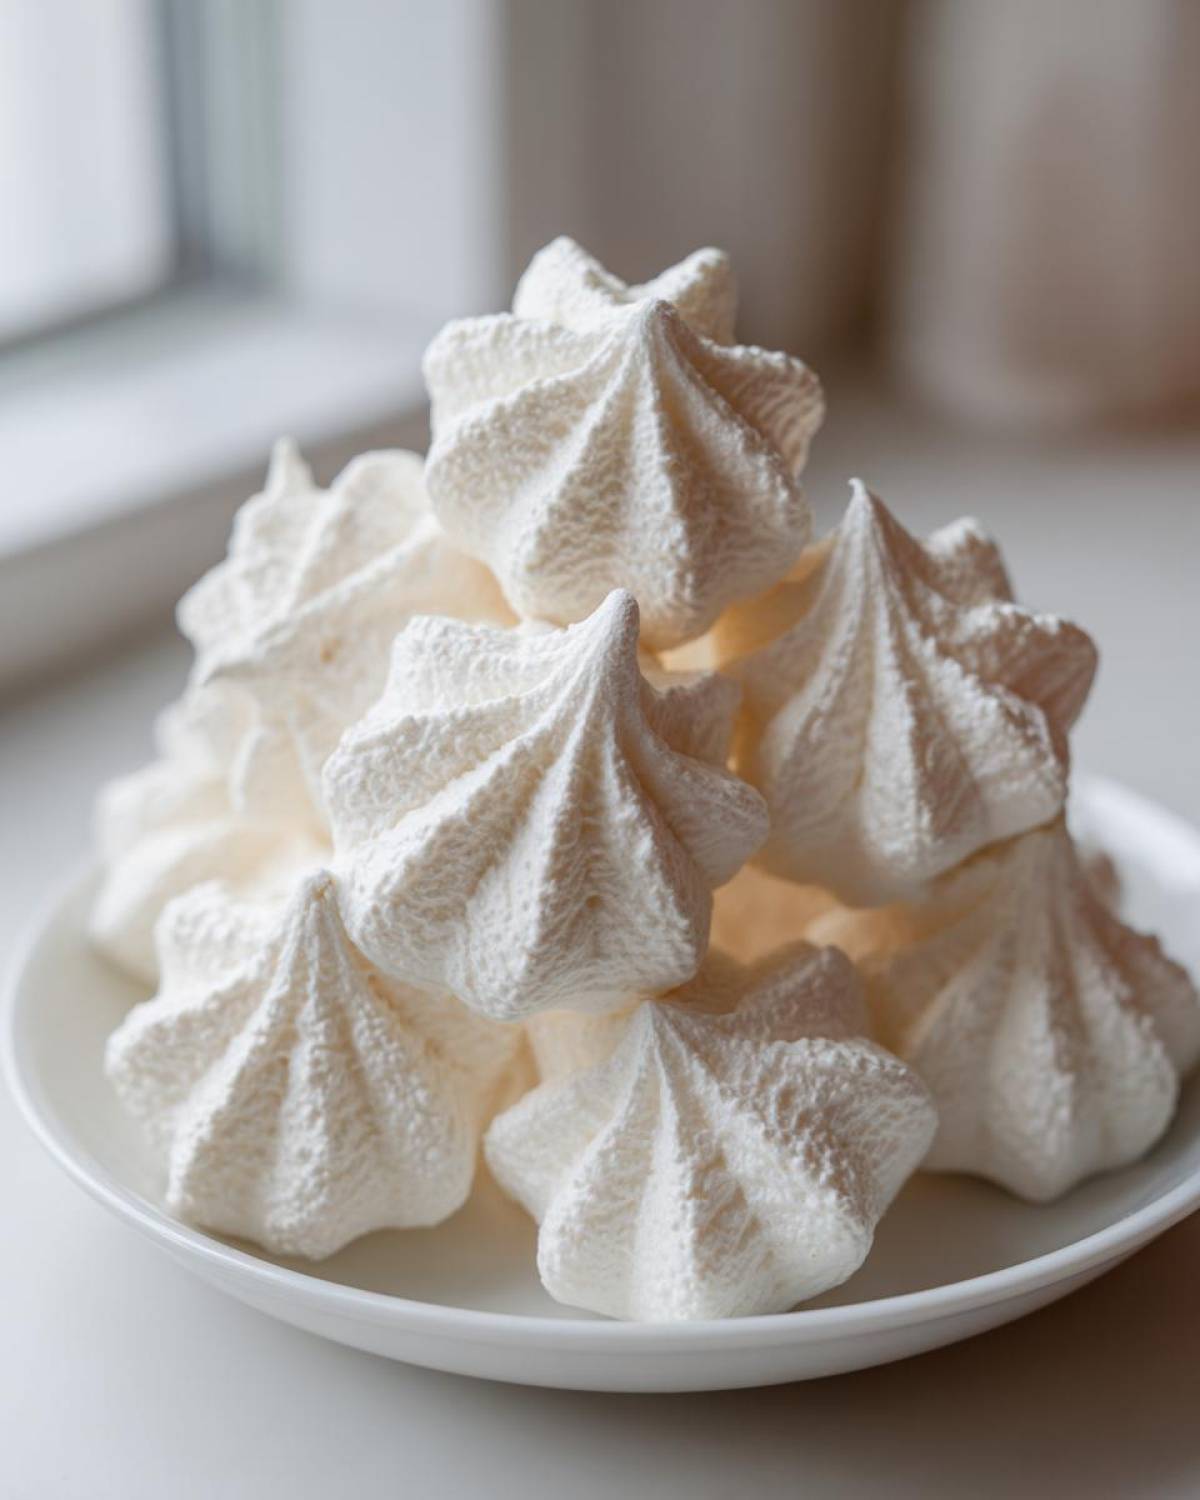
Oh, if there’s one thing I truly adore making, it’s something that feels delicate and makes people go, “Wow, you *made* that?” Meringue cookies are exactly that treat! They look like they need a culinary degree, but trust me, they are so simple once you know the little secrets. I’ve wrecked batches before—we all have—but I finally nailed down this Ultimate Easy Meringue Cookies Recipe. We’re sticking to the basic French method because it’s the most straightforward path to getting those beautiful, light, airy cookies that are just miraculously crisp on the outside but practically dissolve in your mouth. Learning how to whip up perfect egg whites took me a minute, but I’m going to show you exactly how to master it so your next batch of meringue cookies is flawless!
Why You Will Love These Easy Meringue Cookies
Honestly, I wouldn’t share a recipe unless it was truly bulletproof. These light and airy cookies are what simple baking dreams are made of. If you’ve been shaky about trying meringue cookies before, this is the batch that’s going to change everything for you.
- They deliver the *perfect* texture every time: beautifully crisp shells that shatter when you bite them, leading into that wonderful, melt-in-your-mouth soft center.
- It’s a truly simple recipe! You only need about five basic ingredients, and we skip the tricky Swiss or Italian methods for the foundational French meringue.
- They are naturally gluten-free, making them a fantastic, safe treat to share with anyone avoiding wheat.
- You can use this base to create any color or flavor you want—they are the ultimate blank canvas for your creativity!
Give this meringue cookie recipe a try; you’re going to feel like a total baking superstar!
Essential Ingredients for Perfect Meringue Cookies
You asked for simple, and simple is what you get! The key to whipping high, stable meringue cookies really comes down to four core players plus that little bit of magic for stabilization. Don’t even think about grabbing cold egg whites; that’s trouble waiting to happen. They must be room temperature!
- 4 large egg whites (Yes, room temperature! It makes a huge difference when baking with egg whites.)
- 1 cup superfine granulated sugar (Caster sugar works beautifully too, as it dissolves faster.)
- 1 teaspoon pure vanilla extract
- 1/4 teaspoon cream of tartar (This is your insurance policy against collapse!)
- Pinch of salt
If you don’t have superfine sugar—no big deal! Just pulse your regular sugar in a food processor for about 30 seconds until it looks finer. Everything else is straightforward, but make sure your bowl is spotless!
Equipment Needed for Making Meringue Kisses Recipe
Okay, before we even think about whipping anything, let’s chat about your tools. Meringue is one of those desserts where having the right gear makes the difference between success and a puddle of sticky liquid. Don’t worry, you don’t need fancy gadgets, but a few items are absolutely mandatory for these meringue kisses success.
First off, you absolutely need a stand mixer or a very powerful hand mixer. Trying to beat these egg whites by hand with a balloon whisk? You’ll be exhausted before you even hit the ribbon stage! Seriously, save your arm strength.
Next, planning is everything. You’ll want a large mixing bowl—make sure it’s sparkling clean, I mean *brand* new clean, with zero traces of fat. Oil is the sworn enemy of meringue, so wipe down your bowl and whisk attachment with a little vinegar or lemon juice before you start, just in case.
Then, for shaping, you need piping supplies. I always grab a large pastry bag and use a closed star tip, like a Wilton 1M. This creates those classic, restaurant-quality swirls or “kisses.” If you don’t have a piping bag, you can use a sturdy Ziploc bag, but you need to snip the corner *very* carefully—too big of a hole, and you lose control fast.
Finally, parchment paper is a must-have for the baking sheets. Wax paper or silicone mats? Nope, those can sometimes cause the bottom of your meringue to stick or sweat during that long drying process in the oven. Parchment paper ensures a clean release every single time when you’re done!
Step-by-Step Guide: How to Make Meringue Cookies
Alright, here is where the magic happens, and it’s not nearly as complicated as it sounds! Remember, this whole process hinges on patience, especially when adding that sugar. If you try to rush the whipping, you’ll end up with more of a sweet soup than what we want. If humidity is high where you live (like it is near the coast sometimes!), try to tackle these on a drier day, as moisture is the enemy of a good, crispy meringue treat.
Preparing for the French Meringue Cookies
First things first: we need to set the stage for failure-proof baking. Grab your biggest, cleanest mixing bowl—I mean absolutely grease-free! Wipe it down with a paper towel dipped in white vinegar if you need that extra peace of mind. Next, line those baking sheets with parchment paper; this is non-negotiable for easy handling later.
Now, the oven needs a super low, slow bake, which is really a long, gentle dry. Preheat your oven to the absolute lowest setting it goes—somewhere between 175°F and 200°F works perfectly for me. We are drying these out, not actually baking them like a normal cookie.
Whipping Egg Whites to Stiff Peaks: The Secret to Light and Airy Cookies
Pop those room-temperature egg whites and that tiny pinch of salt into your spotless bowl. Start beating on medium speed until they look frothy, like sea foam. Once they get foamy, toss in the cream of tartar, and crank that mixer up to medium-high. You’ll soon see soft peaks start to form—they look like a little soft wave when you lift the whisk.
This is the critical moment where we introduce the sugar. Add it slowly, just one tablespoon at a time, waiting maybe 30 seconds between each addition. It takes patience, I know! Keep beating until you have stiff, glossy peaks. To check? Lift the whisk—if the peak stands straight up without flopping over, you’re golden. Also, rub a tiny bit between your fingers; if you feel any grit, keep whipping until that sugar is completely dissolved. That ensures you get truly light and airy cookies.
Piping and Drying Your Crispy Meringue Treats
Once you add the vanilla, fold it in quickly, and get that meringue into your piping bag. Use a sturdy hand and pipe little kisses or swirls onto your lined sheets. Try to keep them uniform in size so they all dry evenly. They should look beautiful!
Place them in that low-temp oven for about 1 to 1.5 hours. See how they look done? Great! Now the biggest tip of all: Turn the oven completely off. Prop the door open slightly with a wooden spoon—this lets the heat escape slowly. Leave them in there for at least an hour, or until the oven is totally cool. This slow cooling period is what locks in that dry, crisp shell and prevents them from cracking dramatically when you pull them out. Don’t peek during the baking time, just let them dry!
Want more tips on the whipping process? Check out my full breakdown on how to make meringue right here!
Tips for Achieving Perfect Meringue Texture
Achieving that transcendent, just-right perfect meringue texture—crisp but not brittle, airy but not hollow—comes down to listening to a few non-negotiable rules. I’ve learned these the hard way, usually involving me scraping a sticky disaster off the parchment paper, so please take these little secrets to heart!
First, about the sugar: I mentioned pulsing regular sugar if you don’t have superfine, but you absolutely must use that amount of sugar relative to the egg whites. Meringue is, at its core, a sugar foam. The sugar provides the structure and stability that stops those precious air bubbles from collapsing. Cutting back on it just leads to weeping, runny messes, so promise me you’ll weigh it out if you can, or at least measure that superfine sugar carefully!
Second, let’s talk about the weather. Meringue cookies are total humidity sponges! If it’s raining outside, or if you live somewhere already damp, your cookies might take hours longer to dry out or they might stay slightly chewy—which isn’t what we want for these light snacks. If you see a rainy forecast, save your egg whites for another day, or be prepared to leave the oven propped open overnight to give them extra drying time.
Third, if you’re adding color or flavor, do it strategically. If you want to jazz these up—maybe make some summery pink ones or layered holiday desserts—use Jello powder instead of liquid food coloring if you can! Liquid coloring adds unnecessary moisture. If you use Jello powder, fold it in *gently* right after the vanilla. You’ll get vibrant color and a hint of fruit flavor without disrupting how beautifully those stiff peaks hold their shape. If you’re looking for icing ideas for cookies *other* than meringue, I have a great guide on making sugar cookie icing that hardens perfectly.
Lastly, never, ever open that oven door during the drying phase unless you are turning it off. A sudden rush of cool air will cause rapid shrinkage and cracking. We want a slow, gentle drying process for the best results!
Variations for Your Meringue Cookies Recipe
Now that you have mastered the basic formula for perfect meringue cookies, it is time to have some fun! This base meringue cookies recipe is incredibly forgiving, which means we can start playing with flavors and colors to make them special for any occasion. I love swapping out the vanilla for something more exciting depending on the mood, or even making them specifically for gifting.
Remember what I said about folding in Jello powder? That’s the easiest way to introduce color and flavor, but you can get creative with extracts too! Just be sure to keep the liquid extracts minimal—we don’t want to upset that perfectly whipped structure.
Festive Meringue Kisses Recipe Ideas
When the holidays roll around, I always use this recipe to make batches of beautiful, festive treats. They look amazing piled high in tins or little cellophane bags for neighbor gifts. If you’re making holiday swirls, ditch the vanilla and try one of these simple additions:
- Peppermint Swirl: Add 1/2 teaspoon of pure peppermint extract into the batter right when you add the vanilla. For extra holiday cheer, crush up one candy cane very finely and gently fold it in right before piping. If you like peppermint in other cookies, you should check out my guide for peppermint chocolate chip cookies too!
- Chocolate Mocha Kisses: Whisk in 1 tablespoon of good quality, unsweetened cocoa powder right along with your sugar additions, or just before the final stiff peaks. They become this gorgeous, deep brown color. They taste amazing with a tiny drizzle of melted dark chocolate added after they have cooled completely.
- Citrus Zest Delight: For a brighter, spring-y flavor, add the zest of one large lemon or orange just before or along with the vanilla extract. The citrus oils really wake up the sweetness of the sugar.
The key here is restraint. You want flavor, not flood the batter! These little additions turn a simple meringue kisses recipe into something truly memorable.
Storage and Serving Suggestions for Delicate Sweet Treats
Okay, you’ve pulled off the impossible! Your delicate sweet treats are baked, cooled, and looking absolutely perfect. Now, we have to talk storage because the number one enemy of a crisp meringue cookie is simple humidity. If you leave these out on the counter in an open bowl, they’ll start weeping or getting chewy within hours, and that’s just a tragedy!
The biggest rule for keeping your meringues shatteringly crisp is airtight containment pronto. You need to store them in a container that seals completely. I prefer those flat plastic ones with the snap-on lids, or even glass jars with tight-fitting lids. If you’re making a huge batch, you can layer them, but use small pieces of wax paper or parchment sheets between the layers so they don’t stick together.
Humidity is your enemy here. If you live somewhere really moist, like I mentioned before, you can even put a tiny packet of silica gel (the kind you find in shoe boxes, totally clean, of course!) in the container. That little packet will suck up any rogue moisture trying to get in. Do *not* put these in the refrigerator. The fridge is a humid nightmare, and your beautiful meringues will turn sticky almost instantly.
Stored correctly, these little beauties will stay perfect for easily a week, maybe even two, but honestly, they never last that long in my house! They’re incredibly light, so they are perfect for gifting baked holiday treats or just having on hand for when you need something sweet without much commitment.
When it comes to serving these meringue cookies, I love how versatile they are. They are obviously amazing all by themselves—that simple vanilla flavor pairs perfectly with a cup of black coffee or strong tea. If you’re having a party, they look so elegant piled high on tiered serving trays. They also look fantastic tucked next to a rich dessert that needs a textural contrast. Speaking of coffee, if you ever need an energy boost to get you through making a huge batch of meringues, you absolutely have to try my recipe for a coffee smoothie!
Just remember: airtight container, cool, dry pantry shelf, no fridge adventure. That’s the key to enjoying the perfect crispness days later!
Frequently Asked Questions About Baking Meringue for Beginners
It’s totally normal to have questions when you’re first tackling something as delicate as these meringue cookies! Egg whites can be temperamental, and I’ve probably made every mistake in the book over the years. I promise that by understanding what causes the common issues, you’ll feel much more confident next time you’re baking meringue for beginners!
Why are my meringue cookies weeping or sticky after baking?
Ugh, weeping! That’s the worst. This almost always happens for one of two reasons. Reason one is that the sugar didn’t completely dissolve when you were whipping. If you feel sugar grit when you rub the mixture between your fingers, it hasn’t fully incorporated, and that undissolved sugar eventually leaks out as syrup—yep, that’s weeping. Reason two is humidity, again! If they sit out in damp air, they absorb moisture like tiny little sweet sponges, leading to a sticky exterior even if they look done.
Can I make these meringue kisses ahead of time, and how long do they last?
Absolutely, you can make these ahead! In fact, making them a day before is sometimes better because the cooling and drying process benefits from time. As long as you store your finished meringue kisses recipe batch in a completely airtight container at cool room temperature, they should stay crisp for at least a week, maybe even ten days. Just repeat my storage rule: airtight container, no fridge, dry environment. They are fantastic homemade meringue gifts because they travel well if sealed tightly!
Are these simple egg white desserts naturally gluten free?
Yes, they totally are! Since this recipe relies only on egg whites, sugar, cream of tartar, and vanilla, these are inherently gluten free meringues. It’s one of the big perks of these light treats! As long as you make sure you aren’t adding flavored mix-ins that contain wheat flour or gluten, you are good to go. If you want to see more details on making sure your meringues stay naturally free of gluten, I have a little note about that over here on my gluten free meringues guide.
My peaks look stiff, but how do I know they won’t deflate while piping?
If they look stiff, you’re mostly safe! Stiff peaks mean you have trapped enough air and stabilized it with sugar. To really check tenderness, lift your whisk up—the peak should stand straight up and hold its shape even if the tip curls over just a tiny bit. If the entire peak immediately flops over when you lift the whisk, you need more time beating in that sugar. If the peak stands up perfectly but the edges look flaky or ragged, you might have slightly over-beaten; keep going, but fold in your flavoring gently!
Nutritional Snapshot of These Melt in Your Mouth Cookies
Now, let’s talk fuel! These little clouds of sweetness are pretty light on just about everything—except joy, of course. I always like to give a quick overview of what you’re tossing into your body when you sneak one (or four) of these melt in your mouth cookies, but remember, this is just an estimation based on the standard ingredients I use.
Because these are essentially pure sugar and air, they are very low in fat, which is great, but they certainly aren’t a low-sugar treat! That’s why moderation is key with these delightful snacks. Don’t forget to take what I list here with a grain of salt, because how much sugar you use, or if you decide to add coloring or fancy extracts, will change these numbers a bit!
Here is the basic breakdown per cookie, based on a yield of about three dozen:
- Calories: About 45
- Sugar: Around 11 grams
- Fat: Essentially 0 grams! Happy dance!
- Carbohydrates: About 11 grams
- Protein: A tiny half-gram
A quick note from my kitchen: These values are based on the recipe using those ingredients listed above and yielding approximately 36 cookies. If you pipe them much bigger, your numbers will obviously shift slightly. But honestly, the best thing about these simple egg white desserts is how satisfying they are without being heavy!
Print
The Ultimate Easy Meringue Cookies Recipe: Light, Crisp, and Perfect Every Time
- Total Time: 110 min
- Yield: About 3 dozen
- Diet: Gluten Free
Description
Make light, airy meringue cookies that are crisp on the outside and melt in your mouth soft on the inside using this simple French meringue method. This recipe is naturally gluten-free.
Ingredients
- 4 large egg whites, room temperature
- 1 cup superfine granulated sugar (caster sugar)
- 1 teaspoon pure vanilla extract
- 1/4 teaspoon cream of tartar
- Pinch of salt
Instructions
- Preheat your oven to the lowest setting, usually between 175°F and 200°F (80°C to 95°C). Line two large baking sheets with parchment paper.
- Ensure your mixing bowl and whisk attachment are completely clean and free of any grease. Add the room temperature egg whites and salt to the bowl.
- Beat the egg whites on medium speed until they become foamy. Add the cream of tartar and increase the speed to medium-high.
- Once soft peaks form (the peaks curl over when you lift the whisk), begin adding the superfine sugar one tablespoon at a time, waiting about 30 seconds between each addition. Do not rush this step.
- Continue beating until stiff, glossy peaks form. When you lift the whisk, the peak should stand straight up without drooping. Rub a small amount between your fingers; it should feel smooth, not gritty.
- Beat in the vanilla extract quickly.
- Transfer the meringue to a piping bag fitted with your desired tip (a star tip works well for kisses). Pipe small mounds or kisses onto the prepared baking sheets.
- Place the sheets in the preheated oven. Bake (dry) for 1 to 1.5 hours, depending on the size of your cookies and your oven temperature. The goal is to dry them out, not brown them.
- Turn off the oven, prop the door open slightly with a wooden spoon, and let the cookies cool completely inside the oven for at least 1 hour, or until the oven is fully cool. This prevents cracking.
- Store finished meringue cookies in an airtight container at room temperature.
Notes
- For colored or flavored meringues, gently fold in 1 tablespoon of Jello powder or a few drops of food coloring just before the final mixing stage.
- If you do not have superfine sugar, pulse regular granulated sugar in a food processor for 30 seconds until finely ground.
- Humidity affects meringue. Bake on dry days for the best crisp results.
- Prep Time: 20 min
- Cook Time: 90 min
- Category: Dessert
- Method: Baking
- Cuisine: American
Nutrition
- Serving Size: 1 cookie
- Calories: 45
- Sugar: 11
- Sodium: 5
- Fat: 0
- Saturated Fat: 0
- Unsaturated Fat: 0
- Trans Fat: 0
- Carbohydrates: 11
- Fiber: 0
- Protein: 0.5
- Cholesterol: 0


Comments are closed.