

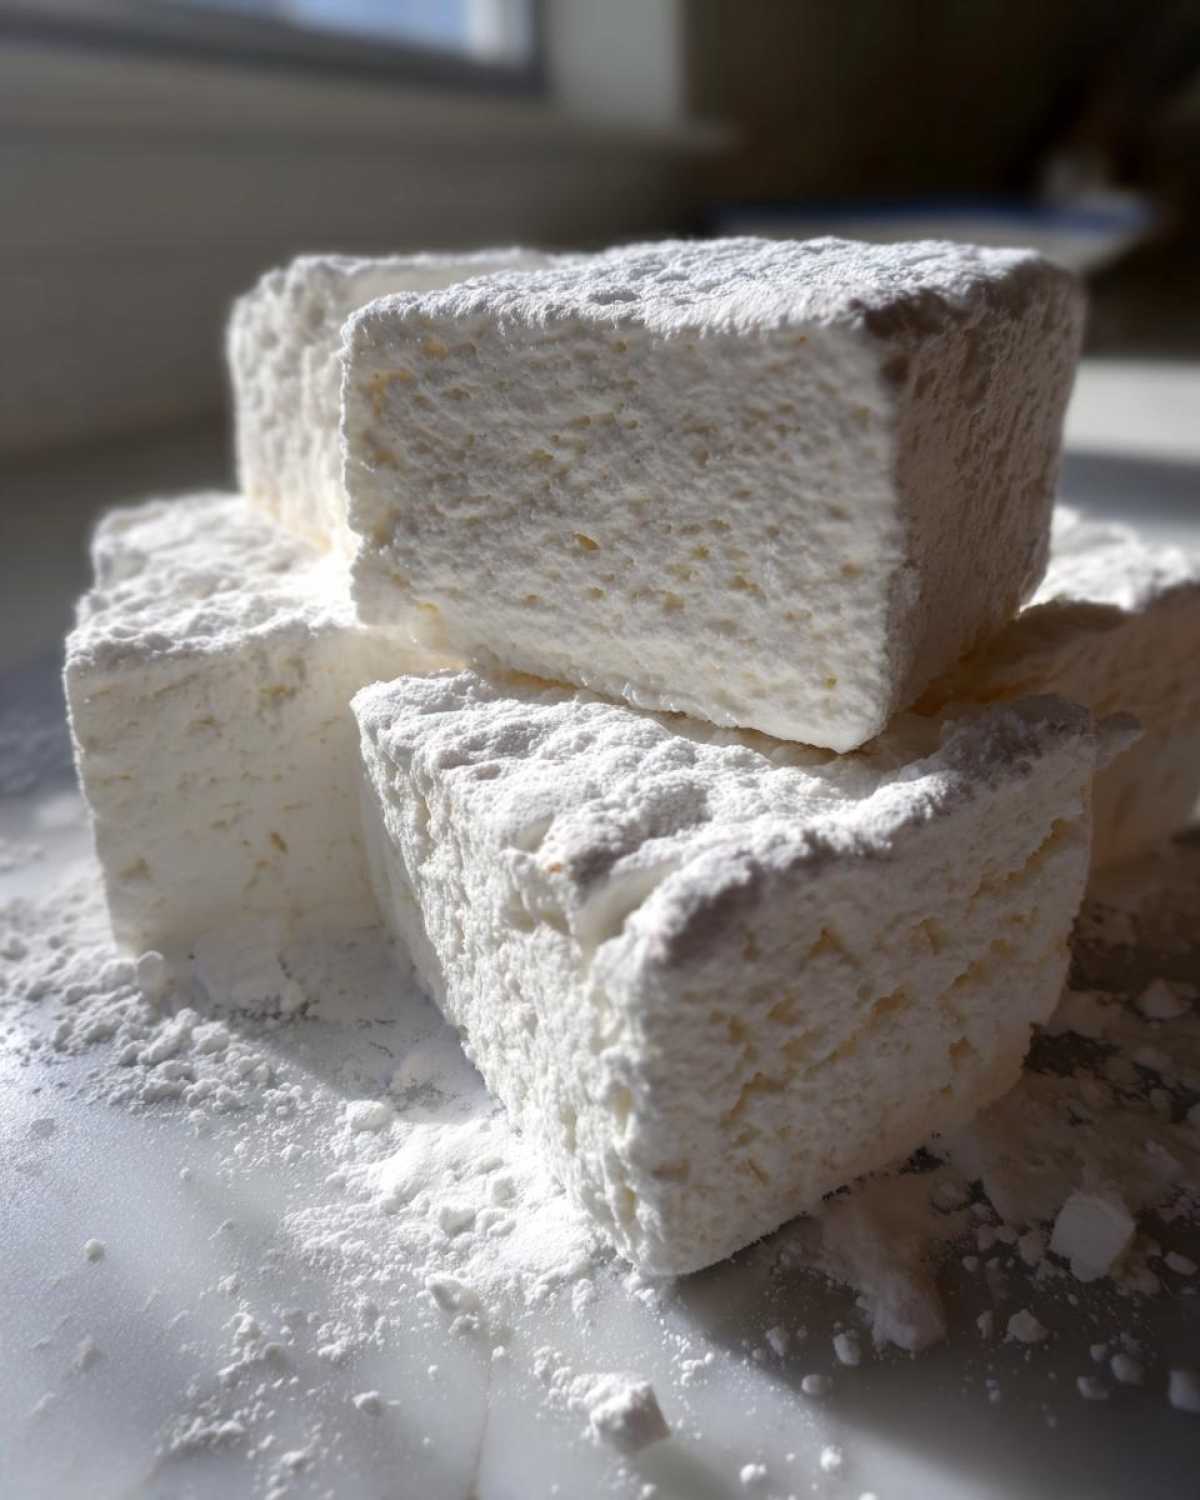
Oh buona sera! Let me tell you something straight away: the moment you buy those sad, chalky, cylinder-shaped puffs from the grocery aisle, you are missing out on true candy magic. Truly! When I first tried making homemade marshmallows from scratch, I almost laughed because the difference is night and day. They are just so dense and lifeless in comparison!
My grandmother, bless her heart, always said that anything worth having in the kitchen is worth making yourself, and these certainly prove her right. This is my absolute best basic recipe for achieving those soft, pillowy squares that literally melt the second they hit your tongue. It requires a bit of focused attention while the syrup cooks, but I promise you, the resulting texture for these homemade marshmallows is worth every second. I simply can’t go back now that I know what real fluff tastes like. If you want to see more wonderful marshmallow inspiration, check out what other bakers are doing over at this popular post!
Why You Will Make Homemade Marshmallows Again and Again
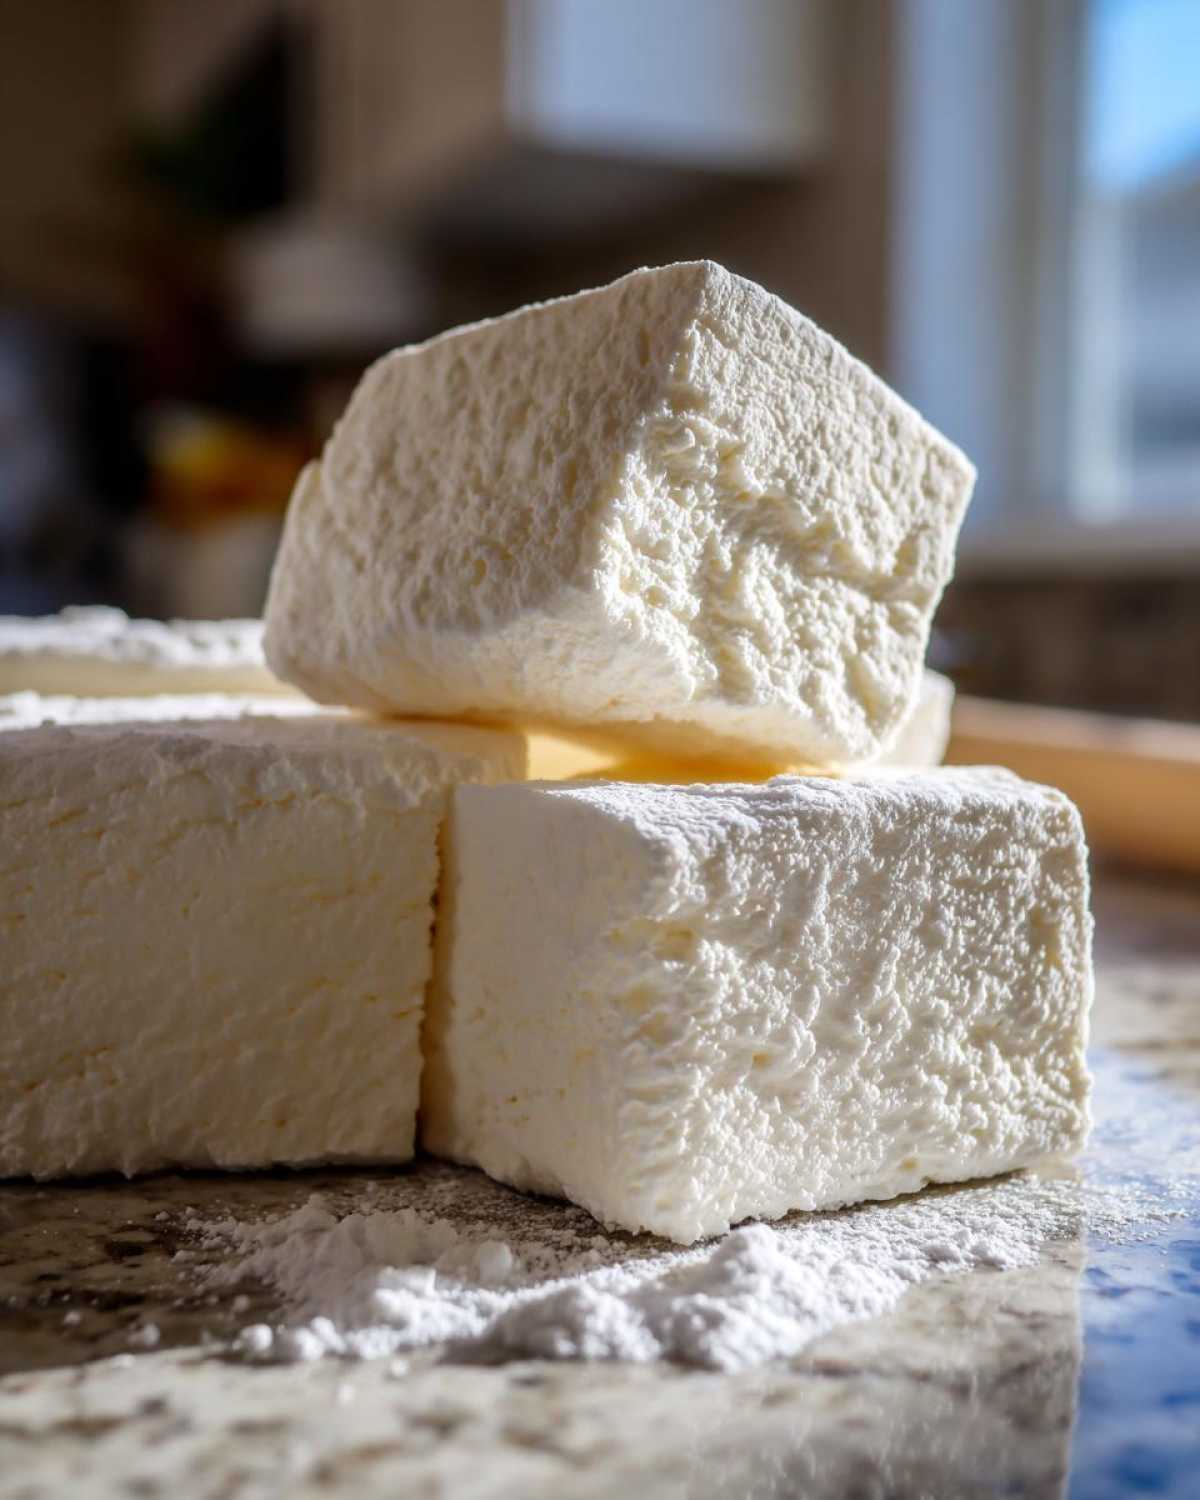
Why bother making these when you can buy them? That’s what my neighbor asked me the first time she saw the cloud of fluff coming out of my mixer! Seriously, once you try these, you’ll understand. Store-bought versions are fine, but ours? Ours are an experience. They’re lighter, fresher, and the vanilla flavor actually sings!
- Unbeatable texture—they are truly soft and pillowy, miles away from the stiff grocery store versions.
- Bright, clear flavor that you just can’t get from anything overly processed.
- It’s a satisfying kitchen accomplishment! Check out some advanced tips for making them even better here.
Achieving That Perfect Pillowy Texture
The magic word here is ‘whipping.’ That long 12 to 15-minute beat time is non-negotiable, my friends. It’s what incorporates all that air after the hot syrup hits the gelatin bloom. This high-speed beating is what turns a thick syrup base into something beautifully ethereal. Don’t skimp on the time; that’s how you guarantee those wonderful, fluffy homemade marshmallows that bounce when you poke them.
Gathering Ingredients for Homemade Marshmallows
Okay, now that you’re dreaming of those soft squares, let’s talk about what you need. For this recipe, we are keeping it classic, but remember, you are in charge of the final flavor! I find the ingredients listed below yield the most reliable, soft chewy candy, but always feel free to experiment later once you master the basic technique. If you are curious about some alternative, perhaps more nourishing approaches, readers sometimes look into options like those discussed here.
We need three main players here: the bloomer (gelatin), the sweetener (sugar and corn syrup), and the flavor enhancers. Using light corn syrup is the key to preventing graininess, which is a texture disaster in my book!
- Three packets of unflavored gelatin – make sure it’s unflavored, we are adding our own gorgeous flavor!
- Sugar and light corn syrup – measured precisely. This is candy chemistry, darling!
- Water – you need some cold water for the gelatin, and a little bit for the syrup.
- Salt, just a tiny pinch to balance all that sweetness.
- Pure vanilla extract, or even better, the seeds from a real vanilla pod if you want to impress someone!
- And finally, for dusting, we mix up plenty of confectioner’s (powdered) sugar with cornstarch.
Ingredient Notes and Substitutions for Homemade Marshmallows
This is where you can really take charge! The recipe calls for light corn syrup because it’s fantastic at keeping things smooth and stopping the sugar from crystallizing on us. If you absolutely must avoid it, you can sometimes substitute it with honey or maple syrup, but be warned—this will absolutely change the color and the flavor profile significantly. These substitutions are what you’d look into if you want **natural homemade marshmallows**.
For those who are trying to avoid the standard syrup, sometimes people look for **no corn syrup marshmallows**, but those often rely on different stabilizers or cooking methods. My experience tells me that sticking to the corn syrup here gives you the best, fluffiest result the first time around.
And one last note on flavor: If you want those incredible **vanilla bean marshmallows**, just skip the extract entirely and scrape the seeds from one full, fat vanilla bean right into the mix after the syrup is incorporated. It makes such a difference for a gourmet effect!
Equipment Needed to Make Homemade Marshmallows
Before we jump to the heat and the whisking, we need to make sure the kitchen workstation is ready! I always feel so much calmer when I have everything lined up, especially when playing around with hot sugar syrup. This isn’t the time to look for a stray tool, trust me.
For this recipe, you don’t need any fancy industrial machines, but you do need a couple of things to ensure safety and success. This is where we build the foundation so the whipping process goes perfectly.
- A Stand Mixer is Essential: Honestly, you must have a stand mixer, preferably one with a whisk attachment. You’ll be whipping this mixture on high speed for nearly fifteen minutes straight. My arms would fall off trying to do that by hand! Make sure your bowl is clean and dry before you start, too.
- A Candy Thermometer: This is not where you guess! Getting the syrup to exactly 240°F—the soft-ball stage—is crucial for structure. Too cool, and your marshmallows will be soup; too hot, and they get chewy or grainy. Don’t worry if you don’t have one yet; I used to borrow one from my sister until I bought mine.
- The Right Pan: Use a 9×13 inch baking pan. It gives the marshmallows the perfect depth. If you only have a 9×9 inch pan, you can use it, but they will be super thick, and you’ll need to increase the setting time quite a bit.
- Spatula and Knife: Have a sturdy spatula ready for scraping the thick mixture out (oil it lightly!) and a very sharp, large knife for cutting later.
Get these ready now, and you’ll feel totally prepared when it comes time for the fun part!
Step-by-Step Instructions: How to Make Marshmallows From Scratch
Are you ready? This is where the real kitchen alchemy happens! Please, remember that we are dealing with hot sugar syrup here, so please be careful when pouring it in—don’t let the mixer splatter hot candy on you. It’s exciting, yes, but we must be mindful! Patience in these first few steps guarantees you end up with those wonderfully fluffy homemade marshmallows later on. If you are looking for simple, proven instructions, this article has a great breakdown: How to Make Homemade Marshmallows.
Preparing the Pan and Blooming the Gelatin
First things first: we must prepare a welcoming bed for our lovely marshmallow cloud. Lightly grease your 9×13 inch pan—I usually just use a little softened coconut oil or vegetable shortening in mine. Then, take your powdered sugar and cornstarch—that’s what we use for dusting, not just powdered sugar alone, trust me—and whisk it together. Now, dust that mixture *generously* all over the bottom and up the sides of the pan. You want zero exposed sticky spots! Don’t be shy here; excess dusting is your insurance policy against sticking.
Next, go grab your stand mixer bowl. Pour in the first half-cup of your very cold water and sprinkle the three packets of gelatin evenly over the top. Don’t stir! Just let it sit there for about 10 minutes. This is called blooming, and it’s how the gelatin wakes up and gets ready to do its job. While that’s happening, we start the serious work with the syrup.
Cooking the Syrup and Whipping the Homemade Marshmallows
In a saucepan, combine your granulated sugar, the light corn syrup, the remaining 1/4 cup of water, and that little pinch of salt. Stir this just until the sugar dissolves over medium heat. Once it starts boiling, you stop stirring completely! Attach your candy thermometer—this is vital! We need this syrup to hit exactly 240°F, the soft-ball stage. This measurement is the secret to the whole structure!
The second it hits 240°F, pull it off the heat immediately. Turn your stand mixer on low speed over the bloomed gelatin. Now, *very slowly* pour the hot syrup down the side of the bowl. Be gentle so you don’t shock the gelatin too much. Once all that beautiful hot goo is in, crank that mixer up to high speed. You must beat it for a good 12 to 15 minutes. I know, it seems forever, but this step builds all the air and volume needed for the perfect recipe for soft marshmallows. When it’s done, it will be thick, brilliant white, and glossy. Finally, beat in your vanilla extract for that amazing aroma! If you want to see some advanced techniques on setting candy, I found some great advice here.
Working quickly now, scrape that glorious, thick mixture into your prepared, dusted pan. Use an oiled spatula to smooth the top. Dust the surface with plenty more of that sugar mixture. Now comes the hardest part of all: you have to leave it alone! Let it set up undisturbed at room temperature for at least four hours, but truthfully, overnight is always better for the final texture.

Marshmallow Cutting Techniques for Perfect Homemade Marshmallows
Your patience has paid off, and your marshmallow slab is now perfectly set! It’s firm, a little springy, and ready for its final transformation into beautiful squares. Now, this is the part where things can get sticky if you aren’t prepared, so listen closely, as this is how we avoid making one giant, unusable, sweet glue brick!
First, flip that pan over onto a cutting board that you have also dusted well with your cornstarch and powdered sugar mixture. If you generously dusted the pan before pouring the mixture in, it should release fairly easily. If it seems stuck, run a thin offset spatula around the edges gently to encourage it to come loose.
Once it’s released, you want to work fast! This is where you need a sharp utensil—I actually prefer a pizza cutter over a regular knife because I can use that rocking motion to slice cleanly through the thick, sticky dessert. My very best tip? You must keep your cutting tool oiled!
- Lightly wipe your knife or pizza cutter with a neutral oil (like vegetable or canola) before every single cut. This prevents the sticky marshmallow from dragging and pulling the square out of shape.
- If you notice the edges getting gummy mid-cut, stop, re-oil your tool, and re-dust your work surface lightly.
- Cut the slab into long strips first. Once you have strips, turn them 90 degrees and cut them into tidy squares.
After you have all your lovely little cubes, drop them immediately into a large bowl containing any leftover dusting mixture. Toss just gently to coat all the freshly cut, sticky sides. This stops them from immediately gluing themselves together in a big pile. If you want to see a demonstration of cutting techniques that really work well, I looked up some great advice here that might help you visualize the process!
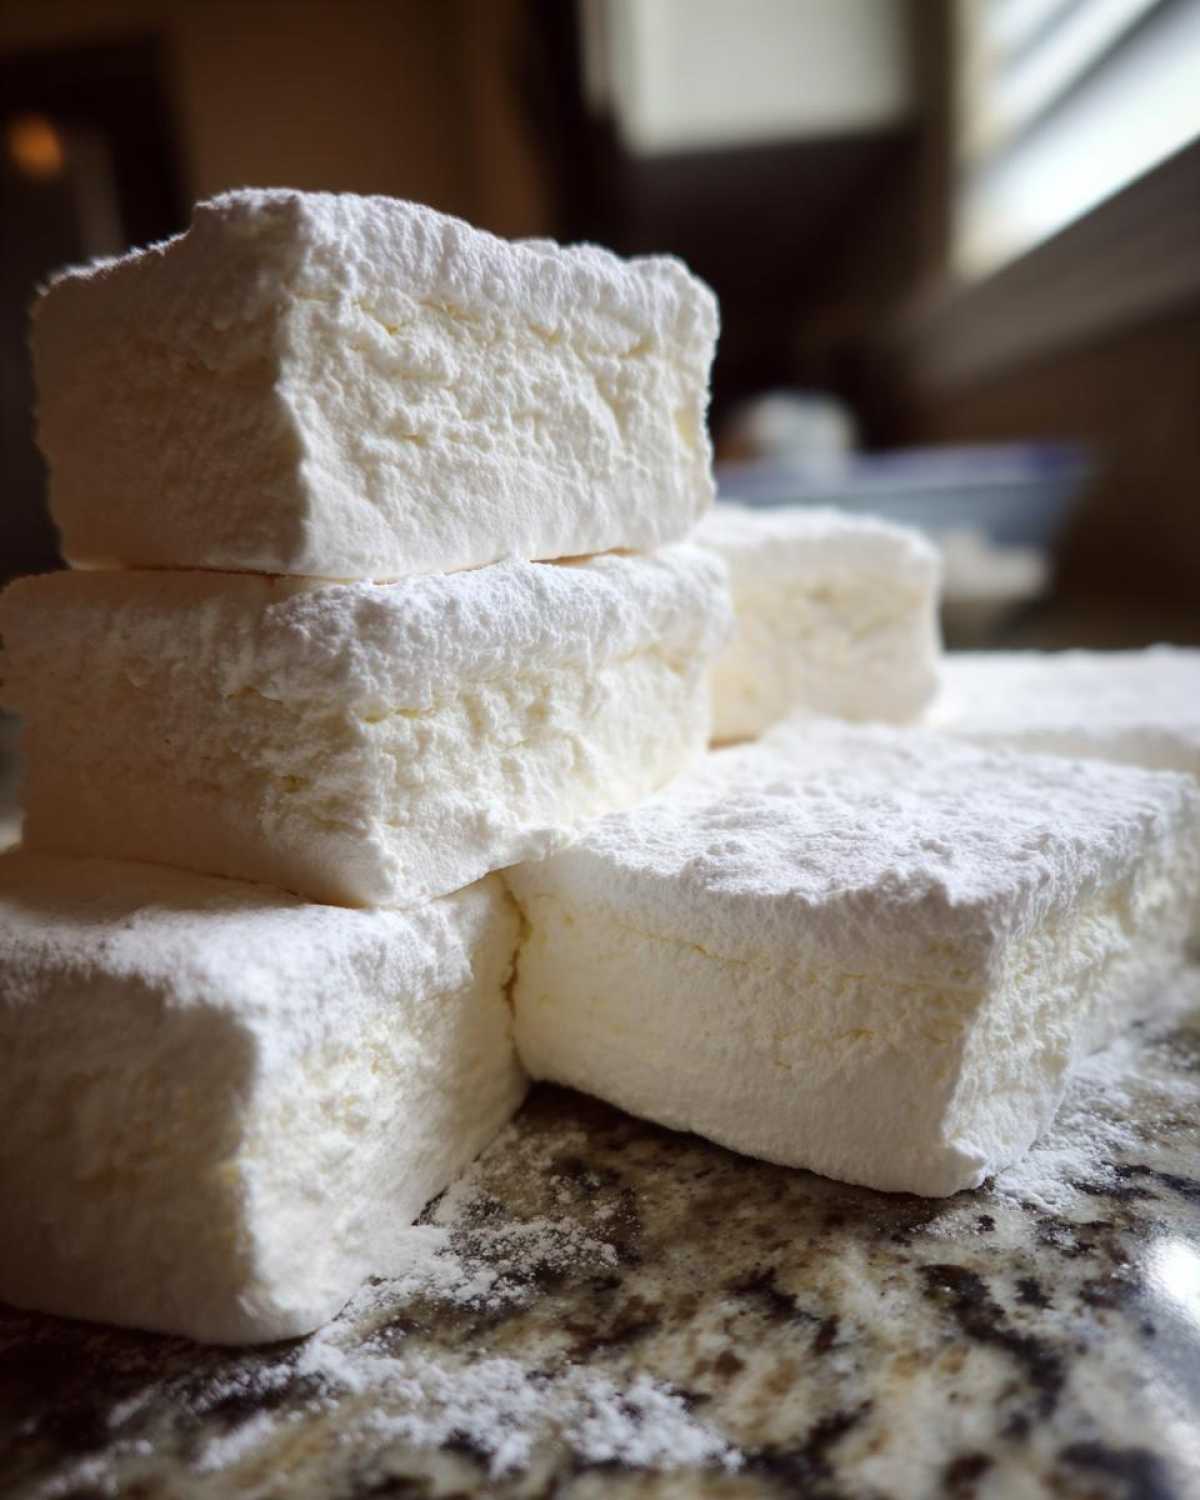
These cuts will give you beautiful, soft, pillowy squares that are just begging to be dunked into hot cocoa!
Using Your **Homemade Marshmallows** in **Homemade Dessert Ideas**
Alright, the hard part is over! You’ve made the softest, most glorious homemade marshmallows, and now the real fun begins—eating them! A stash of these beauties opens up a whole world of dessert possibilities that store-bought marshmallows just can’t touch. Honestly, I find that making these fresh for a party or holiday gathering instantly elevates everything.
They are phenomenal just eaten straight out of the container, I won’t lie. But trust me when I say they are perfect for toasting. Forget about the stiff, waxy things that just burn on the outside! These toast up to a gorgeous golden brown and melt completely through. They are essential if you plan on making proper homemade s’mores ingredients!
And of course, my favorite use during the colder months: dropping them into coffee or hot cocoa. They melt slowly and create this rich, comforting swirl. If you are looking for another traditional Italian-inspired recipe that’s perfect for sharing, you absolutely must try my moist Date Nut Bread recipe here!
Here are a few ways I love to use up my batches of fluffy homemade marshmallows:
- Hot Chocolate Perfection: These melt divinely into warm drinks. They become the ultimate topping for marshmallows for hot chocolate.
- S’mores Upgrade: Toast them over a campfire until gooey. They are fantastic between graham crackers and chocolate.
- Gifting Homemade Treats: Package them up nicely in clear cellophane bags tied with twine. They make such a thoughtful, handmade gift for neighbors or teachers around the holidays. They look so much more gourmet than any store-bought candy!
- Rice Krispie Treats: Use these in any recipe calling for marshmallows. The resulting treat will be chewier and have a cleaner, buttery flavor.
Seriously, once you taste these, you won’t want to keep them just for yourself. They are too good not to become a staple in your collection of homemade dessert ideas!
Storage and Shelf Life for Your Fluffy Homemade Marshmallows
You’ve cut them, you’ve tossed them in the dusting powder, and now you have this beautiful, perfect stash of fluffy homemade marshmallows. Hooray! But wait, you might not want to eat all four dozen tonight, right? That’s okay! The storage for these is refreshingly simple, just like everything else in this recipe.
The key is keeping them away from dry air and keeping them from touching each other too much, otherwise, that coating wears off and you’re back to marshmallow glue!
Here is what you need to do:
- Use the Right Container: Find an airtight container. Glass ones are lovely, but really, any container that seals well will work.
- Layer Carefully: You cannot just dump them in! They need something between the layers. Cut squares of parchment paper or wax paper and place a single layer of marshmallows on the paper. Then add another piece of paper on top, then the next layer of marshmallows, and so on. This prevents your beautiful squares from fusing into one giant, sticky brick overnight.
- Keep Them Cool and Dry: Keep the container stored at room temperature. Do NOT put them in the refrigerator! The fridge is too humid, and it ruins that delicate texture we worked so hard to achieve. They might get damp and sticky.
If you follow these steps—airtight container, parchment paper layers, room temperature—these marshmallows will happily keep their soft, chewy texture for up to two weeks. Honestly, I’ve never had a batch last that long because they disappear so fast, especially once the kids discover them!
Frequently Asked Questions About Making Homemade Marshmallows
Oh, I know you have questions! When you embark on making candy from scratch, you always do, and I love that you are thinking ahead. Addressing these little troubleshooting issues upfront is how we ensure you get those perfect, pillowy homemade sweets every single time. I’ve gathered the ones I get asked most often about this easy marshmallow recipe.
Can I make no gelatin marshmallows?
Ah, the gelatin question! Since gelatin is the protein that provides that bouncy, stretchy structure we want, this specific recipe really does require it to achieve that signature melt-in-your-mouth texture. If you need to avoid animal products, you generally look to agar-agar or certain plant-based stabilizers instead. They work, I’m sure, but they behave differently, and frankly, you won’t get the exact soft, chewy candy that this recipe is known for. For true, light-as-air texture, stick with the gelatin for now!
How do I make these into marshmallow fluff recipe consistency?
That’s a great question for someone who wants to top a pie! Marshmallow fluff is technically the precursor to the actual marshmallow; it’s the mixture before it sets and firms up. If you want fluff, the good news is you stop the process earlier. Instead of pouring the warm mixture into the pan and letting it sit overnight, you would just stop right after beating it for about 8 to 10 minutes until it’s thick, pour it into a jar, and let it cool slightly. But remember, for cutting into squares later, you really need the full set time that this recipe calls for!
If you want to see some other great tips for kitchen success, I always check my own archives, like this helpful guide on making the best egg salad—it’s all about technique!
Nutritional Overview for This Easy Marshmallow Recipe
Now, listen, I am a cook, not a nutritionist! These treats are made primarily of sugar and corn syrup—gorgeous, yes, but definitely an indulgence. The figures below are just an estimate for one square cut from the batch. Please remember that these amounts can change depending on the specific brands of gelatin or corn syrup you use in your kitchen.
- Serving Size: 4 squares
- Calories: Around 150 – they are light!
- Sugar: Approximately 30 grams
- Protein: About 3 grams
- Fat: Zero, thank goodness!
Enjoy them responsibly, my dears. They are best served warm in a gigantic mug of rich hot chocolate!
Print
Fluffy Homemade Vanilla Marshmallows: The Best Recipe
- Total Time: 4 hr 35 min
- Yield: About 4 dozen
- Diet: Vegetarian
Description
Make soft, pillowy homemade marshmallows from scratch. This easy recipe yields vanilla marshmallows that are far superior to store-bought versions, perfect for hot chocolate or s’mores.
Ingredients
- 3 packets unflavored gelatin
- 1 cup cold water, divided
- 1 cup granulated sugar
- 1 cup light corn syrup
- 1/4 cup water
- 1/4 teaspoon salt
- 1 tablespoon pure vanilla extract
- 1/2 cup powdered sugar, for dusting
- 1/2 cup cornstarch, for dusting
Instructions
- Lightly grease a 9×13 inch baking pan. In a small bowl, whisk together the powdered sugar and cornstarch. Dust the bottom and sides of the prepared pan generously with this mixture. Set aside.
- In the bowl of a stand mixer fitted with the whisk attachment, pour 1/2 cup of the cold water and sprinkle the gelatin evenly over the top. Let it sit for 10 minutes to bloom.
- While the gelatin blooms, combine the granulated sugar, corn syrup, 1/4 cup water, and salt in a medium saucepan. Stir over medium heat until the sugar dissolves.
- Attach a candy thermometer to the saucepan. Bring the mixture to a boil without stirring. Continue boiling until the syrup reaches 240°F (soft-ball stage). Remove from heat immediately.
- With the stand mixer running on low speed, slowly and carefully pour the hot syrup down the side of the bowl into the bloomed gelatin mixture.
- Increase the mixer speed to high. Beat for 12 to 15 minutes until the mixture is very thick, glossy, white, and holds stiff peaks. It should feel warm, not hot, to the touch.
- Beat in the vanilla extract during the last minute of mixing.
- Working quickly, scrape the marshmallow mixture into the prepared pan. Use a lightly oiled spatula to spread it evenly.
- Dust the top surface generously with the remaining powdered sugar and cornstarch mixture.
- Let the marshmallows set uncovered at room temperature for at least 4 hours, or preferably overnight.
- Once set, turn the marshmallow slab out onto a cutting board dusted with the sugar/cornstarch mixture. Use a sharp, oiled knife or pizza cutter to cut into squares. Toss the cut edges in the dusting mixture to prevent sticking.
Notes
- For a richer flavor, substitute the vanilla extract with seeds scraped from one vanilla bean.
- You can use this recipe for homemade s’mores ingredients or drop these soft chewy candy pieces into your hot chocolate.
- To store, place the cut marshmallows in an airtight container, separated by parchment paper, at room temperature for up to two weeks.
- Prep Time: 20 min
- Cook Time: 15 min
- Category: Dessert
- Method: Candy Making
- Cuisine: American
Nutrition
- Serving Size: 4 squares
- Calories: 150
- Sugar: 30
- Sodium: 10
- Fat: 0
- Saturated Fat: 0
- Unsaturated Fat: 0
- Trans Fat: 0
- Carbohydrates: 38
- Fiber: 0
- Protein: 3
- Cholesterol: 0


Comments are closed.