

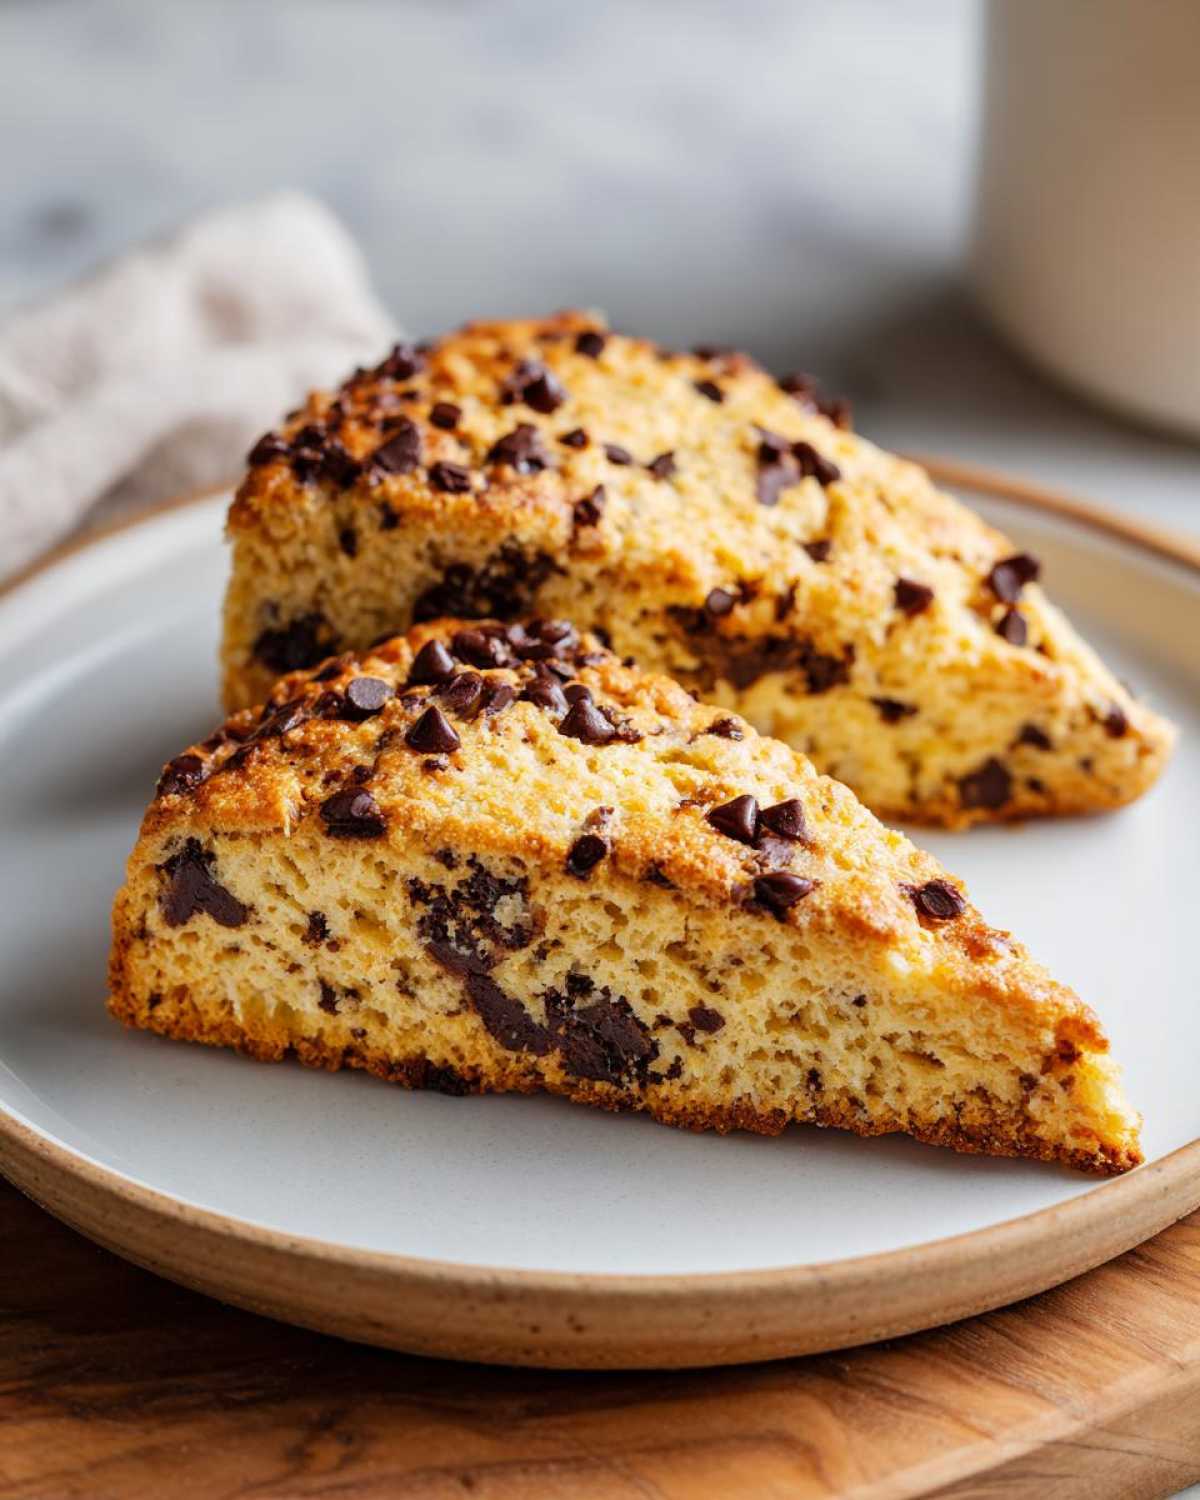
Oh, I get it. When you first switch to a gluten-free diet, you mourn the little things, right? For me, it was perfectly craggy, buttery scones. Everything I tried was either a rock or just… gummy. It felt like a crime that we couldn’t have that amazing, tender crumb! That’s why I spent nearly six months agonizing over this recipe until I cracked the code. Trust me when I say these Gluten-Free Chocolate Chip Scones are a miracle. They actually bake up tasting exactly like a rich, slightly crunchy chocolate chip cookie, but in scone form! We nailed the texture, and I’m so excited to finally share them.
Why You Will Love These Gluten-Free Chocolate Chip Scones
Honestly, these aren’t just “good for gluten-free.” They are genuinely amazing scones. If you’re tired of dense, heavy pastries masquerading as scones, you need these in your life. They are quick, too—perfect for an easy breakfast treat!
- Unbelievably tender interior that rivals traditional scones.
- We’ve managed to achieve that sought-after flaky texture!
- They taste just like sneaking a bite of cookie dough before baking.
- Perfect for pairing with a cup of tea or coffee. If you want to compare them to a classic, check out my notes on traditional methods and what makes these different here.
The Essential Ingredients for Perfect Gluten-Free Chocolate Chip Scones
Okay, listen up, because this is the most crucial part for achieving that Perfect Texture Gluten Free Pastry we’re aiming for. With gluten-free baking, the flour blend is everything! You absolutely need a high-quality all-purpose blend that already includes xanthan gum. If yours doesn’t have it, you’ll need to add about a teaspoon, otherwise, the structure just falls apart.
Remember, keeping everything cold is non-negotiable; that’s what creates the layers! Don’t let your butter get soft while you measure everything out.
- 2 1/4 cups gluten-free all-purpose flour blend (with xanthan gum, seriously!)
- 1/4 cup granulated sugar
- 1/4 cup packed light brown sugar (this gives us that cookie flavor!)
- 1 tablespoon baking powder
- 1/2 teaspoon salt
- 1/2 cup (1 stick) cold unsalted butter, cut into small cubes
- 1 cup semi-sweet chocolate chips (use slightly fewer if you plan on adding nuts later!)
- 1/2 cup heavy cream, plus a little extra for brushing
- 1 large egg
- 1 teaspoon vanilla extract
If you’re interested in other staple GF ingredients, sometimes I use almond flour when testing other recipes, like my fluffy breakfast ideas over here, but for these scones, stick to a reliable 1:1 blend!
Gluten Free Scones Recipe: Step-by-Step Instructions
Alright, let’s get down to business. Making these Gluten-Free Chocolate Chip Scones is mostly about technique, not complicated steps. Before you even touch the flour, get your oven cranked up to 400 degrees Fahrenheit. Line a baking sheet with parchment paper; trust me, scraping stuck gluten-free pastry off a pan is nobody’s idea of fun.
Preparing the Dry Mix and Cutting in Butter for Gluten-Free Chocolate Chip Scones
First, grab a big bowl and whisk together all the dry stuff: the GF flour blend, both sugars, the baking powder, and the salt. You want this totally uniform. Now for the butter cubes! Toss them in—make sure they feel icy, not yielding. Use a pastry blender or your fingertips to cut that butter in. You’re aiming for coarse crumbs, and you should still see some pea-sized chunks of butter hanging around. Those chunks are your flakiness creators!
Gluten-free dough won’t behave like regular flour dough; it won’t magically come together and get elastic. It stays a bit sad and crumbly, so don’t panic when it looks like wet sand mixed with flour dust. After the butter is in, gently stir in those lovely chocolate chips.

Mixing, Shaping, and Baking Your Gluten-Free Chocolate Chip Scones
In another little bowl, you need to whisk your wet ingredients: the heavy cream, egg, and that beautiful vanilla. Pour this into your dry mix. Use a fork, and I mean *gently*, just mix until everything barely comes together. If you overwork it, even without gluten, you deflate all the air bubbles we worked so hard to create!
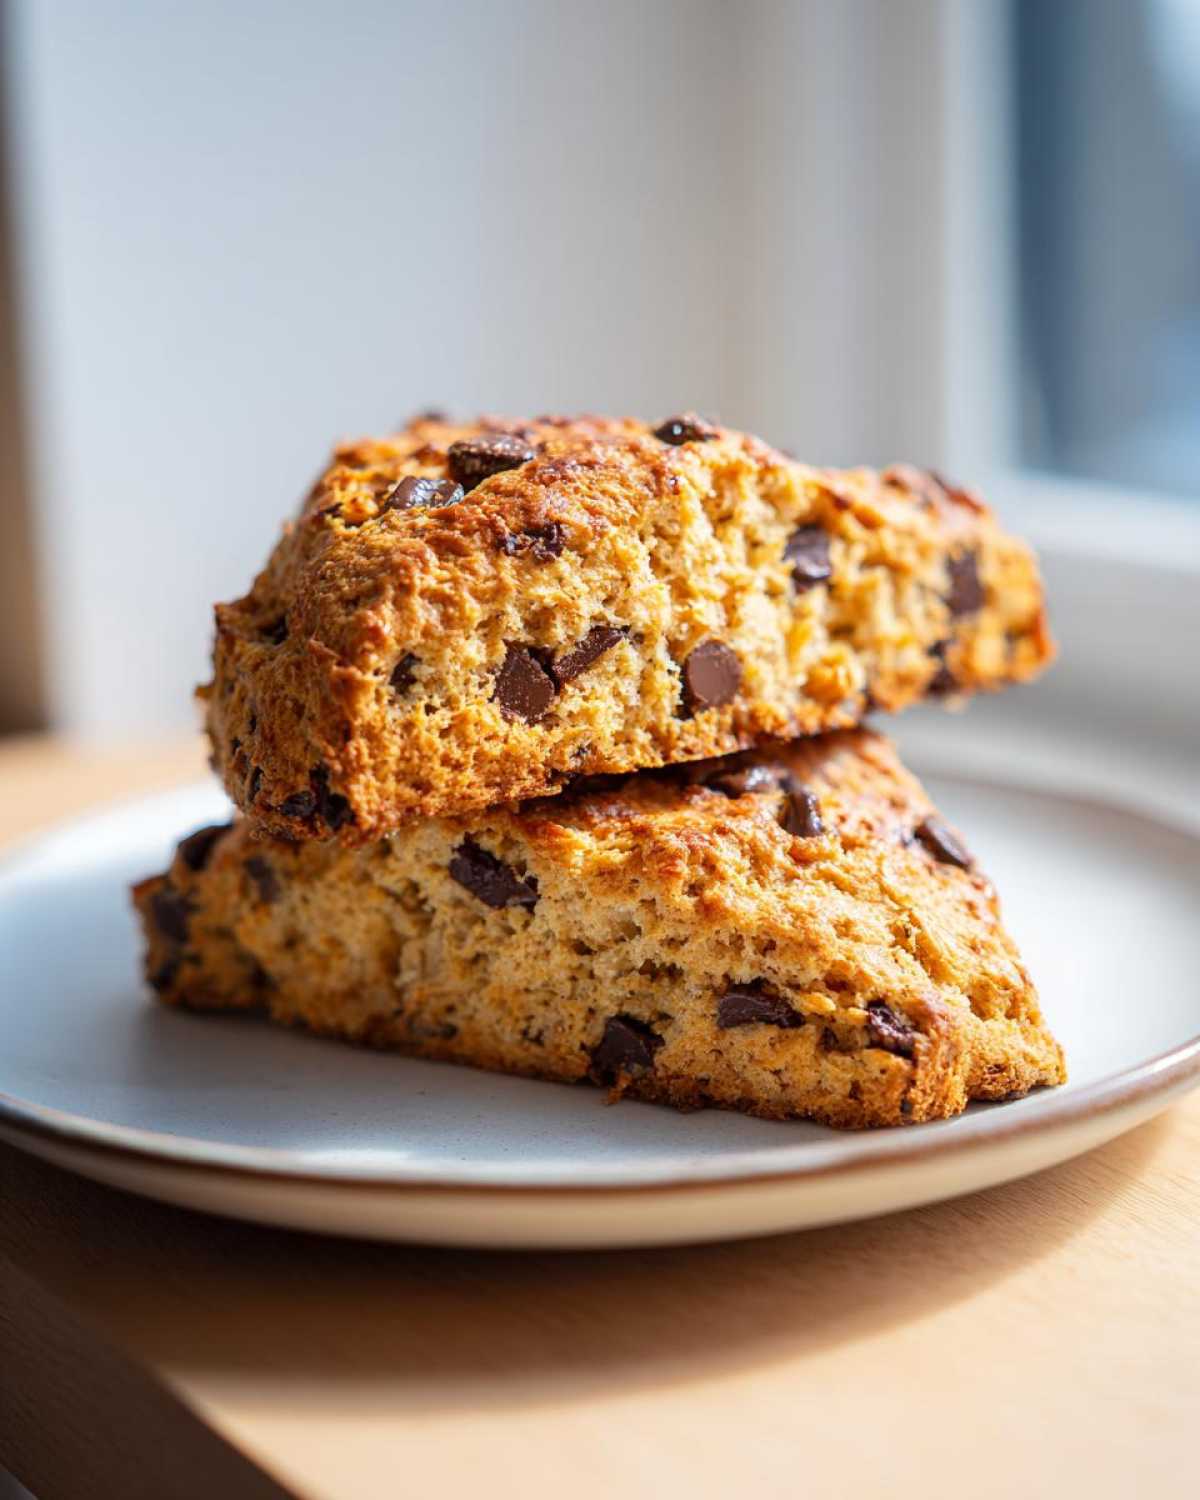
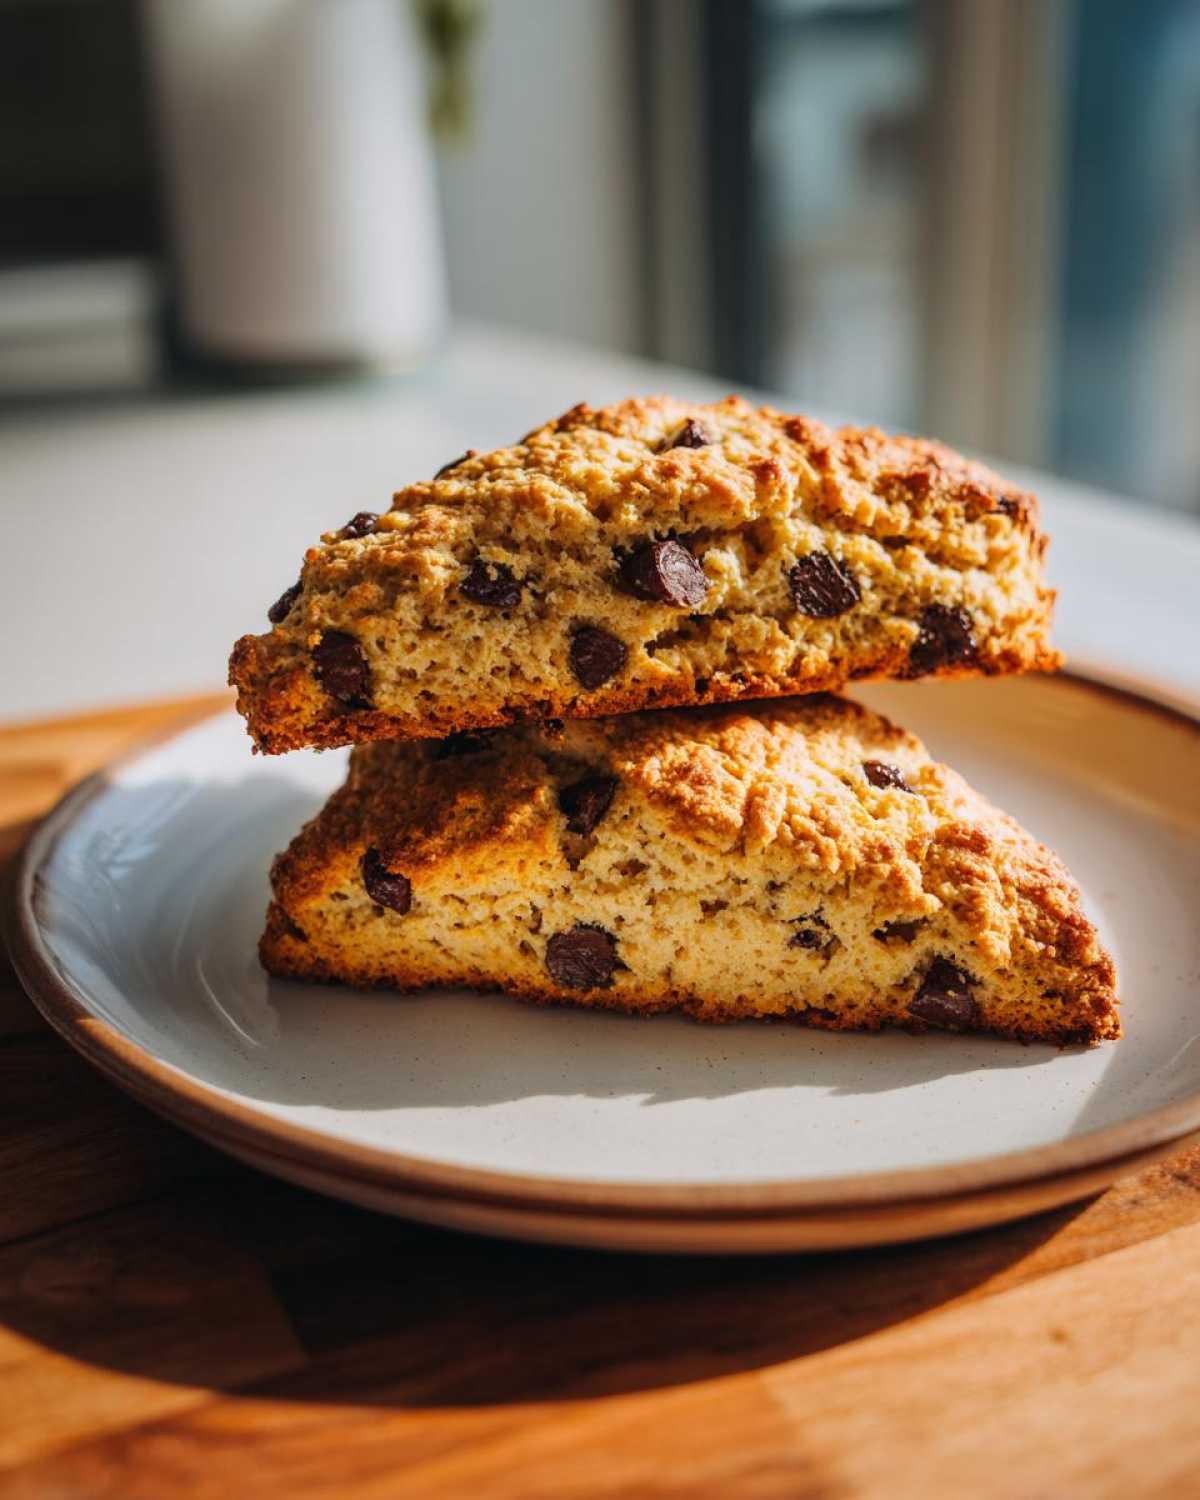
Dust a clean surface lightly with extra GF flour. Turn the sticky dough out and pat it into a circle about 3/4 of an inch thick. No rolling pins needed here! Cut that disk into 8 wedges, like a pizza. Pop them onto your parchment-lined sheet, giving them space to breathe. Before they go in, brush the tops lightly with a touch more heavy cream—maybe even sprinkle on coarse sugar if you want them extra crunchy! Bake for 15 to 18 minutes. You want them golden brown on top and fully cooked through. Let them rest on the pan for five minutes before moving them to a rack. If you want tips on how long to keep them fresh, I have a whole post on freezing ingredients here!
Expert Gluten Free Baking Tips for Scones Success
It took me ages to figure out the specific quirks of baking without gluten, but now I feel like I can conquer anything, and you will too! The biggest secret in my Gluten Free Baking Tips for Scones collection is really just resisting the urge to fiddle with the dough once the cream goes in. Don’t knead it. Don’t punch it down. Remember, you aren’t developing gluten; you’re just hydrating the starches and gums. Overworking it just incorporates too much air, and then poof—you’re left with a hockey puck instead of a scone.
Also, the flour blend matters more than anything else. I’ve tested so many brands! I highly recommend sticking to one that closely mimics the structure of standard flour for reliable structure—it makes achieving that light, almost crumbly texture so much easier. If you want my deep dive on the best blends out there, you can read my thoughts on the Best All Purpose Flour Blend for Scones right here. Seriously, that little bit of research upfront saves you so much frustration!
Ingredient Notes and Substitutions for Gluten-Free Chocolate Chip Scones
Since we’re working without the magic of wheat, we have a little more flexibility in swapping things out, which is great for dietary needs! People are often asking me about making these into Dairy Free Scone Options, and it’s totally achievable because the structure relies heavily on the cold fat and the xanthan gum, not the dairy itself.
You can definitely swap the heavy cream for a thick, full-fat canned coconut cream or even a high-quality, plain dairy-free yogurt. If you use yogurt, you might need to add just a splash more vanilla because yogurt tends to be tangier. Just keep that liquid ratio tight!
For the butter, if you need to go strictly dairy-free, use a good quality block vegan butter alternative. Don’t use the soft tub stuff—you need that icy cold, sturdy block fat to cut into the flour just right, same as regular butter. This keeps the bake flaky and prevents density.
What about the chocolate chips? Semi-sweet is classic, but feel free to mix it up! I adore using chopped dark chocolate chunks instead. They melt into these gorgeous little pools throughout the scone, making it feel instantly more decadent. You could even throw in some chopped pecans or walnuts if you want a crunchier texture than the Best Gluten Free Chocolate Chip Baking typically offers. If you were curious about other breakfast swaps, I’ve dabbled a lot with almond flour recipes which you can see here, but for this scone, the 1:1 blend really gives you that classic chew we’re looking for!
Variations: Making Your Gluten Free Scones Recipe Unique
Just because this is the perfect base recipe doesn’t mean you can’t play around! Part of the fun of baking, especially Gluten Free Chocolate Chip Scones, is customizing them to your mood. These scones are so forgiving because they lean so heavily on the rich textures of butter and brown sugar, giving you lots of room to experiment with flavors.
If you’re looking to deepen the cookie flavor profile—which is what we are really going for in our Best Gluten Free Chocolate Chip Baking—you can swap out half those semi-sweet chips for dark chocolate or even milk chocolate. I love doing a mix! Try finely chopping a bar of good quality dark chocolate instead of using chips; the way it melts provides a totally different gooey texture.
If you want to add crunch, nuts are your best friend here. Pecans and walnuts work beautifully together, toasted lightly first, of course. Just toss about half a cup of chopped nuts in when you stir in the chocolate chips.
Speaking of spices—don’t be afraid to add just a tiny pinch of something unexpected to the dry mix when you’re getting started. A tiny bit of ground cardamom or even a whisper of nutmeg elevates the standard chocolate chip flavor profile in the most delightful way. See how I played with spice levels in my red velvet cookies for inspiration here. Small touches like that make all the difference when you’re perfecting your favorite Gluten Free Scones Recipe!
Serving Suggestions for Your Homemade Gluten Free Tea Time Treats
These Gluten Free Chocolate Chip Scones are so richly flavored with butter and brown sugar—they really taste like a dessert on their own! That said, they are absolutely divine when served warm, preferably just a few minutes out of the oven while the chocolate is still gorgeously gooey.
Since these are slightly sweeter and richer than a traditional savory scone, you don’t always need a heavy topping. A very light dusting of powdered sugar is my go-to recommendation if you don’t want to mask the chocolate flavor. It just gives them that lovely bakery finish.
However, if you are serving these up for a proper afternoon tea moment and want to lean into the classic pairings, you cannot go wrong with clotted cream. It’s thick, it’s rich, and it melts beautifully into those warm little nooks and crannies. It’s decadent, for sure, but since these are your special Homemade Gluten Free Tea Time Treats, why not indulge?
And, of course, jam! Even though the cookie flavor is strong, a bright, tart jam can cut through the richness wonderfully. I tend to use raspberry or a mixed berry preserve. If you ever want to try making your own super easy, no-fuss version that sets up perfectly, I highly recommend my recipe for Easy Raspberry Jam Recipe (No Pectin). It takes minimal time and tastes infinitely better than anything you buy jarred!
Pairing-wise, they are fantastic with a bold black coffee or a strong Earl Grey tea. Enjoy them while they are at their peak warmth!
Storage and Reheating Instructions for Gluten-Free Chocolate Chip Scones
This is where gluten-free baking can sometimes get tricky, so listen closely! Because we aren’t using gluten to hold onto moisture like traditional scones, these lovely guys can go stale faster if you just leave them sitting out on the counter. But don’t worry, they last longer than you’d think if you follow two simple rules: airtight storage and smart reheating.
If you plan on eating them all on the day you bake them—which, honestly, who could blame you?—just leave them on the counter loosely covered with a kitchen towel. But for anything longer than 24 hours? You need to put them away properly. Store the cooled scones in a truly airtight container. I prefer stacking them with a little parchment paper square between each one so the chocolate doesn’t smudge together, especially if it’s humid in your house.
If you’re storing them for up to three days on the counter, they should be fine! If you need to keep them longer, toss them in the freezer. They freeze beautifully, and freezing is actually a fantastic way to preserve that just-baked tenderness.
Reheating is key to bringing them back! Don’t just microwave them unless you absolutely have to (microwaving GF baked goods can sometimes make them tough if overdone). The absolute best way to revive a frozen or day-old scone is quickly popping it into a toaster oven or a regular oven set to about 300 degrees Fahrenheit for about 5 to 7 minutes. This gently warms the butter again and melts the chocolate just enough. It makes them taste like you just pulled them out of the oven this minute!
Frequently Asked Questions About Gluten Free Scones Recipe
Can I use a different gluten-free flour blend for these scones?
That’s a fantastic question, and the answer sometimes changes things! For these Gluten-Free Chocolate Chip Scones, I really push for a 1:1 high-quality blend that already contains xanthan gum. That gum is what mimics the elasticity gluten usually provides, keeping your pastry from crumbling into dust. If you happen to be using a blend without it, you absolutely must add about one teaspoon for this recipe to work well structurally. If you don’t add xanthan gum, you might find you need to add a tiny splash more cream, but start small—gluten-free doughs absorb liquid differently than regular ones!
How do I prevent my Gluten-Free Chocolate Chip Scones from becoming dry?
Look, dryness is the enemy of all gluten-free baking, but we are fighting it on two major fronts here to make sure you get those Flaky Gluten Free Scones! First, don’t overmix the dough once you add the cream. Seriously, just mix until you see the flour disappear. Overworking it knocks out the air we relied on. Second, keep that butter frigid! Cutting hard, cold butter into the flour creates pockets that melt during baking, steaming the dough and creating tender layers. That’s your secret weapon against dryness!
Are these considered an Easy Gluten Free Breakfast Pastry?
Absolutely, yes! I truly think this is one of the simplest and most rewarding Best Gluten Free Chocolate Chip Baking recipes out there, which is why I included it in my list of quick sweets. The prep time is only about 15 minutes, and because they bake so fast at a high heat (15-18 minutes at 400 degrees!), you can go from zero to fresh-baked pastry in under 40 minutes total. They really are a contender for the title of Easy Gluten Free Breakfast Pastry when you need something special but fast. If you want to see other quick baked goods, including some wonderful moist muffin recipes, check out my favorites here!
Print
Gluten-Free Chocolate Chip Scones
- Total Time: 33 min
- Yield: 8 servings
- Diet: Gluten Free
Description
Make tender, flaky scones that taste like chocolate chip cookies using a gluten-free flour blend.
Ingredients
- 2 1/4 cups gluten-free all-purpose flour blend (with xanthan gum)
- 1/4 cup granulated sugar
- 1/4 cup packed light brown sugar
- 1 tablespoon baking powder
- 1/2 teaspoon salt
- 1/2 cup (1 stick) cold unsalted butter, cut into small cubes
- 1 cup semi-sweet chocolate chips
- 1/2 cup heavy cream, plus more for brushing
- 1 large egg
- 1 teaspoon vanilla extract
Instructions
- Preheat your oven to 400 degrees Fahrenheit. Line a baking sheet with parchment paper.
- In a large bowl, whisk together the gluten-free flour blend, granulated sugar, brown sugar, baking powder, and salt.
- Add the cold butter cubes to the dry ingredients. Use a pastry blender or your fingertips to cut the butter into the flour until the mixture resembles coarse crumbs with some pea-sized pieces of butter remaining.
- Stir in the chocolate chips.
- In a separate small bowl, whisk together the heavy cream, egg, and vanilla extract.
- Pour the wet mixture into the dry ingredients. Use a fork to gently mix until just combined. Do not overmix; the dough will be slightly sticky.
- Turn the dough out onto a lightly floured surface (use extra gluten-free flour). Gently pat the dough into a 3/4-inch thick circle or rectangle.
- Cut the dough into 8 equal wedges or use a round cutter for individual scones. Place the scones onto the prepared baking sheet, leaving about 1 inch between them.
- Brush the tops of the scones lightly with extra heavy cream.
- Bake for 15 to 18 minutes, or until the tops are lightly golden brown and a toothpick inserted into the center comes out clean.
- Let the scones cool on the baking sheet for 5 minutes before transferring them to a wire rack to cool slightly.
Notes
- Use a high-quality gluten-free flour blend that already contains xanthan gum for the best texture.
- Keep the butter very cold; this helps create flaky layers in gluten-free pastry.
- If you want a richer flavor, substitute half of the heavy cream with full-fat sour cream.
- For a crispier exterior, sprinkle a little coarse sugar on top before baking.
- Prep Time: 15 min
- Cook Time: 18 min
- Category: Breakfast
- Method: Baking
- Cuisine: American
Nutrition
- Serving Size: 1 scone
- Calories: 350
- Sugar: 18
- Sodium: 220
- Fat: 21
- Saturated Fat: 13
- Unsaturated Fat: 8
- Trans Fat: 0
- Carbohydrates: 35
- Fiber: 1
- Protein: 5
- Cholesterol: 75


Comments are closed.