

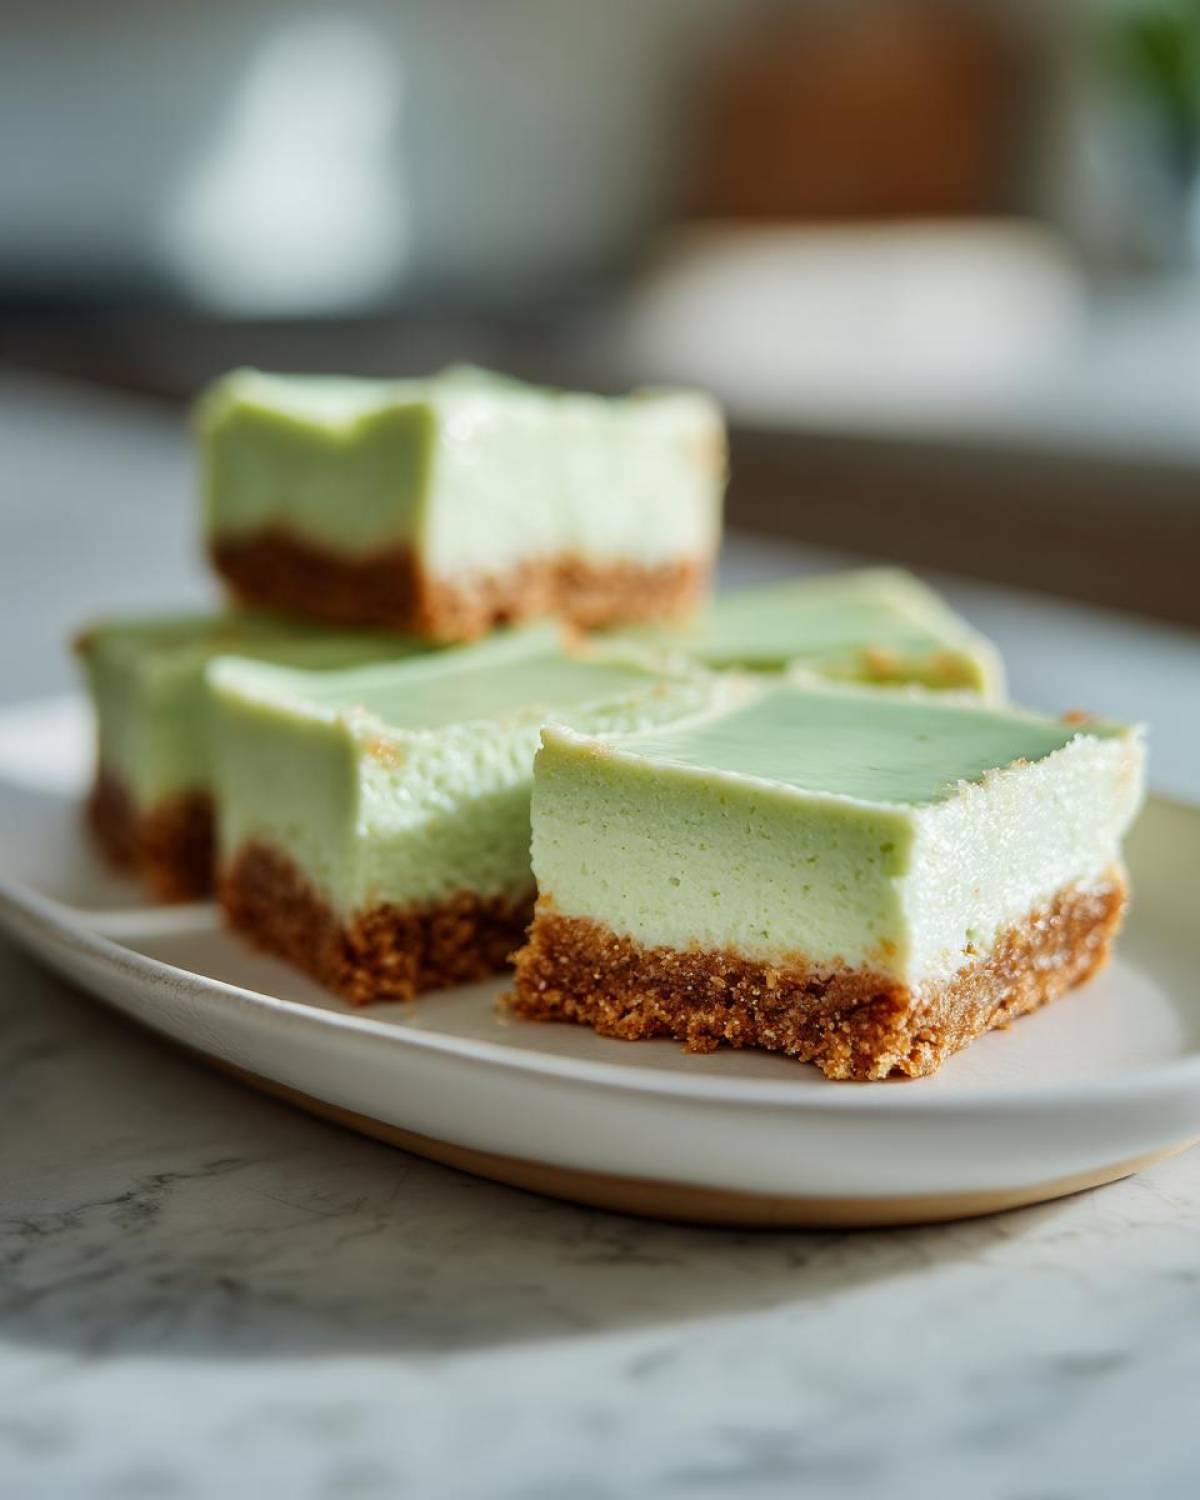
If you’re anything like me, when the summer heat hits, you start craving something bright, unbelievably tangy, but you absolutely do *not* want to deal with a soggy pie crust and a flimsy slice that falls apart the second you pick it up. Forget that! That’s why I’m obsessed with making big batches of **Creamy Key Lime Pie Bars with Graham Cracker Crust**.
Bars are the unsung heroes of potlucks and backyard BBQs, right? You can cut them into perfect squares ahead of time, and they hold together like a dream. I’ve perfected this recipe over the years to guarantee you get that signature tartness hitting your tongue first, followed by this impossibly rich, creamy filling. Seriously, the texture on these is just spot-on every single time. Trust me, this is the **Best Key Lime Bar Recipe** you’ll ever need!

Why You Will Love These Creamy Key Lime Pie Bars with Graham Cracker Crust
I swear, these squares solve all my dessert dilemmas! They are bright, they’re easy, and they travel like a dream. You won’t find a better combination of tang and sweetness, I promise. Here’s why they’re about to become your new favorite:
- The filling sets up beautifully—so rich and creamy, not runny at all!
- That buttery, crisp $\text{Graham Cracker Crust Bars}$ is the perfect salty-sweet base.
- They slice perfectly into squares, making serving a crowd ridiculously simple.
- You get that authentic, zippy citrus punch in every bite of these $\text{Key Lime Pie Bars}$!
You simply have to try this $\text{Creamy Key Lime Pie Bars with Graham Cracker Crust}$ recipe because it checks every single box! Because you asked, you can check out my tips for making even the best $\text{Key Lime Pie Bars}$ absolutely foolproof over here: the best Key Lime Pie Bars.
Gathering Ingredients for Your Creamy Key Lime Pie Bars with Graham Cracker Crust
Okay, the beauty of this recipe is that the ingredient list for these amazing $\text{Creamy Key Lime Pie Bars with Graham Cracker Crust}$ is surprisingly short! You probably have half of this stuff laying around already. We break it into two groups: the crust, which definitely needs that buttery base, and the filling that gives us that incredible tropical *zing*.
You’ll need the full 1 1/2 cups of graham cracker crumbs, 6 tablespoons of melted butter, and just a tiny bit of sugar for that crust. For the filling that makes these Rich and Creamy Lime Bars so special, grab that whole 14-ounce can of sweetened condensed milk—that’s our secret weapon for creaminess! Don’t skip the 2 large egg yolks; they help everything set up nicely in the oven. If you can snag fresh key limes, go for it, but bottled works great too! See my favorite shortcuts for making quick desserts here: 5 Ingredient Key Lime Pie No Bake.
- Graham Cracker Crumbs: 1 1/2 cups
- Granulated Sugar: 1/4 cup (plus more for the crust)
- Unsalted Butter: 6 tablespoons, melted
- Sweetened Condensed Milk: 1 (14 ounce) can
- Key Lime Juice: 1/2 cup (fresh or bottled)
- Large Egg Yolks: 2
- Lime Zest: 1 teaspoon
Step-by-Step Guide to Making Creamy Key Lime Pie Bars with Graham Cracker Crust
Alright, time to get down to business! This is where the magic happens, and trust me, this process is so much simpler than making a full pie. We’re building these delicious $\text{Lime Squares for a Crowd}$ in layers. Keep your oven set to 350°F (175°C) as we start. The absolute must-do first step? Line that 8×8 pan with parchment paper, making sure you leave some overhang on the sides. That overhang is your handle later, so don’t skip it!
Preparing the Graham Cracker Crust Base
First things first, we tackle that buttery foundation. In a bowl, mix your graham cracker crumbs, that reserved 1/4 cup of sugar, and the 6 tablespoons of melted butter. You need to mix this like you mean it until every crumb is coated. We want a solid base for these Graham Cracker Crust Bars!
Press that mixture firmly into the bottom of your parchment-lined pan. I use the bottom of a measuring cup to really tamp it down tight—you want it compact so it doesn’t crumble when you slice it later. Pop that crust into the oven for just 10 minutes to set it. Then, pull it out and let it cool down just a touch while you whip up the filling.
Mixing and Pouring the Creamy Key Lime Filling
Now for the payoff! This is what gives you those wonderfully Rich and Creamy Lime Bars. Grab a clean bowl—no need to wash the crumb bowl—and whisk together that can of condensed milk, your 1/2 cup of lime juice, the two egg yolks, and the zest. Whisk it gently but thoroughly until it’s totally smooth. Don’t stop whisking too soon; you want to ensure those yolks incorporate completely to guarantee that creamy texture you’re reaching for!
When the crust has stopped scorching hot, slowly pour that lime mixture right over the top. Try to keep it even! If you want it extra smooth, you can pop this whole pan into the oven right away, but I like to let the crust cool down for about 15 minutes first.
For more ideas on simple, no-bake lime treats that skip the oven entirely, check out the options here: No Bake Key Lime Pie Bars.
Baking and Chilling the Key Lime Pie Dessert Squares
Bake the bars for just 15 to 18 minutes. This is the trickiest part! You are looking for the edges to look set, but when you gently wiggle the pan, the very center should still have a little bit of *jiggle*—like really firm Jell-O. If you see no movement at all, you’ve probably overbaked them, and they won’t be as creamy.
Once they come out, you have to let them cool on the counter until they hit room temperature. This is important! After that, cover them gently and slide them into the fridge for a minimum of 4 hours. Honestly, if you can wait until the next day, these $\text{Key Lime Pie Dessert Squares}$ slice cleaner than you can imagine. That deep chill is key to perfect $\text{Desserts with Graham Cracker Base}$!
Tips for Achieving the Best Creamy Key Lime Pie Bars Recipe
Look, everyone wants the creamiest bar, right? If you follow the main recipe, you are 90% there, but these little tricks are what take these $\text{Easy Key Lime Dessert}$ bars from good to ridiculously amazing.
First, let’s talk juice quality. If you use fresh Key Limes, the flavor is intense and floral, which is lovely. But if you’re relying on bottled Key Lime Juice, make sure it’s a brand you trust! Low-quality juice can sometimes mute that necessary tartness, and we need that *zing* to balance the richness of the condensed milk.
My biggest tip for creamy texture is to make sure you’re mixing the filling just until it’s smooth, but not whipping air into it unnecessarily. Too much air can cause little holes or bubbles when they bake. We want density, not fluff!
And slicing? Oh boy, slicing can be frustrating. For those perfect squares, you absolutely need that 4-hour chill—or better yet, overnight. If you try to rush it, you end up with a smeary mess! After chilling, use a long, thin knife dipped in hot water between every single cut. Wipe it dry, dip it again. It’s tedious, but that’s how you get professional-looking $\text{Key Lime Bars Recipe}$ cuts!
For other quick ideas when you need citrus fast, check out my roundup of Easy Key Lime Dessert options!
Variations for Your Tangy Lime Bars
While I stand by this foundational recipe for the absolute Best Key Lime Bar Recipe, sometimes you just need to switch things up, especially if you’re making these $\text{Festive Summer Lime Squares}$ for the third weekend in a row!
The most dramatic change you can make is skipping the cooling and going straight for a beautiful meringue topping. Once the bars are baked and just slightly cooled (not completely cooled!), whip up a simple Italian or Swiss meringue and spread it over the top. Then, stick it under the broiler for about 60 seconds—watch it like a hawk because it browns fast! That adds a lovely, fluffy contrast to the rich, baked base.
If you want a slightly different citrus note, try swapping out about a quarter of the key lime juice for fresh lemon—it amps up the sharpness! For other great citrus desserts that taste amazing and are easy on the baker, take a look at my thoughts on Citrus Dessert Recipe ideas.
Serving Suggestions for Lime Squares for a Crowd
Because these $\text{Lime Squares for a Crowd}$ are naturally so bright and tangy, you don’t need much to dress them up! A classic dollop of fresh, unsweetened whipped cream is honestly the best companion—it gives contrast to the tartness in the $\text{Festive Summer Lime Squares}$.
If you’re worried about slicing them perfectly, just line your serving platter with parchment paper anyway! Before serving, scatter a few thin slices of lime or some bright red raspberries right beside the squares. That little bit of color makes them look so professional. They are truly designed to be grabbed right off the platter!
If you want to see how I make these look extra special for outdoor parties, check out my tips for Festive Summer Lime Squares!
Storage and Reheating Instructions for Homemade Key Lime Bars
The best part about these $\text{Homemade Key Lime Bars}$ is that they actually taste *better* the next day! You absolutely must keep them covered tightly in the refrigerator. They’ll stay perfectly delicious and creamy for up to four days without any issue—which is great news when you’re trying to feed a crowd.
Freezing is an option too! If you want to save these $\text{Simple Dessert Bars}$ for later, wrap individual squares tightly in plastic wrap, then tuck them into a freezer bag. They freeze beautifully for about two months. Just thaw them in the fridge overnight before you plan to serve them. Honestly, I wouldn’t bother reheating them; they are perfect served straight from the cold!
Frequently Asked Questions About Creamy Key Lime Pie Bars
I get so many messages asking about the little details, especially concerning that perfect texture in our $\text{Creamy Key Lime Pie Bars}$! It’s smart to ask because those precise steps are what separate an okay bar from the **Best Key Lime Bar Recipe**.
I’ve gathered up the questions I receive most often about handling the crust and nailing that signature tang. If you’re worried about getting the perfect set, reading these might just save you some fridge-staring!
Can I use regular lime juice instead of key lime juice?
You absolutely can, but just know you’re getting a different experience! Regular Persian limes are much more acidic and usually don’t have that complex, floral sweetness that true Key Limes have. If you use standard lime juice, you might need to increase the lime zest slightly or maybe even add an extra teaspoon of sugar to balance the sharp acidity. But hey, if bottled key lime juice is all you’ve got, this recipe is still fantastic!
Why are my bars still too soft in the middle?
This usually means one of two things! Either you pulled them out of the oven too soon, or—and this is more common—you didn’t give them enough time to chill. Those bars need that cold time in the fridge for the condensed milk and yolks to fully firm up. A slight jiggle is okay when baking, but that final set happens in the cold. Seriously, chilling overnight is the secret to the firmest bars!
How do I get clean slices for my Graham Cracker Crust Bars?
This is the biggest secret to perfect $\text{Graham Cracker Crust Bars}$! Don’t even try to slice them while they are room temperature—they will smear everywhere. You have to chill them completely, like I mentioned before. Once they are rock hard from the fridge, get a long, sharp knife and dip it into a tall glass of hot water. Wipe the knife totally dry, make one clean downward push, and then immediately rinse and re-dip for the next cut. It sounds fussy, but it makes all the difference!
If you want to dive deeper into making sure your bars are perfectly dense and flavorful, check out my guide on Rich and Creamy Lime Bars.
Estimated Nutritional Data for Simple Dessert Bars
Okay, bargain hunters and calorie counters, listen up! I always get asked around the holidays if these $\text{Simple Dessert Bars}$ are going to ruin everyone’s diet goals. Look, they’re made with condensed milk and butter, so they aren’t exactly kale salad, but knowing what’s in your food is always smart!
Here is the approximate nutritional breakdown per single bar, based on cutting the 8×8 pan into 16 equal squares. Remember this is just an estimate, because your portion sizes might be bigger or smaller than mine! I always joke that my family eats slightly larger squares, but hey, that’s why we bake!
If you want to see some lighter recipes that are still packed with flavor, take a look at my tips for other Simple Dessert Bars!
- Serving Size: 1 bar
- Calories: 220
- Sugar: 22g
- Sodium: 110mg
- Fat: 12g
- Saturated Fat: 7g
- Carbohydrates: 26g
- Protein: 4g
Just a little disclaimer here: Since we are using real butter and condensed milk—the things that make these bars so delicious—the numbers reflect that richness. But honestly, when you factor in how easy these $\text{Key Lime Pie Dessert Squares}$ are to make, I think you’ll agree they’re worth every single, tangy bite!
Print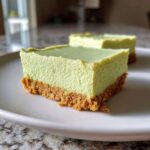
Creamy Key Lime Pie Bars with Graham Cracker Crust
- Total Time: 4 hr 33 min
- Yield: 16 bars
- Diet: Vegetarian
Description
Make rich, tangy Key Lime Pie Bars with a simple graham cracker crust. This recipe yields a creamy, easy-to-serve dessert perfect for any gathering.
Ingredients
- 1 1/2 cups graham cracker crumbs
- 1/4 cup granulated sugar
- 6 tablespoons unsalted butter, melted
- 1 (14 ounce) can sweetened condensed milk
- 1/2 cup key lime juice (fresh or bottled)
- 2 large egg yolks
- 1 teaspoon lime zest
Instructions
- Preheat your oven to 350°F (175°C). Line an 8×8 inch baking pan with parchment paper, leaving an overhang for easy removal.
- Combine graham cracker crumbs and 1/4 cup sugar in a medium bowl. Pour in the melted butter and mix until the crumbs are evenly moistened.
- Press the crumb mixture firmly and evenly into the bottom of the prepared pan. Bake the crust for 10 minutes. Remove from the oven and let it cool slightly.
- In a separate bowl, whisk together the sweetened condensed milk, key lime juice, egg yolks, and lime zest until smooth.
- Pour the lime filling evenly over the slightly cooled crust.
- Bake for 15 to 18 minutes, or until the edges are set but the center still has a slight jiggle. Do not overbake.
- Let the bars cool completely on a wire rack at room temperature.
- Refrigerate the bars for at least 4 hours, or until fully chilled and firm before slicing into squares.
Notes
- For a brighter lime flavor, use fresh key lime juice if available.
- If you prefer a thicker crust, increase the butter to 7 tablespoons.
- Chill the bars overnight for the cleanest cuts when slicing.
- Prep Time: 15 min
- Cook Time: 18 min
- Category: Dessert
- Method: Baking
- Cuisine: American
Nutrition
- Serving Size: 1 bar
- Calories: 220
- Sugar: 22
- Sodium: 110
- Fat: 12
- Saturated Fat: 7
- Unsaturated Fat: 5
- Trans Fat: 0
- Carbohydrates: 26
- Fiber: 1
- Protein: 4
- Cholesterol: 35


Comments are closed.