

Oh my gosh, if you think Brussels sprouts are boring or kind of bitter, you just haven’t met them at their best! I used to think they tasted like sad little cabbages floating in grease, but that changed completely when I started treating them right. Seriously, this recipe is the game-changer that got my whole family—even my veggie-skeptic brother—asking for seconds.
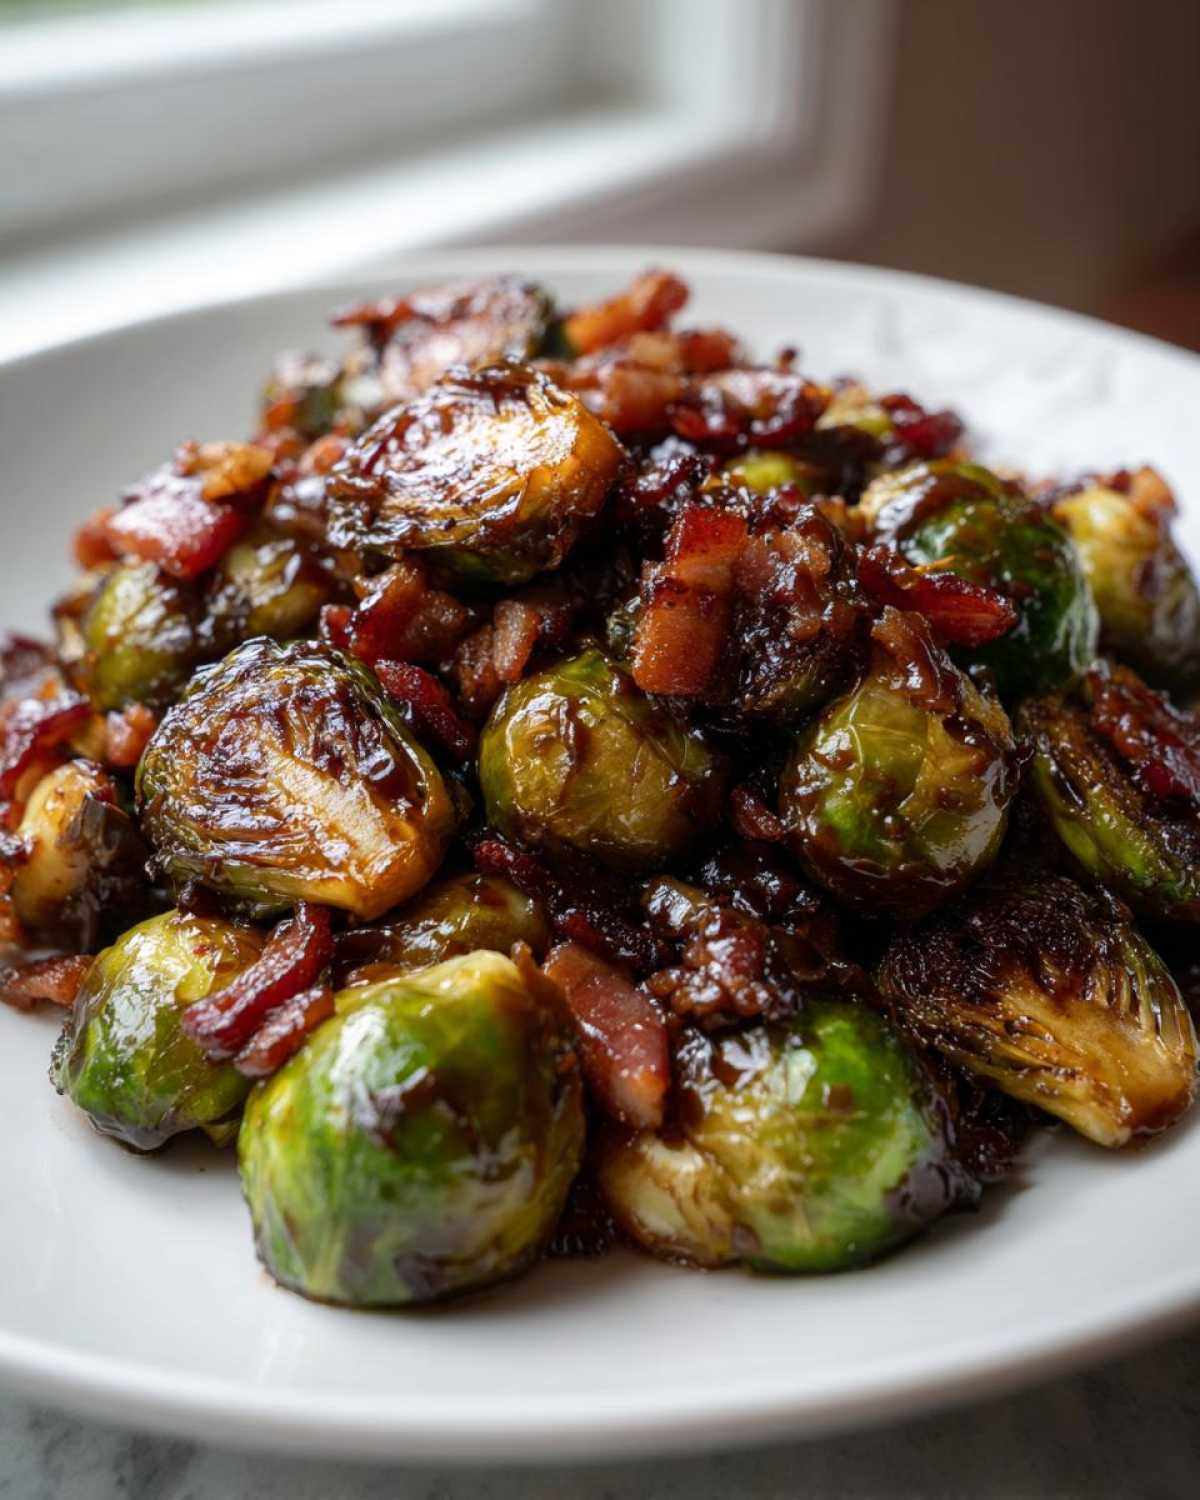
What makes this dish unbeatable? It’s the textural fireworks! We’re taking those humble little sprouts, getting them perfectly tender-crisp in the oven, and then hitting them with two powerful flavors: salty, crispy bacon and a mouth-puckering balsamic glaze. Trust me when I say that the Balsamic Glazed Brussels Sprouts with Bacon is my absolute go-to. It’s fancy enough for Thanksgiving, but quick enough to throw together on a Tuesday when you need a really fantastic side dish. It’s truly the best side dish with bacon and vinegar you’ll ever whip up!
Why This Balsamic Glazed Brussels Sprouts with Bacon Recipe Works So Well
I’ve made this dish probably fifty times, and I finally nailed the technique after burning or, worse, *sogging* too many batches. This method cuts through all the fuss. It gives you that incredible restaurant-quality flavor without spending all day wrestling with vegetables. You get so much depth from such simple prep work!
Here’s the real deal on why this combination sings:
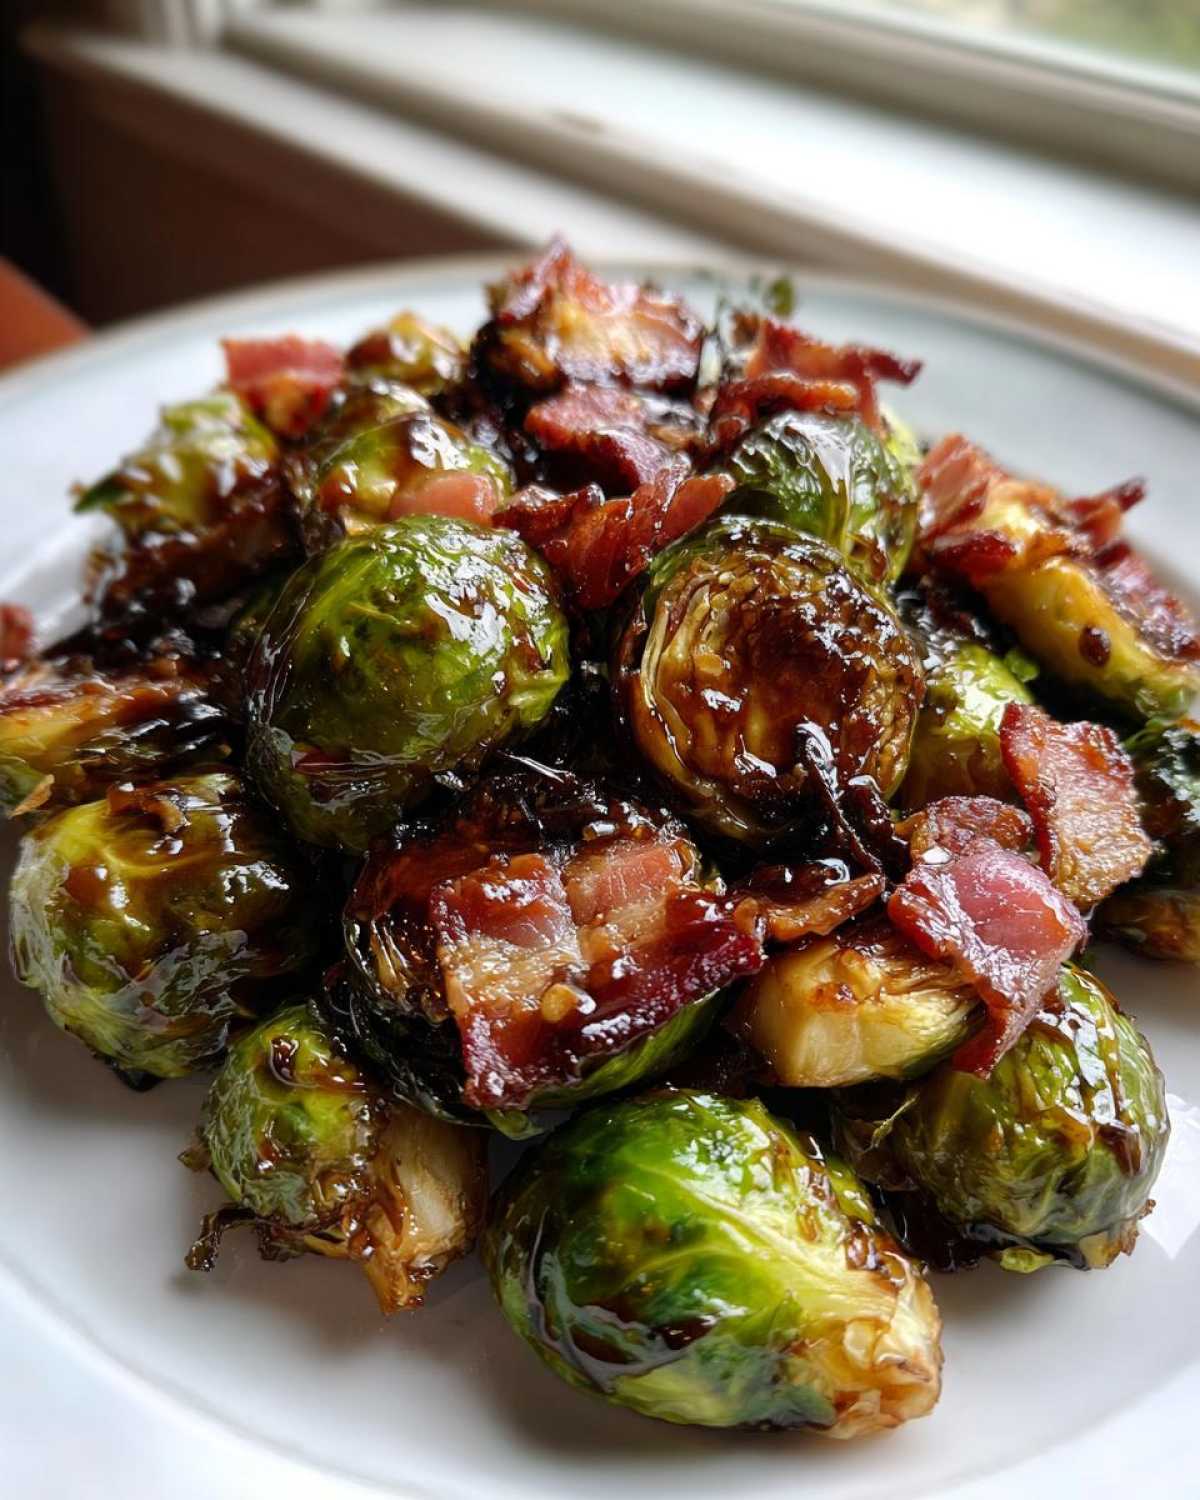
- You get these gorgeous, **perfectly caramelized Brussels sprouts** that are blistered on the outside but still slightly tender inside. No soggy bottoms here, I promise!
- The crunch factor is major. The bacon renders out just the right amount of fat to help crisp up the sprouts, providing salty counterpoint to the sweet glaze.
- It’s truly the best of both worlds—a sweet and savory vegetable recipe that feels totally gourmet but takes about 10 minutes of actual work.
Perfectly Caramelized Brussels Sprouts Texture
The secret to avoiding mushy sprouts is high initial heat and not overcrowding the pan. We roast them hot and fast! The goal is to get that beautiful, almost charred exterior that really locks in the sweetness we are trying to achieve. That high roasting temperature is key for that **perfectly caramelized Brussels sprouts** texture.
The Essential Sweet and Savory Balance
This is where the magic happens! You’ve got the deep, salty punch from the bacon—that’s your savory base. Then we layer on the balsamic glaze we make separately. The glaze is tangy first, but the slight bit of brown sugar we whisk in brings a lovely, mellow sweetness right at the end. It’s that perfect, mouth-watering sweet and savory combination that makes you sneak one straight off the baking sheet!
Gathering Ingredients for Balsamic Glazed Brussels Sprouts with Bacon
Okay, don’t panic when you see the list—it’s deceivingly short! This wonderful Bacon Brussels Sprouts side dish comes together with very few heavy hitters, but each one pulls its weight. I’ve made this so many times that I actually keep the sprouts and bacon stocked at all times!
Here is what you need to pull this simple five ingredient side dish together:
- Brussels Sprouts: You’ll need about a pound and a half, trimmed, and you must halve them! This is key for even roasting.
- Bacon: Six slices, cut into nice little one-inch pieces. Don’t worry about being too exact, we want some variation in size.
- Olive Oil: Just two tablespoons, for tossing with the veggies.
- Salt and Pepper: A half teaspoon of salt and a quarter teaspoon of pepper—the basics!
- For the Glaze: Half a cup of balsamic vinegar, two tablespoons of brown sugar, and one clove of garlic, minced super fine.
Ingredient Notes and Substitution Tips
Listen up, because the balsamic vinegar matters here! Skip the super cheap, thin bottle for this. You want something that’s decent quality, maybe one that’s aged for a year or two, because we are reducing it down. If your balsamic is already naturally very sweet, definitely start with just one tablespoon of that brown sugar and taste before you add the second. You don’t want it cloying!
And don’t stress about the garlic; if you’re out of fresh, you can use about half a teaspoon of garlic powder when you’re tossing the sprouts with the oil, but using fresh garlic in the glaze adds a fantastic depth of flavor when it simmers. This little bit of finesse is what separates a good vegetable side from a *great* one!
How to Make Homemade Balsamic Glaze for Vegetables
The glaze! Ah, this is the component that elevates our Balsamic Brussels Sprouts recipe from just ‘roasted veggies with bacon’ to something truly restaurant-worthy. Honestly, making your own homemade balsamic glaze for vegetables is so ridiculously easy, I don’t know why anyone buys the stuff in a squeezy bottle. That stuff is usually way too thick and often loaded with corn syrup, and we don’t want that artificial sweetness!
This process is basically about letting the vinegar work its magic. You take your half cup of balsamic vinegar, and you throw in that brown sugar and the minced garlic in a little saucepan. Don’t use a massive pot; we want it relatively shallow so the liquid evaporates faster. Set your burner to medium heat and bring it up to a gentle simmer.
The absolute key here is patience, which, let’s be real, is the hardest spice in my pantry! You need to let this simmer gently, stirring every minute or so for about eight to ten minutes. You’re waiting for beautiful reduction. When it’s ready, you pull a spoon out, and the glaze should cling to the back of it. It shouldn’t be goopy, but it should visibly thicken up. If it’s too thin when you take it off the heat, don’t panic—it thickens even more as it cools down even slightly. If you accidentally reduce it too much and it turns into a sticky blob, just whisk in a tiny, tiny splash of water or even a teaspoon of fresh balsamic right off the heat, and it’ll loosen right up. But watch it closely near the end; those last two minutes are intense!
Step-by-Step Instructions for Balsamic Glazed Brussels Sprouts with Bacon
Alright, time to put it all together! Making these Balsamic Glazed Brussels Sprouts with Bacon is a two-pronged attack: we roast the good stuff while simultaneously building our killer glaze. Keep your eye on both things, but remember the glaze needs constant low heat stirring, so make sure it’s simmering before you pull the sprouts out!
Prepping and Roasting the Sprouts and Bacon
First things first, get that oven screaming hot! We’re preheating to 400°F. You need a big baking sheet—don’t cram them in! If they are piled up, they steam, and we absolutely do not want steamed Brussels sprouts. Line it with parchment paper too; it makes cleanup of all that bacon grease ridiculously easy.
Toss those halved sprouts really well with your oil, salt, and pepper. We want every surface lightly coated so they get those great brown edges. Scatter them out on the pan in a single layer. Now, here’s my trick for the bacon: throw the bacon pieces right on the same sheet, scattered among the sprouts. It cooks right alongside them and renders out that savory fat we want coating the veggies.
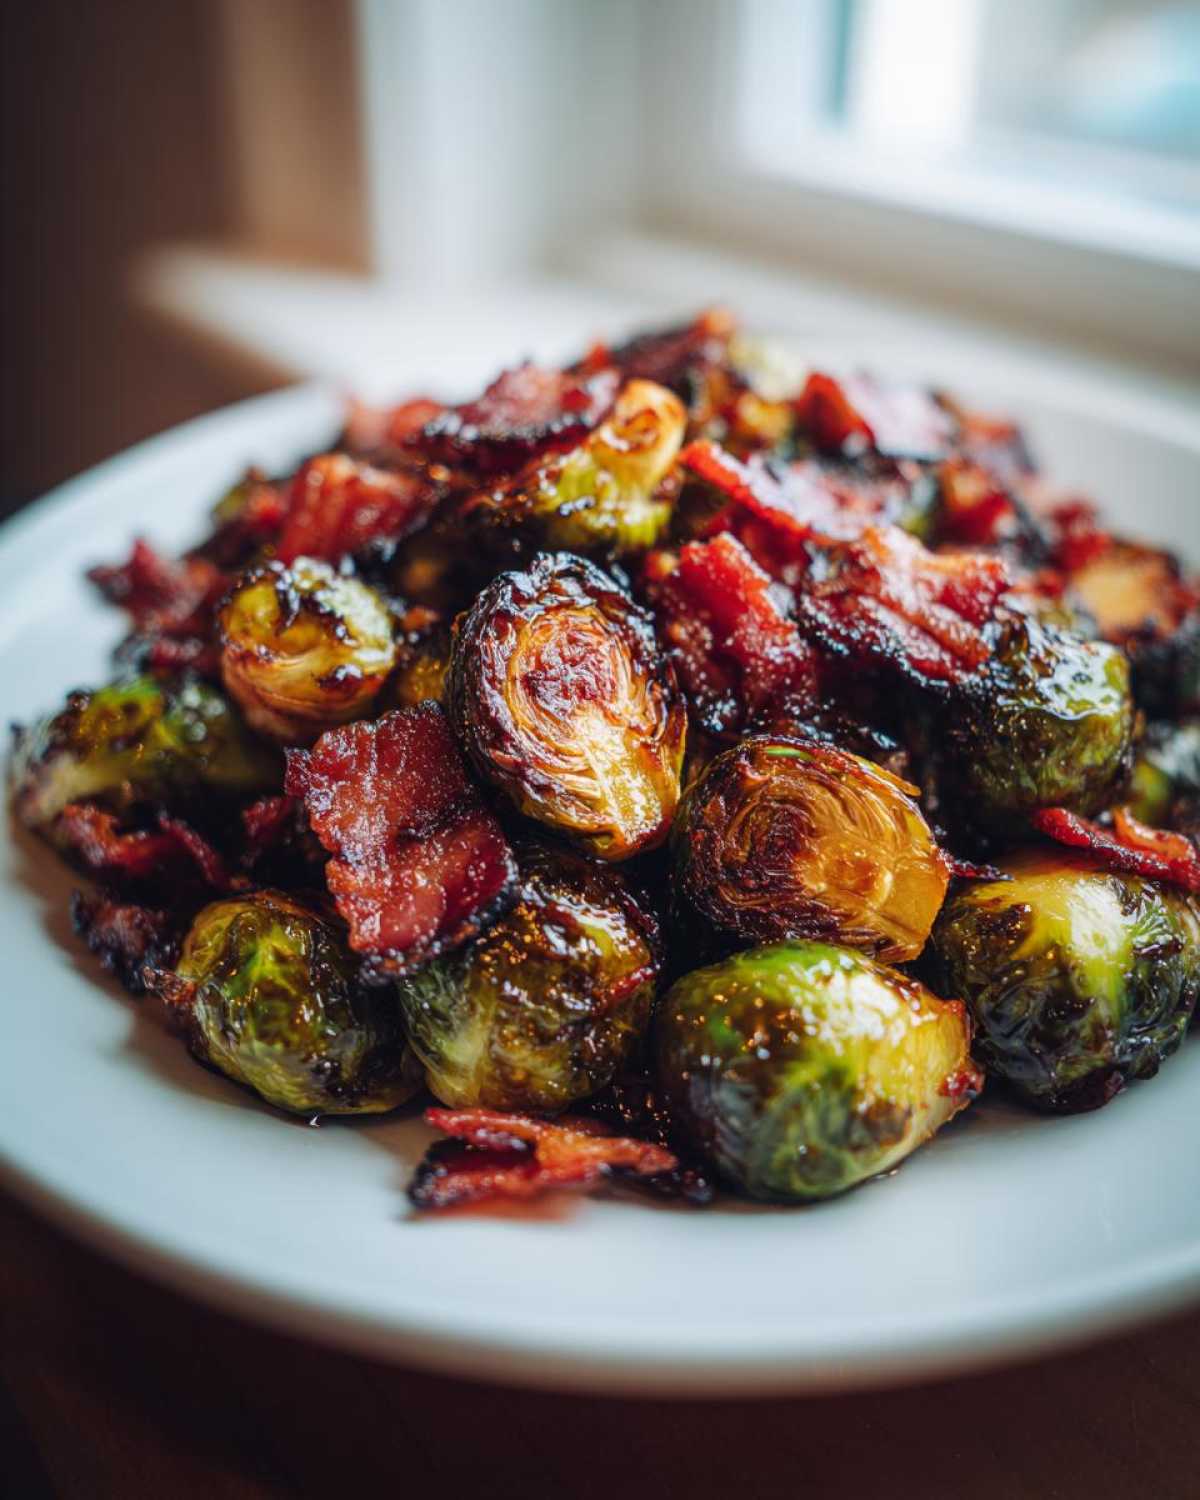
Pop the tray in the oven for about 15 minutes. When you pull them out that first time, that bacon is likely getting ready, and the sprouts are softening up. Carefully drain off most of that rendered bacon fat—I use the edge of a paper towel held with tongs to soak up any big puddles, leaving just a thin shimmering layer. Give everything a good stir and pop it back in for another 10 to 15 minutes until the bacon is truly crisp and the sprouts have developed deep brown color spots. That two-stage cooking is the secret to crispy bacon Brussels sprouts side dish perfection.
Combining the Glaze and Final Toss
While that second roasting phase is happening, get your glaze going on the stovetop. Remember what I said about simmering that vinegar, brown sugar, and garlic gently? You’re looking for that reduction so it coats the back of your spoon nicely. Once it hits that perfect thickness (remember, it thickens slightly more once off the heat), take it off the stove immediately so it doesn’t burn!
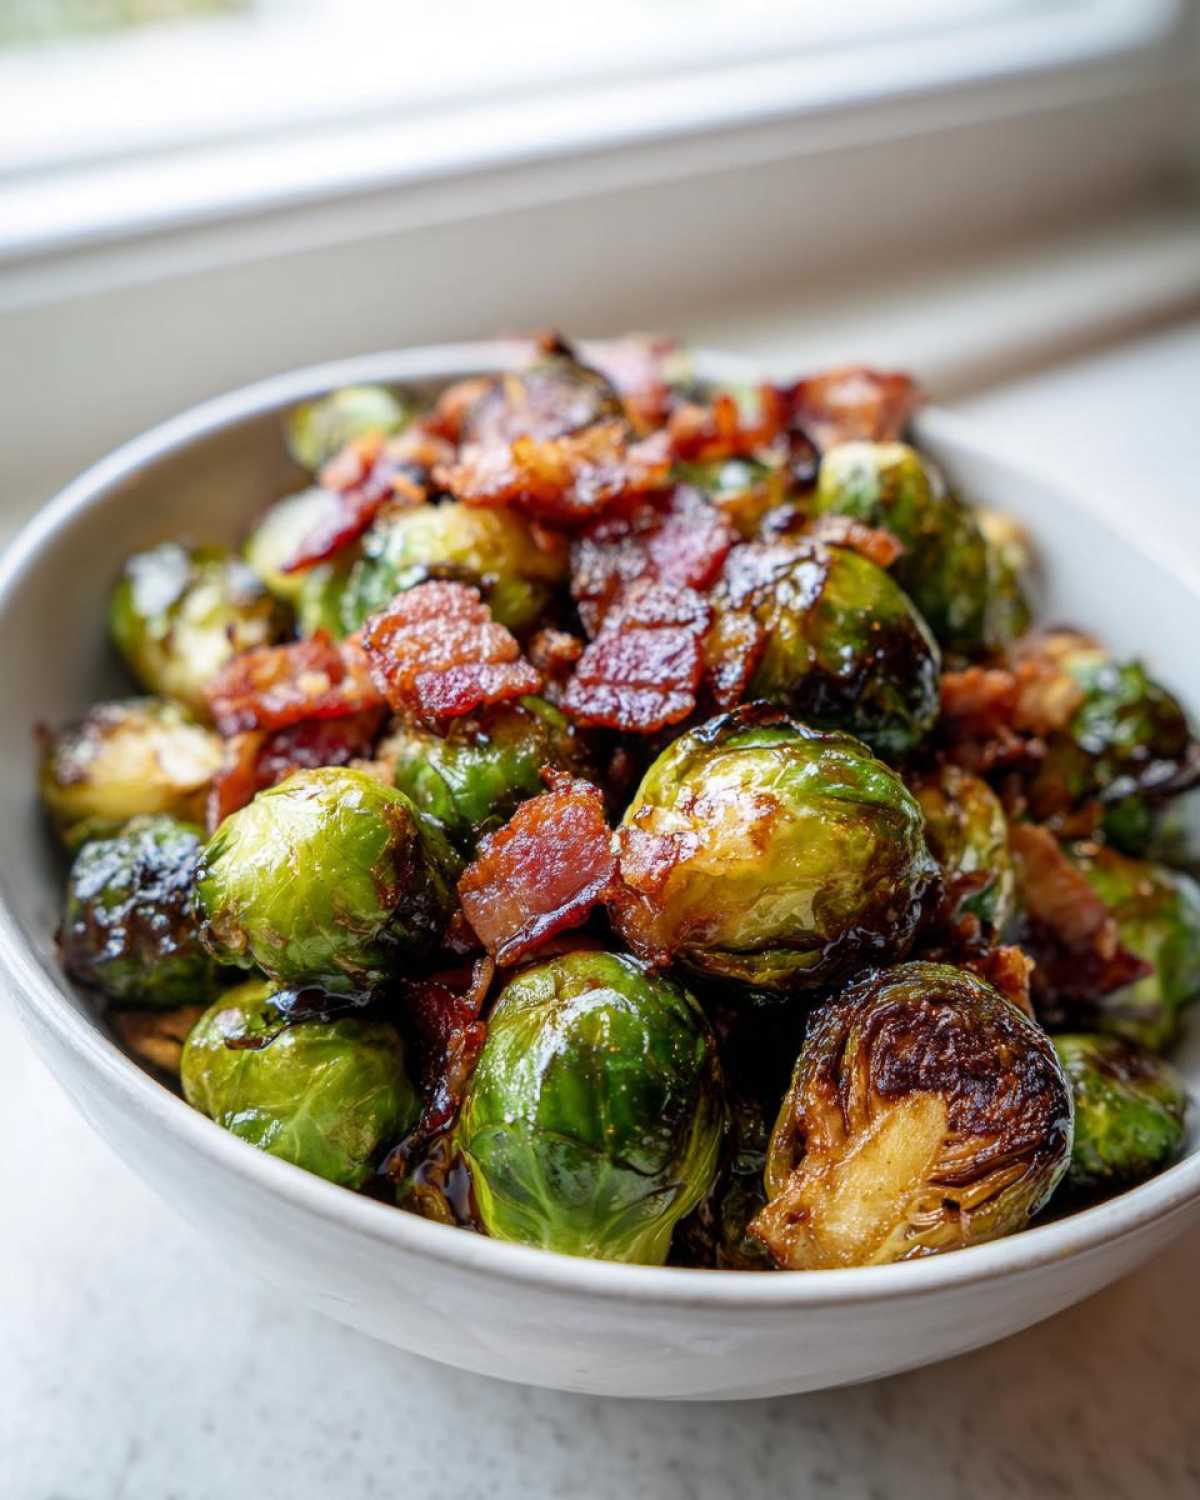
As soon as the sprouts and bacon are done roasting, transfer the hot mixture to a large, clean bowl. Do not wait! You need that heat to help the glaze adhere. Pour that warm, tangy vegetable side dish glaze right over the top. Toss everything quickly but gently until every sprout and piece of bacon is glistening and coated. Serve them right away while they are hot and crispy—that’s when they taste their absolute best!
Tips for Crispy Bacon Brussels Sprouts Air Fryer Method
Now, I know not everyone has a giant sheet pan for roasting, or maybe you just want dinner on the table faster than 40 minutes of roasting time! If you’ve got an air fryer, you absolutely need to try this method because it yields unbelievably crispy results. Seriously, for getting the best crispy bacon Brussels sprouts air fryer results, the air fryer beats the oven every single time for speed.
The key is still the same: we need to keep things separated as much as possible so air can circulate around everything. I usually cook mine in two separate batches using my air fryer garlic parmesan green beans basket size as my guide. Don’t try to cram it all in one go, or you’ll end up steaming them, and that’s the biggest air fryer mistake you can make!
Here’s my cheat sheet for the air fryer:
- Bacon First: Toss your cut bacon pieces with just a tiny drizzle of oil—maybe half a teaspoon—and air fry them at 375°F for about 6 to 8 minutes. You want them crispy but not carbonized. Pull them out, drain the fat onto a paper towel, and set them aside.
- Sprouts Second: Toss your seasoned sprouts with just a little bit of olive oil (we don’t need the fat from the bacon since we already rendered it). Cook those babies at 375°F for 12 to 15 minutes total. Make sure you shake the basket halfway through! This gets them beautifully tender on the inside while getting those perfect crispy edges.
- The Finish: Once both components are done, toss them together in a bowl with the warm balsamic glaze we made earlier. This keeps the bacon crumbly and the sprouts hot and coated just right!
This method saves about 15 minutes off the total cook time, which is amazing when you’re rushing dinner. The glaze goes on last, just like in the oven method, so don’t try to air fry it—that’s a recipe for a sticky mess! Let me know how it works for you; I think you’ll be totally shocked by how crispy they get!
Serving Suggestions for This Bacon Brussels Sprouts Side Dish
The best part about mastering these Balsamic Glazed Brussels Sprouts with Bacon is figuring out what to put them next to! Honestly, they are so loaded with flavor—salty, sweet, tangy—that they can stand up to some pretty heavy main courses. But my favorite way to serve them is definitely around the holidays. They look gorgeous piled high on a platter next to turkey or ham!
But don’t save them just for special occasions! If you’re just making a weeknight meal, this Bacon Brussels Sprouts side dish takes something simple, like a roasted chicken breast or even just a big baked potato, and instantly makes the whole plate feel more cheerful and complex. Seriously, they are perfect for just about any occasion where you want a vegetable that people will actually eat without complaining. A little sprinkle of toasted pecans on top just before serving makes them look even fancier if you have company!
Storage and Reheating Instructions for Balsamic Glazed Brussels Sprouts
Okay, so these sprouts are so good that you might actually have leftovers, which is rare in my house! But if you do, storing them properly is key so that tasty little glaze doesn’t turn into total sludge. When it comes to leftovers, we have to talk about moisture control. The sprouts will inevitably soften a little bit when they cool down, and that glaze, which was perfect when warm, can get a little sticky in the fridge.
You want to store your Balsamic Glazed Brussels Sprouts with Bacon in an airtight container. Keep them in the fridge for up to three, maybe four days max. Any longer than that, and the vibrant flavor starts to fade. Make sure they are completely cooled down before you seal the container up tight!
The Absolute Do Not: Avoid the Microwave!
I’m putting this one in bold because you need to listen to me on this! If you try to reheat these sprouts in the microwave, you are guaranteeing yourself a sad, soggy, mushy mess. The microwave heats them too quickly using steam, and suddenly, all that crispy goodness we worked so hard for is gone. The bacon softens, and the sprouts weep moisture. Don’t do it!
We are aiming for that delightful texture we achieved the first time around, so we need to revive that crispness. It takes just a couple of minutes longer than microwaving, but the payoff is huge. Trust me, take the extra few minutes for reheating properly—it’s what separates a good cook from someone who just eats leftovers in defeat!
Best Ways to Reheat for Maximum Crispness
To bring these back to life, you have two excellent options, depending on how much time you have. Both methods rely on dry heat to chase out any extra moisture and re-crisp the bacon and the edges of the sprouts.
My first choice, especially if I’m making a big batch for leftovers, is the oven or a toaster oven. Spread the cold sprouts out thinly on a baking sheet—don’t overlap them too much! Heat your oven back up to 350°F. Pop the sheet in for about 8 to 10 minutes. You’ll notice the glaze starts to look shiny again, and the edges firm up. This is perfect for serving alongside a reheating dinner.
If you’re reheating just a small serving—say, a single portion you want *immediately*—the air fryer is your other secret weapon. Toss the cold sprouts back into your air fryer basket (maybe add a tiny, tiny drizzle of oil if they look dry). Set it to 350°F for just 3 to 5 minutes. Check them after 3 minutes. They get hot fast in there! This method gets them nearly as crisp as the day you made them. Remember, we are reviving the texture here, not fully cooking them again!
Reader Questions About This Tangy Vegetable Side Dish
I get so much mail from people who are trying this recipe, and honestly, I love hearing what tweaks everyone is making! It just proves how adaptable this simple combination of flavors is. Here are some of the most common things folks ask me when they are getting ready to cook their Balsamic Glazed Brussels Sprouts with Bacon.
Can I skip the bacon if I need a vegetarian dish?
Oh, absolutely! I totally understand; sometimes you just can’t have pork on the menu, or maybe you’re hosting vegetarians. If you skip the bacon, you lose some of that initial savory fat, so you need to compensate! The best way to make this a vegetarian dream is to toss those sprouts with maybe three or four tablespoons of olive oil instead of the two originally listed. Also, add about half a teaspoon of smoked paprika to your toss—that gives you that deep, savory smokiness that the bacon usually brings to the party. Serve it with some toasted pecans on top just before serving makes them look even fancier if you have company!
What if I don’t have brown sugar? Can I use honey?
Yes, you can substitute the brown sugar with honey! They both provide that essential sweetness needed to balance the sharp vinegar in our glaze. If you swap it out, I recommend starting with just one and a half tablespoons of honey instead of the two tablespoons of sugar. Honey tends to be a little sweeter than brown sugar, and we don’t want to push this into overly sweet territory. Remember, we are making a sweet and savory vegetable recipe, not a dessert! Also, honey caramelizes ever so slightly faster, so keep a very close eye on that glaze simmering on the stovetop!
My sprouts came out a little bitter. Why?
That bitterness usually comes from two things: either your sprouts were older (the older they get, the more bitterness develops) or they cooked too slowly, causing them to steam instead of roast. When you’re trying to achieve those perfectly caramelized Brussels sprouts, heat is your best friend. Make sure your oven is truly at 400°F before they go in, and ensure they are spread out in a single layer. The high heat cooks the natural sugars and eliminates that sharp, overwhelming bitterness, leaving you with that lovely, slightly sweet vegetable.
How thick should the balsamic glaze really be?
This is the most common follow-up question I get about making this tangy vegetable side dish! When you are cooking the glaze down, you’re looking for a syrupy consistency, not a thick candy. If you pull a spoon out of the sauce, the glaze should coat the back of the spoon entirely, and if you run your finger across the back of the spoon, the line you create should hold its shape for a second or two before slowly merging back together. If it’s dripping off instantly, it needs more simmering time! If it’s already gone solid on the spoon, take it off the heat immediately!

Nutritional Estimate for Balsamic Glazed Brussels Sprouts with Bacon
Okay, I know this is a super savory, bacon-laden vegetable dish, so we don’t exactly serve this up when we are counting every single calorie, but I totally believe in transparency! When you’re planning out your plates, especially if you’re making a big feast like Thanksgiving or a heavy weekend dinner, it helps to know what’s in your side.
Please remember that these numbers are just my best guess based on the ingredients list provided. I’m using standard ingredient measurements, and every brand of bacon or balsamic vinegar is going to vary just a little bit. This is a rough guide, not a certified nutritionist report! You’ll see that the fat content is slightly higher due to the bacon rendering, but there’s good fiber in all those sprouts!
Here is the estimated breakdown for one serving of these Balsamic Glazed Brussels Sprouts with Bacon:
- Serving Size: 1 serving
- Calories: Approximately 250
- Total Fat: 18g (Watch that Saturated Fat: 6g)
- Carbohydrates: 18g (Great news—that’s 5g of Fiber!)
- Protein: 8g
- Sugar: 12g (This is mostly from the glaze, so keep that in mind!)
- Sodium: Around 350mg (Bacon definitely pumps this up!)
If you are worried about the overall fat content, you can always skip adding the bacon directly into the roast and instead just use a tiny bit of the rendered bacon fat to toss the sprouts in olive oil, then serve the crispy bacon bits on the side for sprinkling! Either way, this is an incredibly satisfying Bacon Brussels Sprouts side dish that’s worth every single bite!
Print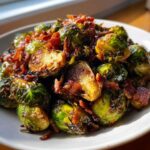
Balsamic Glazed Brussels Sprouts with Bacon
- Total Time: 40 min
- Yield: 4 servings
- Diet: Vegetarian
Description
This recipe provides instructions for roasting Brussels sprouts until tender-crisp, combining them with crispy bacon, and coating everything in a simple, tangy balsamic glaze.
Ingredients
- 1.5 lb Brussels Sprouts, trimmed and halved
- 6 slices Bacon, cut into 1-inch pieces
- 2 tablespoons Olive Oil
- 1/2 teaspoon Salt
- 1/4 teaspoon Black Pepper
- 1/2 cup Balsamic Vinegar
- 2 tablespoons Brown Sugar
- 1 clove Garlic, minced
Instructions
- Preheat your oven to 400°F (200°C). Line a large baking sheet with parchment paper.
- In a large bowl, toss the halved Brussels sprouts with olive oil, salt, and pepper. Spread them in a single layer on the prepared baking sheet.
- Place the bacon pieces in a small, oven-safe skillet or directly on the baking sheet among the sprouts.
- Roast for 15 minutes. Remove the pan from the oven. Carefully drain off any excess bacon fat, leaving about 1 tablespoon on the pan. Stir the sprouts and bacon together. Return to the oven for another 10-15 minutes, or until the sprouts are tender and the bacon is crisp.
- While the sprouts roast, prepare the glaze: Combine the balsamic vinegar, brown sugar, and minced garlic in a small saucepan. Bring the mixture to a simmer over medium heat.
- Reduce the heat to low and let it simmer gently, stirring occasionally, for 8 to 10 minutes, or until the liquid has reduced by about half and coats the back of a spoon. Remove from heat.
- Once the sprouts and bacon are done roasting, transfer them to a large bowl. Pour the warm balsamic glaze over the mixture and toss gently until everything is evenly coated. Serve immediately.
Notes
- For extra crispness, you can air fry the sprouts and bacon at 375°F for 12-15 minutes, shaking halfway through.
- If you prefer a thicker glaze, simmer the vinegar mixture slightly longer, but watch carefully to prevent burning.
- Halve the sprouts uniformly so they cook at the same rate.
- Prep Time: 10 min
- Cook Time: 30 min
- Category: Side Dish
- Method: Roasting
- Cuisine: American
Nutrition
- Serving Size: 1 serving
- Calories: 250
- Sugar: 12
- Sodium: 350
- Fat: 18
- Saturated Fat: 6
- Unsaturated Fat: 12
- Trans Fat: 0
- Carbohydrates: 18
- Fiber: 5
- Protein: 8
- Cholesterol: 25
Comments are closed.