

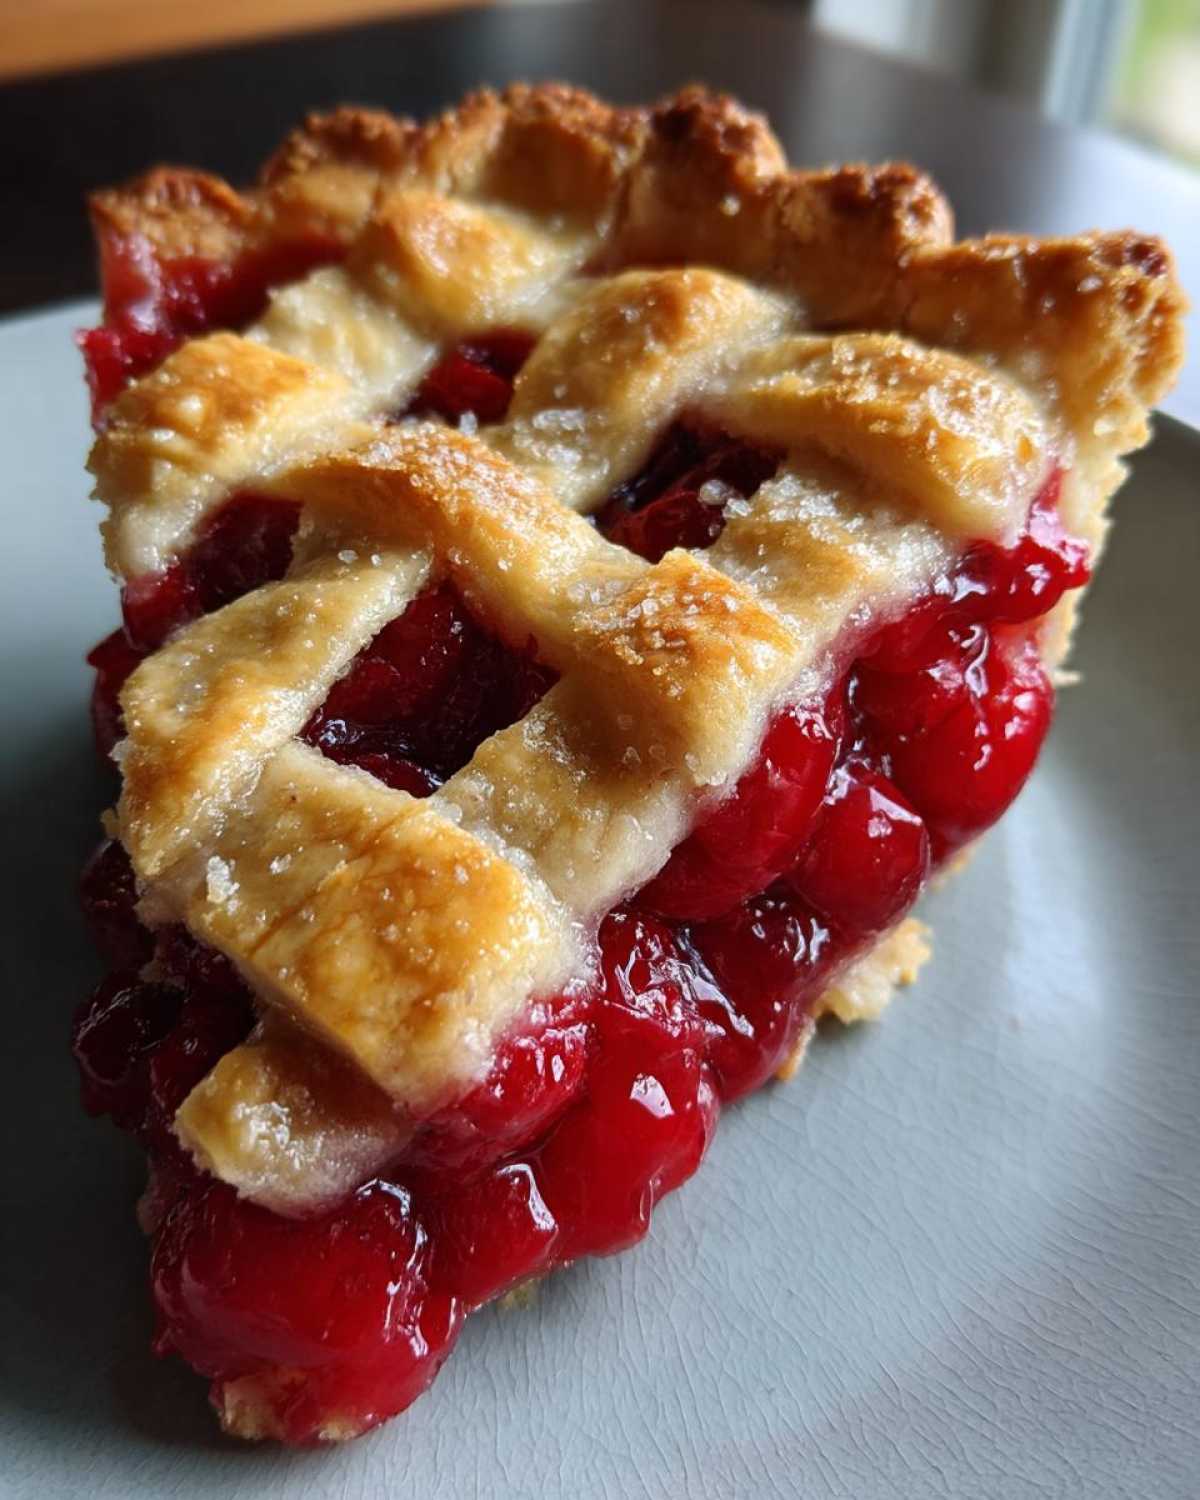
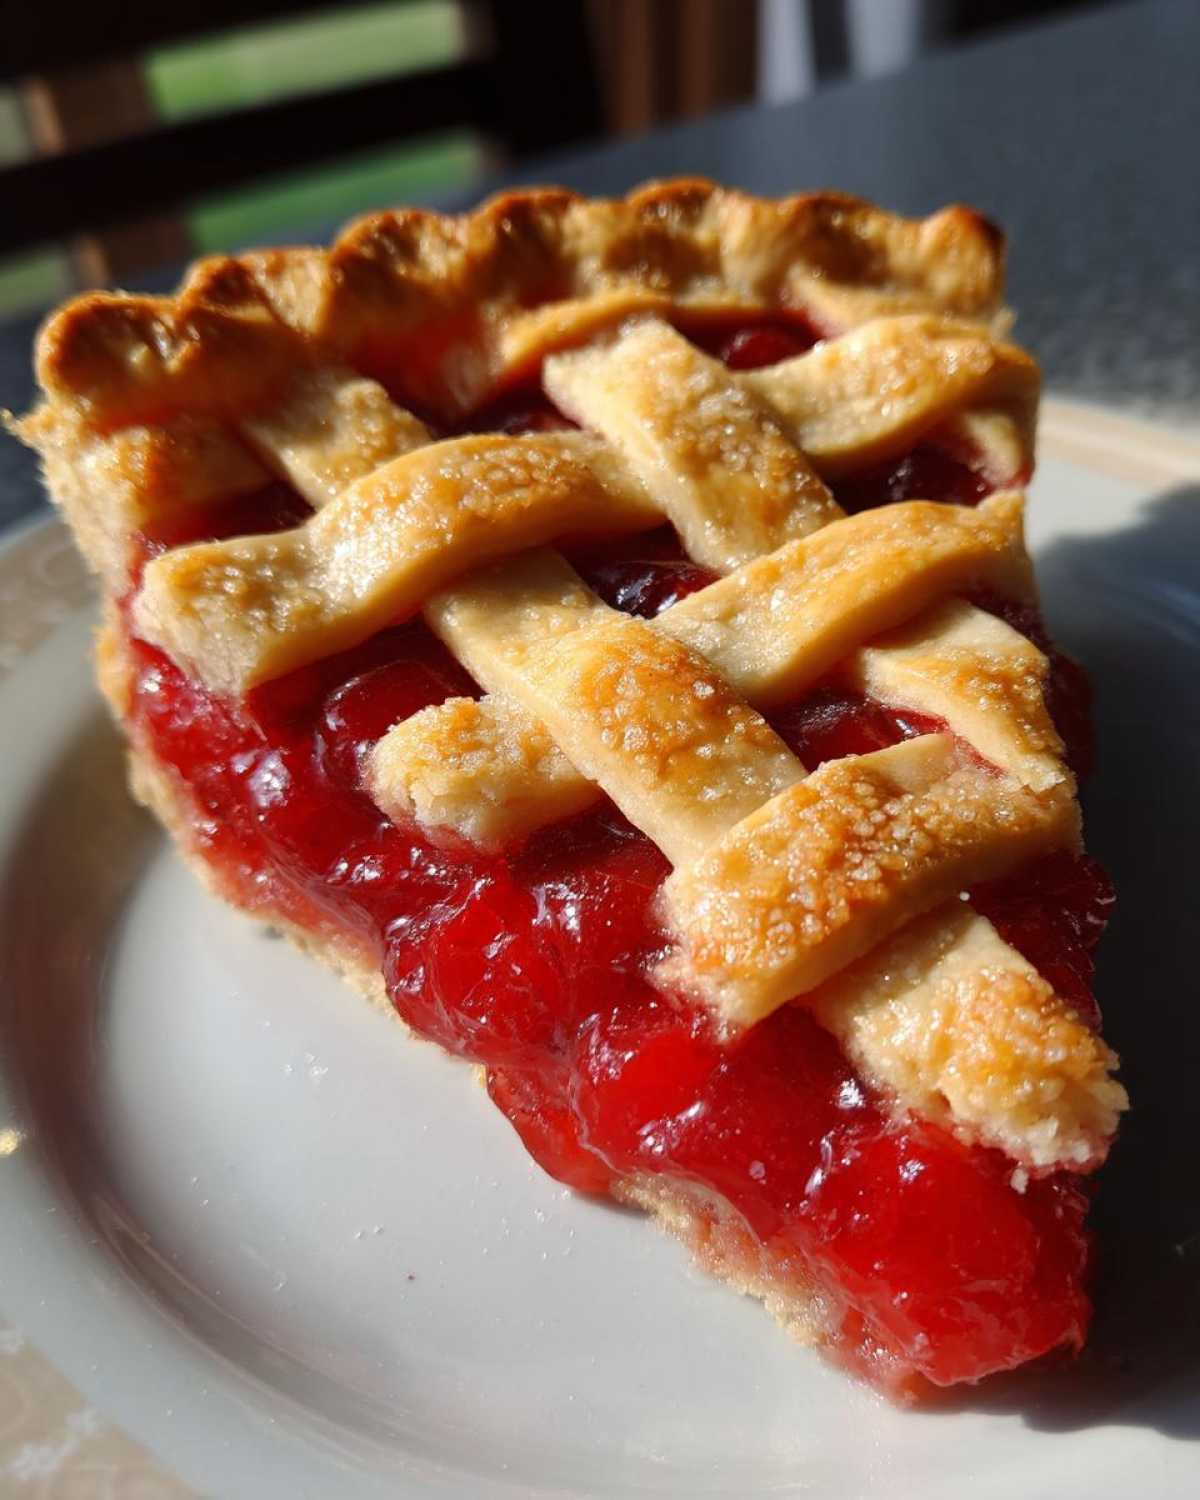
There’s just something magical about a pie, isn’t there? Especially when it’s bursting with bright, tart cherries. It brings back so many sweet memories for me, of summers in Italy and the smell of baking fruit from my grandmother’s kitchen. That’s why I’m so excited to share my recipe for the Ultimate Lattice Top Sour Cherry Pie with you today.
This isn’t just any cherry pie. It’s a celebration of flavor and beauty, combining that perfect tangy sour cherry filling with a stunning lattice crust that’s really easier than you think to create. It’s a recipe born from years of baking, taking those old-world techniques and adding my own little touch.
Every bite of this Ultimate Lattice Top Sour Cherry Pie is a little piece of happiness. The vibrant cherries cut through the sweetness just right, and that buttery, flaky crust is simply divine. It’s truly a showstopper dessert, perfect for any occasion or just because you feel like baking something special. I just know you’re going to fall in love with it as much as I have.

Why You’ll Love This Ultimate Lattice Top Sour Cherry Pie
Building on those cherished memories, this pie is more than just dessert. It’s a little bit of edible art and a whole lot of deliciousness. I think you’ll find so many reasons to adore this particular sour cherry pie:
- It has that timeless, classic cherry pie flavor that everyone loves.
- The lattice top makes it look absolutely beautiful on your table.
- You get that wonderful sweet and tart balance in every bite.
- It’s truly perfect for any special occasion or holiday gathering.
It’s a recipe that brings joy to both the baker and everyone who gets to enjoy a slice.
Ingredients for Your Ultimate Lattice Top Sour Cherry Pie
Gathering your ingredients is the first step to pie perfection! For this delightful sour cherry pie, you’ll need a few key things. Each one plays a part in creating that amazing flavor and texture.
- 3 cups of fresh or frozen sour cherries, make sure they are pitted.
- 1/2 cup of granulated sugar to balance the tartness of the cherries.
- 1/4 cup of cornstarch, which is our secret weapon for a perfectly set filling. It thickens the cherry juices beautifully.
- 1 tablespoon of fresh lemon juice to brighten up the cherry flavor.
- 1/2 teaspoon of almond extract. This adds a lovely depth of flavor that really complements the cherries.
- 1 box (14.1 ounces) of refrigerated pie crusts. Using pre-made crusts makes this recipe much easier!
- 1 large egg, beaten. This is for brushing the top crust to give it a golden shine.
- 1 tablespoon of turbinado sugar (optional). This adds a little sparkle and subtle crunch to the top.
Having everything measured and ready before you start makes the process so smooth.
Ingredient Notes for Your Ultimate Lattice Top Sour Cherry Pie
Just a couple of extra tips on your ingredients. If you’re using frozen cherries, don’t worry about thawing them first. You can just toss them right in with the sugar and cornstarch mixture. The cornstarch will handle the extra liquid as they bake.
For the sugar, granulated works best here, but you could experiment with a mix of granulated and brown sugar for a slightly richer flavor. And while almond extract is my favorite with cherries, you could use vanilla extract if you prefer, though I really love that almond note!
Equipment Needed for Your Ultimate Lattice Top Sour Cherry Pie
You won’t need a ton of fancy gadgets for this pie! Just some basic kitchen tools will do the trick. Here’s what I use:
- A 9-inch pie plate.
- A large mixing bowl for the cherry filling.
- A knife or pizza cutter for slicing the lattice strips.
- A small bowl for beating the egg.
- A pastry brush for the egg wash.
- A baking sheet to place the pie on while it bakes (this catches any drips!).
Having these ready makes everything go smoothly.
How to Prepare Your Ultimate Lattice Top Sour Cherry Pie
Now for the fun part – putting it all together! Making this pie is a process I really enjoy. It feels like a little bit of edible crafting.
First things first, get your oven ready. Preheat it to 400°F (200°C). While that’s heating up, let’s get the filling sorted.
In that large bowl, gently mix your pitted sour cherries with the granulated sugar, cornstarch, lemon juice, and almond extract. Give it a good stir so every cherry gets coated in that lovely mixture. The cornstarch is key here; it helps thicken the juices as the pie bakes.
Next, unroll one of your refrigerated pie crusts. Carefully press it into your 9-inch pie plate. Make sure it fits snugly along the bottom and up the sides. Trim off any extra crust that hangs over the edge.
Now, pour that beautiful cherry filling right into the crust-lined pie plate. Spread it out evenly.
Grab your second pie crust. Unroll it and lay it flat. Use a knife or a pizza cutter to cut it into strips about 1 inch wide. These will be your lattice strips.
Arranging the lattice is the part that looks fancy but is actually quite simple. Lay half of the strips parallel across the top of the filling, spacing them out evenly. Then, fold back alternate strips and lay the remaining strips perpendicular to the first set, weaving them over and under the folded strips. Unfold the first strips back over the perpendicular ones. Trim the ends of your lattice strips so they meet the edge of the bottom crust. Crimp the edges of both crusts together to seal everything in nicely.
In your small bowl, beat the egg with a fork. Use a pastry brush to lightly brush the beaten egg over the entire lattice top. If you like, sprinkle the top with turbinado sugar for a little sparkle and sweetness.
Place the pie plate on a baking sheet. This is super important! It catches any bubbling filling that might escape during baking and saves you from a messy oven cleanup.
Pop the pie into your preheated oven and bake for 20 minutes. Then, reduce the oven temperature to 375°F (190°C) and continue baking for another 30-40 minutes. You’ll know it’s ready when the crust is a beautiful golden brown and you can see the cherry filling bubbling up through the lattice openings.
Once it’s done, take the pie out of the oven and place it on a wire rack. This is the hardest part – you must let the pie cool completely before slicing! This lets the filling set up properly. It usually takes a few hours.
Tips for a Perfect Ultimate Lattice Top Sour Cherry Pie
Over the years, I’ve picked up a few tricks that really help make this pie shine. When you’re handling the refrigerated pie crusts, try to work quickly while they are still cold; this makes them much easier to manage.
For a really neat lattice, try making your strips all the same width. Don’t be afraid to practice the weaving pattern; it gets easier each time!
If you notice the edges of your pie crust are browning too fast while the center isn’t quite ready, you can gently cover just the edges with strips of aluminum foil for the last 15-20 minutes of baking. This protects them from burning.
Serving Suggestions for Ultimate Lattice Top Sour Cherry Pie
Once your pie has cooled completely and the filling is perfectly set, it’s time to enjoy a slice! While this Ultimate Lattice Top Sour Cherry Pie is absolutely divine on its own, a few simple additions can take it to the next level.
My absolute favorite way to serve it is with a generous scoop of vanilla ice cream. The cold, creamy ice cream is just heavenly with the warm, tart cherries. A dollop of freshly whipped cream is also a classic and wonderful choice. For something simpler, a light dusting of powdered sugar adds a touch of elegance.
Storing and Reheating Your Ultimate Lattice Top Sour Cherry Pie
If you happen to have any slices left of your Ultimate Lattice Top Sour Cherry Pie, storing them is easy. Just cover the pie loosely with plastic wrap or aluminum foil and keep it at room temperature for a couple of days. If you need it to last longer, pop it in the fridge for up to 4 days.
To reheat a slice, my favorite way is to warm it gently in the oven at about 300°F (150°C) for 10-15 minutes until it’s heated through. This helps keep the crust nice and flaky.
Frequently Asked Questions About Ultimate Lattice Top Sour Cherry Pie
I get asked a lot of questions about making pies, and cherry pie is no exception! Here are some common ones that might pop into your head as you’re baking this Ultimate Lattice Top Sour Cherry Pie:
Can I use canned cherries for this recipe?
While this recipe is written for fresh or frozen sour cherries, you could potentially use canned. However, canned cherries are often packed in syrup, so you’d need to drain them very well and might need to adjust the amount of sugar and cornstarch slightly to get the right consistency for your cherry pie filling.
How do I prevent the filling from being too runny?
That’s where the cornstarch comes in! Make sure you use the full amount specified. Also, letting the pie cool completely after baking is crucial. The filling thickens as it cools.
Can I make the pie ahead of time?
Yes, you can! You can prepare the pie completely, including the lattice top, and then cover it tightly and refrigerate it for up to 24 hours before baking. You might need to add a few extra minutes to the baking time if it’s going into a hot oven straight from the fridge.
Baking a delicious sour cherry pie is very rewarding!
Nutritional Information Disclaimer for Ultimate Lattice Top Sour Cherry Pie
Just a quick note about the nutritional information provided for this Ultimate Lattice Top Sour Cherry Pie. The values you see are estimates. They can change depending on the specific ingredients and brands you use. It’s always a good idea to consider this when planning your meals.
Share Your Ultimate Lattice Top Sour Cherry Pie Creation
I truly hope you enjoy making this Ultimate Lattice Top Sour Cherry Pie as much as I do! There’s nothing better than seeing your creations come to life in your own kitchen. If you make this pie, please share it with me! Leave a comment below and let me know how it turned out, or even better, share a photo on social media and tag me. I love seeing your baking adventures!
Print
Ultimate Lattice Top Sour Cherry Pie for 1 Happy Baker
- Total Time: 70-80 minutes plus cooling time
- Yield: 8 servings
Description
A delicious sour cherry pie with a beautiful lattice top.
Ingredients
- 3 cups fresh or frozen sour cherries, pitted
- 1/2 cup granulated sugar
- 1/4 cup cornstarch
- 1 tablespoon lemon juice
- 1/2 teaspoon almond extract
- 1 box (14.1 ounces) refrigerated pie crusts
- 1 large egg, beaten
- 1 tablespoon turbinado sugar (optional)
Instructions
- Preheat oven to 400°F (200°C).
- In a large bowl, combine the cherries, granulated sugar, cornstarch, lemon juice, and almond extract. Mix gently to coat the cherries.
- Unroll one pie crust and press it into a 9-inch pie plate. Trim any excess crust.
- Pour the cherry filling into the pie crust.
- Unroll the second pie crust and cut it into 1-inch wide strips.
- Arrange the strips over the filling in a lattice pattern. Trim and crimp the edges to seal.
- Brush the lattice top with the beaten egg and sprinkle with turbinado sugar, if desired.
- Place the pie on a baking sheet to catch any drips.
- Bake for 20 minutes. Reduce the oven temperature to 375°F (190°C) and continue baking for 30-40 minutes, or until the crust is golden brown and the filling is bubbling.
- Let the pie cool completely on a wire rack before slicing and serving.
Notes
- If using frozen cherries, do not thaw them before mixing with the other ingredients.
- Cover the edges of the pie with foil during the last 15-20 minutes of baking if they are browning too quickly.
- Allowing the pie to cool completely is important for the filling to set properly.
- Prep Time: 20 minutes
- Cook Time: 50-60 minutes
- Category: Dessert
- Method: Baking
- Cuisine: American
Nutrition
- Serving Size: 1 slice
- Calories: 350
- Sugar: 30g
- Sodium: 250mg
- Fat: 18g
- Saturated Fat: 8g
- Unsaturated Fat: 9g
- Trans Fat: 0g
- Carbohydrates: 45g
- Fiber: 3g
- Protein: 3g
- Cholesterol: 30mg


Comments are closed.