

When the warm weather hits and the flags come out, you know it’s time for some seriously festive baking! I absolutely live for Memorial Day gatherings, and honestly, you can’t have a true American celebration without something spectacular on the dessert table. Forget those plain sheet cakes; we are going for impact this year. My absolute go-to is this stunning, unbelievably easy Red, White & Blue Marble Memorial Day Cake. I’ve baked hundreds of layer cakes over the years—for weddings, birthdays, and every single summer holiday—and trust me when I say this swirling technique is foolproof. It looks like you spent hours laboring over intricate detail, but I promise, it comes together faster than you think!
Why This Red, White & Blue Marble Memorial Day Cake is a Must-Make
If you want a dessert that stops everyone in their tracks without causing a migraine in the kitchen, this is your recipe. Honestly, this cake is the definition of Easy Patriotic Baking. It’s reliable, it’s visually stunning, and it screams summer celebration! It’s perfect for making a big impression as your DIY Memorial Day Centerpiece Dessert.
- It delivers unbelievable visual drama with minimal extra effort compared to traditional layer cakes.
- The base recipe is a simple, tried-and-true vanilla cake that always comes out moist and tender.
- It fits the theme perfectly—who doesn’t love a good patriotic swirl?
Achieving Vibrant Patriotic Colors
When we talk about red, white, and blue, we need *vibrant* colors, right? We aren’t going for pale pink and faded sky blue here! The secret to intense holiday shades is skipping those watery liquid drops.
Here’s my quick tip for great color intensity: Use gel food coloring. You only need a toothpick dip or two to get the color saturation needed for perfectly bright patriotic layers. Liquid coloring just adds unnecessary moisture to the batter, and frankly, who wants that?
The Simple Swirled Cake Recipe Technique
People see “marble cake” and immediately think it requires advanced piping skills. Nope! That’s why I love this recipe; it embraces the No Fuss Marble Cake Technique. You literally just drop scoops of color in and give the knife a lazy figure-eight swirl.
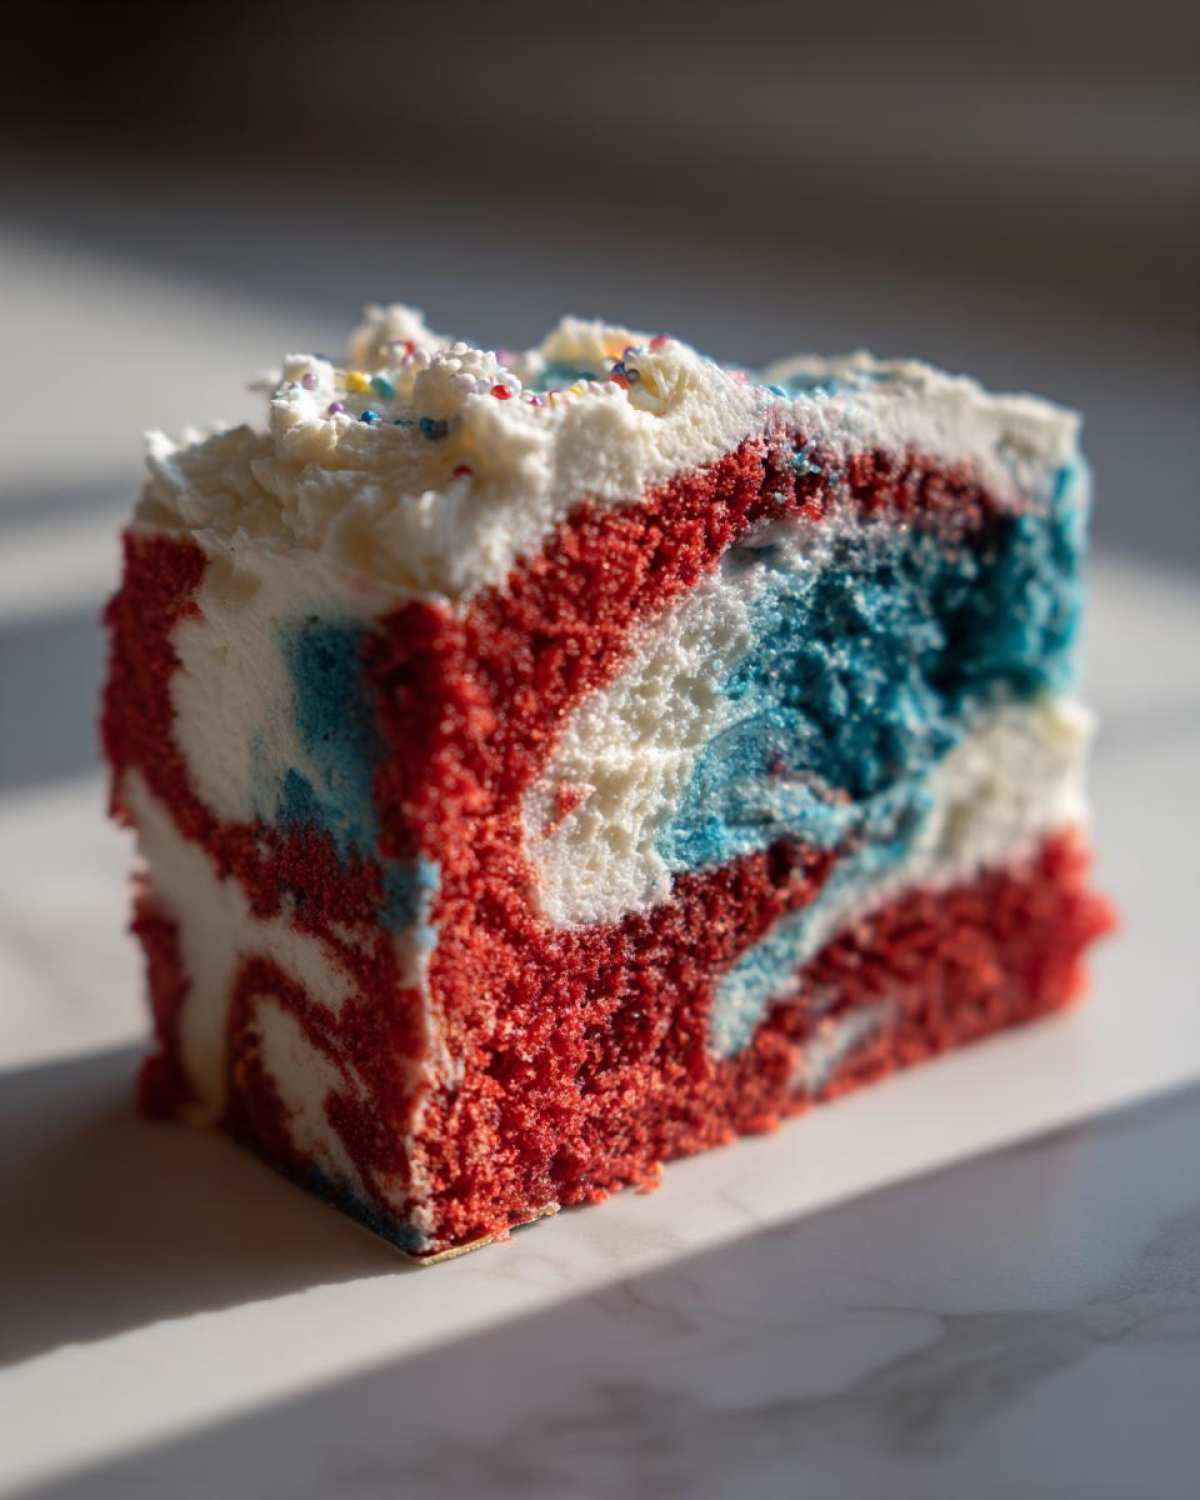
That gentle swirl is all you need to create the beautiful patterns in your Red, White & Blue Marble Memorial Day Cake. Resist the urge to mix it completely! That lightness is exactly what makes it so festive.
Gathering Ingredients for Your Red, White & Blue Marble Memorial Day Cake
Shopping for this cake is easy because we start with a classic, reliable vanilla base. You won’t be dealing with finding specialty flours or weird extracts here, which is why it’s one of my favorite holiday recipes! Everything you need should be right in your pantry or an easy grab from the store.
For the cake itself, you’ll need the basics to create that perfect light crumb. Remember, we need 1 1/2 cups all-purpose flour, 1 1/2 teaspoons baking powder, and just a pinch—1/2 teaspoon salt. For the wet side, grab 1 cup granulated sugar, 1/2 cup unsalted butter that’s softened (and I mean softened, not melted!), 2 large eggs, 1 teaspoon vanilla extract, and 1/2 cup milk.
Now for the fun part! You absolutely need both Red gel food coloring and Blue gel food coloring. For the topping, we’ll list the white frosting ingredients, but don’t forget we are setting up for a clean finish to show off that gorgeous interior! When you get to the frosting later, if you ever want to switch things up and try a cream cheese frosting that tastes like a Cinnabon cinnamon roll, you should totally bookmark this cream cheese frosting recipe. But for now, we stick to classic white!
Ingredient Notes and Substitutions for Your Patriotic Marble Cake Recipe
I know I hyped this up earlier, but it bears repeating: please use the gel coloring! If you only have liquid coloring on hand, you’ll need a whole lot more of it, and frankly, you risk making your batter too thin. Dealing with a super runny batter messes up the marbling completely. Stick to gels for that truly amazing, bright look—that’s how you nail the Vibrant Food Coloring Cake look.
Also, while I always preach using real butter for the best flavor, if you needed a substitute texture for some reason, you *could* swap about half the butter for vegetable shortening. Shortening sometimes makes an even fluffier cake, though you lose a little of that great buttery taste. For this base recipe, though, softened butter wins every time for me!
How to Prepare the Red, White & Blue Marble Memorial Day Cake Instructions
Okay, now for the actual assembly! This is where most people think things get complicated, but trust me, this is the easy part once you have everything ready. First things first, get that oven going! You need to preheat it to 350°F (175°C). While it’s heating up, grease and flour both of your 8-inch round cake pans. I usually grease them with butter and then dust them lightly with flour, tapping out the excess. This ensures zero sticking!
- In a medium bowl, whisk together your dry components: flour, baking powder, and salt. Just a quick whisk until they look combined, and set that aside.
- In your big mixing bowl, cream that softened butter and sugar until they look light and fluffy—you want it looking pale yellow! Beat in the eggs one at a time, making sure each one is incorporated before adding the next, and then stir in your vanilla.
- Now, add the dry mix and the milk alternately, starting and ending with the dry stuff. Seriously, mix this only until the streaks disappear. If you overmix, you activate the gluten, and suddenly your beautiful cake won’t be fluffy at all.
- Time for the fireworks! Divide that plain batter evenly into three separate bowls. One stays white (that’s essential!), one gets the red gel, and the last gets the blue gel. Mix each one gently until the color is perfectly uniform.
- Grab your prepared pans. Instead of pouring smooth layers, you’re going to drop alternating spoonfuls of the red, white, and blue batters randomly into the pans. Don’t try to do stripes—just plopping scoops in works best.
- This step is crucial for your Red, White & Blue Marble Memorial Day Cake: Take a butter knife or a simple skewer and gently swirl through the batter about 2 or 3 times. That’s it!
Bake these beauties for about 25 to 30 minutes. They are done when a toothpick inserted in the center comes out clean. Let them sit in the pans for about 10 minutes before gently turning them out onto a wire rack to cool completely. You can find my totally reliable recipe for making homemade vanilla cupcake batter which uses very similar creaming techniques if you ever want to practice a small batch before tackling the big day: Check out my moist vanilla cupcake tutorial.
Mastering the Swirl: Tips for a Perfect Patriotic Marble Cake Tutorial
The number one mistake people make in any Patriotic Marble Cake Tutorial is going too far with the swirling. You are trying to create streaks, not muddy brown batter! Think of it like a lazy figure-eight motion with your knife. You only want to pass the knife through the different colors two or three times maximum.
If you mix it until the colors are totally blended, you’ve essentially just made a slightly off-white cake with a very dense texture because you overworked the batter when trying to “fix” the swirls! Keep it quick, keep it light, and those gorgeous, crisp red, white, and blue sections will shine through beautifully once the cake is baked and cooled.

Baking Tips for the Best Memorial Day Dessert Ideas
So, you’ve finished mixing, and the vibrant batter is looking spectacular, but don’t let your guard down yet! Baking is all about heat management, especially with a festive cake like this meant to be a showstopper. My biggest piece of advice for any layered cake destined to be a holiday centerpiece is to know your oven. Give it a few minutes to come up to temperature before you slide those pans in.
Once they are out and look perfectly done—that toothpick test is your friend—let them rest in the pan for a solid 10 minutes. This allows the structure to set up just enough so they don’t collapse when you flip them. I also lean heavily on one of those little expert tips I found: try chilling the layers before you even think about frosting them!
Chilling the cooled layers makes them much firmer and way less crumbly when you handle them. It keeps your white frosting from sliding around, which is exactly what you want when you are putting together a sharp-looking patriotic dessert!
Presentation: Frosting the Red, White & Blue Marble Memorial Day Cake
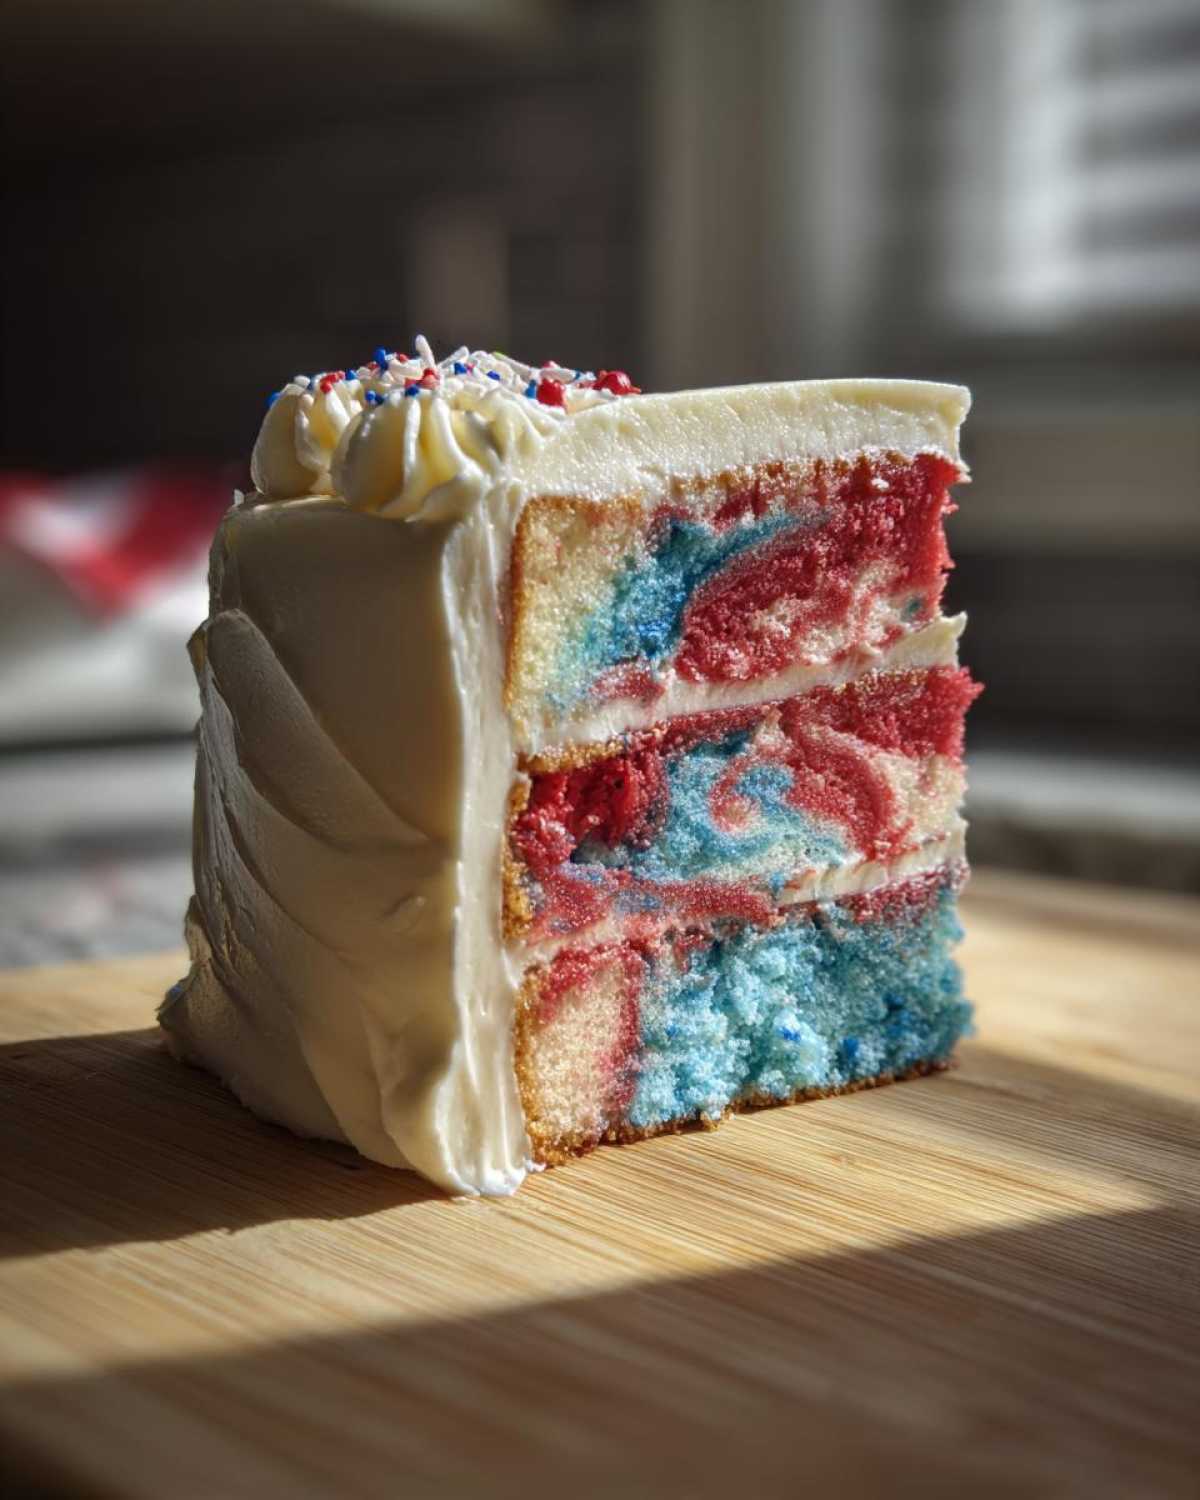
Okay, the hard part is over! You’ve got three perfectly baked, wonderfully swirled layers hiding that gorgeous red, white, and blue pattern inside. Now comes the presentation, and honestly, this is where we make this cake shine as a true Festive Summer Cake Design centerpiece!
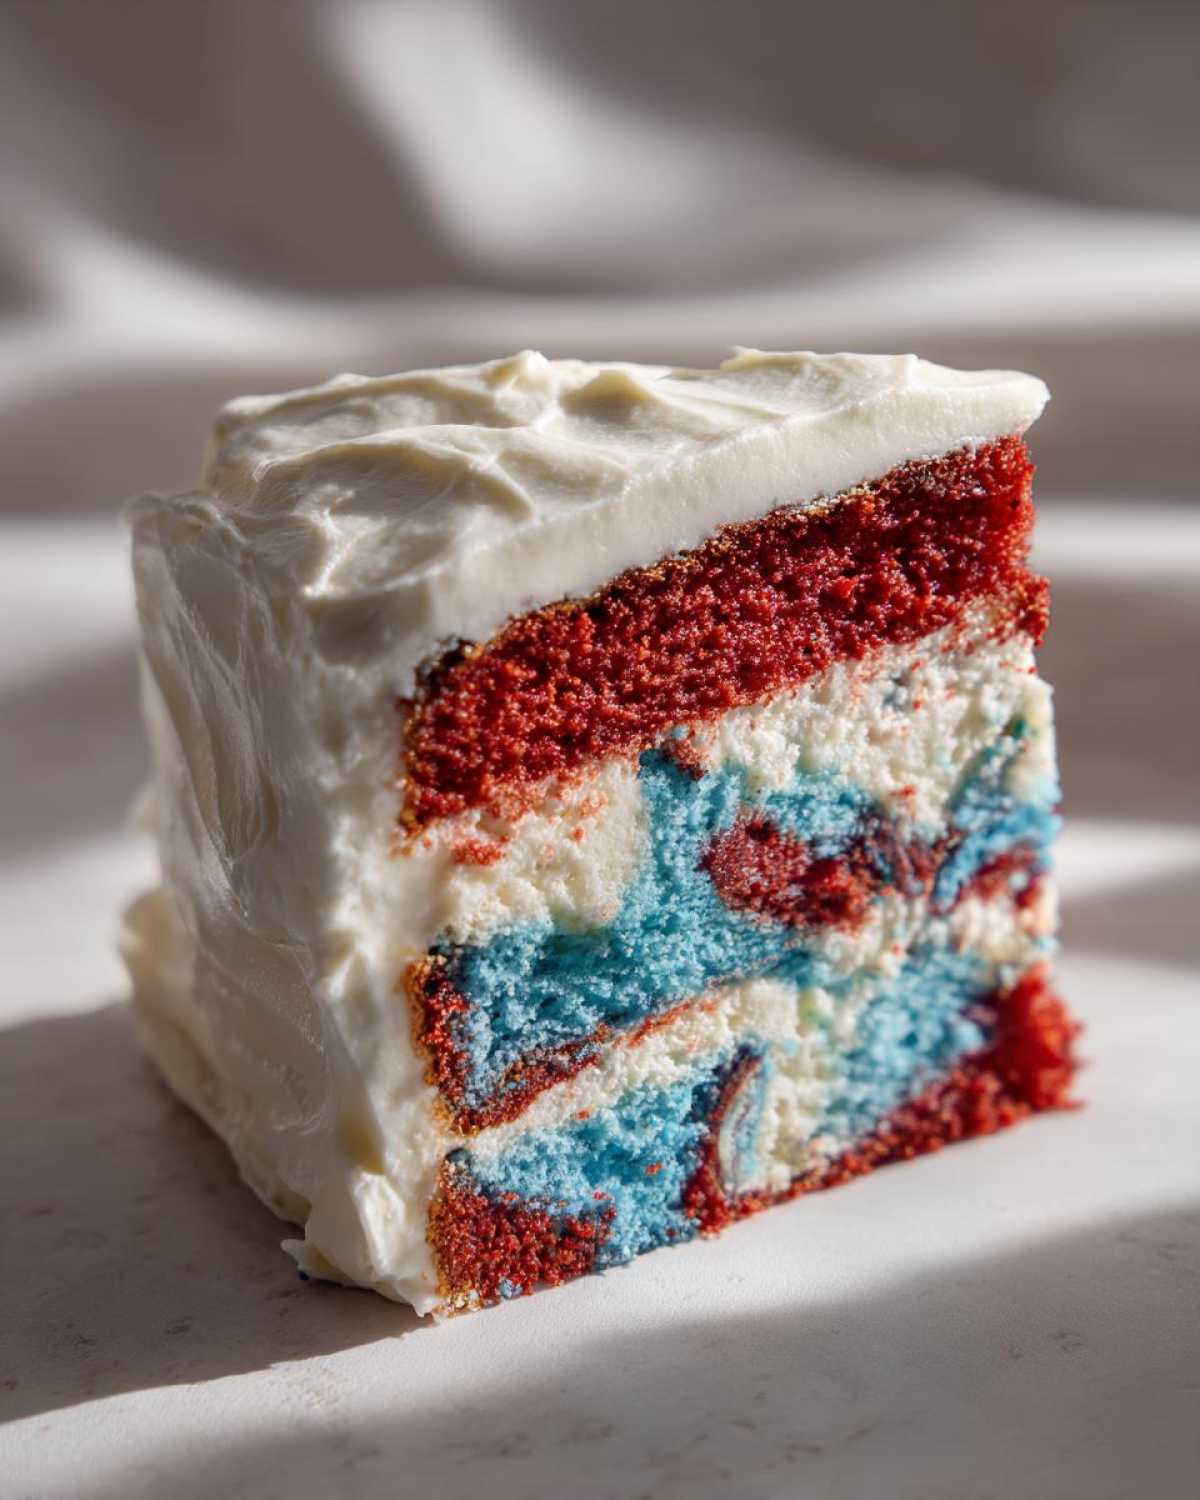
Because the fireworks are happening *inside* the cake, I strongly recommend keeping the exterior super clean and crisp. You want that marble effect to be the star of the show, not competing with bright blue frosting everywhere! My absolute favorite way to finish this beauty is with a thick, decadent layer of pure white vanilla buttercream. It frames the red and blue so perfectly, giving you that classic, sharp patriotic look.
If you need a reliable buttercream recipe that pipes beautifully—and let’s be real, who doesn’t want frosting that holds its shape?—you have to check out my go-to recipe for that perfect finish. It’s simple, buttery, and holds up great outside on a summer patio: My favorite easy vanilla buttercream.
When you stack those layers, use just enough frosting between them to secure them, but don’t go crazy thick—we want the height of the marble to show! A simple crumb coat, chilled for about 15 minutes, followed by a final smooth, thick layer of that brilliant white frosting, and you have an instant showstopper. It just looks so brilliantly All-American on the picnic table!
Storage and Make-Ahead Tips for Your Red, White & Blue Marble Memorial Day Cake
Planning ahead is the secret weapon for any big holiday meal, right? With the Red, White & Blue Marble Memorial Day Cake, you have a fantastic opportunity to bake part of the work off your plate before the big day arrives. I always suggest breaking the process into two manageable chunks!
If you are baking this a day or two early, bake those layers, make sure they are completely cool—and I mean rock solid cool—and then wrap each one tightly. I mean *tightly*! Use plastic wrap first, snug against the cake itself, and then follow that with a layer of aluminum foil. This double-wrap keeps any fridge or freezer odors out and locks in that moisture, which is key.
You can safely store the wrapped, unfrosted layers at cool room temperature for a day, or stick them right in the fridge for up to three days. They freeze beautifully, too! If you’re freezing them, I’d leave them wrapped like that for about a week. When you pull them out, let them thaw wrapped on the counter for a few hours before you even think about unwrapping them.
Now, once you assemble and frost the whole thing, you’re moving into different territory. Frosting keeps the cake nice and moist, but because of the butter in the frosting, you need to manage temperature carefully. If it’s a hot summer day, I recommend storing the fully assembled cake in the fridge until about an hour before you plan to serve it. You don’t want that beautiful white frosting sliding off!
If you’ve made a big batch and just can’t eat it all, slices freeze wonderfully too. Just wrap the individual slices super tight—plastic wrap then foil—and they taste nearly as good a month later when you pull one out for a surprise summer dessert!
Serving Suggestions for this All American Cake Recipes Centerpiece
Look, this Red, White & Blue Marble Memorial Day Cake is already the showstopper—it’s the main event on your dessert table! But every great star needs a supporting cast, right? Since this cake has such rich flavor from the buttery vanilla base and vibrant colors, you want pairings that complement it without weighing things down, especially as the summer heat settles in.
Since this cake is destined to be your DIY Memorial Day Centerpiece Dessert, think light, bright, and refreshing alongside it. Instead of piling on heavy sides, try serving small bowls of fresh, mixed summer berries. A simple mix of raspberries, blueberries, and maybe some thinly sliced strawberries creates a beautiful, edible garnish for each plate, echoing the colors of the cake itself!
For beverages, you want something that cuts through the sweetness. After a big afternoon BBQ, heavy drinks just don’t cut it. I always suggest something fizzy and tropical to keep the party light and cooling. If you want to keep things family-friendly but still festive, you have to try mixing up some mocktails! This iced pineapple coconut mocktail recipe is incredible—it tastes like a vacation but uses simple ingredients.
If you are serving adults and want to make it boozy, a light Prosecco or a crisp Sauvignon Blanc pairs wonderfully with the subtle sweetness of this layered cake. The key is balance. You’ve got a beautiful, rich cake—now let the sides and drinks keep the vibe cool and crisp for your final summer celebration!
Frequently Asked Questions About This Patriotic Marble Cake Tutorial
I get messages all the time asking for clarification on the tricky bits of marbling, especially when you’re working with bright, eye-catching holiday colors. It’s totally normal to have questions when trying to nail that perfect look for your Layer Cake with Patriotic Colors! Here are a few of the things I hear most often when people are getting ready to tackle this recipe.
Can I use liquid food coloring instead of gel for the Red White Blue Cake Recipe?
Oh, I really, really wish you didn’t have to, but for the best results with this Red White Blue Cake Recipe, you should stick to the gel! I know liquid coloring is cheaper and easier to find sometimes, but it’s mostly water. When you add enough liquid coloring to get the deep red or bold blue we need for a truly festive look, you’re dumping a ton of extra moisture into your batter.
That extra liquid thins out your batter way too much! It ruins the whole point of the marble effect because the colors will bleed right into each other instead of staying separate. Gel coloring is super concentrated, so you only need a tiny toothpick dip, keeping your batter consistency absolutely perfect every single time.
How do I prevent the red and blue from turning purple in my Swirled Cake Recipe?
This is the biggest headache when creating a patriotic pattern! If the red and blue batters touch before you swirl them, or if you swirl too vigorously, you end up with a sad, muted purple mess where those colors meet. My trick for success in this Swirled Cake Recipe is simple: patience, and dropping carefully.
When you are dropping the batter spoonful by spoonful into the pan, try to aim the red and blue dollops so they are surrounded by white or another color, but don’t let them sit right next to each other if you can help it. Then, when you take that knife for the gentle swirl, just go through the layers once or twice. The less you touch it, the less chance you give the red and blue pigments to mingle and create purple!
What is the best way to make this Red, White & Blue Marble Memorial Day Cake ahead of time?
You absolutely can get a head start on this, which is great because you’ll want to focus on that frosting right before serving! I always tell people to bake the layers, let them cool completely, and then wrap them up incredibly tight—two layers of plastic wrap followed by foil works for me. Keep them at room temperature if you’re frosting the very next day, or stash them in the freezer if you want to bake a few days early later in the summer.
When it comes to the actual assembly, this cake is best frosted the morning of your event. If you freeze the layers, let them thaw in the wrapper on the counter for a few hours first. If you just baked them the day before, pop them in the fridge for 30 minutes before stacking. Chilling firms up the cake, and that’s the key to a smooth finish when you apply that bright white frosting!
Share Your Red, White & Blue Marble Memorial Day Cake Creations
I’ve shared all my best secrets for getting that perfect, festive swirl in your Red, White & Blue Marble Memorial Day Cake, but now it’s your turn! Baking should always be a celebration, and I absolutely love hearing how this recipe turned out for your family gatherings. Did you manage to get those deep patriotic colors? Did you stick with the classic white frosting, or did you try something completely different?
Please, please, please leave a quick rating below! It helps other bakers know this is a reliable recipe they can trust for their summer holidays. If you tried any fun variations—maybe you added lemon zest to the white cake portion, or perhaps you used a different type of sprinkle on top—share it in the comments!
And you know I want to see the results! Snap a picture of your final masterpiece—that stunning cross-section shot is my favorite—and tag me on social media. Seeing the beauty you create with this recipe is seriously the best part of having this blog. Happy baking, and have a wonderful, safe Memorial Day!
Print
Red, White & Blue Marble Memorial Day Cake
- Total Time: 55 min
- Yield: 8 servings
- Diet: Vegetarian
Description
Make a visually striking marble cake featuring patriotic red, white, and blue colors perfect for your Memorial Day celebration.
Ingredients
- 1 1/2 cups all-purpose flour
- 1 1/2 teaspoons baking powder
- 1/2 teaspoon salt
- 1 cup granulated sugar
- 1/2 cup unsalted butter, softened
- 2 large eggs
- 1 teaspoon vanilla extract
- 1/2 cup milk
- Red gel food coloring
- Blue gel food coloring
- White frosting ingredients (butter, powdered sugar, milk, vanilla)
Instructions
- Preheat your oven to 350°F (175°C). Grease and flour two 8-inch round cake pans.
- In a medium bowl, whisk together the flour, baking powder, and salt. Set aside.
- In a large bowl, cream the softened butter and sugar until light and fluffy. Beat in the eggs one at a time, then stir in the vanilla extract.
- Gradually add the dry ingredients to the wet ingredients, alternating with the milk, mixing until just combined. Do not overmix.
- Divide the batter evenly into three separate bowls. Leave one bowl white. Add red gel coloring to the second bowl and blue gel coloring to the third bowl. Mix each until the color is uniform.
- Drop alternating spoonfuls of the red, white, and blue batters randomly into the prepared cake pans.
- Take a butter knife or skewer and gently swirl through the batter 2-3 times to create a marble effect. Do not over-swirl, or the colors will blend completely.
- Bake for 25 to 30 minutes, or until a toothpick inserted into the center comes out clean.
- Let the cakes cool in the pans for 10 minutes before inverting them onto a wire rack to cool completely.
- Once cool, frost the layers with your preferred white frosting for a clean, patriotic look.
Notes
- Use gel food coloring instead of liquid coloring for the most intense, vibrant patriotic shades.
- For a cleaner marble, use slightly less batter in each color bowl, ensuring you have enough white batter to separate the red and blue.
- Chill the layers briefly before frosting to make assembly easier.
- Prep Time: 25 min
- Cook Time: 30 min
- Category: Dessert
- Method: Baking
- Cuisine: American
Nutrition
- Serving Size: 1 slice
- Calories: 350
- Sugar: 35g
- Sodium: 250mg
- Fat: 18g
- Saturated Fat: 10g
- Unsaturated Fat: 8g
- Trans Fat: 0g
- Carbohydrates: 45g
- Fiber: 1g
- Protein: 5g
- Cholesterol: 70mg
Comments are closed.