

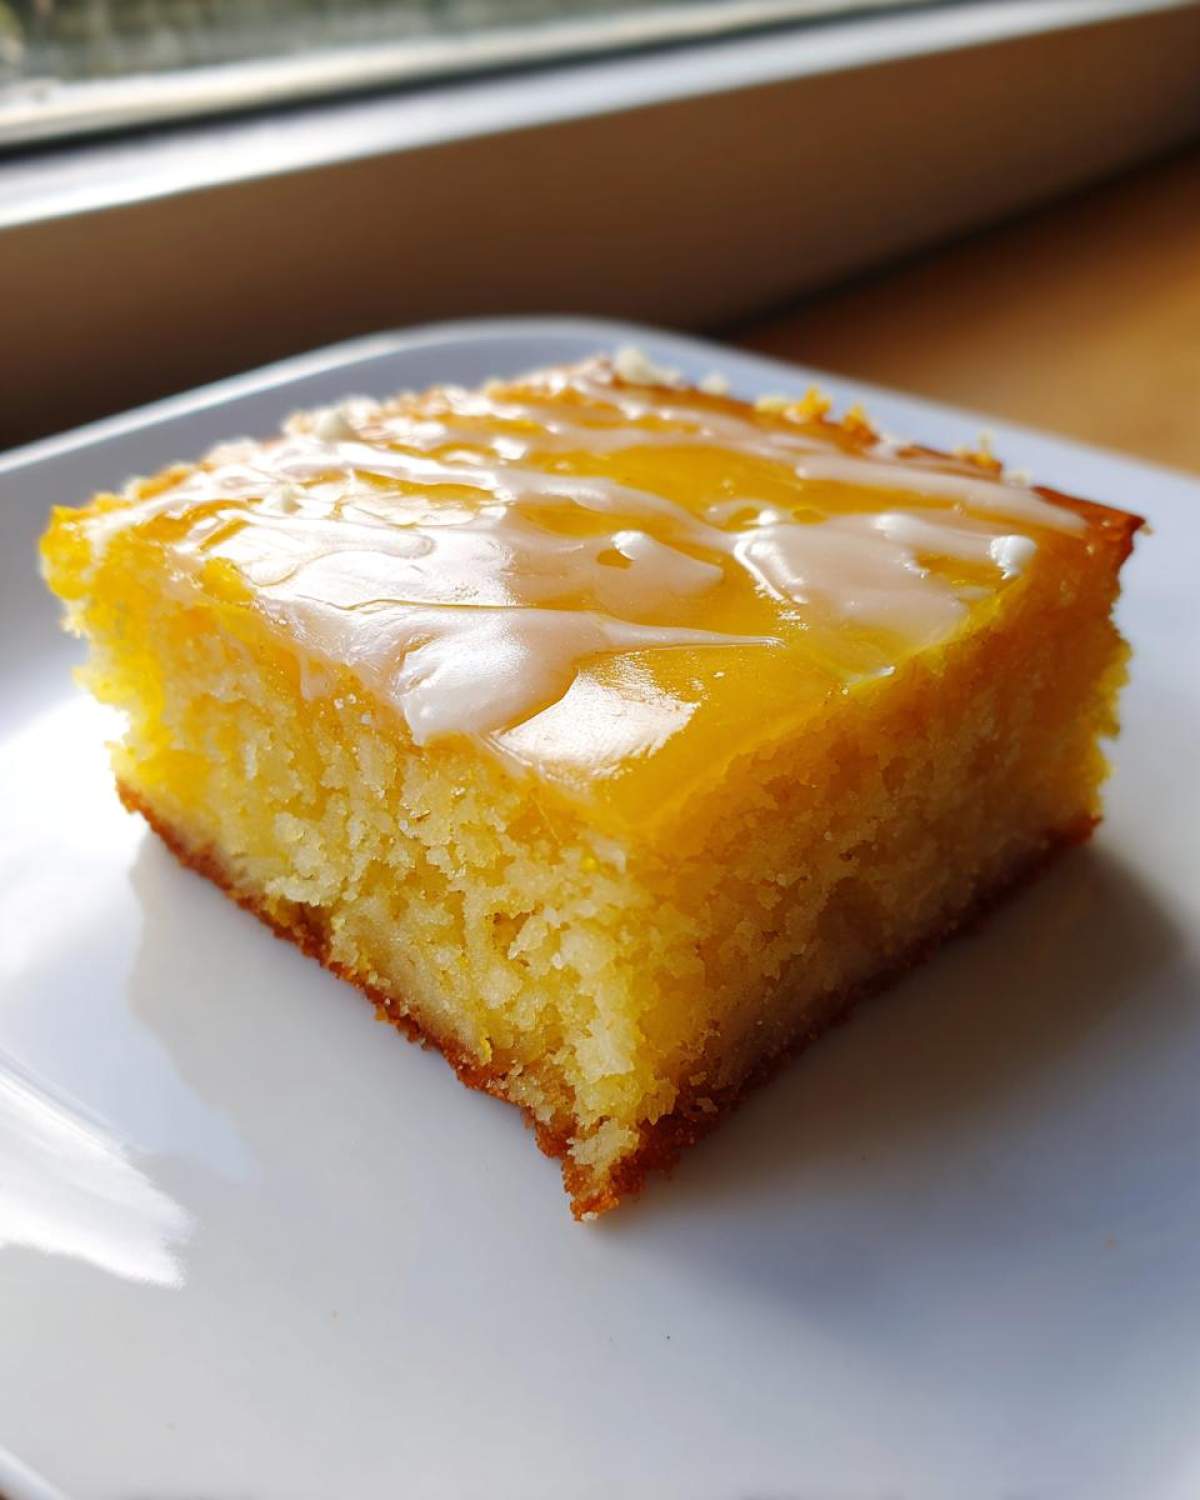
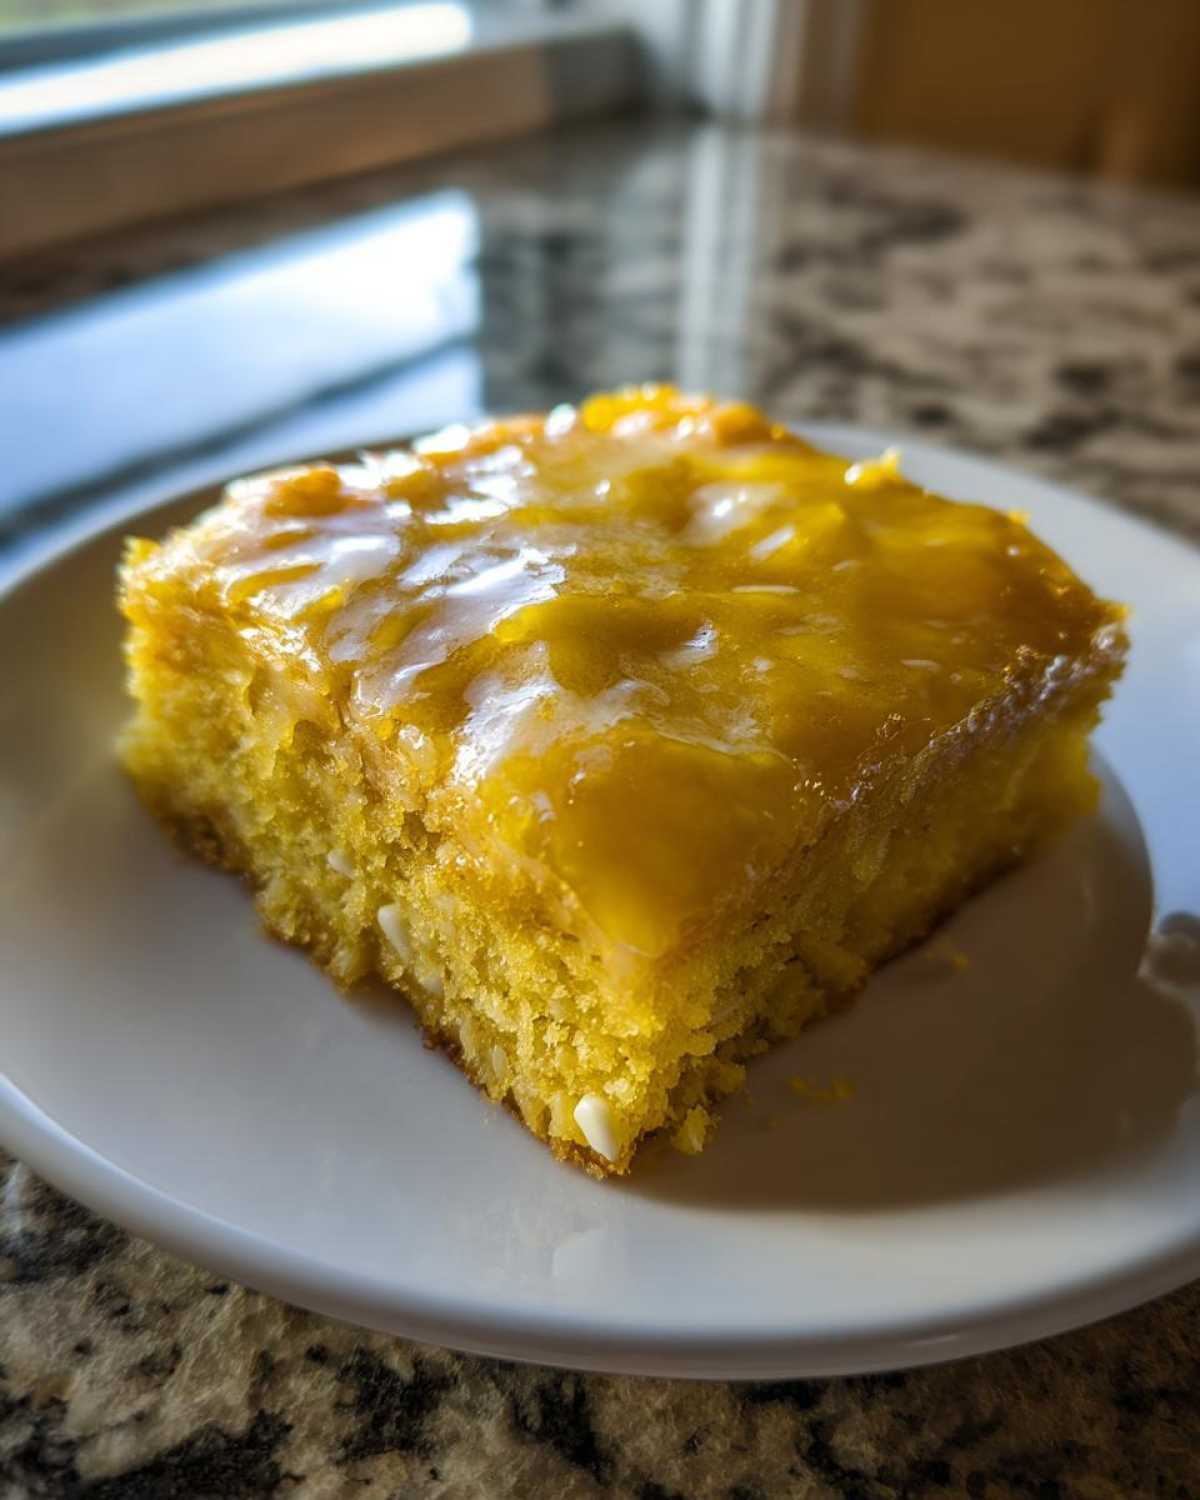
Okay, stop whatever you’re doing. Forget everything you think you know about lemon bars; we’re elevating this game entirely. I spent way too many afternoons testing this formula until I nailed it—the absolute best combination is sunshine-bright citrus cutting through deep, rich fudgy goodness. Trust me, these Lemon Brownies are not those sad, cakey squares your aunt makes. Nope! These are dense, chewy, and intensely flavorful.
My whole mission here was to bottle the feeling of the first truly warm, sunny day and pack it into a truly decadent dessert. It took a few tries; that first batch was too tart, the second too sweet, and the third tasted suspiciously like cake batter. But now? We have perfected the ratio of zest to sugar. You get that satisfyingly dense texture and that gorgeous, shiny, crackly top that everyone fights over. This recipe uses melted butter and a specific mixing order that guarantees chewiness every single time.
Why You Will Love These Fudgy Lemon Brownies
I know you’re busy, so here is the quick snapshot of why you need to make these Fudgy Lemon Brownies RIGHT NOW:
- They hit that perfect middle ground: truly fudgy, not cakey at all!
- The lemon flavor is punchy and bright, which wakes everything up.
- That gorgeous, shiny crackly top appears with minimal effort.
- It comes together in one bowl, making cleanup super easy.
- They travel well, making them perfect for picnics or potlucks.
Essential Ingredients for Perfect Lemon Brownies
Look, you can’t make a dynamite dessert with lackluster ingredients, right? That’s rule one in my kitchen. Getting that signature *dense* texture and that explosive lemon flavor depends entirely on what you grab from the pantry. Please, please, please do not be tempted to use bottled lemon juice here. Fresh zest and juice are the absolute heart and soul of these Lemon Brownies. When I see fresh lemons, I just know we’re making something special!
For the Lemon Brownies Batter
This is the main event! You need quality basics and just a few stars to make this happen:
- 1 cup (2 sticks) unsalted butter, melted (We need that melted butter for fudginess!)
- 2 cups granulated sugar
- 4 large eggs (Room temperature is best, but go with what you have!)
- 1 tablespoon lemon zest (Don’t skip zesting—this is where the magic lives!)
- 1/4 cup fresh lemon juice
- 1 teaspoon vanilla extract
- 1 1/4 cups all-purpose flour
- 1/2 teaspoon salt (It balances all that sugar, trust me)
- 1/2 cup white chocolate chips (Totally optional, but highly recommended for an extra layer of creaminess!)
For the Bright Lemon Drizzle Glaze
This thin layer goes on after cooling and gives you that gorgeous sweet/tart finish. You just need two things:
- 1 cup powdered sugar
- 2 tablespoons fresh lemon juice (Again, fresh is key!)
You’ll adjust the juice until you get a thick, pourable consistency. We want a drizzle, not a puddle that runs off the sides!
Step-by-Step Instructions to Make Lemon Brownies
This method feels slightly different than making a regular chocolate brownie, but stick with me because the structure of mixing the sugar and butter first is what gives us that beautiful, shiny crust! For a deeper dive into general brownie technique, check out my classic brownie recipe for comparison.
Preparing the Pan and Oven for Lemon Brownies
First things first: get your oven warming up to 350°F (175°C). Since these bars are dense, we need an easy escape route! Line a 9×13 inch baking pan with parchment paper, making sure you leave a couple of inches hanging over the long sides. You’ll use those overhangs as handles to lift everything out later. Give the parchment a quick spray of non-stick just to be safe.
Mixing the Wet Ingredients for Lemon Brownies
In a big bowl, whisk together your melted butter and that granulated sugar like you mean it! You need to whisk until that mixture looks lighter and smoother. This step is crucial for that crackly top mentioned earlier—we want that sugar dissolved as much as possible. Then, beat in your four eggs, one at a time, making sure the batter smooths out after each addition. Finally, stir in the lemon zest, the fresh lemon juice, and the vanilla extract until everything swirls together nicely. Don’t worry if it looks a little separated; the flour will fix that up!
Combining Dry Ingredients and Final Batter Assembly for Lemon Brownies
Now, grab a separate, smaller bowl and quickly whisk your flour and salt together. No need to overthink this part, just ensure the salt is evenly distributed. Next, add that dry mix gradually into your big bowl of wet ingredients. Use a spatula now—we are being gentle! Fold everything together just until you don’t see any more white streaks of flour. Seriously, stop mixing right there! If you’re using those optional white chocolate chips, fold those in gently right at the end. We don’t want a tough, gluten-heavy bar.
Baking Time and Testing for Chewy Lemon Brownies
Pour that lovely yellow batter into your prepared pan and spread it out evenly. It’s time for the oven—bake these beauties for about 25 to 30 minutes. To check if they’re done, insert a toothpick near the center. If it comes out coated in *moist crumbs*, you are golden! If it’s wet batter dangling off, give it five more minutes. We want them slightly underdone for that perfect chewy texture.
Glazing and Cooling Your Homemade Lemon Brownie Bars
This is the hardest part: waiting! You MUST let the brownies cool completely in the pan on a wire rack before you even think about glazing them. Seriously, if you glaze them hot, it just melts right in. While they cool, whisk the powdered sugar and lemon juice together until it’s smooth. If it feels too thick, thin it with a tiny bit more juice. Once the bars are fully cool, drizzle that bright glaze all over. Then, let that glaze set up completely—about 30 minutes—before cutting them into clean squares. Patience pays off!
Tips for the Best Crackly Top on Your Lemon Brownies
Everyone loves that shiny, paper-thin, crackly crust on a brownie. It just screams homemade perfection! For these Lemon Brownies, the secret isn’t just luck; it’s all about dissolving that sugar properly. You have to whisk that melted butter and sugar together really well before adding the eggs. We are physically whipping air into the sugar crystals, which creates those beautiful, fragile layers on top as they cook.
Also, make sure your eggs are fully incorporated—don’t just stir them in! Beating them one by one helps develop the structure needed for that signature sheen. If you want to see how this technique relates to other dense confections, check out my guide on fudgy homemade brownies recipe. It’s all about the mixing!
Ingredient Notes and Substitutions for Lemon Brownies
I get so many questions about ingredient swaps, and honestly, with something as delicate as balancing sweet and tart, substitutions can really change the outcome. For these Lemon Brownies, we need accuracy, especially concerning the fresh components. The texture relies heavily on the liquid ratios working perfectly with the dry items, so please stick close to the plan!
Boosting the Citrus Flavor in Your Lemon Brownies
If you are using lemons that aren’t supremely vibrant, you might want to push the flavor a little further. I sometimes sneak in an extra half-tablespoon of zest without any problem—it just amps up that amazing citrus punch. If you really love an acidic tang, a tiny pinch of food-grade citric acid works wonders, adding brightness without adding extra liquid to the batter. But usually, just using super fresh lemons gets the job done!
Storage and Reheating Instructions for Lemon Brownies
These Lemon Brownies are actually the best on Day Two, which tells you how stable and rich they are! Because of the glaze, I usually don’t leave them sitting on the counter for too long, especially if my kitchen gets warm. You can store leftovers tightly covered at room temperature for about two days, but honestly? They stay chewier when they’re cool.
My personal suggestion is to keep them in an airtight container in the refrigerator once that glaze is fully set. They become wonderfully dense and almost fudge-like when chilled—it’s a treat! If you do chill them, just let them sit on the counter for about 15 minutes before serving so they soften up just a little bit. Reheating isn’t really necessary; these bars are designed to be delicious at room temperature or slightly cool. If you try to warm them too much, that beautiful lemon glaze can get messy fast!
Serving Suggestions for Citrus Dessert Bars
Once your Homemade Lemon Brownie Bars are perfectly set—that glaze just shiny enough—it’s time to think about presentation! While these bars really shine on their own, elevating them just a touch makes them feel extra special, you know? I love serving these as a bright finish to a heavy meal.
If you want to skip the glaze entirely and go for a cleaner look, just dust them lightly with powdered sugar right before serving. That works great too! But my favorite way to serve these is slightly warmed (after chilling!) with a tiny dollop of fresh whipped cream on the side. The cream cuts the tartness beautifully.
For a gorgeous spring spread or a summer gathering, try pairing them next to something fresh. If you need a lighter side dish idea, I often make a light strawberry spinach salad to contrast the richness of these bars. A few fresh raspberries or thinly sliced strawberries placed alongside the bar on the plate make the whole dessert pop visually!
Frequently Asked Questions About Lemon Brownies
I always get messages after people try these, so let me just clear up a few things right here! These frequently asked questions pop up all the time concerning these beautiful Citrus Dessert Bars.
How do I ensure my Lemon Brownies are chewy and dense?
Oh, this is the most important question! To guarantee that perfectly chewy texture, you absolutely must not overmix the flour—just fold until it disappears. Secondly, when you test for doneness, the toothpick needs to come out with moist crumbs attached, not clean! That little bit of extra moisture cooks out as they cool, keeping them rich and dense, not dry.
Can I make White Chocolate Lemon Brownies without the glaze?
Yes, totally! If you skip the drizzle, you get a less sweet bar, which some people prefer. Just make sure you dust the top lightly with powdered sugar after they cool down for presentation points. The vanilla and lemon flavor is still fantastic without it!
And speaking of flavor, if you’re looking for other bright desserts, you might love my recipe for easy lemon poppy seed yogurt parfait for breakfast!
Nutritional Estimate for Homemade Lemon Brownie Bars
If you’re trying to keep track of things, I’ve put together a rough idea of what’s in these decadent Homemade Lemon Brownie Bars. Now, remember, I’m a baker, not a nutritionist, so take these numbers with a grain of salt—or maybe just a tiny pinch of that salt we added to the batter!
We calculated this based on 16 even servings. Because we are drizzling that sugary glaze on top, the sugar content is definitely up there, but wow, is it worth it! Always remember that the exact brand of butter you use or whether you skip the white chocolate chips will change things slightly, so view this as a helpful guideline rather than a hard set of rules.
- Serving Size: 1 square
- Calories: 250
- Sugar: 30g
- Sodium: 80mg
- Fat: 13g
- Protein: 3g
If you’re looking for something lighter that still hits that bright citrus note for a summer spread, I made a lovely easy lemon poppy seed yogurt parfait, which is a totally different vibe but still wonderfully zesty!
Print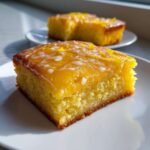
Fudgy Lemon Brownies
- Total Time: 45 min
- Yield: 16 squares
- Diet: Vegetarian
Description
A recipe for dense, chewy brownies infused with bright lemon flavor, featuring a crackly top.
Ingredients
- 1 cup (2 sticks) unsalted butter, melted
- 2 cups granulated sugar
- 4 large eggs
- 1 tablespoon lemon zest
- 1/4 cup fresh lemon juice
- 1 teaspoon vanilla extract
- 1 1/4 cups all-purpose flour
- 1/2 teaspoon salt
- 1/2 cup white chocolate chips (optional)
- For the Glaze: 1 cup powdered sugar
- For the Glaze: 2 tablespoons fresh lemon juice
Instructions
- Preheat your oven to 350°F (175°C). Line a 9×13 inch baking pan with parchment paper, leaving an overhang on the sides for easy removal. Lightly grease the paper.
- In a large bowl, whisk the melted butter and granulated sugar together until well combined.
- Beat in the eggs one at a time, mixing well after each addition.
- Stir in the lemon zest, lemon juice, and vanilla extract until just combined.
- In a separate bowl, whisk together the flour and salt.
- Gradually add the dry ingredients to the wet ingredients, mixing gently until just incorporated. Do not overmix. Fold in the white chocolate chips if using.
- Spread the batter evenly into the prepared pan.
- Bake for 25 to 30 minutes. The edges should look set, and a toothpick inserted near the center should come out with moist crumbs attached, not wet batter.
- Let the brownies cool completely in the pan on a wire rack.
- Prepare the glaze: Whisk together the powdered sugar and 2 tablespoons of lemon juice until smooth. Add more powdered sugar or lemon juice, a teaspoon at a time, to reach a thick drizzling consistency.
- Once cooled, drizzle the glaze over the brownies. Let the glaze set before cutting into squares.
Notes
- For a more intense lemon flavor, increase the zest to 1 1/2 tablespoons.
- To achieve a crackly top, ensure you mix the sugar and melted butter thoroughly before adding the eggs.
- Chill the brownies for 30 minutes after the glaze sets for cleaner cuts.
- Prep Time: 15 min
- Cook Time: 30 min
- Category: Dessert
- Method: Baking
- Cuisine: American
Nutrition
- Serving Size: 1 square
- Calories: 250
- Sugar: 30
- Sodium: 80
- Fat: 13
- Saturated Fat: 8
- Unsaturated Fat: 5
- Trans Fat: 0
- Carbohydrates: 33
- Fiber: 1
- Protein: 3
- Cholesterol: 65


Comments are closed.