

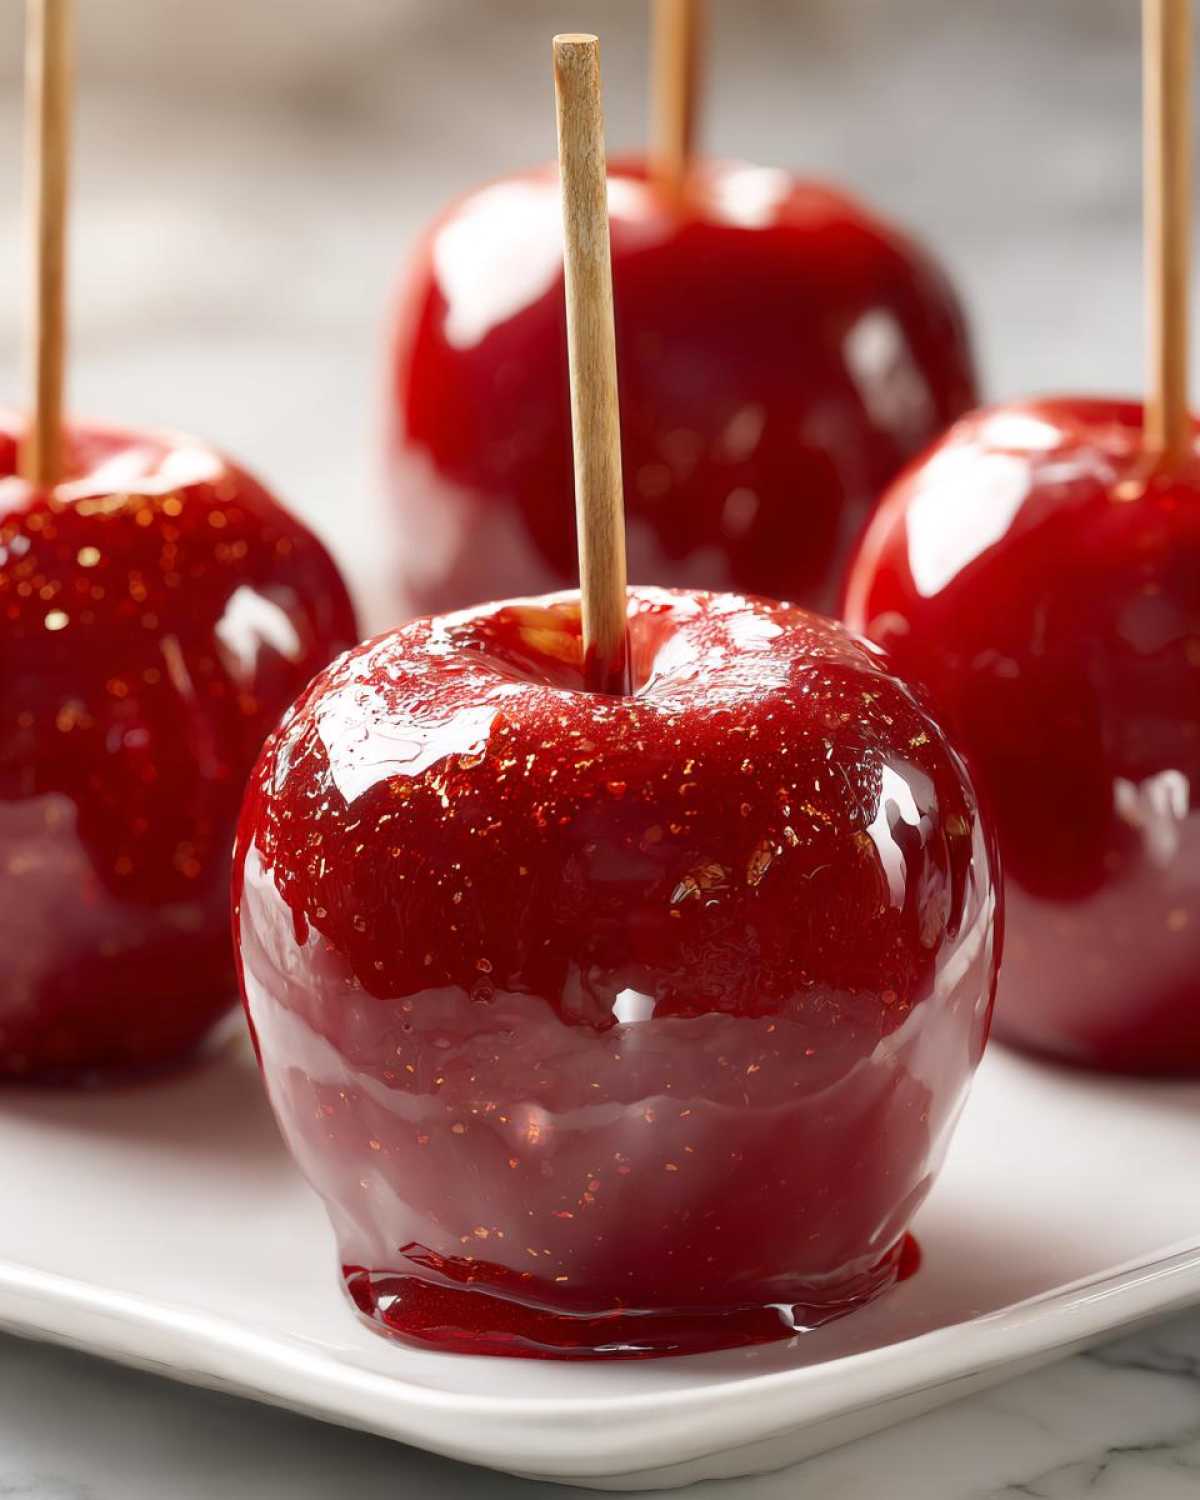
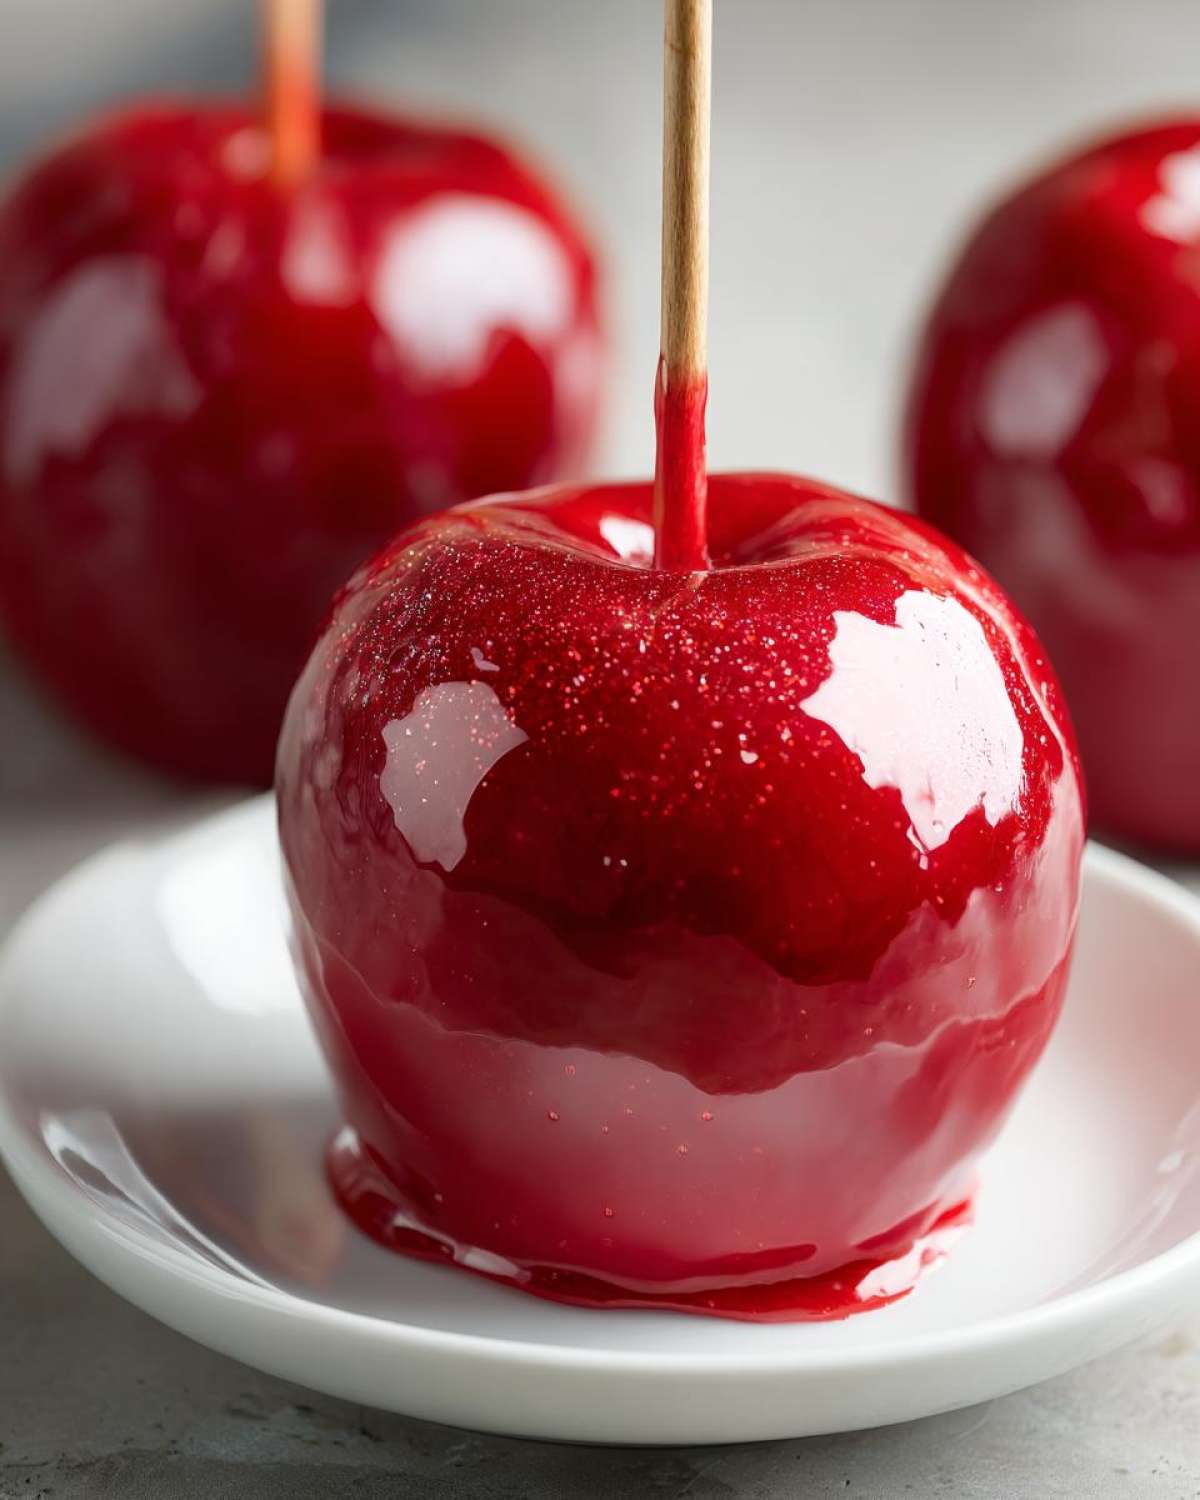
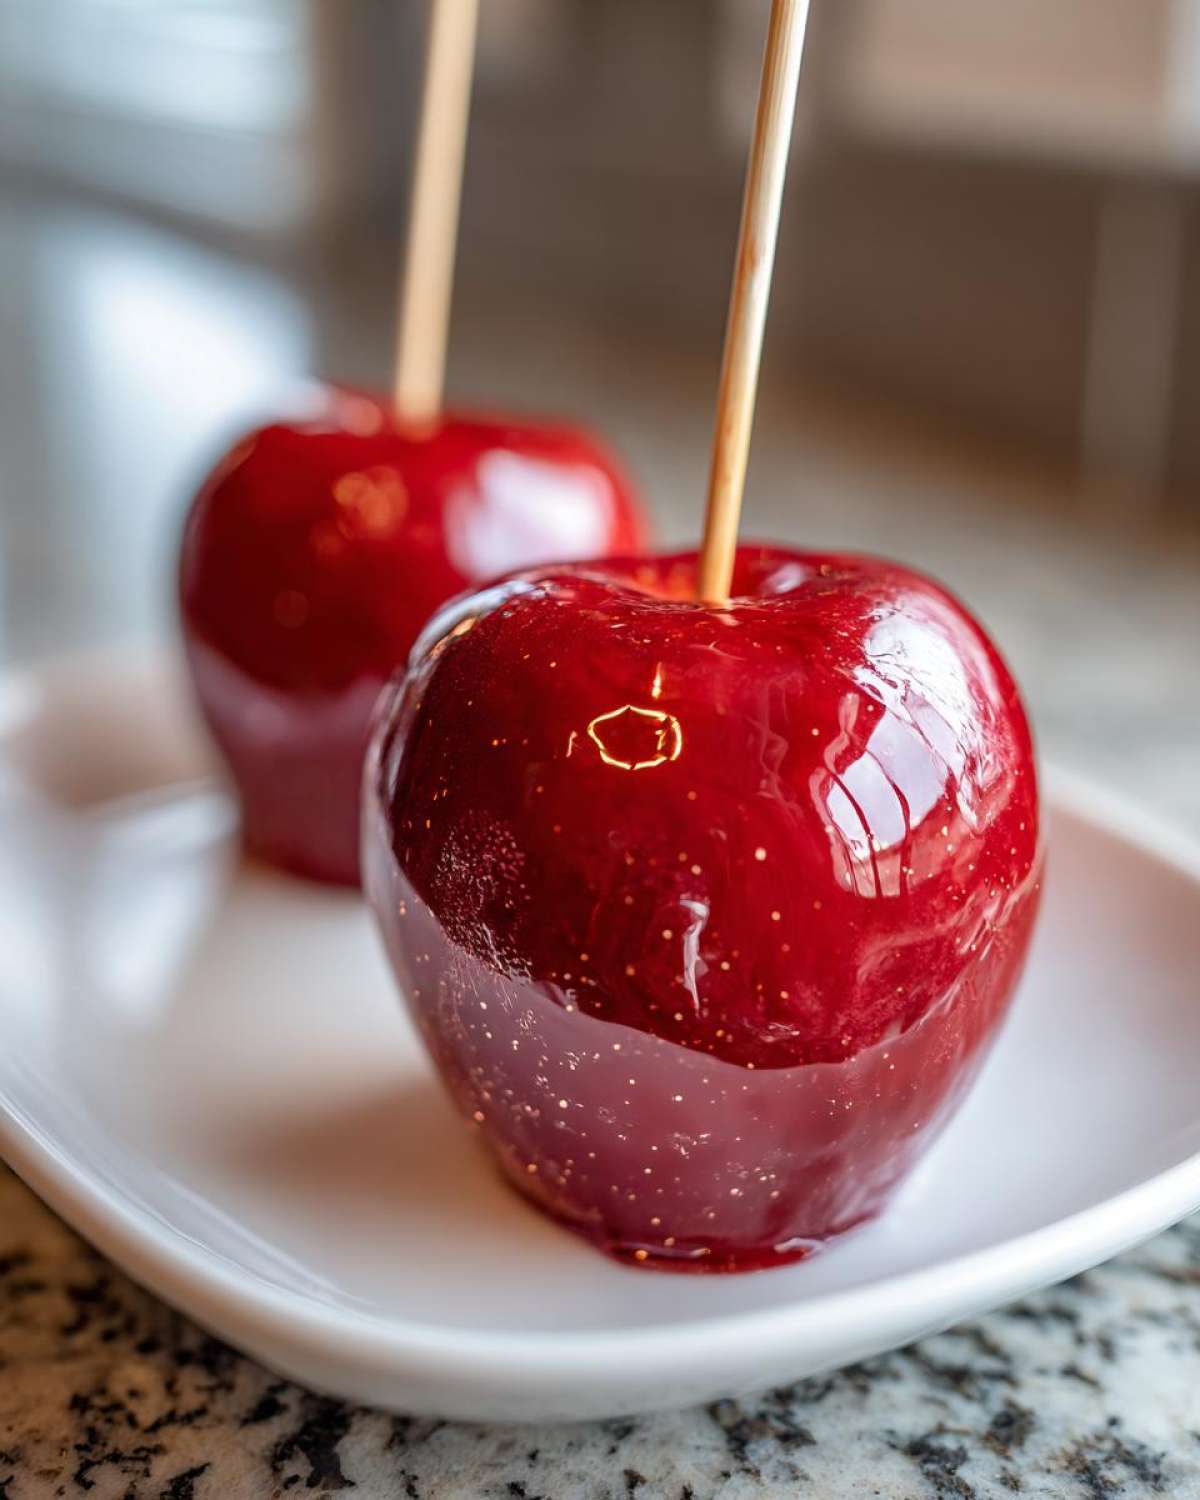
Oh, candy apples! Just saying the words brings back memories of crisp autumn air and dazzling, impossibly shiny red treats at the fairgrounds. If you’ve ever tried to make them at home, you know the nightmare: grainy texture or, worse, a coating riddled with frustrating little air bubbles! Well, trust me when I say those days are over. I spent years messing with sugar ratios until I cracked the code. This is, hands down, the easiest recipe out there for classic candy apples, and I promise you, the resulting coating is so glossy and perfectly hard, it looks like spun glass. Seriously, my first solo attempt ended up looking like a lumpy, caramelized mess—but I finally figured out the true secret sauce right here, and now we get that perfect, bubble-free finish every single time. Get ready for the best homemade candy apples of your life!
Why This Is the Best Easy Candy Apple Recipe
I know there are a million recipes out there claiming to be the “best,” but trust me, this one is special because it skips unnecessary steps and focuses only on what matters: a flawless, shiny crust. You don’t need fancy equipment or hours waiting around. This method uses basic pantry staples you probably already have. It gets you straight to that satisfying *crack* when you bite in. Honestly, if you struggled with grainy candy before, this recipe is going to be your new go-to, especially when you need a quick batch of apple crisp recipe alternatives for a party.
Key Features of Our Classic Candy Apples
This simple formula guarantees three things every single time you make these sweet apple treats:
- Reliable Hard Crack: We hit that 300°F mark consistently, meaning no sticky apples later.
- Beginner Friendly: If you’ve never made candy before, this is your gateway! It’s beginner candy making heaven.
- That High Gloss: The corn syrup ratio in this batch ratio gives you that jaw-dropping, bright, shiny candy coating that screams professional results.
Ingredients for the Perfect Candy Apple Coating
Okay, let’s talk supplies! You don’t need a whole spice cabinet for this, just the essentials to get that wonderful, shiny candy coating. I’m aiming for that classic, bright red look, so food coloring is usually a must! The corn syrup is our non-negotiable secret weapon to stop the sugar from turning into rock candy; it keeps everything smooth and pliable, guaranteeing that shiny candy coating we’re aiming for. Honestly, if you’ve been scared to try homemade candy apples because they sounded too tricky, this ingredient list proves they’re totally approachable. Here is exactly what you need pulled out onto the counter:
- 6 medium apples (Granny Smith or Fuji recommended)
- 2 cups granulated sugar
- 1 cup light corn syrup
- 1 cup water
- 1 teaspoon red food coloring (optional)
- 1/2 teaspoon cinnamon extract or vanilla extract (optional)
- 6 wooden skewers or lollipop sticks
Selecting the Right Apples for Your Candy Apple
Choosing the right base apple is almost as important as the syrup itself! If you use a soft, mushy apple, guess what happens when it meets 300-degree syrup? It’s a mess, honey! You need something firm that can handle the heat and not collapse under the weight of that gorgeous coating. Granny Smith apples are my absolute go-to because their tartness cuts right through the intense sweetness. Fuji apples are also fantastic; they’re naturally crisp and hold their shape really well, which is vital for a beautiful finished snack. Remember, whatever you pick, it needs to be bone dry before it touches that hot sugar mixture!
Step-by-Step Instructions: How to Make Candy Apples
Alright, here’s where the magic happens! This process moves quickly once you hit the temperature zone, so have everything ready to go beforehand. We are making classic candy apples, and precision with that thermometer is what separates the pros from the not-so-pros. Don’t worry if this is your first time working with hard crack candy; I’ll walk you through the timing. If you’re wondering about great recipes to pair these with, check out my apple cobbler recipe once the apples are peeled!
Preparing the Apples for Dipping
This step is non-negotiable, people. You must wash your apples well, but the absolute most important thing is drying them completely. I mean *completely*! Use paper towels, let them air dry, whatever you need to do. Any speck of water or moisture clinging to the skin will hit that super-hot syrup and immediately turn into steam, causing those dreaded bubbles in your coating. Once they are dry, pop those skewers right into the core firmly. You want them snug enough so they don’t wiggle when you dip them.
Achieving the Hard Crack Candy Apple Coating Instructions
Time to make the syrup! Put your sugar, corn syrup, and water into a medium saucepan. Stir it gently over medium heat until that sugar dissolves entirely and you don’t feel any grit when you rub a bit between your fingers. Now, listen close: the second it starts to boil, stop stirring! If you stir after it boils, you risk crystallization, and you’ll end up with grainy candy instead of a shiny candy coating. Stick your candy thermometer in there and let it climb. You need to reach exactly 300 degrees Fahrenheit—that’s the hard crack stage. Once you hit 300°F, pull it off the heat instantly!
If you’re adding color and extract, stir that in swiftly now. Tilt the pan slightly and quickly dip and swish each apple in the hot mixture. Let the excess drip off for just a second, then place them on parchment paper. They cool fast, so use that brief window of time wisely!

Expert Tips for No Bubble Candy Apple Success
I’ve gotten so many emails asking “Why are my candy apples lumpy?” or “How do I get rid of those awful bubbles?” Don’t you worry your sweet little head—we nailed that! Achieving those perfectly smooth, no bubble candy apples comes down to three main things that I learned the hard way. Mastering these tips is the difference between a fun Halloween treat and a kitchen disaster!
First, let’s re-emphasize the enemy: moisture. After washing your apples, you cannot be gentle with the drying process. I blot mine repeatedly, and then I let them sit on the parchment paper for a good ten minutes while the syrup heats up, just to be sure they are fully dry. If the apple is even slightly cool or damp, the boiling syrup hits it and creates steam pockets, which turn into those ugly bubbles.
Second, avoid crystallization at all costs! This happens when the sugar structure breaks down incorrectly, often caused by stirring the syrup after it starts boiling. Resist the urge! That sugar needs to climb steadily up to 300°F without being disturbed. If you see any sugar crystals forming on the sides of your pot above the liquid line, I use a wet pastry brush to gently wipe them down back into the candy mixture. It sounds delicate, but it works like magic.
Finally, remember the working time. Once you pull the pan off the heat, the mixture starts thickening up fast. If you notice the coating getting too thick to dip smoothly, don’t panic and don’t throw it out! Just put the burner back on the absolute lowest setting for about 30 seconds until it thins out slightly. You’re just re-liquefying what’s already cooked; you aren’t trying to boil it again. This small adjustment during dipping guarantees you get the thinnest, glossiest coverage possible!
Variations on the Classic Candy Apple
Once you master the base recipe—that perfect, bubble-free coating—you can really start having fun! Making classic candy apples is wonderful, especially for Halloween or Fall gatherings, but why stop at bright red? Think about adding flavor! Instead of just vanilla extract, try a little bit of peppermint extract for a Christmas vibe, or maybe even some ground cinnamon into the syrup before you dip! It really amps up the cozy factor on your sweet apple treats. If you’re looking for a rich contrast to the tartness, you could even dream up some creamy dips, like a copycat Cinnabon cream cheese frosting recipe to serve alongside these hard candy beauties!
If you’re aiming for something a bit more gourmet, try swirling! Once you take the pot off the heat but before you dip, pour a tiny bit of a contrasting colored syrup (easy to make in a separate small pot or even melted colored candy melts) right on top of the red batch. When you dip, you get this gorgeous swirl effect. It really elevates these from simple holiday treats to genuine party apple snacks. Honestly, if you’ve been scared to try homemade candy apples because they sounded too tricky, this ingredient list proves they’re totally approachable.
Making Colorful Candy Apples
Getting creative with color is super simple; it’s all about the food coloring! Remember to add this after you pull the pan off the heat and just before dipping, because if you boil the coloring, the shade can change or dull out. If you want stunning blue candy apples for a themed party or bright green for St. Patrick’s Day, just swap out the red coloring for a few drops of gel food coloring—gel works best because it’s concentrated and won’t thin out your syrup as much as the liquid drops might. Keep a few tiny bowls of different colors ready if you’re making a big batch of these fun apple recipes, so you can dip quickly into each shade!
Storage and Serving Suggestions for Your Candy Apple
Once these gorgeous candy apples have hardened up—and seriously, give them a good half hour to chill out!—you need to store them correctly so that yummy, shiny candy coating doesn’t get sticky. Avoid the fridge! Cold temperatures create condensation, and condensation melts the candy, turning your perfect crust into sugary goo. Keep your finished candy apples at room temperature in a cool, dry spot. I usually set them on a tray lined with wax paper.
For serving, contrast is key! The pure sweetness of the candy apple pairs magically with something salty. Don’t knock it ‘til you try it: grab a handful of slightly salty popcorn for your guests to munch on between bites of hard candy. If you happen to have leftovers and need to keep them perfect for a few days, you can actually wrap each one individually in plastic wrap before storing them loosely in a container. This really protects your beautiful coat! If you are having trouble keeping your apples firm, try my air fryer maple glazed carrots recipe while you wait for them to set!
Frequently Asked Questions About Homemade Candy Apples
It’s totally normal to have a few panics when you start working with boiling sugar! I always have questions popping into my head halfway through the cook time, so I gathered up the ones I hear the most. Hopefully, these quick tips solve any last-minute worries you have about making these sweet apple treats!
What is the big difference between caramel apples vs candy apples?
This is the question everyone asks! Basically, it’s the temperature we aim for. Caramel apples use a softer candy base—we cook that mixture until it’s chewy, usually around 245°F. That’s why they stay soft and sticky. For these classic candy apples, we push the heat way up to 300°F, which hits the “hard crack” stage. That’s what gives you that glass-like, crisp shell instead of a gooey chew. It makes all the difference for a good party apple snack!
My coating keeps turning grainy or crystallization happens! What went wrong?
Ugh, graininess is the worst! This almost always means one of two things happened. Either you stirred the syrup after it started boiling, which knocks the sugar molecules out of sync, or you had sugar crystals remaining on the side of the pot that fell back into the mixture. Remember my tip about using a wet pastry brush to wipe the sides down before it boils? Do that religiously! Also, make sure you are using clean bowls and utensils for the whole process.
When is the best time to dip my apples into the prepared candy coating?
You want to dip as soon as you hit that 300°F mark and take the pan off the heat, but you need to work quickly! The ideal window is right after you stir in the coloring and extract. If you wait too long, the syrup hardens right there in the pan. Trust me, trying to reheat that thick stuff is a nightmare and usually leads to a burnt flavor. If you’re making a big batch, you might need to gently return the pot to *very* low heat for a few seconds just to loosen the mixture up before dipping the next apple. If you are looking for a great cool-down drink to have afterwards, try my iced pineapple coconut mocktail recipe!
Can I make these ahead of time for a holiday?
Yes, you totally can! These are actually great to make a day ahead, especially since they are hard candy and not soft caramel coating. Store them wrapped loosely in plastic wrap in a cool, dry place, away from any humidity. Do not put them in the fridge!
Nutritional Estimate for One Classic Candy Apple
Now, I’m definitely not a nutritionist—I’m over here worrying about bubbles in my sugar, not macro counts! But since I know a lot of you are curious about what exactly goes into one of these gorgeous, giant, sweet apple treats, I pulled the numbers from the database for you. Please take this as a general guideline only; since we are dealing with homemade candy, the final count can vary based on the size of the apple you use and how thick your personal candy apple coating ends up being.
Generally, a single serving of our classic candy apple breaks down something like this. Remember, most of that sugar content comes from the hard candy coating itself, but wow, does it make a beautiful snack!
- Serving Size: 1 apple (approximate)
- Calories: 350
- Sugar: 85g (Yep, it’s a treat!)
- Fat: 0g
- Protein: 0g
- Carbohydrates: 90g
- Sodium: 1mg
So, these are definitely for special occasions, right? They are pure, unadulterated fun sandwiched between a firm apple and a super crispy shell. They pair wonderfully with less sweet snacks—maybe some salty nuts or a slice of plain yogurt if you’re trying to balance the sweetness after enjoying one of these holiday candied apples!
Share Your Homemade Candy Apple Creations
Now that you’ve conquered the hard crack stage and achieved that unbelievable, bubble-free finish on your candy apple, I absolutely need to see your creations! Seriously, there is nothing I love more than seeing your successful holiday candied apples out in the wild. Did you go for that classic deep red? Or did you experiment with some of the colorful candy apples we talked about?
Head down to the comments below and tell me how it went! Did this prove to be the best recipe for you? Were you able to dip them perfectly without fear? I live for these success stories. If you managed to overcome the fear of crystallization and got that super shiny candy coating, give this recipe a rating up top so other beginners know they can trust this method!
And please, I beg you, snap a picture! You can share your party apple snacks on Instagram and tag me—that would honestly make my week. Think of all the people you can impress at your next gathering with these amazing sweet apple treats. If you are looking for a lighter, healthier treat for the next day, you might want to check out my no bake lemon blueberry energy bites recipe! Happy baking, and enjoy that satisfying *crunch*!
Print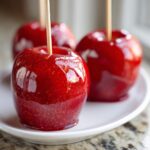
Easy Classic Candy Apples
- Total Time: 35 min
- Yield: 6 servings
- Diet: Vegetarian
Description
Follow these steps to make classic, glossy candy apples at home with a perfect, bubble-free coating.
Ingredients
- 6 medium apples (Granny Smith or Fuji recommended)
- 2 cups granulated sugar
- 1 cup light corn syrup
- 1 cup water
- 1 teaspoon red food coloring (optional)
- 1/2 teaspoon cinnamon extract or vanilla extract (optional)
- 6 wooden skewers or lollipop sticks
Instructions
- Wash and thoroughly dry the apples. Remove the stems and insert a wooden skewer firmly into the center of each apple.
- In a medium saucepan, combine the sugar, corn syrup, and water. Stir over medium heat until the sugar dissolves completely.
- Stop stirring once the mixture boils. Insert a candy thermometer.
- Cook the syrup without stirring until it reaches 300 degrees Fahrenheit (hard crack stage). This usually takes 15 to 20 minutes.
- Remove the pan from the heat. If using, quickly stir in the food coloring and extract. Work fast, as the mixture will thicken.
- Tilt the saucepan slightly. Dip and rotate each apple into the hot syrup, ensuring an even, thin coating. Lift the apple and let excess syrup drip off briefly.
- Place the coated apples on a baking sheet lined with parchment paper or a silicone mat.
- Let the candy apples cool completely and harden for at least 30 minutes before serving.
Notes
- For a bubble-free coating, ensure your apples are completely dry before dipping. Moisture causes bubbles.
- Do not stir the syrup once it begins to boil; this can cause crystallization.
- If the coating thickens too much while dipping, return the pan to low heat briefly to thin it out, but do not let it boil again.
- Prep Time: 15 min
- Cook Time: 20 min
- Category: Dessert
- Method: Stovetop Cooking
- Cuisine: American
Nutrition
- Serving Size: 1 apple
- Calories: 350
- Sugar: 85g
- Sodium: 1mg
- Fat: 0g
- Saturated Fat: 0g
- Unsaturated Fat: 0g
- Trans Fat: 0g
- Carbohydrates: 90g
- Fiber: 0g
- Protein: 0g
- Cholesterol: 0mg

Comments are closed.