
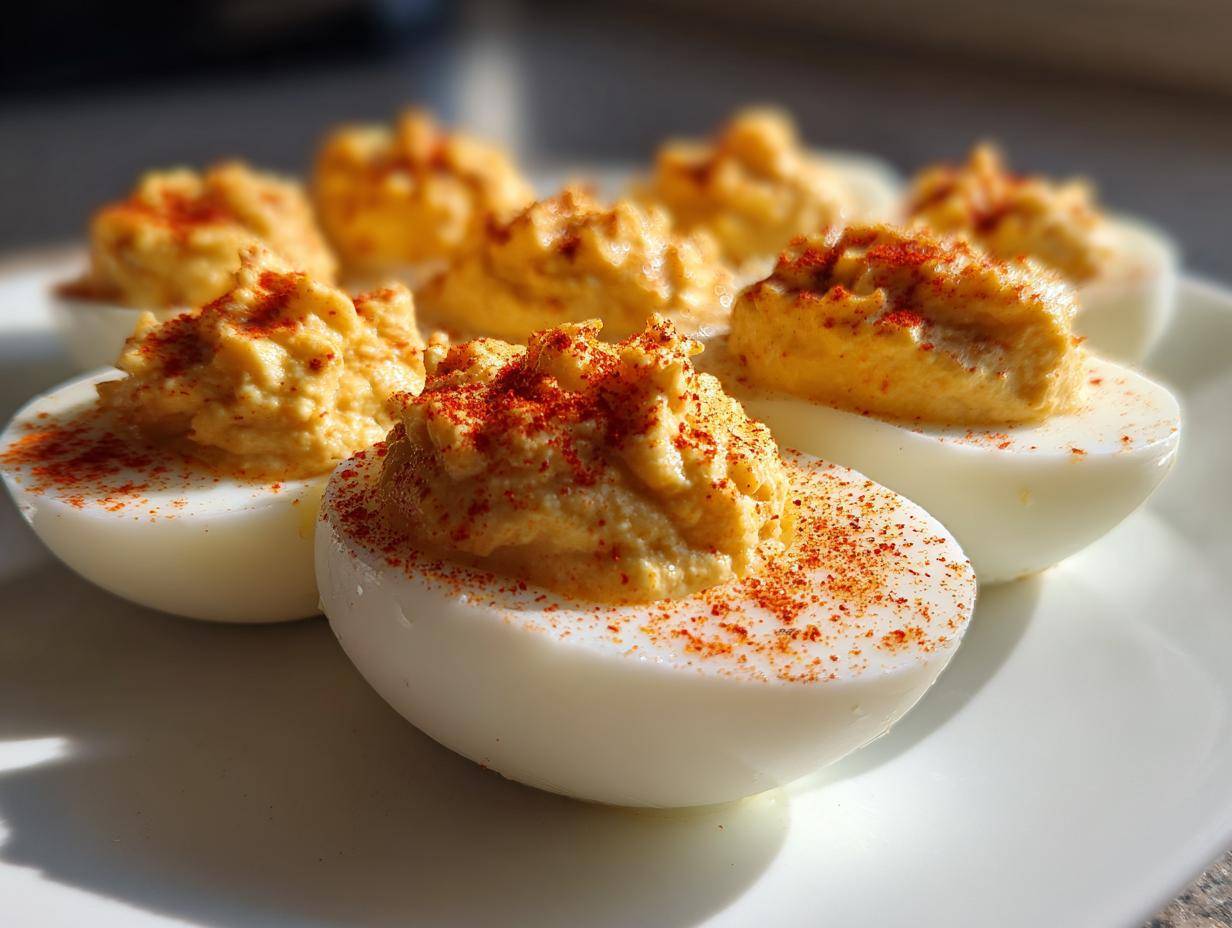
If there’s one single appetizer that vanishes the second you set it down at any family reunion, holiday party, or backyard BBQ, it’s deviled eggs. Honestly, I don’t trust a potluck that doesn’t feature these beauties! People try to get fancy with fancy fillings, but sometimes, you just need that perfect, nostalgic bite: creamy, tangy, and bright yellow. This foolproof deviled eggs recipe is what I use every single time. I swear by the simple method I learned from my aunt—the water-to-ice ratio is key! These deviled eggs really shone at my cousin’s engagement party last summer; everyone kept asking if I’d bought them premade. Nope! Just simple steps and the best classic flavor.
Why This is the Best Deviled Eggs Recipe for Your Next Party (Classic Appetizer)
You need reliability when you’re cooking for a crowd, and this recipe never lets me down. Forget dry yolks and sad-looking whites! This formula is what delivers the absolute best deviled eggs every time you try it. You’ll see why it’s headed straight to your ‘keeper’ file.
- Perfect, bright yellow yolks—gone are the grey rings!
- The filling whips up silky smooth thanks to a little trick I use.
- That unmistakable tangy, savory flavor that says ‘comfort food.’
Trust me, these classic appetizer bites disappear faster than anything else on the table. If you’re looking for something equally amazing for your next gathering, you should check out my classic cheese ball recipe next!
Ingredients for Perfect Deviled Eggs (Yields 24 Halves)
I keep my ingredients list short and sweet—that’s the secret to keeping this classic appetizer so easy! When you stick to the basics, the flavor of the egg really shines through. Don’t bother looking for fancy extras here; this is about nailing the fundamentals first. If you happen to be running low on mayo, I have an amazing recipe for easy homemade mayonnaise you can whip up while your eggs are chilling!
Here is exactly what you will need to get 24 perfect halves piping hot to the table:
- 12 large eggs (Make sure they’re cold when you start, trust me.)
- 1/2 cup mayonnaise (Use your favorite full-fat kind for the best creaminess!)
- 2 tablespoons yellow mustard (This gives it that classic little punch.)
- 1 tablespoon white vinegar (Don’t skip this—it brightens everything up.)
- 1/4 teaspoon salt
- 1/8 teaspoon black pepper
- Paprika, for garnish (A light dusting is all you need for that pop of color.)
That’s it! Twelve eggs, a few pantry staples, and you’re ready to make a platter full of delicious snacks.
How to Make Deviled Eggs: Step-by-Step Instructions
Okay, this is where the magic happens. Properly cooking the eggs is seriously 80% of the battle when you’re aiming for the best deviled eggs. If you mess up the boil, peeling is a nightmare, and nobody wants green rings around their yolks! We’ll tackle the eggs first, then whip up that gorgeous, creamy filling. For more general expertise on eggs, you can always check out my guide on creamy egg salad, which uses a similar base!
Achieving Perfectly Cooked and Easy-to-Peel Eggs
This step is non-negotiable for easy peeling. Put those 12 eggs right into a big saucepan—don’t crowd them. Cover them with cold water, making sure the water is about an inch over the top of the eggs. Now, bring that water to a hard, rolling boil. Once it’s boiling like crazy, you immediately kill the heat, cover the pot tightly, and let them sit, untouched, for exactly 12 minutes. When the timer goes off, dump the hot water and immediately plunge those eggs into a big bowl of ice water. That ice bath is crucial because the shock stops them from overcooking and makes the shell shrink slightly away from the white. Oh, and here’s my little helper tip: add about one teaspoon of baking soda to the water when you start boiling. Seriously, the shells practically slide right off after that whole process!
Creating the Smooth Filling for Your Deviled Eggs
Once those eggs are cool, peel ’em and slice them right down the middle lengthwise. Gently scoop every bit of the yolk into a bowl. Now, you want smooth, right? Take a fork and mash those yolks until they are as powdery fine as you can get them. If you want ultra-smooth, use a fine-mesh sieve to push them through, honestly, it’s worth the extra dishwashing! Now, add in your mayonnaise, that yellow mustard, the white vinegar, salt, and pepper. Mix it all up vigorously. Keep stirring until you have a completely homogenous, creamy filling. Don’t stop mixing early, or you’ll end up with lumpy bits when you taste-test later!
Assembling and Garnishing Classic Deviled Eggs
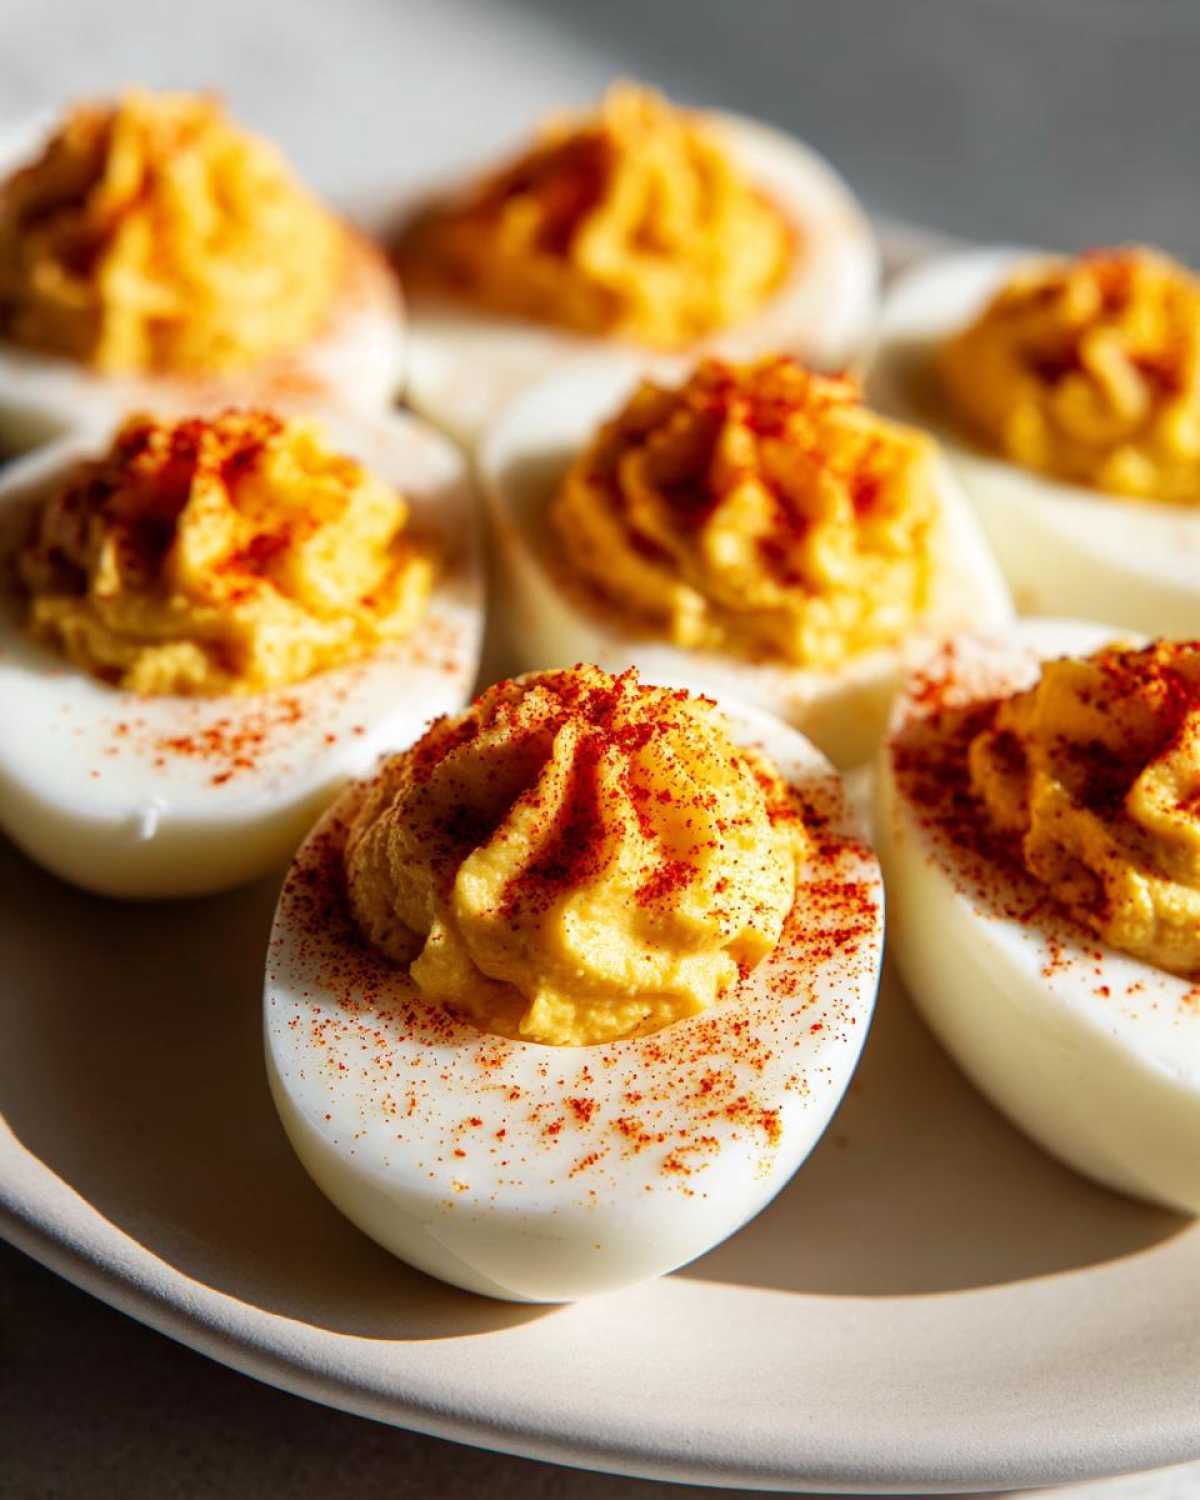
Time to fill those egg white cups! You can totally use a piping bag fitted with a star tip if you want that fancy, bakery look—it makes these deviled eggs recipe look professional. If you’re in a rush, though, just grab a small spoon and gently dollop the filling back into the cups. Make sure the mound looks generous! The very last thing you do, which signals ‘these are done and ready to serve,’ is dusting the top of each one with a light, even sprinkle of paprika. That color contrast is what makes them look so utterly irresistible at parties. They are now ready to be the star!
Tips for the Absolute Best Deviled Eggs
I’ve learned a few secrets over the years that separate decent deviled eggs from the ones everyone begs you for year after year. If you want bragging rights and the title of ‘Best Potluck Deviled Eggs Maker,’ pay attention to these fine details. It all comes down to temperature control and avoiding those sad-looking gray yolks!
First, let’s talk about those gross green rings around the yolk. That happens when the egg is overcooked, and the sulfur in the white reacts with the iron in the yolk. See why that 12-minute rest off the heat is so important? Stick to that timing, and you’ll get beautiful, vibrant yellow centers. If you’re worried, that ice bath is your emergency brake! Don’t let those eggs hang out on the counter after boiling.
Texture is the next battlefield. Nobody likes a grainy filling! The fork-mashing is good, but sometimes you need an extra step for that super-smooth, almost whipped texture. I sometimes press the mashed yolks through a fine-mesh sieve—it takes maybe three extra minutes, but the result is pure silk. It’s the difference between a homemade filling and something you get at a five-star deli.
Also, for tanginess, remember that vinegar is your friend. A tablespoon is standard, but if you taste your mixture and it feels a little flat, add another half teaspoon of vinegar. It cuts through the richness of the mayonnaise perfectly. If you’re looking for a creamy alternative to mayo someday—maybe for a lighter side dish—you should definitely check out my mayo-free creamy egg salad recipe. But for this classic version? Stick to the tried and true mayo!
Making Deviled Eggs: Storage and Make-Ahead Guide
Planning ahead is the key to being a relaxed host, right? Nobody wants to be stuffing eggs minutes before guests arrive! The good news is, this party finger food is one of the best appetizers for prepping early. But timing matters, because raw egg whites get weird if left uncovered, and creamy fillings don’t love sitting out.
Generally, once assembled, deviled eggs are best eaten the same day, but you can safely keep them in the fridge for up to two days. The secret weapon here is separating everything if you’re making them the day before. Honestly, for the absolute freshest taste, aim to assemble them within 3 to 4 hours of serving.
If you need to get a head start, here’s my drill:
- Boiled Eggs Only: You can boil and peel your eggs up to three days ahead of time! Keep those naked whites tightly wrapped in plastic wrap in the fridge. They stay great!
- Filling First: The yolk mixture (the filling) is perfectly fine stored in an airtight container in the fridge for up to two days. It smells and tastes exactly the same.
- Putting It Together: Only combine the filling and the whites right before you plan to serve them, or at least an hour before. If they sit assembled for too long, the filling can start to weep a little liquid onto the whites.
When you’re ready to plate them up, spoon or pipe the filling back in, give them that final paprika dusting, and you’re done! Being organized with your deviled eggs means you can focus on other things, like maybe trying out that easy crockpot potato soup while you wait for everyone to arrive!
Deviled Eggs Variations: Customize Your Classic Appetizer
While the classic recipe I shared is truly spot-on, I totally get wanting to try a little something different based on what you have on hand or what your crowd loves. Changing up the filling is so easy, and you don’t need to rewrite the whole recipe to get a fun twist! These aren’t major overhauls; they are just little nudges to make your classic appetizer uniquely yours.
My rule for variations is this: don’t mess with the yolk-to-mayo/mustard ratio too much. That base is what keeps them creamy and gives them that classic tangy foundation.
Adding a Little Pickle Power
This is probably the most common twist people put on their deviled eggs, and for good reason! A teaspoon or two of finely minced sweet pickle relish stirred right into the yolk mixture adds a bright, almost electric *zing* that bounces off the richness of the mayo. If you use sour dill relish, you might want to cut back on the vinegar a tiny bit in the base recipe. It adds texture and a flavor layer that people go absolutely wild for.
Spice it Up (Heat Lovers, Listen Up!)
If your family likes things with a bit more fire, this is the easiest change you can make. Instead of just sprinkling paprika on top, swap it out for smoked paprika—it gives the finished product a deep, smoky flavor that is phenomenal. Or, if you want real heat, mix about a half teaspoon of your favorite hot sauce right into the filling mixture. I’m personally obsessed lately with a little kick of sriracha; it blends right in and just elevates everything. If you’re feeling adventurous with spice, you should totally dive into my recipe for spicy Sriracha deviled eggs if you want something truly fiery!
The Savory Topping Swap
You don’t always need extra flavor *in* the filling; sometimes, the garnish does all the work. Instead of using regular sweet paprika on top, try a pinch of freshly cracked black pepper, or even better, a sprinkle of chopped fresh chives or dill across the top. The fresh herbs lend a beautiful color and a surprisingly clean finish to the savory egg filling. These little finishing touches take your deviled eggs from great to gorgeous!
Serving Suggestions for This Classic Appetizer
Okay, your incredible deviled eggs are done, perfectly creamy, beautifully garnished. Now what? These savory bites are year-round superstars, but they really shine when paired right! Because they are rich and satisfying on their own, you want to serve them alongside things that offer a nice textural contrast or a little freshness.
Think about picnics and potlucks—you need food that travels well and doesn’t mind sitting out for a bit (keep them cool, though!). Deviled eggs are the ultimate party finger food because everyone knows them and loves them, and they pair well with literally anything.
Game Day Lineup
If you’re making these for a big game day spread, you have to balance the heavy richness of the eggs with something crispy and something salty. I always serve them next to a big bowl of crunchy tortilla chips specifically for dipping up any filling that might spill out onto the platter (I know you do it too!). They also look fantastic nestled on a platter next to my recipe for crispy onion rings. The onion rings bring the sweet crunch, and the deviled eggs bring the cool, creamy tang. It’s the perfect combo!
Holiday & Picnic Pairings
For a major holiday spread, like Easter or Thanksgiving, these are never the main attraction, but they can’t be missing! They look stunning next to lighter, fresher sides. Try serving them alongside a big green salad with a simple vinaigrette, or maybe some cold summer salads like potato or pasta salad. They offer a great protein boost compared to just crackers and cheese.
If you’re heading to a picnic, pack them carefully, but know they are an ideal savory component. They are so much easier to transport than something hot, messy, or stacked up high. They just sit there looking delicious, ready to be grabbed!
The “Just Because” Snack
Don’t wait for an official party! If you make a batch of these **deviled eggs**, you should absolutely keep a few for yourself for lunch the next day. They are truly fantastic cold, straight out of the fridge alongside a crisp apple or some baby carrots. They transform a boring lunch into something special. Seriously, these aren’t just for crowds; they’re for satisfying those random savory cravings too!
Frequently Asked Questions About How to Make Deviled Eggs
I get so many questions after people taste how good these turn out! It’s natural when you find a new favorite appetizer. I’m happy to share everything I know about making the process smooth, especially if you’re trying to figure out **how to make deviled eggs** for the first time. I’ve rounded up the most common things people ask me about!
How long can I make deviled eggs ahead of time?
For food safety and the absolute best quality, I always recommend assembling them no more than 24 hours before you plan to serve them. If you need to prep earlier, boil and peel your eggs and store them separately from the filling. Once you mix the yolks and mayo, you can cover that filling tightly and keep it in the fridge for up to two days. But remember, the fresher they are assembled, the better they look and taste!
What makes the filling for deviled eggs creamy?
Creaminess comes down to two things: texture and ratio. First, you absolutely must mash those yolks until they are powder-fine before adding anything else. If you don’t get out all the lumps first, the filling will feel grainy, not creamy. Second, the ratio of binder—that’s the mayo and mustard—to the dry yolk needs to be spot on. You want enough to make it look like a thick frosting, not a runny sauce. Stick to the recipe amount, and if it seems too stiff at first, add your liquid (mustard/vinegar) just a tiny bit at a time until it yields when you press it gently.
Can I make easy deviled eggs without mayonnaise?
You can, but I’ll warn you, it slightly changes that classic flavor profile we were going for! If you absolutely can’t use mayo, you can substitute it with an equal amount of plain, full-fat Greek yogurt. It will give you a tangier, slightly lighter result, but it still binds beautifully. Another great alternative, if you don’t mind a subtle green tint, is using half an avocado instead of mayo. Mash it right in with the yolks! It makes for fantastic, creamy easy deviled eggs. If you’re playing around with different egg-based dishes, you might also enjoy my deviled egg pasta salad recipe!
Nutritional Estimate for Deviled Eggs
Okay, so I know when we’re making something this delicious, we probably aren’t counting every single calorie, but it’s still good to have a general idea of what’s in these little bites! Since every brand of mayo and mustard plays favorites differently, take these numbers with a grain of salt—they are just an estimate based on standard pantry staples, okay? This is just an FYI for everyone, especially if you’re prepping these for a bigger spread where people might be balancing out their plates.
Here is the general nutritional breakdown for two halves of our classic, creamy deviled eggs:
- Serving Size: 2 halves
- Calories: 90
- Fat: 8g
- Saturated Fat: 2g
- Protein: 3g
- Total Carbohydrates: 0g
- Sugar: 1g
- Sodium: 120mg
See? They are small, savory, and packed with protein, making them a perfect little bite to grab while you’re mingling! They are low-carb, too, which is always a nice bonus for keeping things balanced at a party. Just remember, these numbers are an estimate, so make them with love and enjoy every single one!
Print
Classic Deviled Eggs Recipe
- Total Time: 32 min
- Yield: 24 halves
- Diet: Vegetarian
Description
A simple recipe for making creamy, tangy deviled eggs, a perfect appetizer for any gathering.
Ingredients
- 12 large eggs
- 1/2 cup mayonnaise
- 2 tablespoons yellow mustard
- 1 tablespoon white vinegar
- 1/4 teaspoon salt
- 1/8 teaspoon black pepper
- Paprika, for garnish
Instructions
- Place eggs in a large saucepan and cover with cold water by about one inch.
- Bring the water to a full, rolling boil over high heat.
- Once boiling, immediately remove the pan from the heat, cover it, and let the eggs stand for 12 minutes.
- Transfer the eggs to an ice bath (a bowl of ice water) and let them cool completely, about 10 minutes.
- Peel the cooled eggs and slice them in half lengthwise.
- Carefully scoop the yolks into a small bowl.
- Mash the yolks with a fork until fine.
- Add the mayonnaise, mustard, vinegar, salt, and pepper to the yolks. Mix until the filling is smooth and creamy.
- Spoon or pipe the yolk mixture back into the hollowed-out egg white halves.
- Sprinkle paprika over the top of each filled egg half before serving.
Notes
- To make peeling easier, add 1 teaspoon of baking soda to the water when boiling the eggs.
- For a smoother filling, press the mashed yolks through a fine-mesh sieve before mixing in the other ingredients.
- If you do not have a piping bag, use a small spoon to fill the egg white halves.
- Prep Time: 20 min
- Cook Time: 12 min
- Category: Appetizer
- Method: Boiling and Mixing
- Cuisine: American
Nutrition
- Serving Size: 2 halves
- Calories: 90
- Sugar: 1
- Sodium: 120
- Fat: 8
- Saturated Fat: 2
- Unsaturated Fat: 6
- Trans Fat: 0
- Carbohydrates: 0
- Fiber: 0
- Protein: 3
- Cholesterol: 95



Comments are closed.