

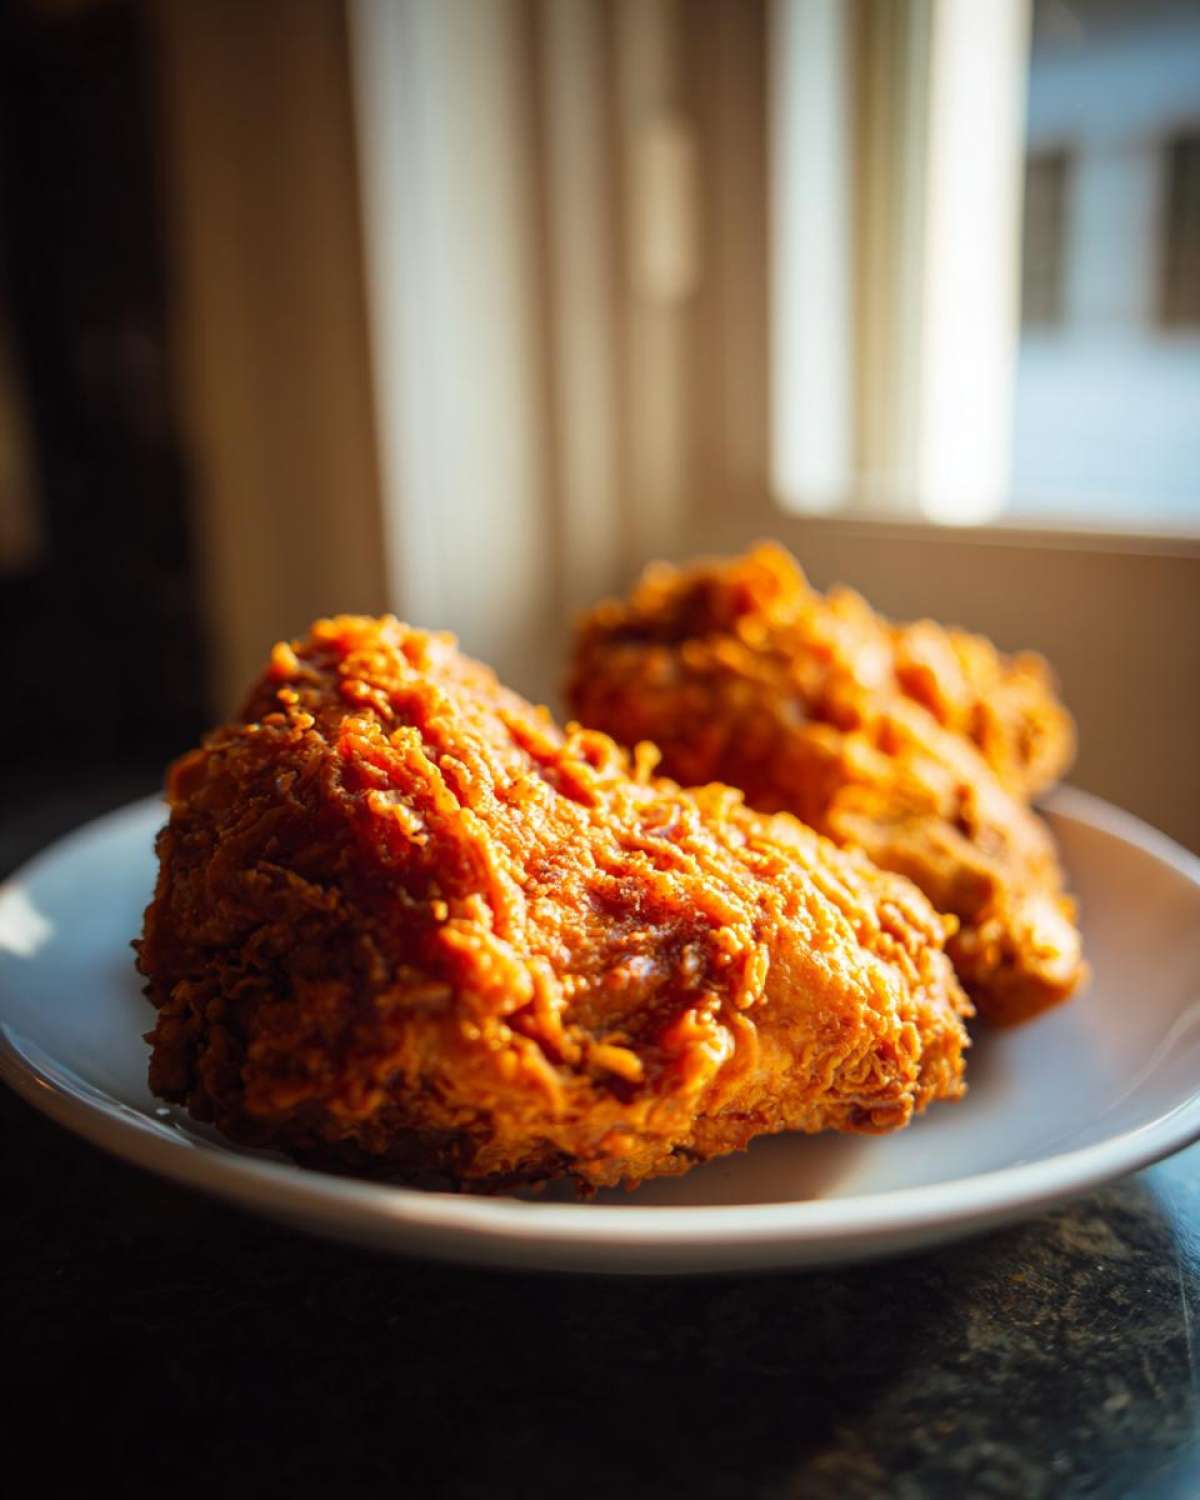
Forget soggy, flavorless chicken, friends. We are talking about that show-stopping, shatteringly crisp, golden brown crust that makes you close your eyes after the first bite! I’m spilling all my secrets for truly next-level fried chicken that manages to be unbelievably juicy underneath all that crunch. This isn’t your grandma’s recipe, unless your grandma secretly knew about the magic combination of a long buttermilk soak and a double-dip dredge. Seriously, once you try this method for Ultra-Crispy Buttermilk Fried Chicken, you won’t go back to the old way. It locks in the moisture while building that glorious, craggy exterior we all dream about! Let’s get frying!
Why This Buttermilk Southern Fried Chicken Recipe Works (Expert Tips)
Look, there’s a reason why Southern fried chicken deserves all the hype, and it all comes down to two non-negotiable steps. We aren’t just tossing chicken in flour and hoping for the best! We are manipulating texture and tenderness before the oil even gets hot. If you skip the brine or rush the coating, you are missing the genius behind this specific preparation. It’s about building layers, both in flavor and texture, to ensure every single piece is perfect.
You can serve this amazing fried chicken alongside my crispy fried cornbread for a truly authentic meal!
The Role of Buttermilk Brining for Juicy and Crispy Chicken
That buttermilk bath is crucial! The natural acidity in the buttermilk does some serious work, gently breaking down the tough proteins in the chicken. This is how we guarantee that fall-off-the-bone tenderness and incredible juiciness. Look, at least four hours is what you need, but if you can manage overnight, trust me, the results are heavenly.
Achieving the Ultimate Crunchy Chicken Coating
To get that beautifully craggy, ultra-crispy surface, we need two tricks up our sleeve. First, we toss cornstarch right into the flour mix; that starch dries out fast in the hot oil, maximizing crunch. Second, the double dredge! Dipping it back into the wet mixture and then into that flour again locks in the coating. This builds the signature Crunchy Chicken Coating that flakes off perfectly.
Gather Your Ingredients for Perfect Fried Chicken
Okay, before we get frying, we need our ducks (or, well, chicken pieces!) in a row. Getting the right stuff makes all the difference between good fried chicken and *legendary* fried chicken. Make sure you’ve got bone-in, nice skin-on pieces—I love a mix of dark meat like thighs and drumsticks because they handle the heat so well.
You’ll need two full cups of flour for that thick dredge, and don’t forget the cornstarch; it’s our secret weapon for crispiness! And since we are going Southern style, make sure you have that full two cups of buttermilk waiting for the soak. We’re aiming for perfection, so gather everything up, maybe even pull out your sweet potato biscuits ingredients now, too!
Step-by-Step Instructions to Make Classic Fried Chicken
Alright, here’s where the real action starts! Making killer fried chicken is all about following the sequence and respecting that hot oil. Don’t rush the brine part, and seriously, watch that thermometer like a hawk during the fry. If your oil temperature isn’t right, you end up with greasy disappointments instead of golden perfection. We’ve prepped the flavor; now we build that magnificent crunchy shell!
If you need a shortcut for a different dinner later, try my easy honey garlic chicken recipe, but for this classic, stick to the plan!
Marinating the Chicken (Brine Prep)
First things first: get that chicken swimming in the buttermilk and hot sauce. Make sure every nook and cranny is coated, cover it up, and stick it in the fridge. I know it’s torture, but you absolutely must let it chill for a minimum of four hours. Overnight is genuinely my preference for peak tenderness here.
Preparing the Dredge and Double Coating for Fried Chicken
While that chicken chills, whisk together all your dry stuff—flour, cornstarch, and all those lovely spices—in a shallow pan. When you pull the chicken out, let that extra buttermilk drip off—we want drips, not puddles! Now, heavily dredge each piece, really pushing that flour in to make those craggy bits form. Then, for extra credit, dip it back into the buttermilk bath fast, and hit that flour one last time. That’s how you guarantee amazing fried chicken!
The Deep Frying Process: Temperature Control is Key
Pour your oil until it’s about two inches deep, and heat it up carefully to exactly 325°F. This is non-negotiable for crispness! Gently slide just 3 or 4 pieces into the oil; if you crowd the pot, the temperature plummets, and your chicken gets greasy. Fry them for about 6 to 8 minutes on each side until you hit that beautiful deep golden brown—aim for 165°F internal temp. Pull them out onto a wire rack, never paper towels, to drain. That rack keeps the bottom crust from steaming!
Tips for Foolproof Fried Chicken Success
Even the best recipe needs a little finesse, right? These little pointers are what transform my standard fried chicken process into something truly dependable every single time—that’s why I call it my guide to Foolproof Fried Chicken success! Don’t skip the thermometer check, honestly; oil regulation is half the battle.
If you’re looking for another crispy option for game day, you absolutely have to check out my guide on crispy air fryer chicken wings later this week!
Remember, the double dredge is optional! If you are feeling like a lighter, less craggy crust today, just stick to a single dip in the flour mixture. Also, try to keep your chicken pieces uniform in size. A mix of big drumsticks and small wings means the small ones will be done while the big ones are still raw at the bone. We want consistency!
Serving Suggestions for Your Golden Brown Chicken
Now that you have this unbelievably perfect, Golden Brown Chicken resting on the rack, you need sides that can stand up to its perfectly crisp texture and savory flavor. You can’t serve perfection without classic comfort food partners, right?
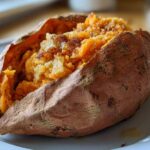
My first thought is always creamy mashed potatoes, perfect for catching those flavorful little oil bits. Next, you absolutely need something tangy to cut the richness, so vinegar-based coleslaw is a must. And because I love cheese so much, pairing this with a small bowl of my creamy cheddar potato soup is the ultimate indulgence. Maybe bake some sweet tea alongside it, and you’ve got the best Southern dinner imaginable!
Storage and Reheating Best Practices for Fried Chicken
Oh, leftovers! The best part of making a giant batch of amazing fried chicken is having some the next day. Keep any extras in the fridge, but try not to keep them more than three days—the crust just starts turning soft after that, even in a sealed container. Don’t try the microwave, please! It turns that beautiful crunch into rubbery sadness.
If you want to bring that crispy heaven back to life, trust me on this: use a wire rack set on a baking sheet in a hot oven (around 400°F) or pop it in the air fryer for about 8 to 10 minutes. That dry heat sucks the moisture right out of the coating, making it crunchy again almost instantly. That’s how you get the best reheat!
Frequently Asked Questions About Making Fried Chicken
I always get tons of questions after people try this recipe because deep frying can feel a little intimidating at first! Don’t worry, these are the exact things I wondered about when I first tried to master the ultimate piece of fried chicken. Drop any others in the comments below if you have them!
If you are looking for an alternative quick dinner idea sometime, check out this chicken fried rice recipe!
Can I use chicken breasts instead of bone-in pieces for this fried chicken recipe?
Yes, you absolutely can swap them out! Breasts are tricky because they are very lean and cook way faster than thighs or drumsticks. I highly recommend cutting the breasts into uniform, large pieces or even thick strips so they cook evenly. Just watch them like a hawk because they dry out fast. You’ll probably pull your chicken breasts out about two minutes sooner than the darker meat parts.
What is the secret to the Best Homemade Fried Chicken texture?
Oh, that texture! That’s the payoff for all the chilling time. The secret to the Best Homemade Fried Chicken texture comes down to two things we talked about: the long, cold soak in buttermilk, which tenderizes everything, and making sure you do that double dredge. Pressing that flour mixture onto the chicken before it goes in keeps the coating from falling off, giving you those glorious peaks and valleys that get super crunchy when they hit the hot oil.
How do I ensure my fried chicken is Juicy and Crispy?
This is the number one concern! For the juiciest outcome, you must not skip the buttermilk brine—seriously, that acid does the magic. For the crisp part, it is all about the oil temperature. If you fry your chicken when the oil is too cool (below 315°F), the crust gets soggy almost instantly because it soaks up the grease instead of crisping up. Keep that temperature regulated, and you’ll have beautifully Juicy and Crispy Chicken every time!
Estimated Nutritional Information for This Fried Chicken
So, let’s talk numbers, because this is deep-fried comfort food, after all! These figures are just my best guess based on the recipe details, and they absolutely change depending on how thick your crust gets or exactly which pieces of chicken you use. This estimate aims for one piece of skin-on, bone-in chicken.
For one serving, you’re looking at roughly 450 calories, about 28g of fat, and a solid 30g of protein keeping you full. You always get a bit of sugar (around 2g) from the buttermilk or spices, and sodium will run a bit high at 650mg. Remember, this is a treat, not an everyday salad, so enjoy that savory dinner!
Share Your Ultra-Crispy Results
Now that your kitchen smells incredible from all that amazing fried chicken, I really want to know how it turned out! Did you manage that extra crunchy coating? Let me know by rating the recipe with stars right below. Tag me in your photos on social media—I love seeing your beautiful golden pieces! Don’t forget to check out my moist fresh plum cake for dessert!
Print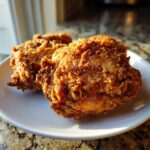
Ultra-Crispy Buttermilk Fried Chicken
- Total Time: 55 min
- Yield: 4 servings
- Diet: Low Fat
Description
Make classic Southern fried chicken that is juicy inside and features an extra crunchy, golden crust using a buttermilk soak.
Ingredients
- 3 lbs bone-in, skin-on chicken pieces (thighs, drumsticks)
- 2 cups buttermilk
- 1 tablespoon hot sauce
- 2 cups all-purpose flour
- 1/2 cup cornstarch
- 2 teaspoons salt
- 1 teaspoon black pepper
- 1 teaspoon paprika
- 1 teaspoon garlic powder
- 1/2 teaspoon cayenne pepper
- Vegetable oil, for frying
Instructions
- Place chicken pieces in a large bowl. Pour buttermilk and hot sauce over the chicken. Mix to coat completely. Cover and refrigerate for at least 4 hours, or preferably overnight.
- In a shallow dish, whisk together the flour, cornstarch, salt, pepper, paprika, garlic powder, and cayenne pepper. This is your dredge mixture.
- Remove chicken from the buttermilk, letting excess drip off, but do not wipe it dry.
- Dredge each piece thoroughly in the flour mixture, pressing the flour onto the chicken to create a thick, craggy coating. For extra crispiness, dip the floured chicken back into the buttermilk briefly, then dredge a second time in the flour mixture.
- Pour enough vegetable oil into a deep, heavy-bottomed pot or Dutch oven to reach a depth of about 2 inches. Heat the oil to 325 degrees Fahrenheit (160 degrees Celsius). Use a thermometer to monitor the temperature.
- Carefully place 3 to 4 pieces of chicken into the hot oil, ensuring you do not overcrowd the pot, which lowers the oil temperature.
- Fry the chicken for about 6 to 8 minutes per side, turning carefully, until deep golden brown and cooked through (internal temperature reaches 165 degrees Fahrenheit or 74 degrees Celsius). Smaller pieces cook faster than larger ones.
- Remove the chicken from the oil and place it on a wire rack set over a baking sheet to drain excess oil. Do not place directly on paper towels, as this steams the bottom crust.
- Repeat with remaining chicken, adjusting the heat as necessary to maintain the oil temperature between 315 and 330 degrees Fahrenheit.
Notes
- For the crispiest coating, ensure your oil temperature is correct before adding the chicken. If the oil is too cool, the chicken absorbs too much grease.
- If you prefer a lighter crust, skip the double dredge step.
- Use chicken pieces that are similar in size for even cooking.
- Prep Time: 20 min
- Cook Time: 35 min
- Category: Dinner
- Method: Deep Frying
- Cuisine: American
Nutrition
- Serving Size: 1 piece
- Calories: 450
- Sugar: 2
- Sodium: 650
- Fat: 28
- Saturated Fat: 7
- Unsaturated Fat: 21
- Trans Fat: 0
- Carbohydrates: 18
- Fiber: 1
- Protein: 30
- Cholesterol: 110

Comments are closed.