

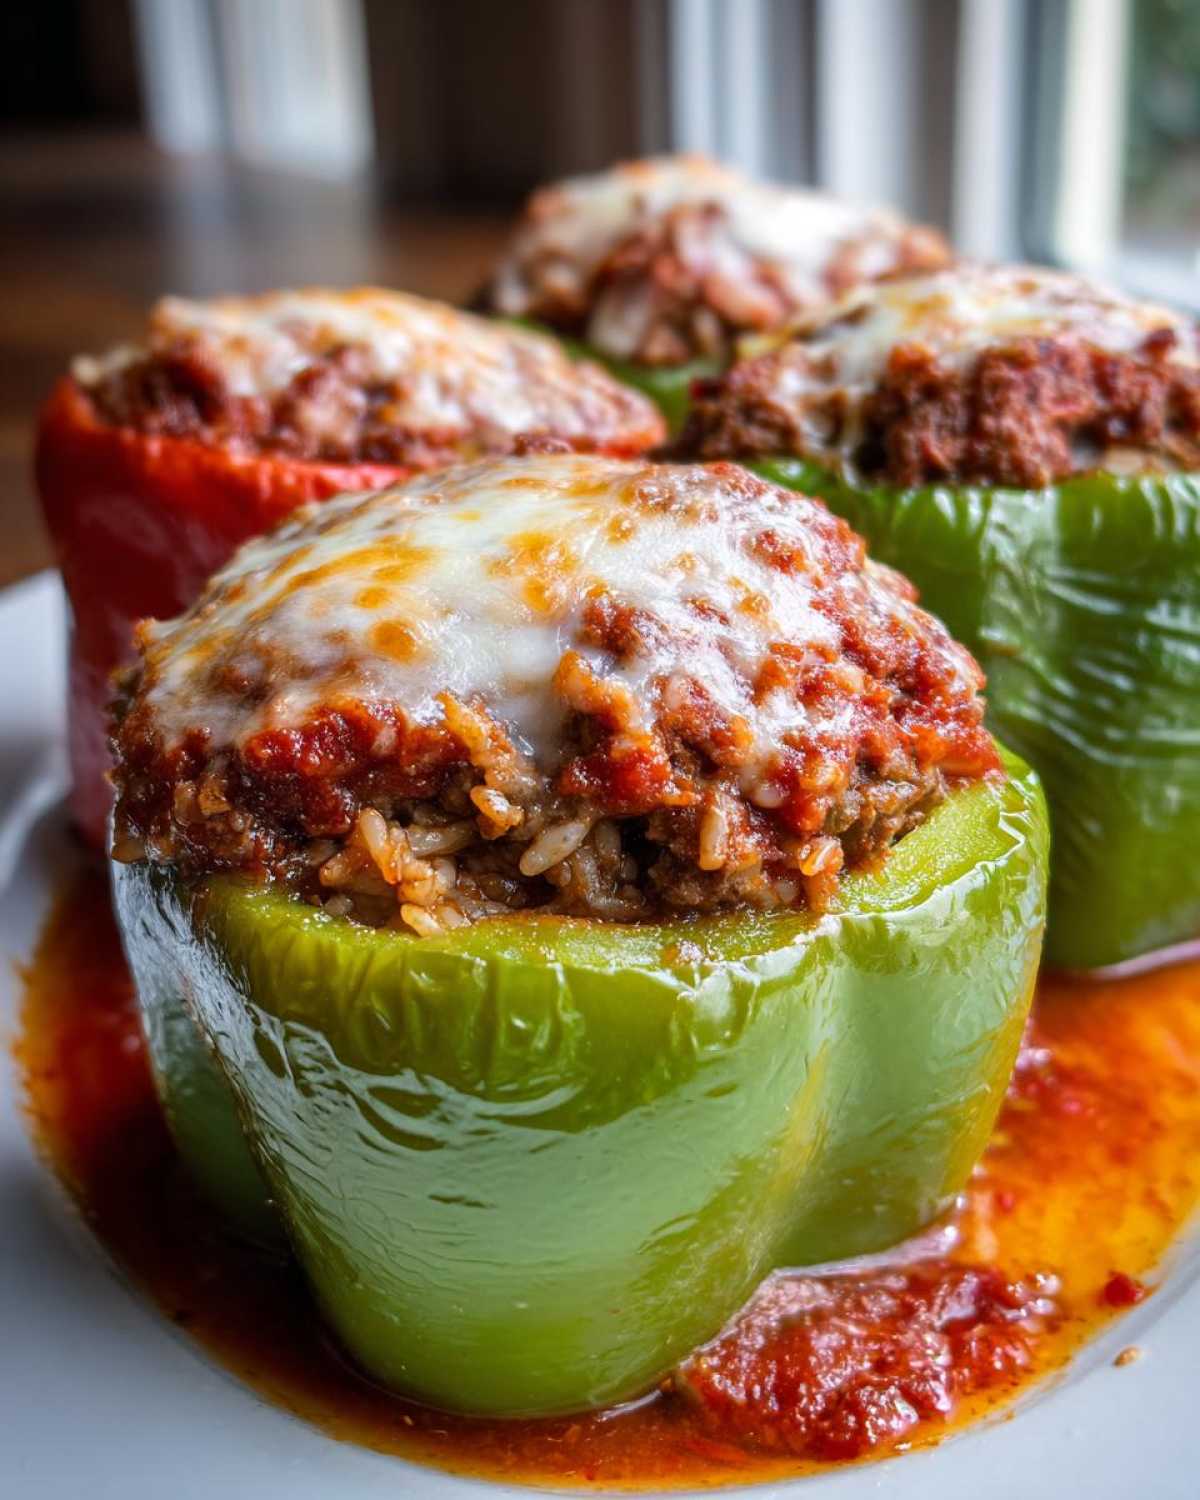
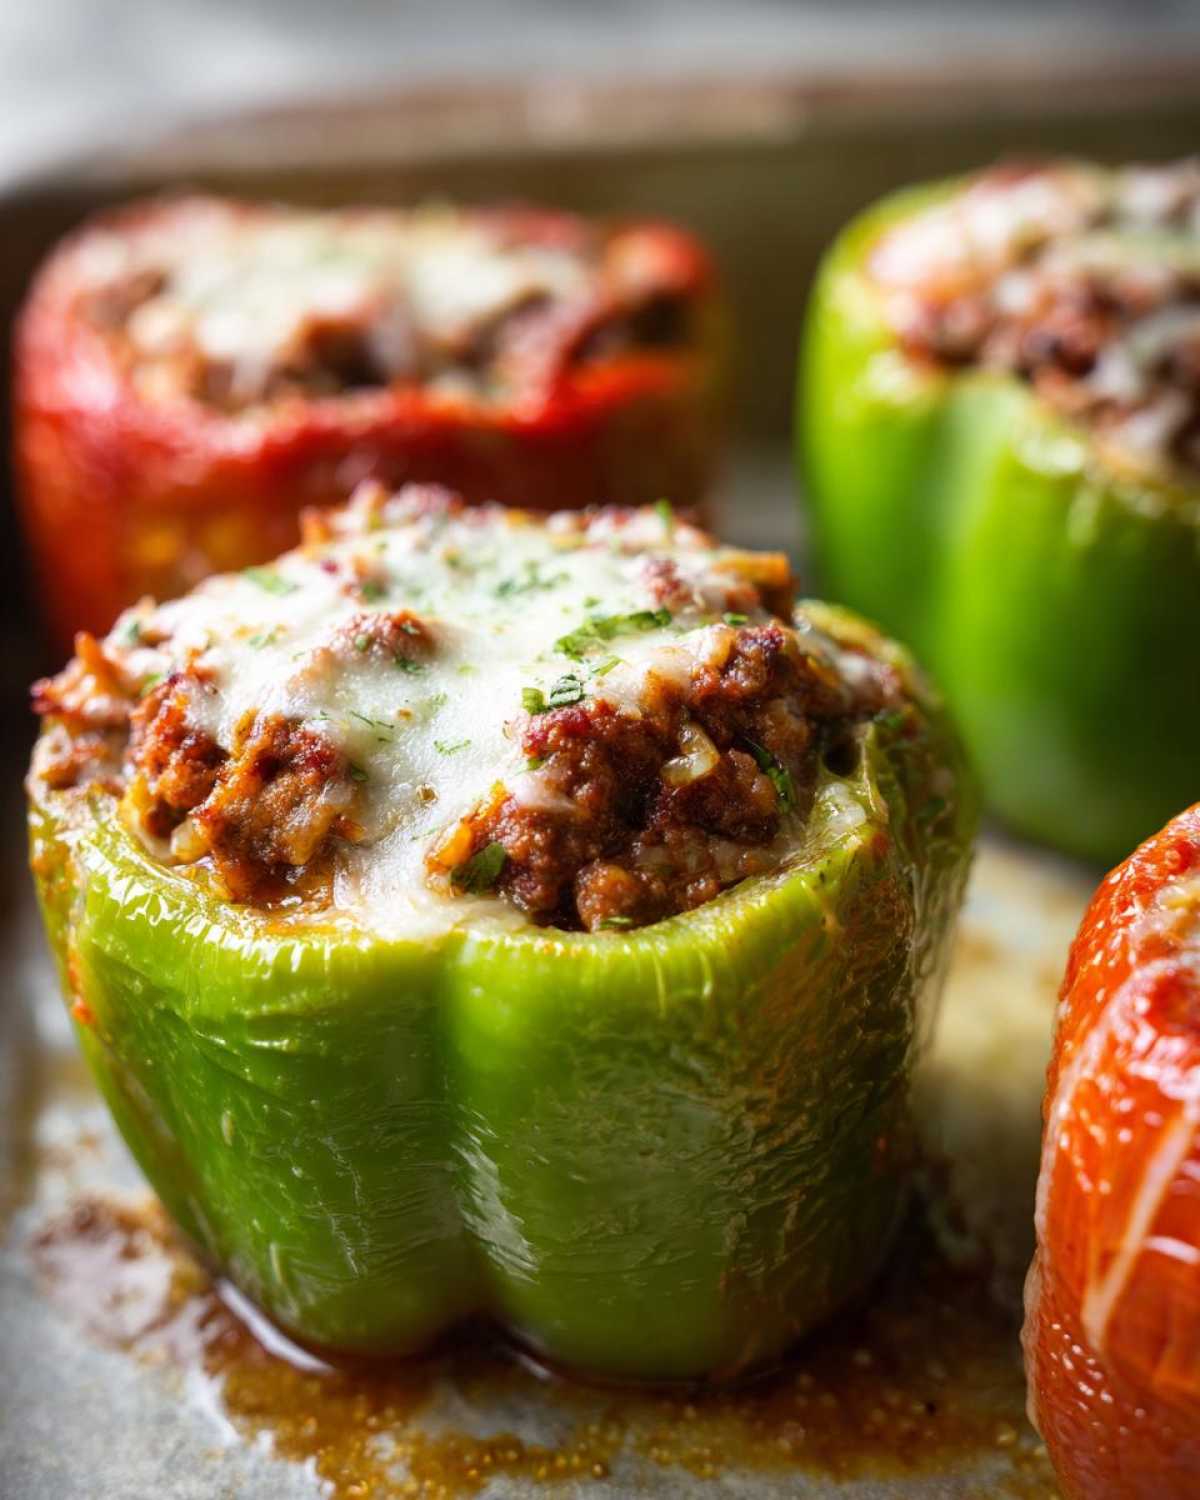
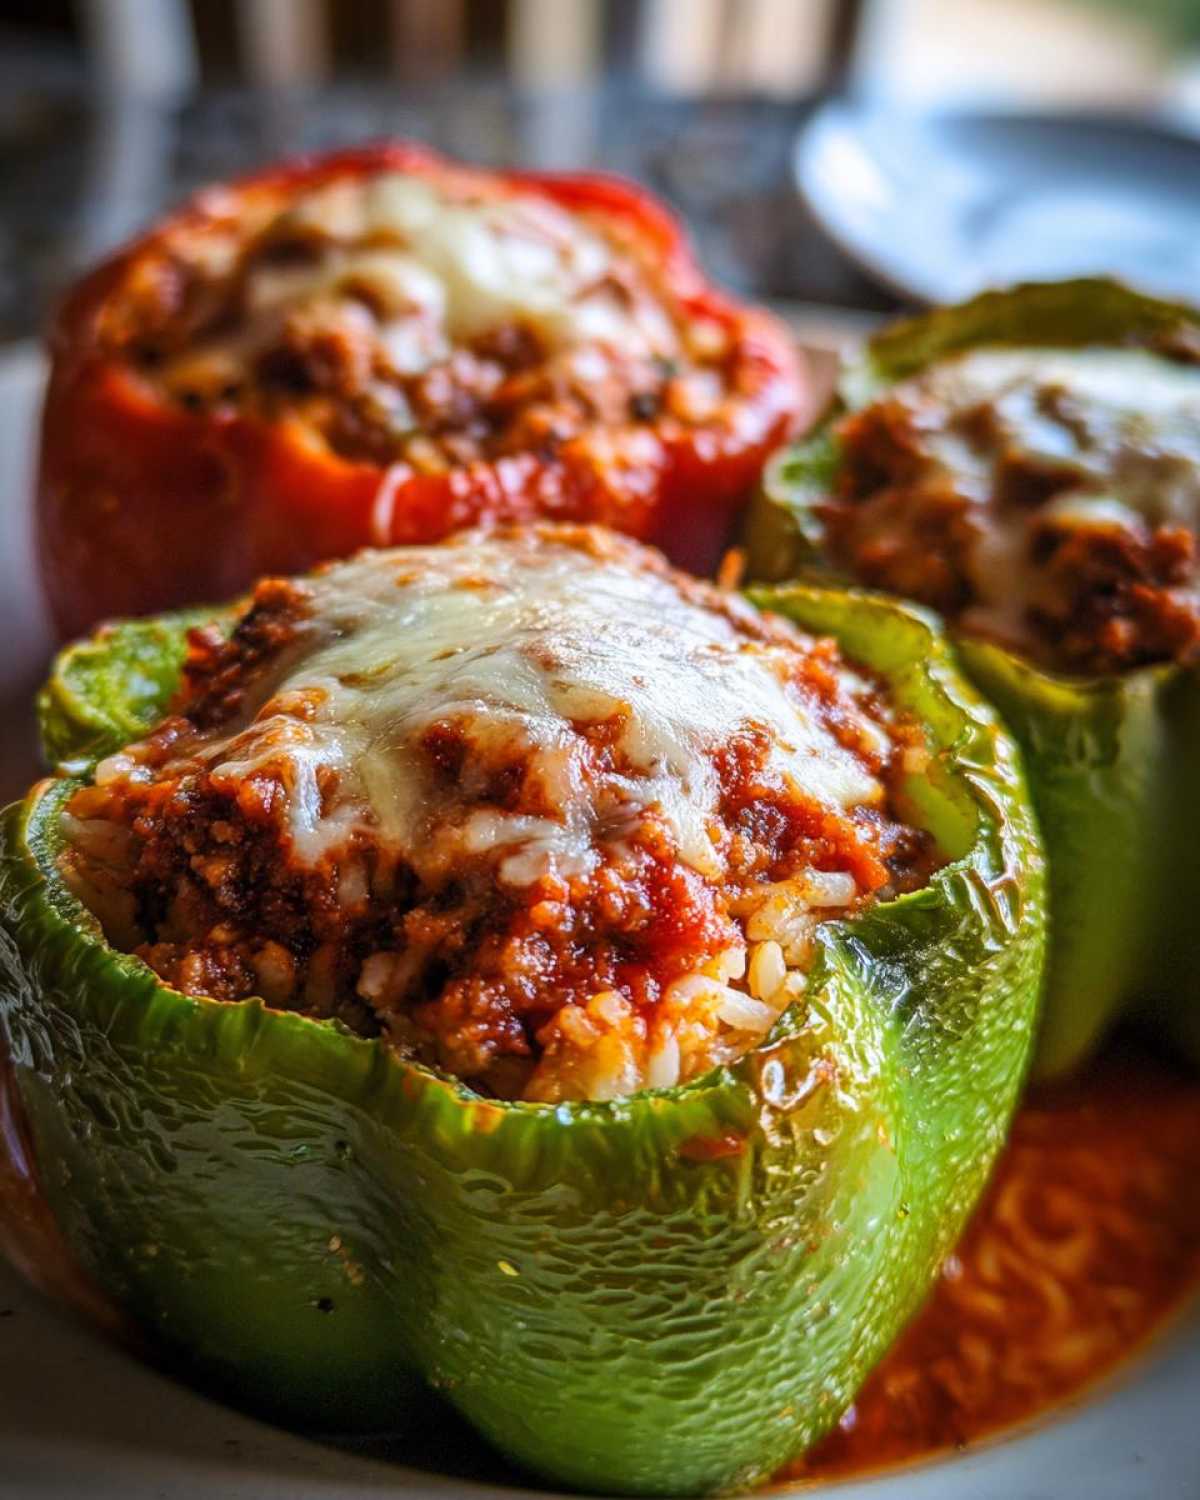
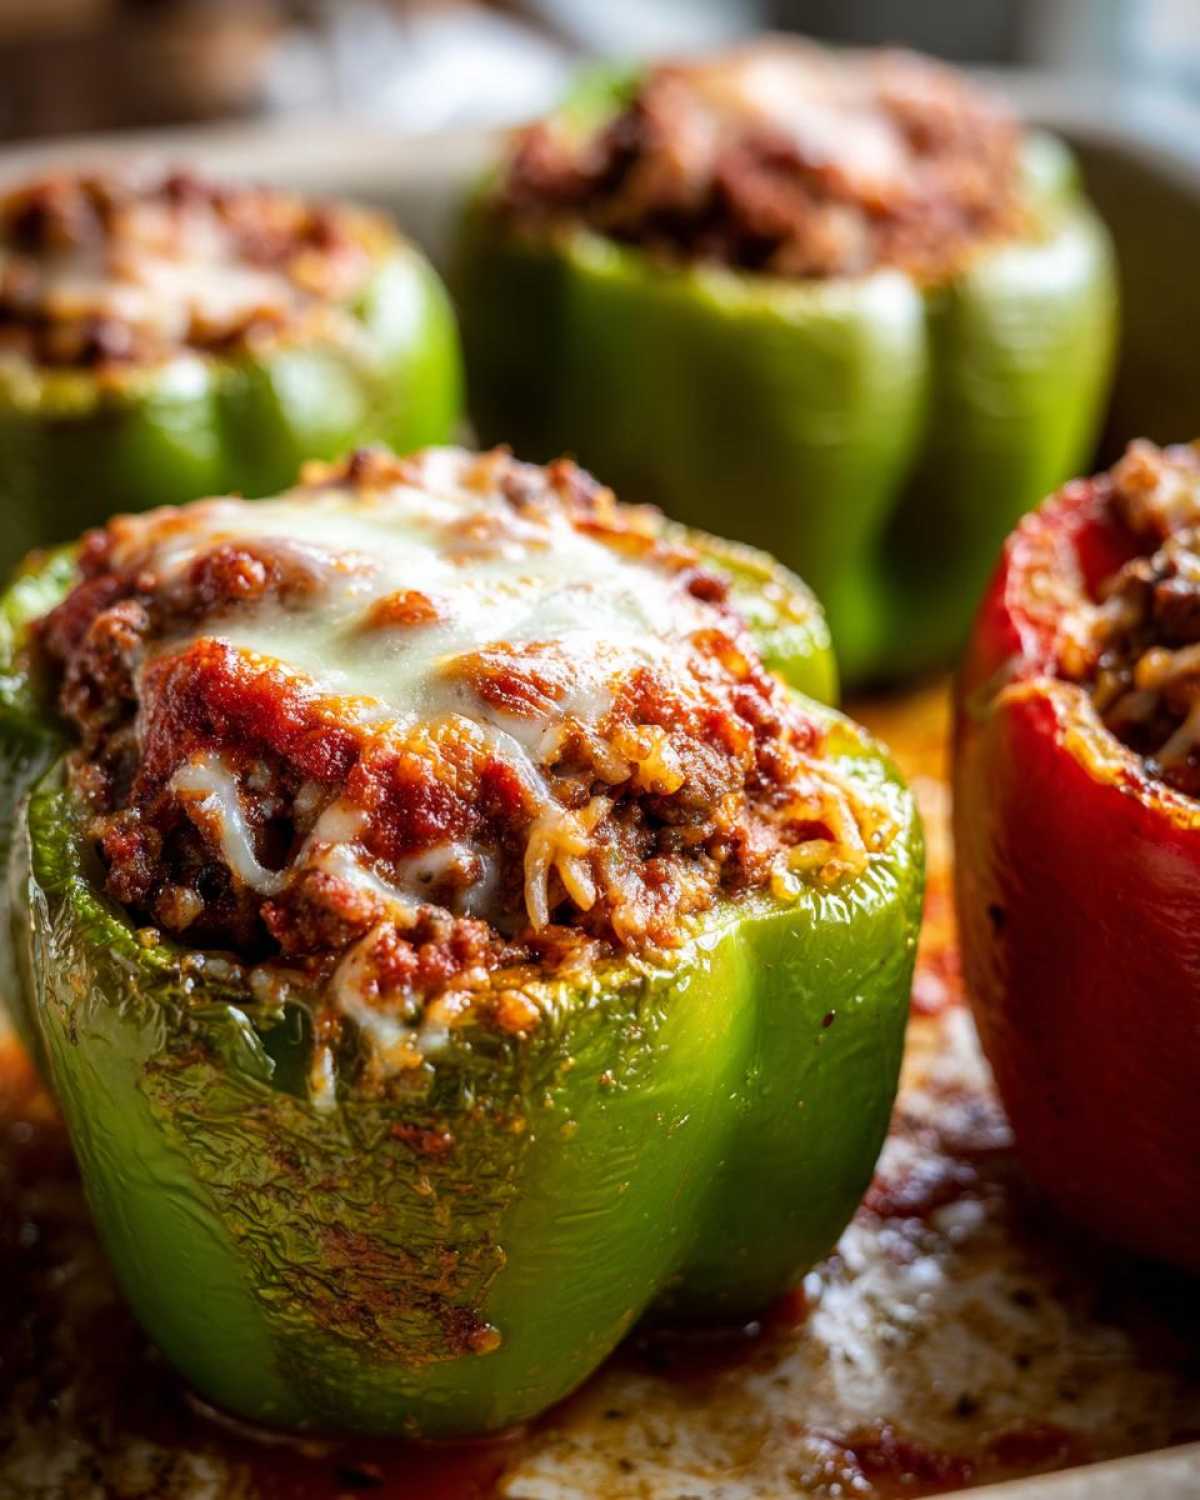
Oh my goodness, I have something truly special for you today! If you are hunting for that perfect, hearty, cozy meal that tastes exactly like coming home, stop right now. This **Classic Stuffed Peppers Recipe** is the one. Forget all those fussy, modern takes; we’re sticking to the tried-and-true method that Mom used, and her mom used before her. This isn’t just a recipe; it’s a big, warm hug delivered in a tender bell pepper shell, packed with savory ground beef, fluffy rice, and that bright tomato flavor. It’s my absolute go-to for a satisfying, easy weeknight dinner that feels like event food!
Why This Classic Stuffed Peppers Recipe is a Family Favorite
I know there are a million stuffed pepper recipes floating around out there, but trust me when I say this particular one sticks around for a reason. It hits every single nostalgic note without any weird ingredients that trip up the flavor. It’s the definition of reliable comfort food, and that’s why it’s always on rotation at my house. I’ve gotten so many requests for this one!
Here’s what makes this the reigning champion among all our Family friendly stuffed pepper ideas:
- It uses simple pantry staples, so you usually have everything you need already!
- The prep is straightforward; once the filling is mixed, it’s just spooning it in.
- It’s fantastic for leftovers – honestly, sometimes they taste even better the next day!
- The peppers get perfectly tender when baked slowly, never tough or crunchy.
If you’re looking for a dinner that pleases everyone at the table, this is it. You can even use leftover seasoned ground beef from another night if you’re pressed for time, though I really prefer cooking it fresh. You should definitely check out my recipe for easy chicken tacos if you need another weeknight lifesaver!
Ingredients for the Classic Stuffed Peppers Recipe
Okay, let’s talk about what goes into this masterpiece! The beauty of an old fashioned stuffed peppers recipe is that the ingredient list is short and sweet. You don’t need anything fancy, just good quality basics. I always grab the freshest looking bell peppers I can find—I usually mix red and green since they bake up so beautifully side-by-side.
Make sure you have everything measured out before you start cooking the meat, otherwise you’ll be scrambling! See, I learned that lesson the hard way when I tried to start mincing garlic while my onions were burning up. Oops!
Here is exactly what you’ll need for four hearty servings:
- Bell Peppers: 4 large ones. Any color works, but I usually go for a mix of red, yellow, and green.
- Olive Oil: Just 1 tablespoon to start things off nice and savory.
- Ground Beef: One pound, please! I typically use 85/15 because I like a little flavor, but you can use leaner if that’s your preference.
- Onion: 1 medium onion, finely chopped. Don’t skip the onion; it’s the soul of the filling!
- Garlic: 2 cloves, minced. I’m not shy with garlic, so feel free to bump that up to three if you’re a garlic fanatic like me!
- Cooked Rice: 1 cup of white rice, already cooked. This is important—make sure it’s cooked before you mix it in!
- Tomatoes: One 14.5 ounce can of diced tomatoes. Make sure you keep the juice! That liquid is essential for the moisture.
- Tomato Sauce: Half a cup of plain tomato sauce goes directly into the meat mix.
- Seasoning: 1 teaspoon of dried oregano, half a teaspoon of salt, and a quarter teaspoon of black pepper. Simple, classic Italian flavors.
- For Topping (Optional but Encouraged!): More tomato sauce—about half a cup extra to pour around the peppers in the dish—and half a cup of shredded mozzarella cheese if you want that gooey, cheesy top layer.
Remember, using pre-cooked rice is one of the secrets to making this an easy homemade stuffed peppers night!
Step-by-Step Instructions for Your Classic Stuffed Peppers Recipe
Alright, let’s get cooking! This is where the magic happens. People sometimes get intimidated by the idea of baking filled vegetables, but honestly, this process for how to make baked stuffed peppers is so foolproof. It’s all about getting the wet ingredients mixed just right so your peppers come out tender, not crunchy. If you’ve ever struggled with raw peppers, just follow my lead here, and you’ll nail it every time. And speaking of nailing it, if you love a good one-pan meal, you absolutely have to try my creamy garlic butter chicken meatballs soon!
Preparing the Peppers and Oven Setup
First things first, we need to heat the house up! Go ahead and preheat that oven to 375 degrees Fahrenheit (that’s 190 Celsius). While that’s coming up to temperature, grab your 4 large bell peppers. You want to slice the tops right off—think of it like giving them little hats. Then, reach inside and scoop out all those seeds and the white membranes. You want them completely hollowed out so they can cradle all that delicious filling. Place your empty peppers cut-side up right there in your greased baking dish. They should sit nice and snug!
Creating the Ground Meat and Rice Filling Recipe
Now for the most flavorful part—the stuffing! Grab a big skillet and warm up that tablespoon of olive oil over medium heat. Toss in your chopped onion and sauté it until it gets soft and starts looking a little translucent—that usually takes about five minutes. See how sweet that already smells?
Next comes the ground beef. Break it up with your spoon as you brown it. Here is a HUGE tip for a better-tasting, less greasy filling: Once the beef is fully browned, carefully tip the skillet over the sink and drain off every bit of excess fat. Soggy filling is the enemy of a great Classic ground beef and rice recipe!
Once it’s drained, turn the heat down low and stir in your minced garlic, letting it cook for just about 30 seconds until you can really smell it—don’t let it burn! Now, remove the pan from the heat. This is key since we don’t want to cook the rice or tomatoes right now. Stir in the cooked rice, the can of diced tomatoes (juice and all!), the half cup of tomato sauce, oregano, salt, and pepper. Mix everything until it’s just combined. Seriously, don’t overmix!
Assembling and Baking the Classic Stuffed Peppers Recipe
Time to stuff these beauties! Take that savory meat and rice mixture and spoon it evenly into the hollowed-out peppers. Pack it in gently, but don’t smash it down too hard. You want a little room for everything to settle.
Before they go into the oven, pour about half a cup of that extra tomato sauce right around the *base* of the peppers in the baking dish. This liquid is going to steam the peppers from the bottom up, which guarantees they get tender! Cover that dish tightly with aluminum foil. That trapped steam is what cooks the pepper flesh perfectly. Bake covered for 45 minutes.
After 45 minutes, carefully take off the foil—watch out for hot steam! If you’re using that optional mozzarella, now is the time to sprinkle it over the top of each warm pepper. Pop them back into the oven, but this time *uncovered*, for another 10 to 15 minutes. You want the peppers soft when you poke them with a fork, and the cheese glistening golden brown.
Expert Tips for the Perfectly Cooked Stuffed Peppers Guide
I’ve made this dish countless times, and I learned the hard way that sometimes, even after the baking time, peppers can still be a little too firm, especially if I used thicker, greener peppers. That’s why knowing how to check for doneness is part of the Perfectly cooked stuffed peppers guide. Honestly, once, I rushed dinner, pulled them out too soon, and had to chew so much! We won’t make that mistake again.
If they still feel stiff after the 15-minute uncovered bake, just put the foil back on and give them another 10 minutes. The goal is for the pepper flesh to yield easily to a fork, almost melting against the soft meat filling. It’s worth the extra time!
Another little trick? If you like your peppers *super* soft from the start, boil the hollowed-out peppers in plain water for about 5 minutes before you even start on the meat mixture. Drain them well, then proceed with step two. It’s a little extra step, but it guarantees zero crunch, which some folks just prefer in their Traditional stuffed peppers recipe. It’s similar to how I blanch my scallions for the Irish Champ—just warming them up first really changes the texture for the better!
When you’re selecting your peppers, look for ones that have nice, flat bases so they sit upright easily in your baking dish. Also, check the wall thickness; thinner walls mean faster cooking, so if you buy thick ones, be prepared to add that extra 10 minutes of covered baking time.
Ingredient Notes and Substitutions for Your Classic Stuffed Peppers Recipe
This recipe is built on tradition, but that doesn’t mean we can’t get creative! One of the best things about this dish is how flexible it is regarding the stuffing. If you’re trying to get creative with your Best bell pepper stuffing ideas, you have lots of options. For example, if you aren’t feeling the ground beef one night, I’ve swapped it out successfully with ground turkey or Italian sausage. Just remember to drain the fat, no matter what meat you use!
What about the grains? The rice keeps it classic, but you can absolutely swap that white rice for cooked quinoa or even barley if you want a chewier texture. If you feel like cutting back on carbs, you can definitely replace the one cup of rice with an extra half-pound of ground meat or use finely chopped mushrooms to bulk up the filling without adding any grains. I even have a low-carb tuna stuffing recipe if you’re feeling adventurous—you can check out my notes on tuna stuffed bell peppers for inspiration!
Remember that flavor profile from the sausage stuffed mushrooms? You can borrow some of that spice! Try swapping the oregano for Italian seasoning blend, or toss in a teaspoon of smoked paprika for a different depth of flavor.
Make Ahead Stuffed Peppers and Storage Instructions
I love having these ready to go! This recipe is fantastic for your weekend meal prep, which is why it’s one of my favorite Make ahead stuffed peppers options. You have two main choices here.
For the absolute easiest dinner, assemble the peppers completely—stuff them, place them in the dish, and even pour the extra tomato sauce around the base. Cover them tightly with foil and place the whole dish in the fridge for up to 24 hours. When you’re ready to bake, just add the 10-15 minutes extra to the covered cooking time since they’re starting cold. Honestly, making them ahead like this makes weeknights so much less stressful! It works just like my instructions for the egg bake recipe; prepping early is the key to surviving the week.
If you’ve already baked them? No big deal! Let them cool completely, then store them in an airtight container. They keep beautifully in the fridge for about three days. When you’re reheating, I find that covering them again with foil and warming them up in the oven (about 350°F until hot) keeps the peppers nice and moist. If you’re in a huge rush, the microwave works, but make sure they are covered so they don’t dry out. Cooking them fully, cooling, and then reheating is a foolproof way to manage leftovers for an Easy homemade stuffed peppers lunch the next day!
Serving Suggestions for This Comfort Food Casserole Recipe
Since these stuffed peppers are a whole meal packed into one neat little package—meat, veggie, and carb—they don’t need much company. But if you want to round out your dinner plate, keep things light so you can still enjoy every single bite of that amazing filling! This is truly one of the best Comfort food casserole recipes because it stands so well on its own.
I always pair mine with something bright and fresh. A simple, crisp green salad with a sharp vinaigrette is *perfect* alongside this rich, savory filling. The acidity really cuts through the richness of the meat and cheese. You can find my favorite simple dressing recipe right here for a crunchy cabbage salad—it has the perfect crunch!
If you need something starchy (because who doesn’t love scooping up extra sauce?), skip the heavy sides like potatoes. Go for something crusty instead. A good, crusty loaf of Italian or French bread allows everyone at the table to sop up all that yummy tomato sauce left pooling in the bottom of the baking dish. That leftover sauce is liquid gold, I’m telling you!
Frequently Asked Questions About the Classic Stuffed Peppers Recipe
It’s funny how often people ask the same things about this dish, even though I think I covered every little detail above! That’s totally normal, though. When you’re talking about a cherished, Traditional stuffed peppers recipe, you want total confidence before you start. So, here are a few of the questions I get asked the most about making sure these turn out absolutely perfect every single time.
Can I make this vegetarian?
You totally can! To keep that satisfying texture, I’d recommend ditching the ground beef entirely and using two cups of chopped mushrooms, maybe mixed with a can of lentils or some finely crumbled smoked tofu. You’ll still want that cooked rice and tomato base, but the earthiness of the mushrooms really carries the savory filling beautifully. It transforms into a great vegetarian comfort dish! If you’re feeling really adventurous, you can even try a totally different path like my tuna stuffed bell peppers if you want zero meat/veggie stuffing!
Why are my peppers still hard after baking?
This is such a common issue! Usually, it means one of two things: either your peppers were very thick and needed more time, or you didn’t add enough moisture to the baking pan. Remember that critical step where we pour sauce around the base? If you skip that, the peppers steam less, and you end up with crunchy edges. If they’re still hard, just put the foil back on and bake another 15 minutes until they yield to a fork.
Can I use different colored peppers for this recipe?
Absolutely! You can use any color you like, though the flavor profile changes slightly. Green peppers are the most vegetable-forward and slightly bitter, which some folks love. Red, yellow, and orange peppers are sweeter, especially once they bake. I always mix colors because it looks so much prettier on the table—it’s much more appealing than just four green ones!
Do I have to use white rice?
No, but cooked white rice (like long-grain white rice) is the classic choice because it holds its shape well and absorbs the tomato juices without getting mushy. If you use brown rice, just be aware that it might need a little extra moisture in the filling or slightly longer baking time to fully soften up. If you feel like cutting back on carbs, you can absolutely replace the one cup of rice with an extra half-pound of ground meat or use finely chopped mushrooms to bulk up the filling without adding any grains.
How do I stop the filling from being too watery?
If you suspect your filling is too wet, don’t panic! The number one cause is not draining the fat from the beef, or adding too much liquid from the diced tomatoes. Take the pan off the heat after browning the meat and let it sit for just five minutes before draining. If it still seems soupy, mix in a tablespoon or two of plain breadcrumbs or one tablespoon of tomato paste to help bind it up before you spoon it into the peppers. That always saves the day for me!
Estimated Nutritional Data for Classic Stuffed Peppers Recipe
Now, I’m not a nutritionist, so please take these numbers with a grain of salt—I always say cooking from scratch beats any label anyway! These estimates are based on the recipe using ground beef and mozzarella cheese. Depending on the leanness of your beef and whether you skip the cheese, your numbers will swing a little. But generally, this is a hearty, protein-packed, Classic Stuffed Peppers Recipe that makes a complete dinner all on its own.
Here’s the breakdown for one generously sized pepper based on the standard measurements. I always check the back of my tomato cans just to be sure the sodium levels look right before I start!
- Serving Size: 1 pepper
- Calories: Around 450
- Fat: Roughly 25 grams (This includes saturated fat around 10g)
- Carbohydrates: About 30 grams
- Protein: About 30 grams
- Sodium: Around 550mg
- Cholesterol: About 90mg
See? It’s a balanced meal, hitting all the major food groups right inside that pepper! If you swap out the beef for leaner ground turkey, those fat and cholesterol numbers will drop down quite a bit, but the protein stays strong!
Print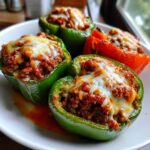
Classic Stuffed Bell Peppers
- Total Time: 80 min
- Yield: 4 servings
- Diet: None
Description
Follow this straightforward recipe for traditional stuffed bell peppers filled with ground beef, rice, and tomato sauce, then baked until tender.
Ingredients
- 4 large bell peppers (any color)
- 1 tablespoon olive oil
- 1 pound ground beef
- 1 medium onion, chopped
- 2 cloves garlic, minced
- 1 cup cooked white rice
- 1 (14.5 ounce) can diced tomatoes, undrained
- 1/2 cup tomato sauce, plus more for topping
- 1 teaspoon dried oregano
- 1/2 teaspoon salt
- 1/4 teaspoon black pepper
- 1/2 cup shredded mozzarella cheese (optional)
Instructions
- Preheat your oven to 375 degrees Fahrenheit (190 degrees Celsius). Lightly grease a baking dish.
- Prepare the peppers: Cut the tops off the bell peppers and remove the seeds and membranes. Place the peppers cut-side up in the prepared baking dish.
- Cook the meat mixture: Heat the olive oil in a large skillet over medium heat. Add the chopped onion and cook until soft, about 5 minutes. Add the ground beef and cook, breaking it up, until browned. Drain off any excess fat.
- Combine the filling: Stir the minced garlic, cooked rice, diced tomatoes (with juice), 1/2 cup tomato sauce, oregano, salt, and pepper into the skillet with the meat mixture. Mix well.
- Stuff the peppers: Spoon the meat and rice mixture evenly into the hollowed-out bell peppers.
- Add liquid: Pour about 1/2 cup of extra tomato sauce around the base of the peppers in the baking dish. This helps keep them moist.
- Bake: Cover the baking dish tightly with aluminum foil. Bake for 45 minutes.
- Uncover and finish: Remove the foil. If using cheese, sprinkle the mozzarella over the top of each pepper. Bake uncovered for another 10 to 15 minutes, or until the peppers are tender and the cheese is melted and lightly browned.
- Rest and serve: Let the peppers cool for 5 minutes before serving.
Notes
- You can substitute ground turkey or sausage for the ground beef.
- If you prefer a softer pepper, boil the hollowed peppers for 5 minutes before stuffing them.
- Leftovers store well in an airtight container in the refrigerator for up to 3 days. Reheat covered in the oven or microwave.
- Prep Time: 20 min
- Cook Time: 60 min
- Category: Dinner
- Method: Baking
- Cuisine: American
Nutrition
- Serving Size: 1 pepper
- Calories: 450
- Sugar: 10
- Sodium: 550
- Fat: 25
- Saturated Fat: 10
- Unsaturated Fat: 15
- Trans Fat: 0
- Carbohydrates: 30
- Fiber: 4
- Protein: 30
- Cholesterol: 90


Comments are closed.