

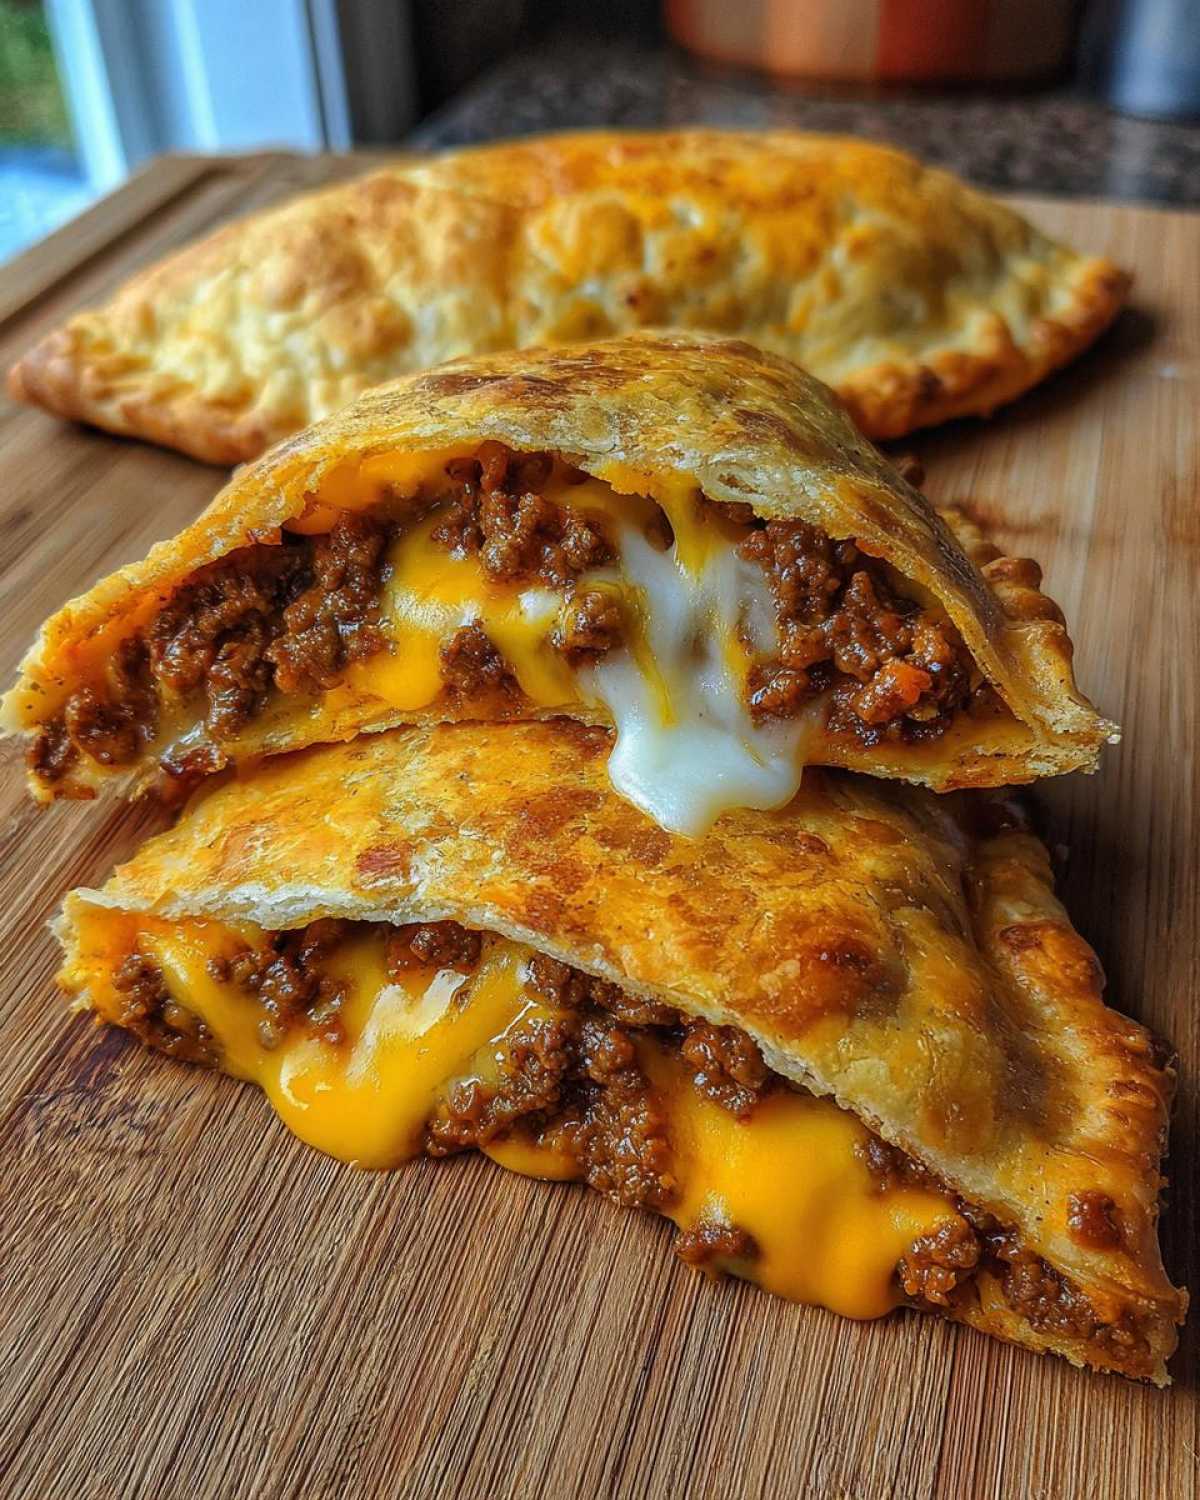
You know those nights? You’re staring into the pantry, everyone’s already hanging off the cabinets demanding dinner, and you need something truly satisfying—something cheesy, something handheld—in about thirty minutes flat? I live for those moments because that’s when the best family recipes are born! I used to struggle constantly finding quick, yet impressive, weeknight meals. But now? We turn to these loaded **cheesy pocket tacos**, and trust me, they are non-negotiable perfection.
Forget the fussy folding or messy shells; we’re using refrigerated biscuits to get a fluffy, puffy exterior that holds mountains of seasoned beef and seriously gooey cheese inside. It’s comfort food dressed up for a Tuesday night, and it’s so easy, my oldest kid can assemble them while I manage the beef. This recipe is my secret weapon for those days when I need a win fast.
Why You Will Love These Cheesy Pocket Tacos (Quick Dinner Taco Idea)
Seriously, what’s not to adore about these things? They tick every single box when you’re trying to get dinner on the table fast without resorting to plain leftovers. These aren’t your average tired tacos; they are an upgrade that feels totally fun.
- The 30-Minute Miracle: We are talking **30 Minute Taco Meal** territory here. From start to finish, you’re done before anyone can get too hangry!
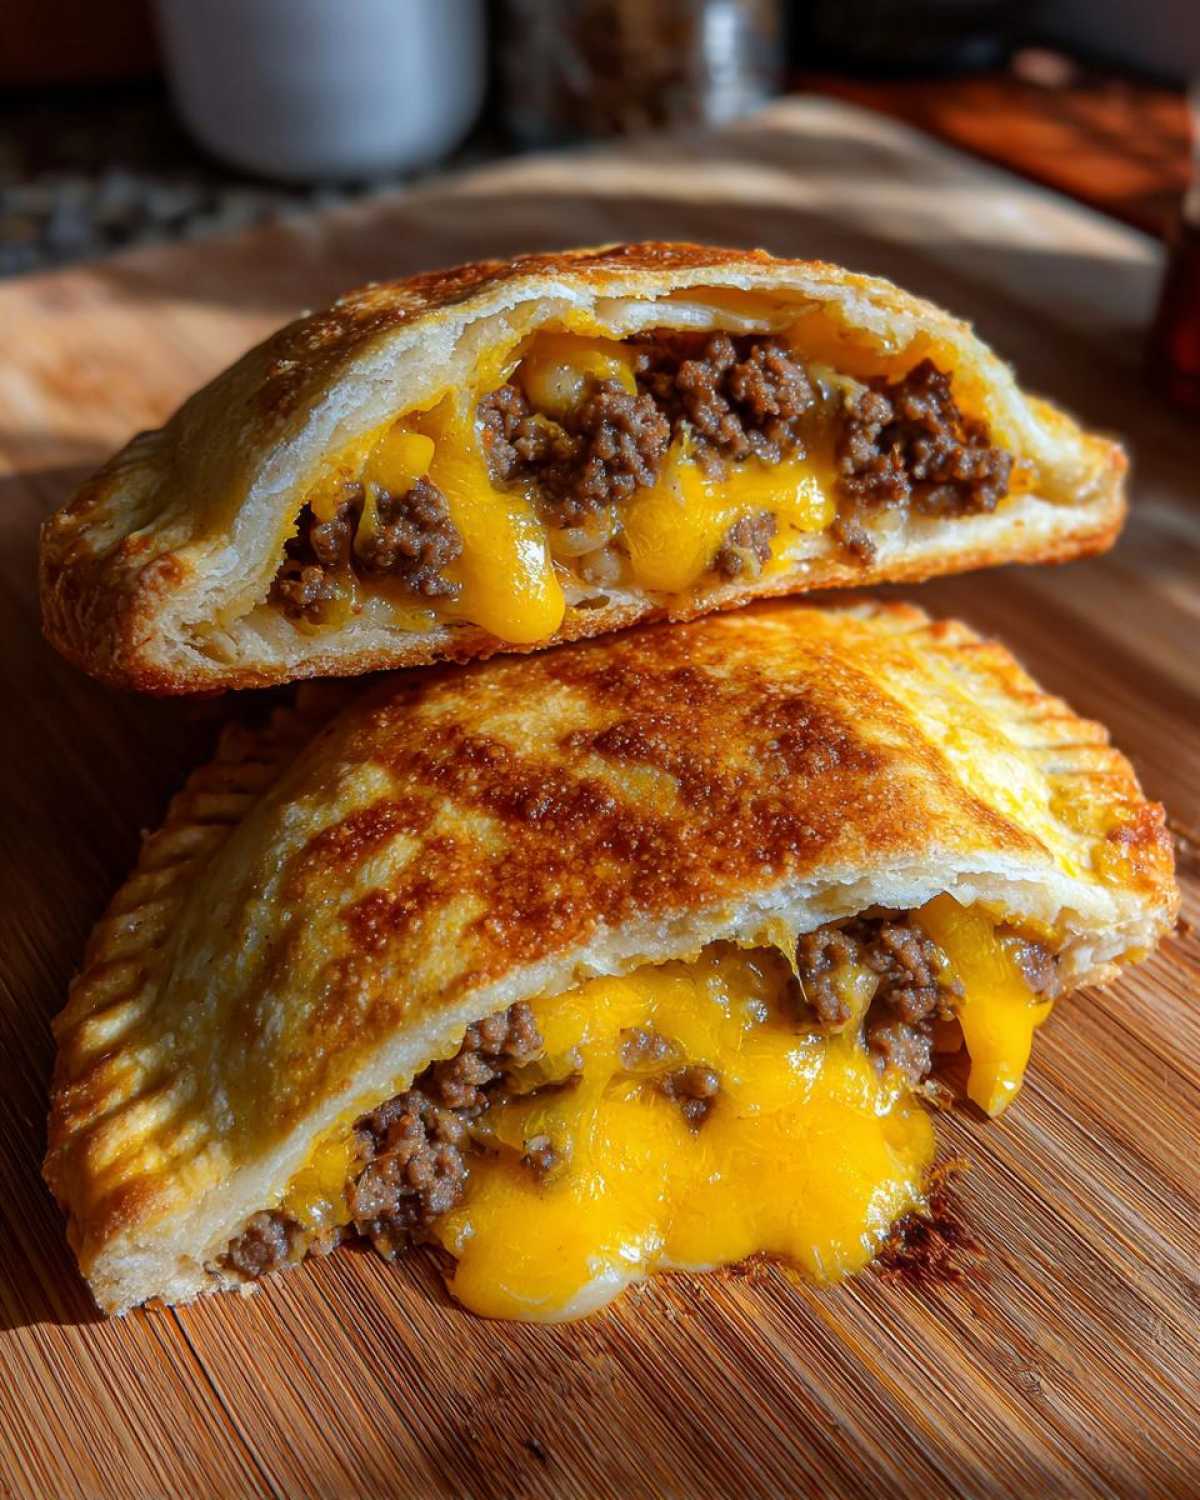
- Peak Family Friendliness: These are the ultimate **Family Friendly Taco Night** hack. Kids love folding them, they love the cheese pull, and they look like little handheld pies, which is always a win.
- Maximum Comfort Factor: If you need **Comfort Food Tacos** that feel hearty and filling, the combination of fluffy biscuit and seasoned beef is unbeatable.
- Built-In Portability: Since they are perfectly sealed, they transport beautifully. Perfect for game days or packing up for a hearty lunch the next day. So simple for **Handheld Cheesy Tacos**!
- Minimal Mess Required: Everything stays neatly tucked inside the biscuit pocket. Less dipping sauce splatter means less to clean up later, which is my favorite part of any taco night upgrade.
Essential Ingredients for Loaded Cheesy Pocket Tacos
Okay, let’s talk about what makes these **Loaded Cheesy Pocket Tacos** come together so fast. The beauty of this recipe is that it relies on pantry staples and one quick trip to the refrigerated section. When you’re aiming for a delicious, **Quick Dinner Taco Idea**, you need ingredients that cooperate! I always lay everything out on the counter before I start cooking; it stops me from panicking halfway through.
For the Ground Beef Filling
The filling has to be perfect—not too wet, otherwise, those pockets burst open before they even hit the oven. That’s why steps matter here!
- You’ll start with 1 pound of good quality ground beef. Don’t skimp here; this is the hearty foundation of our deliciousness.
- For seasoning, grab one standard 1-ounce packet of taco seasoning mix. That’s the perfect amount for a pound of beef to give it that authentic punch.
- We add 1/2 cup of water initially to help the seasoning bloom, but trust me on this next part: you absolutely must drain off every bit of excess grease after browning the meat. Soggy meat equals leaky pockets, and we don’t want that mess!
For the Biscuit Pockets and Cheese
This is where the magic happens—using pre-made biscuits is the ultimate shortcut for fluffy, **Homemade Taco Pockets**.
- You need one standard (16.3 ounce) can of refrigerated biscuit dough. Feel free to use the flaky layers or the butter top kind, whichever you prefer for texture.
- For the cheese, we go for maximum melt factor! I use 1 cup of shredded cheddar cheese combined with 1 cup of shredded Monterey Jack cheese. That blend melts beautifully and gives us that epic cheese pull we crave in these **Cheesy Dinner Idea** creations.
- And a little secret for that gorgeous, slightly shiny, golden brown top? Just one large egg, lightly beaten, sets aside for the egg wash later on. It makes them look professionally baked, even though they are super easy!
Step-by-Step Instructions for the Best Taco Pocket Recipe
Following these instructions will guarantee you end up with perfectly sealed, glorious **Crispy Baked Taco Pockets** every single time. Don’t rush the cooking of the beef, and definitely don’t skimp on sealing those edges! We’re aiming for a successful bake, not a cheesy explosion throughout my oven.
Preparing the Seasoned Ground Beef
First things first: get that oven preheated to 375 degrees Fahrenheit. That way, when your pockets are assembled, they can pop right in. Now, grab a skillet and get that pound of ground beef browned over medium heat. Once it’s fully cooked, this is my expert tip: drain off every bit of excess grease you possibly can! You can blot it with paper towels for extra insurance.
Once drained, stir in that taco seasoning packet and your 1/2 cup of water. Bring that mixture up to a simmer and let it hang out there for about three to five minutes. You want that sauce to slightly thicken up around the meat. Once it looks good, pull the skillet off the heat and let it cool down for a good five minutes. Hot filling melts cheese too fast and can make your dough sticky!
Assembling Your Cheesy Pocket Tacos
Time to open that can of refrigerated biscuits. I separate all eight dough pieces and place them on a lightly greased baking sheet. Now, this is important: gently flatten each biscuit down with your hands—or if you want a thinner biscuit, a rolling pin will work—into a rough circle or square shape. You need enough surface area to fold!
Spoon about one to one-and-a-half tablespoons of the cooled meat mixture onto just one half of the flattened biscuit. Then, sprinkle about a tablespoon of your beautiful cheddar and Jack cheese blend right over the top of the meat. Fold the other side of the dough over to create that classic half-moon shape. You must press the edges firmly together with your fingers, or grab a fork and crimp them shut. Seriously, press hard! This sealing is what keeps everything contained.
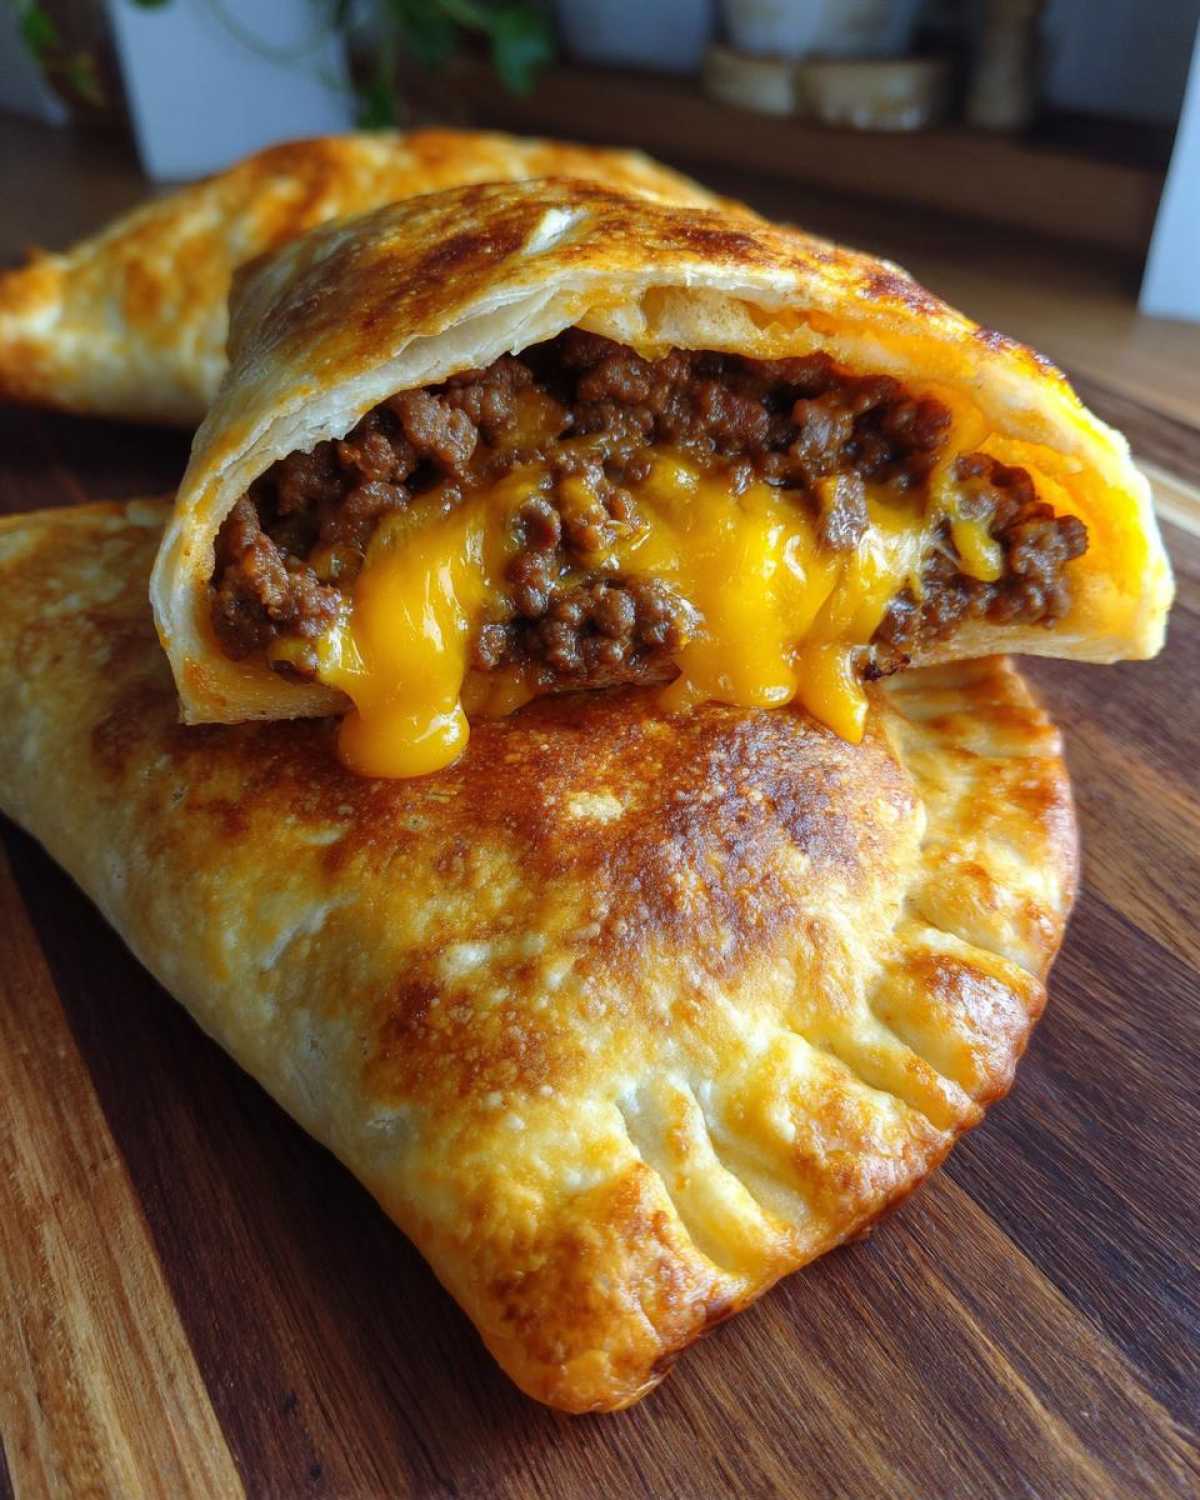
Baking for Golden Perfection (Crispy Baked Taco Pockets)
Once your **Handheld Cheesy Tacos** are sealed and sitting nicely on the sheet, grab that beaten egg wash. Brush the tops of all the pockets lightly. This gives them that professional-looking shine. Pop them into your preheated oven for about 12 to 15 minutes. You are looking for them to be visibly puffed up and beautifully golden brown on top. Once they come out—and try not to burn your fingers grabbing them—let them cool just a tiny bit so the cheese gets slightly set before everyone dives in! For an extra kick, check out my thoughts on quick chicken taco variations while they bake!
Tips for Perfect Cheesy Pocket Tacos Success
I’ve made these so many times that I’ve definitely learned the hard way what works and what turns into a sad, leaky mess on my baking sheet. The sealing process is really where you need to focus your energy if you want perfect, contained **Cheesy Dinner Idea** pockets.
The first time I tried these, I was rushing—you know how it is when that dinner siren goes off—and I only used my fingers to pinch the edges closed. Big mistake! About ten minutes into baking, I heard this *hiss* and looked over to see cheese lava oozing out of three different pockets. It smelled amazing, but the texture outside was instantly soggy where the cheese leaked. Ever since then, I’ve learned to be aggressive!
My rule now is two layers of sealing: pinch the edges tight with your fingers first, making sure there are no gaps. Then, and this is the pro move, take a fork and crimp along the entire edge. The tines create strong ridges that hold up much better against the steam buildup inside. This is the secret to beautiful, intact **Homemade Taco Pockets**.
Another area where people go wrong is the temperature of the filling. I mentioned letting the beef cool, but seriously, if the meat is too hot, it melts the biscuit dough before it even gets to the oven, making it weak. Always let that seasoned beef cool down for at least five minutes after simmering. That little bit of patience pays off massively with a sturdier pocket structure.
Achieving Maximum Crispiness
While the egg wash gives you that beautiful color, if you are obsessed with getting that really satisfying crunch—the kind that makes a perfect cracking sound when you bite in—you need to bring in one extra tool. Don’t forget the amazing suggestion mentioned in the recipe notes: lightly spray the tops of those pockets with cooking spray right before they go into the oven. I know, it seems simple, but that tiny bit of added fat helps the surface of the biscuit dry out and crisp up beautifully. It works just as well as when I use this trick to get crispy potatoes; it just encourages browning and crunch!
If you have an air fryer, those things turn out phenomenal in there too, but you have to work in small batches so they don’t cook unevenly. For the oven method, that egg wash plus the spray is the golden ticket to **Crispy Baked Taco Pockets**.
Ingredient Notes and Substitutions for Cheesy Pocket Tacos
One of the things I love most about this recipe for **cheesy pocket tacos** is how flexible it is once you understand the core structure: a sturdy casing stuffed with hot, savory meat and cheese. While I swear by the fluffy nature of the biscuit dough for that comforting, bready feel, you definitely have options if you’re missing biscuits or just want a different texture!
This entire concept relies on something holding together, so as long as your casing material can handle the moisture of the seasoned beef and cheese without immediately failing, you’re halfway there. It’s fun to experiment, just like when I made those amazing Italian sub roll-ups—you take a familiar concept and adapt the wrapping!
If you want to swap out the beef, ground turkey works beautifully, though you might need to add just a tiny splash more water because the turkey releases less natural fat during cooking. Chicken works too, but you’d want to make sure it’s finely chopped or already cooked and shredded for the best texture inside our pockets!
Tortilla Shell Swap for a Crunchier Texture
The biggest substitution people ask about is swapping those refrigerated biscuits for tortillas. If you want a much thinner, crunchier shell—almost like an empanada—this is absolutely doable! This turns into more of a true stuffed tortilla pocket than the fluffy **biscuit tacos** we started with.
You’ll want to use maybe 8-inch flour tortillas, but heating them briefly—maybe 10 seconds per side in a dry skillet—will make them pliable enough to fold without cracking. When you fold them over, the sealing process is different. You can’t just pinch them; you absolutely *must* use a fork to firmly crimp the edges shut all the way around. I stick to the same meat and cheese ratios, but because the tortilla is thinner, you might use slightly less meat filling to prevent overflow.
When you bake them, the tortilla edges puff up and get wonderfully crispy, which is fantastic if you’re craving that extra crunch factor you sometimes don’t get with the softer biscuit shell. Just make sure those edges are sealed tight, or the steam escaping from the tortilla can burn the cheese onto your baking sheet!
Serving Suggestions for Your Handheld Cheesy Tacos
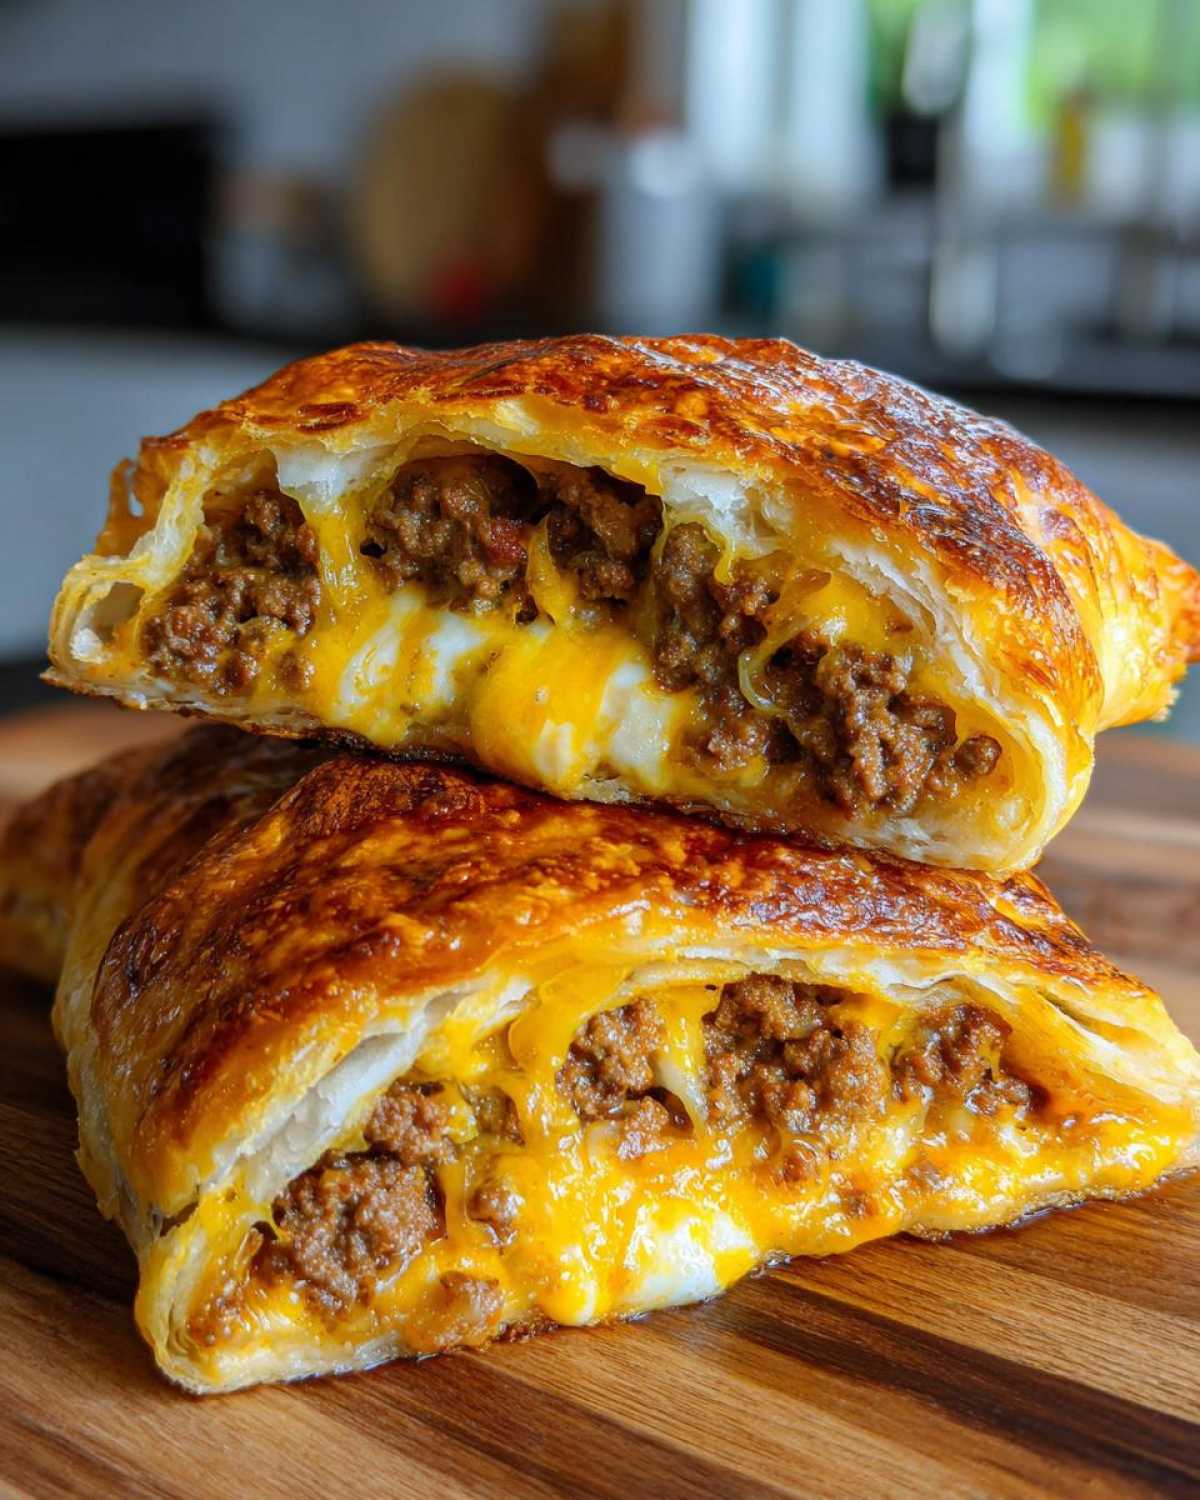
Okay, the **cheesy pocket tacos** are out of the oven, golden brown, puffy, and smelling like the best decision you made all week. Now, we can’t just eat these glorious pockets plain, right? Sure, they are perfectly self-contained meals, but pairing them with the right toppings takes them from a fast dinner to a full-blown family fiesta!
Honestly, because the inside is so rich with that seasoned beef and gooey melted cheese, you want dips that give you a nice cool, sharp, or acidic contrast. Think of them like the perfect crunchy vehicle for your favorite cool sauces. We always keep a few essentials ready whenever these come out.
Sour cream is practically mandatory. It cuts through the richness of the beef and the saltiness of the cheese perfectly. I usually just dollop a generous spoonful right on the side of the plate—or if I’m feeling fancy for company, I put it in a tiny little ramekin for dipping.
And cheese loves spice! So, salsa is a must-have. Whether you like mild Pico de Gallo or something with a serious kick, dipping the hot, slightly crusty biscuit edge into something cool and tomato-based is just heavenly. If you’re feeling ambitious and want to step up your dipping game beyond basic salsa, you absolutely have to try making my creamy avocado cilantro sauce. It’s cool, zesty, and incredible with anything taco-flavored!
Finally, who can pass up guacamole? It gives you that beautiful healthy fat and avocado flavor that goes so well with the savory meat. You can serve these **handheld cheesy tacos** with a simple side salad if you need something green, but honestly, a big bowl of salsa, sour cream, and guac for dipping makes this a complete, satisfying meal for everyone.
Storage and Reheating Instructions for Cheesy Dinner Idea
The great news about these **cheesy pocket tacos** is that they actually taste great the next day, even though they are best right out of the oven. Leftovers are a lifesaver for quick lunches, but you have to store them correctly! If you just throw them in a regular plastic container, the moisture from the filling is going to soak into that beautiful biscuit shell, and you’ll end up with sad, soft pockets.
My rule for these **cheesy dinner ideas** is using an airtight container, but you MUST take one extra step first. Let the pockets cool down completely to room temperature—and I mean completely cool—before you seal them up. If you seal them while they are warm, the condensation is guaranteed to make everything soggy.
Once they are cool, pop them into a sealed container and pop that in the fridge. They should hold up really well for about three good days. Any longer than that, and the texture just starts to change too much for my liking, even though they are still safe to eat.
Now, let’s talk reheating, because this is where you win or lose the battle for crispiness. If you try to reheat these in the microwave, you’ll end up with a hot, sweaty pocket that tastes like warm bread dough. No thank you!
The absolute best way to bring these back to life is using dry heat. Pop them back into a 350-degree oven for about 8 to 10 minutes. This gives the exterior shell a chance to crisp back up nicely. If you’re in a serious hurry and don’t want to wait for the oven to preheat, I highly recommend using an air fryer. Set it to about 325 degrees for just 4 or 5 minutes, keeping a close eye on them. They don’t need much time when they are already cooked!
When you reheat them this way, the cheese melts again, the meat heats through evenly, and that biscuit shell gets that delightful little crunch back that makes these **quick dinner taco ideas** so addictive in the first place. Keep those leftovers handy!
Frequently Asked Questions about Cheesy Pocket Tacos
I get so many questions about these little bundles of joy! They are one of those recipes that seems so simple you think you must be missing something, but I promise, they are genuinely foolproof once you get the sealing technique down. Here are some of the things I hear most often about making the **best taco pocket recipe**.
Can I prepare the filling for these cheesy pocket tacos ahead of time?
Absolutely, yes! This is one of the best parts about relying on the basic biscuit dough here—you can break up the work. You can totally cook the ground beef filling, let it cool completely, and store it in an airtight container in the fridge for up to two days. Just make sure it is totally cooled down first!
When you’re ready to eat, just warm the filling gently in the microwave or a skillet before you start flattening your biscuits. Having the **Ground Beef Cheesy Pockets** filling ready to go makes this a true ten-minute assembly job. It’s the perfect way to prep for a busy weeknight!
What is the best way to reheat leftover biscuit tacos?
This is crucial information if you want to avoid the dreaded microwave mush situation! Since the goal is to keep that exterior slightly crisp, you need dry heat. Never, ever use the microwave if you want them to taste good the second time around. They will get steamed and puffy in a bad way.
For the best results, use your conventional oven or an air fryer. Pop those leftovers onto a baking sheet and heat them at about 350°F for 8–10 minutes. If you’re using an air fryer to crisp up something else, like chicken fried steak, you can throw these right in for 4 or 5 minutes at 325°F. They heat up fast and you get that nice exterior texture back!
Why are my pockets leaking cheese during the bake time?
Oh, I’ve been there! Leaky pockets are the worst because they create one giant, crispy cheese-and-meat mat on your pan. This almost always comes down to one of two things: either the filling was too hot when you assembled them (which melts the dough prematurely), or you didn’t seal the edges aggressively enough. Remember my earlier tip? Pinch them tight with your fingers, and then go over that edge again with the tines of a fork. That extra mechanical seal is what keeps those flavorful insides tucked securely away until they hit your plate!
Can I substitute the ground beef for something else in these easy taco pockets?
Yes, you definitely can! While the standard recipe calls for beef because of its richness, ground turkey or ground chicken works just fine. Just be careful; leaner meats release less fat, so your seasoning might feel a tiny bit drier. If you notice the mixture seems dry after simmering with the water and seasoning, just add about a tablespoon of water or broth until it looks moist again, but not soupy. It’s all about avoiding a dry filling that might crack the dough!
Estimated Nutritional Data for Cheesy Pocket Tacos
Now, I feel like I should preface this section with a big, happy wave of my wooden spoon! These **cheesy pocket tacos** are pure comfort food, and let’s be honest, we aren’t making them for diet points! But I know some of you are curious about what you’re getting into, especially when feeding the family. I pulled the estimated nutritional info for you so you know roughly what’s going on inside these delicious little parcels.
Just keep in mind, this is a ballpark estimate. If you use low-fat beef, reduced-fat cheese, or maybe use those tortilla shells instead of the biscuits, your numbers are going to shift a bit. What you see here is based on the full recipe using the full-fat products listed!
For one whole serving (which the recipe breaks down to one pocket, which is generous!), here’s what the math typically looks like:
- Serving Size: 1 pocket
- Calories: Around 350
- Fat: About 20 grams (Yep, that fat is doing the heavy lifting for flavor!)
- Saturated Fat: Roughly 9 grams
- Carbohydrates: Hovering around 25 grams
- Protein: A solid 18 grams, which keeps everyone feeling full!
See? They are actually pretty well-balanced for a quick dinner idea! They have decent protein, and surprisingly low sugar content (only about 2 grams). The sodium is where you’ll see the bulk of the impact, just because of the seasoning packet and the canned biscuits, so keep that in mind if you’re watching salt intake. But honestly, when they are served fresh alongside some fresh salsa, I think these **handheld cheesy tacos** earn their spot on the table every single week!
Print
Loaded Cheesy Biscuit Pocket Tacos
- Total Time: 30 min
- Yield: 8 servings
- Diet: Vegetarian
Description
Make quick, handheld cheesy pocket tacos using pre-made biscuits stuffed with seasoned ground beef and melted cheese, then bake them until golden brown.
Ingredients
- 1 (16.3 ounce) can refrigerated biscuit dough
- 1 pound ground beef
- 1 packet (1 ounce) taco seasoning mix
- 1/2 cup water
- 1 cup shredded cheddar cheese
- 1 cup shredded Monterey Jack cheese
- 1 large egg, beaten (for egg wash)
Instructions
- Preheat your oven to 375 degrees Fahrenheit. Lightly grease a baking sheet.
- Brown the ground beef in a skillet over medium heat. Drain off any excess grease.
- Stir the taco seasoning mix and water into the cooked ground beef. Bring to a simmer and cook for 3 to 5 minutes, until the sauce thickens slightly. Remove from heat and let cool for 5 minutes.
- Separate the biscuit dough. Gently flatten each biscuit piece into a rough circle or square shape using your hands or a rolling pin.
- Place about 1 to 1.5 tablespoons of the meat mixture onto one half of the flattened biscuit dough.
- Sprinkle about 1 tablespoon of the mixed cheeses over the meat.
- Fold the other half of the biscuit dough over the filling to create a half-moon or pocket shape. Press the edges firmly together with your fingers or a fork to seal the filling inside.
- Place the sealed pockets onto the prepared baking sheet.
- Brush the tops of the pockets lightly with the beaten egg wash.
- Bake for 12 to 15 minutes, or until the biscuits are puffed and golden brown.
- Let cool for a few minutes before serving.
Notes
- For extra crispiness, lightly spray the tops of the pockets with cooking spray before baking.
- You can substitute pre-made tortillas for the biscuits if you prefer a crunchier, thinner shell.
- Serve these with sour cream, salsa, or guacamole for dipping.
- Prep Time: 15 min
- Cook Time: 15 min
- Category: Dinner
- Method: Baking
- Cuisine: American
Nutrition
- Serving Size: 1 pocket
- Calories: 350
- Sugar: 2
- Sodium: 650
- Fat: 20
- Saturated Fat: 9
- Unsaturated Fat: 11
- Trans Fat: 0.5
- Carbohydrates: 25
- Fiber: 1
- Protein: 18
- Cholesterol: 55


Comments are closed.