

Creating a beautiful braided edge for your pumpkin pie crust is simpler than you think! It adds such a lovely, homemade touch. I remember my first attempt at a braided edge pumpkin pie crust. I was a bit nervous, worried it would look messy. But with a little patience, it turned out so charming! It really makes your pie a showstopper. This technique is a fantastic way to elevate your baking. You’ll love the visual impact it gives your pies.
Why You’ll Love This Braided Edge Pumpkin Pie Crust
- It makes your homemade pies look extra special.
- The technique is simple yet looks very impressive.
- It’s a great project for beginner bakers.
- It’s perfect for adding flair during the holidays.
Lina’s Culinary Journey and the Braided Edge Pumpkin Pie Crust
My Italian roots run deep in the kitchen. Growing up, my grandmother’s touch was pure magic. She’d always say that the presentation was part of the love. Learning to create a beautiful pie crust edge, like this braided design, reminds me so much of her care. It’s more than just baking; it’s about tradition. This braided edge pumpkin pie crust technique feels like a little piece of my heritage. It’s a way I share that same warmth. It connects me to those cherished family moments. It shows my dedication to beautiful, delicious food.
Essential Ingredients for Your Braided Edge Pumpkin Pie Crust
You only need a few simple things for this decorative touch. Make sure you have:
- 1 recipe-ready pie crust dough, chilled.
- A little extra flour for dusting your work surface.
Step-by-Step Guide to Creating Your Braided Edge Pumpkin Pie Crust
Preparing the Dough for Braiding
First, gently roll out your chilled pie crust dough. Aim for a circle that fits your pie plate with a little overhang. About 1/8 inch thickness is perfect. This ensures it’s sturdy enough for braiding.
Cutting the Strips
Now, use a knife or a pizza cutter. Slice the dough into even strips. About 1/2 inch wide works well. This consistency is key for a uniform braided look.
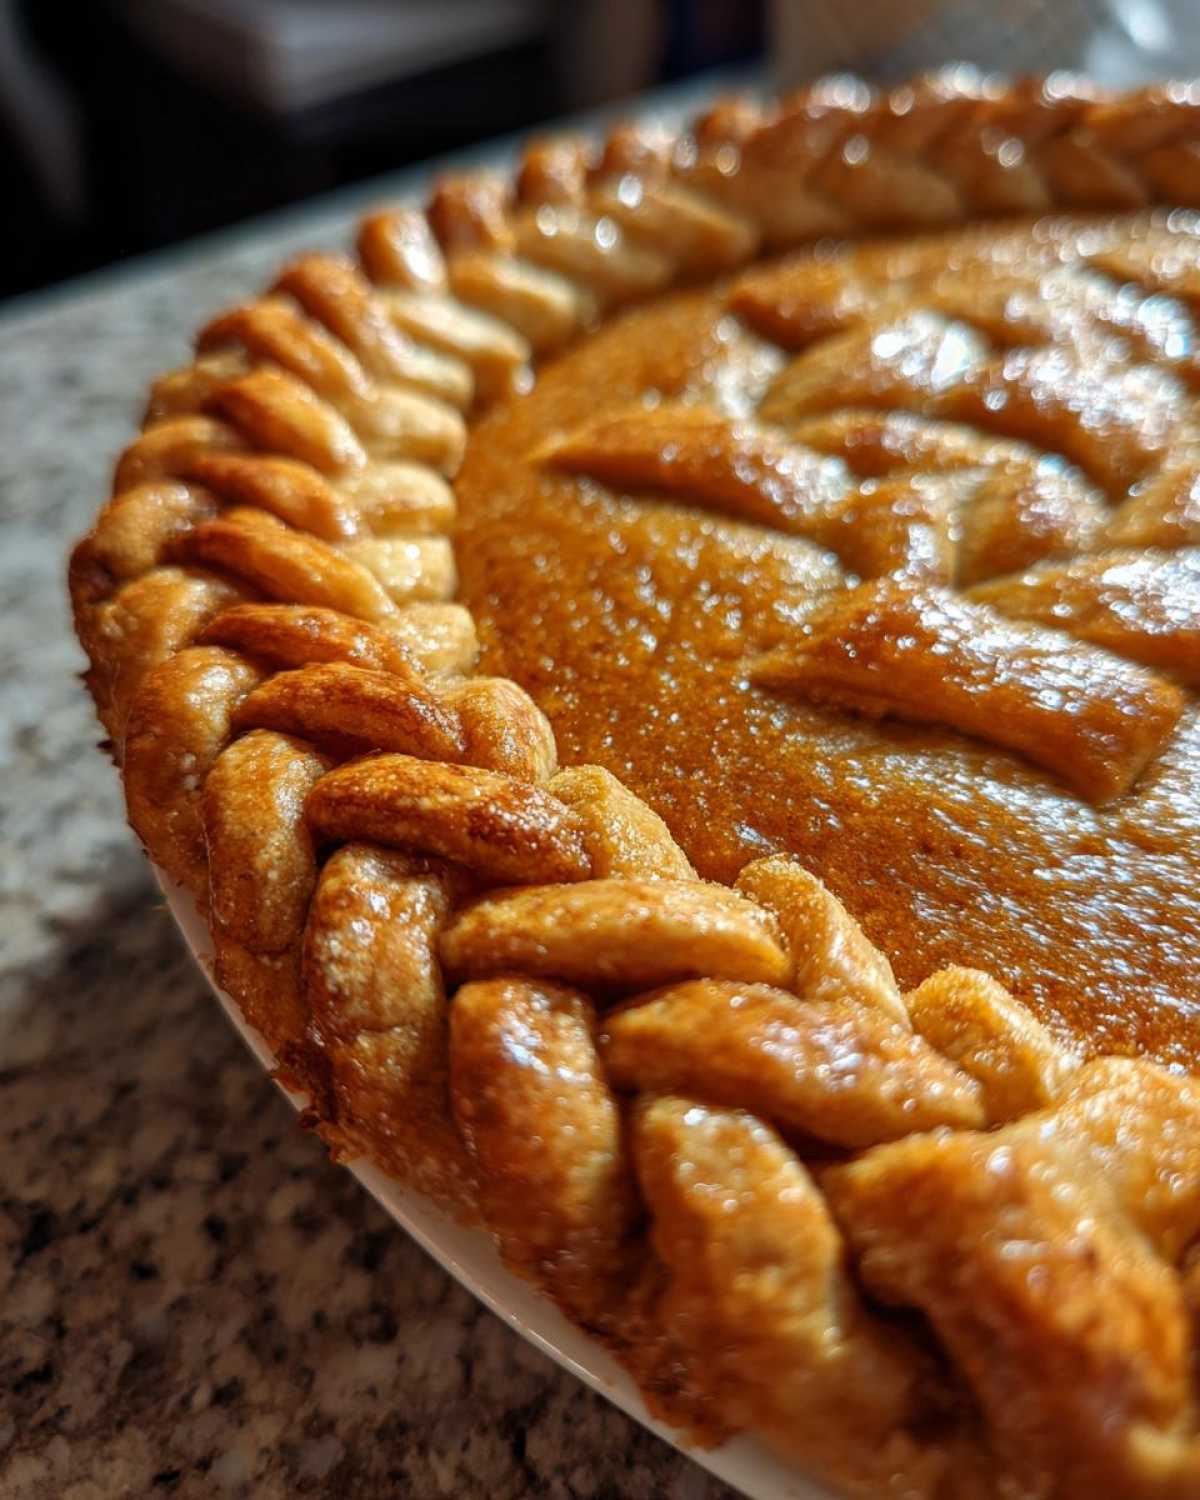
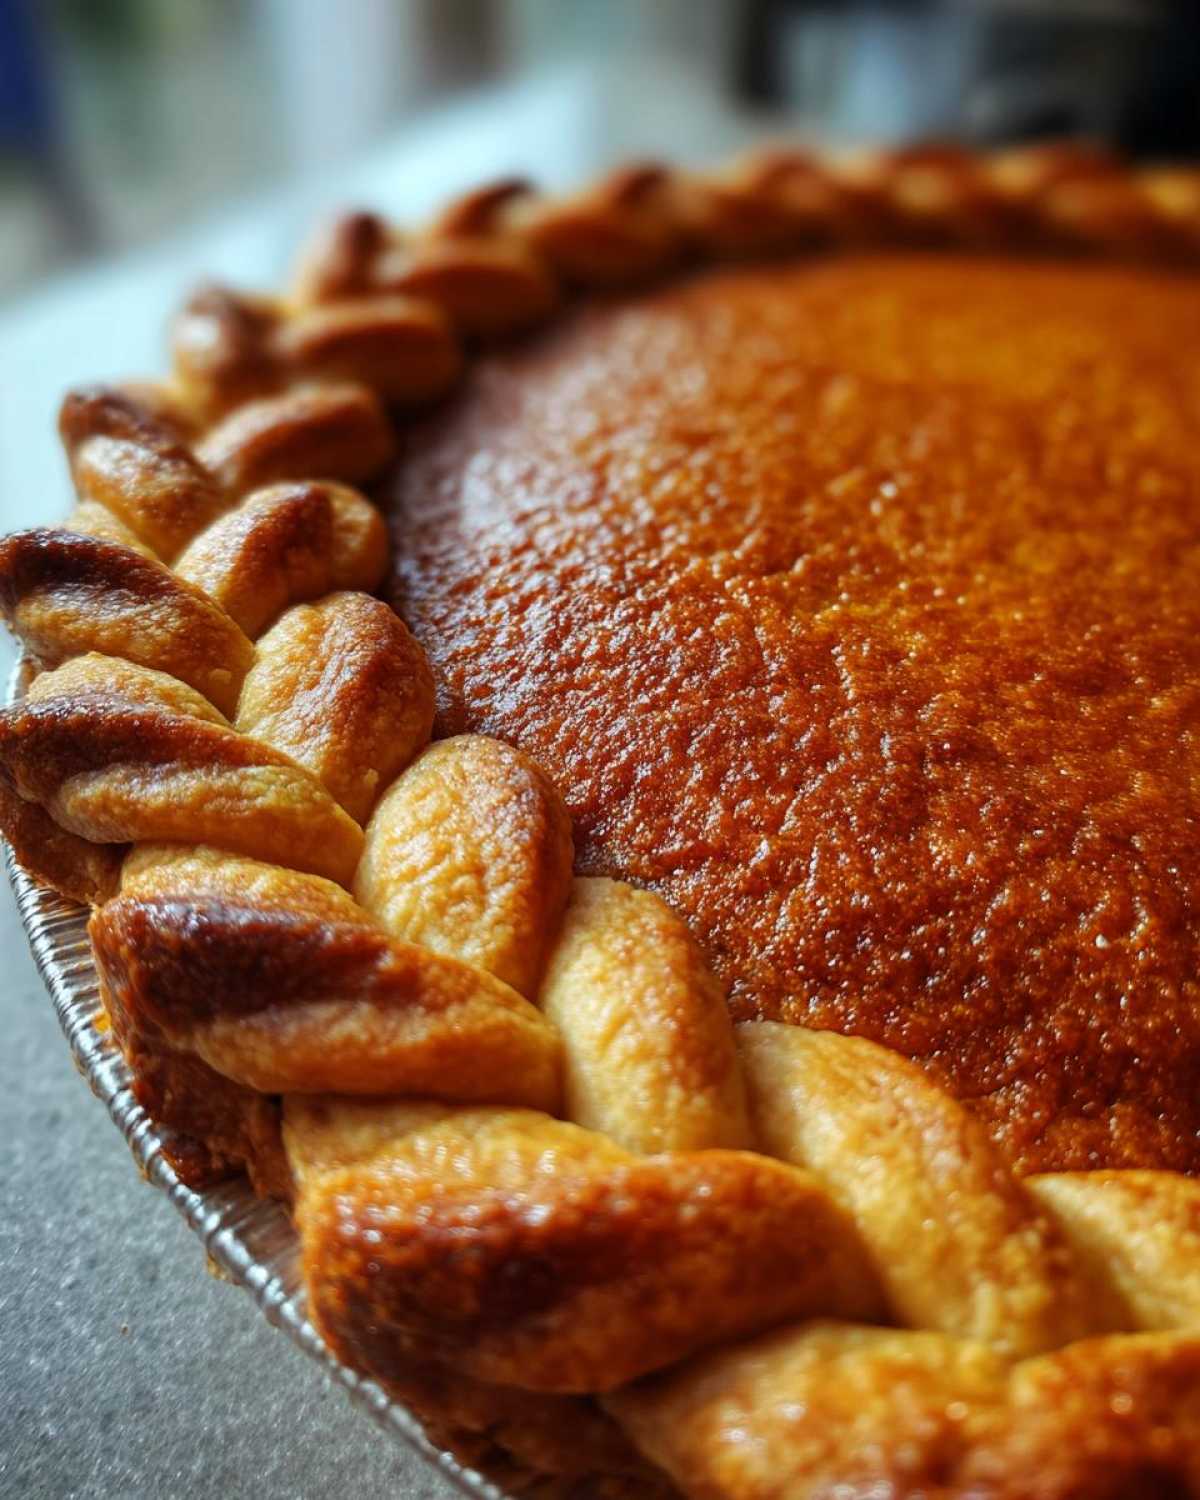
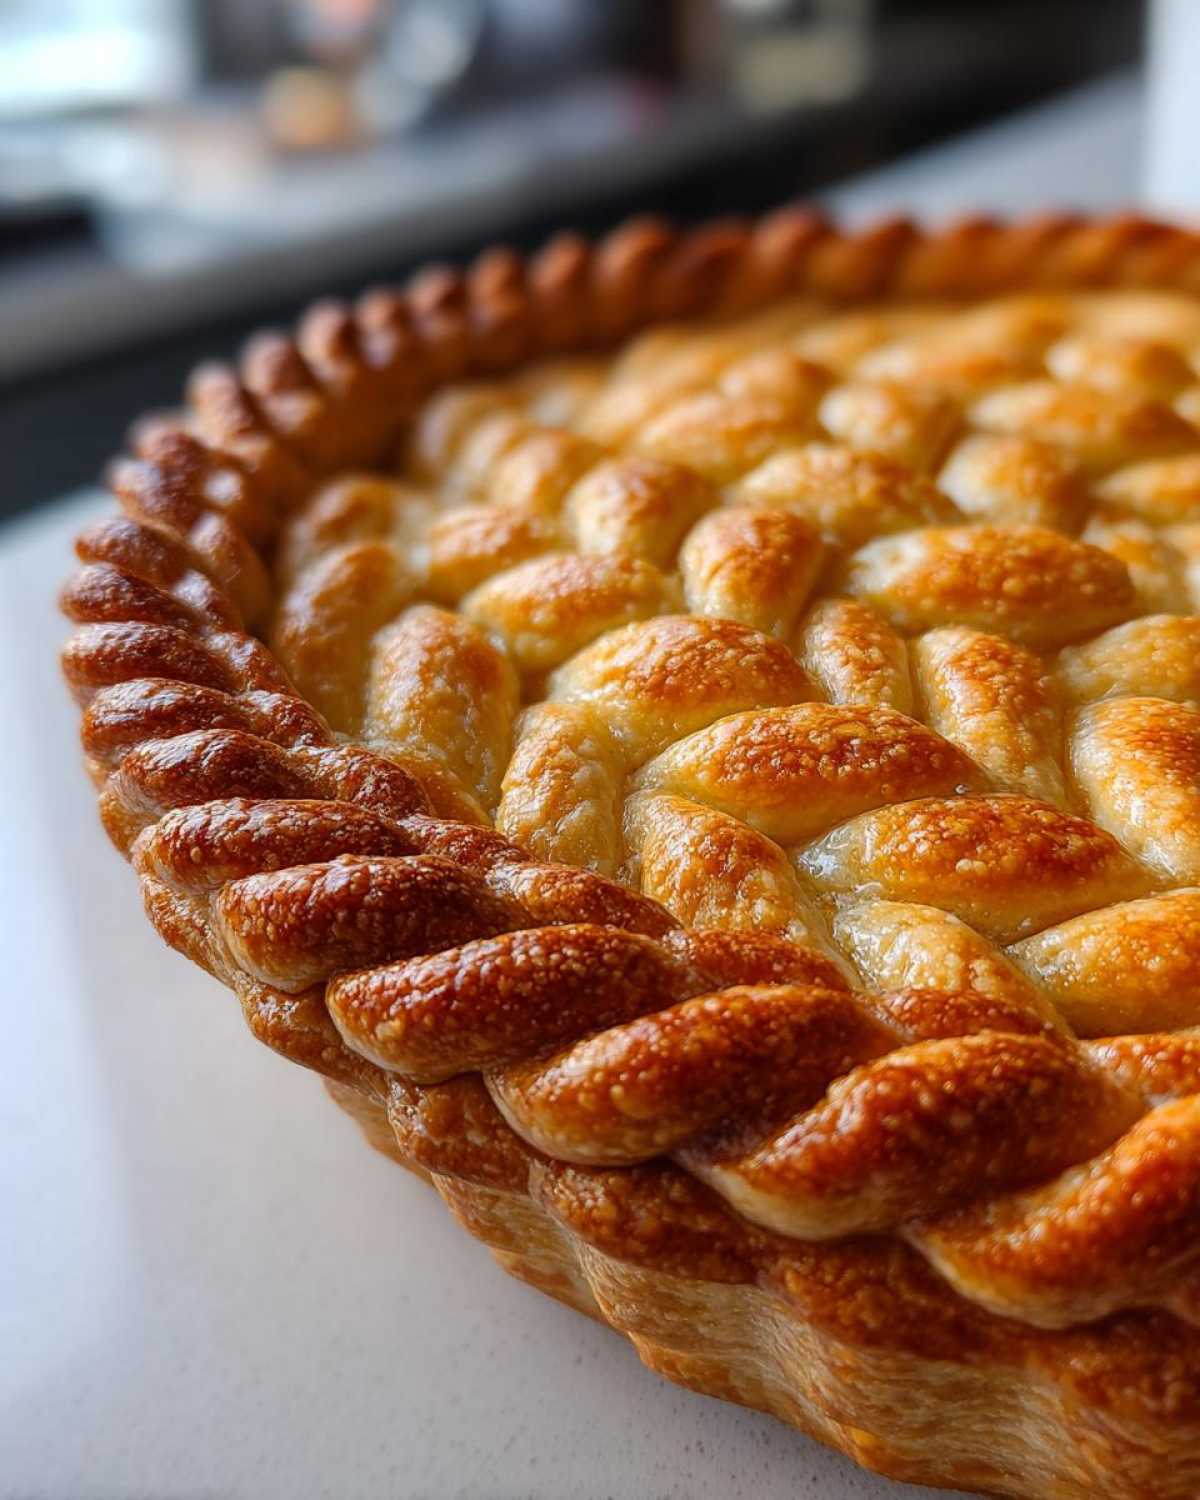
Assembling the Braided Edge Pumpkin Pie Crust
Place the strips around the rim of your pie crust. Overlap them slightly. Take two adjacent strips. Gently twist them together. Continue this around the whole edge. Tuck the ends neatly under.

Finishing Touches for a Perfect Braided Edge Pumpkin Pie Crust
You can crimp the edges with your fingers or a fork. This adds extra definition. Make sure all the tucks are secure.
Tips for a Flawless Braided Edge Pumpkin Pie Crust
Keeping your dough cool is super important. If it gets too soft, pop it in the fridge for a bit. This makes it much easier to handle. Don’t pull the dough too tight when braiding. Gentle tension creates a lovely pattern. If you’re new to this, try practicing on some leftover dough first. It’s a great way to get the feel for it. Remember, practice makes perfect for that beautiful braided edge pumpkin pie crust.
Variations for Your Braided Edge Pumpkin Pie Crust
Want to switch things up? Try adding a pinch of cinnamon to your dough before rolling. You could also use different types of pastry dough. Puff pastry works wonderfully for a different texture.
Serving Suggestions for Your Pumpkin Pie with Braided Edge
This pie looks amazing on its own. Serve it with a dollop of fresh whipped cream. A scoop of vanilla ice cream is also a delicious pairing.
Frequently Asked Questions About Braided Edge Pumpkin Pie Crust
Q: How do I prevent my braided edge from becoming too dry?
A: Keep the dough covered while you work. If you need a break, cover the strips with plastic wrap. This stops them from drying out.
Q: Can I make the braided edge ahead of time?
A: Yes! You can prepare the braided edge a day in advance. Cover the pie loosely and refrigerate. This decorative pie crust will hold up well.
Q: My strips keep breaking. What should I do?
A: Ensure your dough is well-chilled. If it’s too warm, it will be sticky and prone to tearing. A slightly thicker strip can also be more forgiving.
Storing and Reheating Your Braided Edge Pumpkin Pie Crust
Store any leftover pie loosely covered at room temperature for a day. For longer storage, refrigerate it. Reheat gently in a low oven.
Share Your Braided Edge Pumpkin Pie Crust Creations!
I’d love to see your beautiful pies! Share photos on Instagram and tag me. Leave a comment below with your rating. Let’s celebrate our baking wins together!
Print
The Wonderful Braided Edge Pumpkin Pie Crust you’ll adore
- Total Time: 20 minutes
- Yield: 1 braided edge
- Diet: Vegetarian
Description
Learn how to create a beautiful braided edge for your pumpkin pie crust. This simple technique adds an elegant touch to your homemade pies, making them a delightful centerpiece.
Ingredients
- 1 pie crust dough
Instructions
- Roll out your pie crust dough to fit your pie plate.
- Cut the dough into even strips, about 1/2 inch wide.
- Arrange the strips over the edge of the pie crust, overlapping slightly.
- Take two adjacent strips and twist them together gently.
- Continue this process around the entire edge of the pie, tucking the ends under.
- Crimp the edges as desired for extra decoration.
Notes
- Ensure your dough is chilled but pliable for easier handling.
- If the dough becomes too warm, refrigerate it for a few minutes before continuing.
- Practice on a small piece of dough first if you are new to this technique.
- Prep Time: 20 minutes
- Cook Time: 0 minutes
- Category: Pie Crust Decoration
- Method: Baking
- Cuisine: American
Nutrition
- Serving Size: 1 serving
- Calories: N/A
- Sugar: N/A
- Sodium: N/A
- Fat: N/A
- Saturated Fat: N/A
- Unsaturated Fat: N/A
- Trans Fat: N/A
- Carbohydrates: N/A
- Fiber: N/A
- Protein: N/A
- Cholesterol: N/A


Comments are closed.