

Oh, let me tell you, there is nothing better in the world than waking up knowing you’re going to have truly excellent scrambled eggs. Seriously, it’s my favorite call to arms every morning. For years though, I made rubbery, flat discs that tasted like disappointment! I thought that was just how scrambled eggs *were*. I was so wrong, friend. After years of tinkering and ruining far too many breakfasts, I finally unlocked the secret. This isn’t just another recipe; this is the definitive guide to making scrambled eggs that are simultaneously wonderfully fluffy and unbelievably creamy. Trust me, once you try this method, your entire relationship with breakfast is going to change.
Why This Recipe Makes the Best Fluffy and Creamy Scrambled Eggs
Okay, so you’ve seen a million posts out there about making the Easy Breakfast Recipes, but they all miss this one crucial point. The holy grail of scrambled eggs isn’t just chopping up chives or adding a splash of milk—it’s the technique! If you try to rush this, you end up with dry, sad cheese curds, and nobody deserves that first thing in the morning.
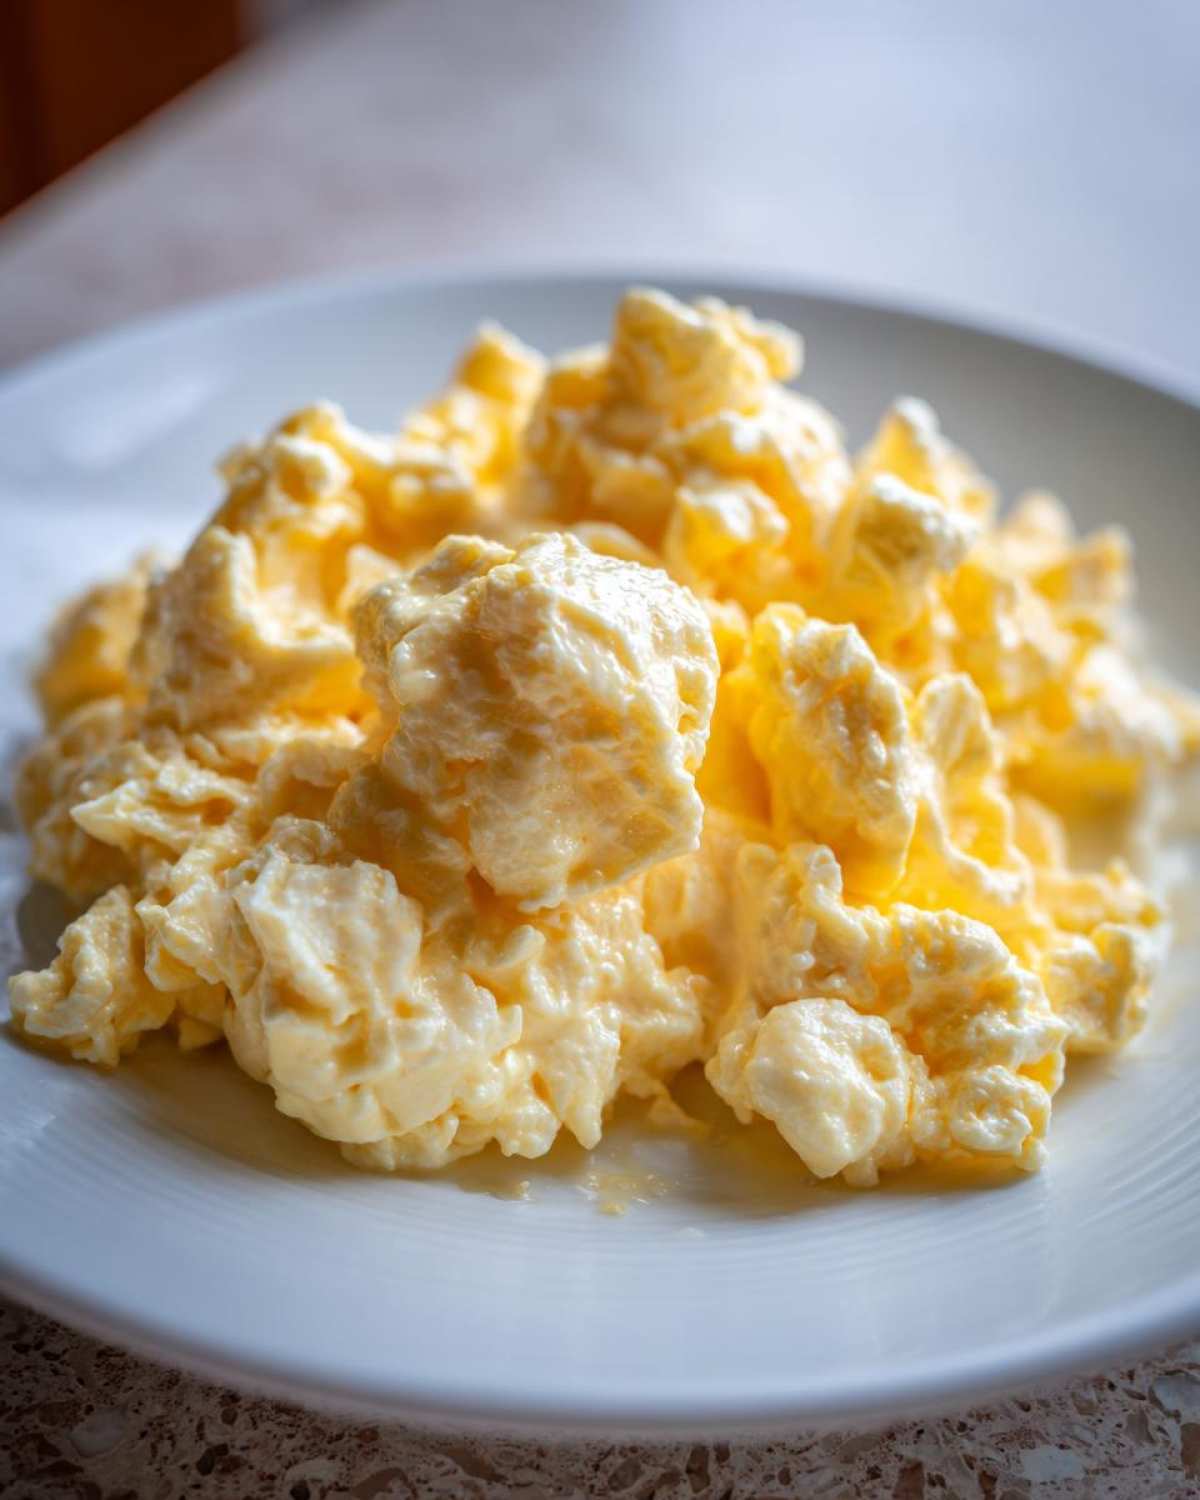
We are aiming for those amazing Best Fluffy Eggs that still melt in your mouth. The real magic trick here involves patience. Seriously, ditch the high heat. High heat sets the proteins in the egg way too fast, squeezing out all the moisture and leaving you with something tough. We’re going for gentle coaxing, not a frantic scramble!
The Secret to Velvety Scrambled Eggs: Low and Slow Cooking
This is my absolute top tip for achieving those Perfect Egg Texture Tips. I cook mine on a heat setting that feels almost too low—like, barely a whisper of heat. When you cook them slowly, the curds form gradually. They trap little pockets of steam and butter within them, which is exactly what creates that luscious, soft-set result. You’ll know you’re doing it right when the eggs look glossy, not matte. Honestly, taking an extra minute or two over low heat separates the amateurs from the scrambled egg masters. Don’t rush the process; the reward is perfect, velvety scrambled eggs!
Ingredients for Perfect Scrambled Eggs
You don’t need fancy things here, which is why this is such a great Simple Egg Techniques recipe. But these few ingredients need to be right, or the texture just won’t cooperate. Remember, we are going for ultimate comfort food morning meals, so keeping it simple is key!
Here’s what you’ll need for one perfect serving. If you’re making breakfast for more people, just multiply everything—but be careful not to crowd the pan if you’re aiming for the creamy curds!
- 3 large eggs (make sure they are fresh!)
- 1 tablespoon unsalted butter (don’t skimp on good butter here)
- 1 tablespoon heavy cream or whole milk (this is what pushes those eggs into true creaminess territory, but you can skip it if you need a Low Carb Breakfast Eggs option)
- A good pinch of salt
- A good pinch of black pepper
That’s it! See? No strange additives. The butter is for flavor and preventing sticking, and the cream is purely for that velvety mouthfeel. If you forget the salt until the end, your eggs will get watery, so make sure you add it right in with the eggs when you whisk them up. We’ll get to that amazing whisking technique next!
Essential Equipment for Fluffy Scrambled Eggs
You can’t achieve perfection if your tools are fighting against you, right? My early days were filled with scratching sounds coming from stainless steel pans, and all that did was make my eggs stick and tear. For the best results—especially for soft-cooked eggs—your equipment matters almost as much as the heat! This isn’t a complex setup, but having the right gear makes the whole 5-minute breakfast process smoother.
First, you absolutely need a great quality non-stick skillet. I’m talking about the one pan you only use for eggs or delicate fish. Keep it clean, keep it scratch-free! If you use anything else, you’ll spend all your time fighting stuck bits instead of gently folding your curds.
Next up is what you use to stir. Forget metal spoons or whisks in the pan! I always grab my heat-resistant rubber spatula. It allows me to get right into the corners of the pan and gently pull the eggs across the base without damaging the non-stick surface. This gentle movement creates those large, soft folds that look so gorgeous on the plate.
Finally, grab a decent sized bowl for whisking and a good balloon whisk. You want to incorporate a lot of air into those eggs before they even hit the heat. This initial aeration is secretly key to getting volume, especially if you’re skipping the cream and aiming purely for fluffy scrambled eggs. Make sure your bowl is big enough that you aren’t splashing egg everywhere when you get enthusiastic with the whisking!
How to Make Creamy Scrambled Eggs: Step-by-Step Instructions
Alright, let’s get into the actual cooking part! This is where all those **Perfect Egg Texture Tips** we talked about really pay off. We’re going to walk through this slowly because the timing is everything when learning How To Make Creamy Scrambled Eggs. If you follow these steps exactly, you won’t end up with that sad, rubbery mess I used to make.
Prepping the Eggs for Optimal Scrambled Eggs Texture
First off, crack those three eggs into your bowl. Don’t just stir them—I mean *whisk* them! You want to beat those yolks and whites until they are totally unified and look a little bit frothy on top. While you’re beating them, toss in your salt and pepper. Remember what I said about additions? If you are going for super fluffy scrambled eggs, this is when you briefly whisk in a tiny splash of water. If you are aiming for the absolute richest, creamiest texture, whisk in that tablespoon of heavy cream right now. Get them good and airy before you even look at the stove!
The Gentle Cooking Technique for Fluffy Scrambled Eggs
Next, remember our golden rule: low to medium-low heat! Put your non-stick pan on, drop that tablespoon of butter in, and let it melt completely until it’s just foaming slightly—don’t let it brown, or your flavor profile is toasted before it even starts. Pour in the whisked eggs. For about thirty seconds, just let them sit there doing nothing! This allows the bottom layer to just barely begin to firm up.
Now, grab your spatula. Gently push the cooked egg from the edges toward the center of the pan, tilting the pan so the runny, uncooked egg flows right over the hot surface underneath. You are folding, not smashing! Keep doing those slow, gentle pushes all the way across the pan. This builds those soft curds. The second they look mostly set but still have a wet, glossy sheen—and I mean *glossy*—pull the pan completely off the heat! They will keep cooking on residual warmth. If you wait until they *look* done in the pan, they will be way overdone on your plate. Serve them right away!
Tips and Variations for Mastering Breakfast Eggs
Now that you know the low-and-slow secret, we can talk about customization. Everyone likes their Mastering Breakfast Eggs just a little differently, right? Whether you want to double down on the fluff or lean into the supreme creaminess, I have the little tricks I learned over the years that keep everything tasting gourmet without adding complexity. These adjustments are what elevate simple scrambled eggs from a basic morning staple to a proper comfort food morning meal!
If you found my main instructions resulted in eggs that were a bit soft for your liking, don’t blame the method—blame missing moisture management! Remember how I told you to add that splash of water instead of milk if you want serious fluff? Water creates steam, and that steam lifts the eggs higher, making them lighter. Cream, conversely, is fat, and fat weighs things down just enough to create those decadent, ribbon-like layers we associate with truly velvety scrambled eggs.
And hey, you don’t have to stick to the basics. Feel free to follow my link to avocado-egg-salad-mayo-free-creamy-recipe/ if you want a totally different angle, but for these stovetop scrambled eggs, mix-ins should generally wait until the very end.
Adding Mix-Ins to Your Scrambled Eggs
Timing is everything when you throw in extras. If you add something too soon, it interferes with the delicate coagulation process. For herbs, like fresh chives or parsley, wait until the eggs are practically done—literally the last 10 seconds. We want the flavor of fresh herbs, not cooked, wilted greens. So when you are pulling the pan off the heat, toss in your Scrambled Eggs with Chives and gently fold them in. The residual heat will warm them perfectly.
Speaking of late additions, let’s talk Scrambled Eggs with Cheese. This is non-negotiable for me on weekends! But you have to be strategic. If you add the cheese (cheddar, Gruyère, whatever your heart desires) when the eggs are still too runny, the cheese melts too fast, gets oily, and prevents the eggs from setting properly underneath it. My rule for adding cheese is to wait until all the visible liquid egg is gone, but the eggs are still glistening wet. Stir that cheese in right then, about 30 seconds before you plan to plate them. Those thirty seconds, off the direct heat, are enough to melt the cheese into the curds, not burn it onto the bottom of the pan. It’s perfection, I’m telling you!
Serving Suggestions for Your Scrambled Eggs
So now you have these incredible, custardy mouthfuls of breakfast perfection. What do you serve them with? You don’t want some soggy, boring side dish ruining the magic of truly great scrambled eggs, right? Since this is one of my favorite Easy Breakfast Recipes after all, the pairings should be simple but satisfying. You want things that complement the richness without overpowering that delicate texture we worked so hard to achieve!
A crispy base is totally essential, in my opinion. Slightly thick slices of sourdough toast, grilled in a little bit of butter (yes, more butter, I have no regrets!), are my go-to. Toast provides the perfect sturdy vehicle for scooping if your eggs are super creamy, and the crunch is a great textural counterpoint to the softness you’ve created.
If I have an extra five minutes on a weekend, I’ll usually pair this with something smoky. Crispy bacon is classic, of course, but have you tried serving these alongside something a little unexpected? Maybe some slices of perfectly ripe avocado sprinkled with everything bagel seasoning? That adds healthy fat and amazing flavor contrast.
And if you want to get really wild with your sweet-potato-biscuits-recipe/, these eggs are amazing served right on top of a warm, fluffy biscuit instead of traditional gravy. Talk about ultimate comfort food morning meals! Just make sure whatever you choose doesn’t require fussy last-minute cooking, because these eggs need to be eaten the second they come off the heat!
Storage and Reheating Scrambled Eggs
Okay, so you made a truly incredible batch of fluffy and creamy scrambled eggs, and—oops!—you have leftovers. Happens to the best of us, right? But here’s the tricky part: reheating scrambled eggs can instantly undo all that careful low-heat work and turn them into dry little hockey pucks. The key to storing these beauties is speed and containment, and the reheating is all about moisture replenishment!
First things first: for the absolute best texture, you should really aim to eat these right away. That brief window when they are glossy and slightly wet is when they are divine. If you have leftovers, you need to get them into an airtight container immediately. I mean it—as soon as they come out of the pan, get them into the fridge. If they sit on the counter cooling slowly, the residual heat will keep cooking them, and they will become tough before you even seal the container!
Cooling and Storing Your Leftover Scrambled Eggs
When I store them, I try to spread the eggs into a thin layer on a clean plate before transferring them to the storage container. This helps them cool down rapidly, stopping that carry-over cooking process right in its tracks. I never keep them longer than two days, tops. Honestly, after day one, the texture starts to change significantly, even in an airtight container.
If you’re planning ahead for your Quick Egg Meals later in the week, you can also freeze them! But you have to mix in a little extra liquid before freezing—about a tablespoon of sour cream or cream cheese per serving, mixed right in. It sounds weird, but the extra fat helps protect the protein structure from getting destroyed by the ice crystals.
Gently Reheating for the Best Texture
This is the moment of truth. Never, ever microwave that tight little container of leftover scrambled eggs on high heat! That’s a recipe for immediate disaster. If you need to reheat them fast, put them in a microwave-safe bowl and use 50% power in 15-second blasts. Mix thoroughly between each blast.
However, my preferred method, the one that saves your precious fluffy scrambled eggs texture, is reheating them on the stovetop. Put a tiny pat of butter into that non-stick pan—just a thimbleful. Set the heat to low, just like we did for cooking them the first time. Gently place your cold eggs in the pan and as they warm up, add just a teaspoon of milk, water, or broth for every half-cup of eggs you have.
Stir them very gently until they are warm all the way through. They won’t get as billowy as they were when fresh, but they will regain that creamy, soft quality we love so much. It takes a little more time than thirty seconds in the microwave, but I promise you, the effort keeps your Comfort Food Morning Meals tasting like you just made them!
Frequently Asked Questions About Scrambled Eggs
I get so many questions about making scrambled eggs perfect, which makes sense because everyone wants a reliable Quick Egg Meals option in their back pocket! Since this is truly one of the best 5 Minute Breakfast ideas out there, it’s worth ironing out any confusion. Here are the questions I hear most often about getting the texture just right.
Can I make these scrambled eggs ahead of time?
Honestly, you shouldn’t if you are aiming for the creamy, glossy texture we worked so hard for in the main recipe. Scrambled eggs are one of those foods that really suffer when reheated, even if you use gentle methods. The magic is in that fresh, just-off-the-heat moment. If you absolutely must prep ahead—maybe for a huge brunch buffet—I’d suggest cooking them slightly *underdone* from what you usually prefer, adding a tablespoon of cream cheese to the batch while it’s still warm, and storing it very tightly sealed.
When you reheat your batch of scrambled eggs, use the lowest heat setting on the stove and stir constantly, adding a splash of milk or broth every minute or so as they warm up. This helps reintroduce moisture that starts escaping the moment they leave the pan. They won’t taste exactly the same as fresh, but this technique saves them from becoming totally dry cubes!
What is the difference between fluffy and creamy scrambled eggs?
This is a fantastic question because people look for both, but they usually require slightly different approaches! Fluffiness is all about volume and lightness. To get that airy lift, you need to incorporate more air when whisking, and often, using water instead of cream helps create lift via steam. Fluffy versions have larger, looser curds.
Creamy scrambled eggs, on the other hand, are richer and denser, almost like soft custard. That’s achieved primarily through a higher fat content—hello, heavy cream!—and cooking *extremely* slowly over lower heat while stirring constantly to create very small, velvety curds. My recipe is designed to hit a happy middle ground, but if you want maximum fluff, use water; for maximum cream, lean into the slow heat and heavy cream!
Do I really need to use low heat? Can’t I cook them faster?
Trust me, I know you want your Quick Egg Meals fast! But if you crank the heat, those eggs go from liquid to rubber in about ten seconds flat. Low heat is necessary because it allows the proteins in the egg to bond slowly, trapping the fat and moisture inside. When the heat is too high, the proteins seize up instantly, squeezing all the delicious liquid right out. Once you see how velvety these turn out from taking the extra three minutes over low heat, you’ll realize it’s totally worth the minimal extra time!
Serving Suggestions for Your Scrambled Eggs
So now you have these incredible, custardy mouthfuls of breakfast perfection. What do you serve them with? You don’t want some soggy, boring side dish ruining the magic of truly great scrambled eggs, right? Since this is one of my favorite Easy Breakfast Recipes after all, the pairings should be simple but satisfying. You want things that complement the richness without overpowering that delicate texture we worked so hard to achieve!
A crispy base is totally essential, in my opinion. Slightly thick slices of sourdough toast, grilled in a little bit of butter (yes, more butter, I have no regrets!), are my go-to. Toast provides the perfect sturdy vehicle for scooping if your eggs are super creamy, and the crunch is a great textural counterpoint to the softness you’ve created.
If I have an extra five minutes on a weekend, I’ll usually pair this with something smoky. Crispy bacon is classic, of course, but have you tried serving these alongside something a little unexpected? Maybe some slices of perfectly ripe avocado sprinkled with everything bagel seasoning? That adds healthy fat and amazing flavor contrast.
And if you want to get really wild with your sweet-potato-biscuits-recipe/, these eggs are amazing served right on top of a warm, fluffy biscuit instead of traditional gravy. Talk about ultimate comfort food morning meals! Just make sure whatever you choose doesn’t require fussy last-minute cooking, because these eggs need to be eaten the second they come off the heat!
Storage and Reheating Scrambled Eggs
Okay, so you made a truly incredible batch of fluffy and creamy scrambled eggs, and—oops!—you have leftovers. Happens to the best of us, right? But here’s the tricky part: reheating scrambled eggs can instantly undo all that careful low-heat work and turn them into dry little hockey pucks. The key to storing these beauties is speed and containment, and the reheating is all about moisture replenishment!
First things first: for the absolute best texture, you should really aim to eat these right away. That brief window when they are glossy and slightly wet is when they are divine. If you have leftovers, you need to get them into an airtight container immediately. I mean it—as soon as they come out of the pan, get them into the fridge. If they sit on the counter cooling slowly, the residual heat will keep cooking them, and they will become tough before you even seal the container!
Cooling and Storing Your Leftover Scrambled Eggs
When I store them, I try to spread the eggs into a thin layer on a clean plate before transferring them to the storage container. This helps them cool down rapidly, stopping that carry-over cooking process right in its tracks. I never keep them longer than two days, tops. Honestly, after day one, the texture starts to change significantly, even in an airtight container.
If you’re planning ahead for your Quick Egg Meals later in the week, you can also freeze them! But you have to mix in a little extra liquid before freezing—about a tablespoon of sour cream or cream cheese per serving, mixed right in. It sounds weird, but the extra fat helps protect the protein structure from getting destroyed by the ice crystals.
Gently Reheating for the Best Texture
This is the moment of truth. Never, ever microwave that tight little container of leftover scrambled eggs on high heat! That’s a recipe for immediate disaster. If you need to reheat them fast, put them in a microwave-safe bowl and use 50% power in 15-second blasts. Mix thoroughly between each blast.
However, my preferred method, the one that saves your precious fluffy scrambled eggs texture, is reheating them on the stovetop. Put a tiny pat of butter into that non-stick pan—just a thimbleful. Set the heat to low, just like we did for cooking them the first time. Gently place your cold eggs in the pan and as they warm up, add just a teaspoon of milk, water, or broth for every half-cup of eggs you have.
Stir them very gently until they are warm all the way through. They won’t get as billowy as they were when fresh, but they will regain that creamy, soft quality we love so much. It takes a little more time than thirty seconds in the microwave, but I promise you, the effort keeps your Comfort Food Morning Meals tasting like you just made them!
Estimated Nutrition Facts for Scrambled Eggs
I always like to include the basics for those of you tracking things, though let’s be honest, these are pure comfort food! These numbers are based on the base recipe—just the eggs, butter, salt, and pepper. If you add cream, cheese, or toast on the side, you’ll need to factor those additions in separately, of course!
This is generally a fantastic option if you’re looking for a high-protein start to the day, as it keeps the carbs incredibly low since we aren’t serving it with potatoes or bread in this base calculation.
- Serving Size: 1 serving
- Calories: 220
- Fat: 17g
- Saturated Fat: 10g
- Carbohydrates: 1g
- Sugar: 1g
- Protein: 13g
- Cholesterol: 450mg
- Sodium: 150mg
Keep in mind that the cholesterol reading is high because eggs are naturally high in cholesterol, but modern science tells us that dietary cholesterol doesn’t impact everyone’s blood cholesterol the way we once worried about. If you use egg whites instead of whole eggs, your fat and cholesterol counts will drop significantly, but you’ll lose a lot of that perfect creamy texture we’re aiming for here!
Print
The Ultimate Fluffy and Creamy Scrambled Eggs Recipe
- Total Time: 7 min
- Yield: 1 serving
- Diet: Vegetarian
Description
Learn the simple technique to make perfectly fluffy and creamy scrambled eggs every time using low heat and gentle stirring.
Ingredients
- 3 large eggs
- 1 tablespoon unsalted butter
- 1 tablespoon heavy cream or whole milk (optional, for extra creaminess)
- Pinch of salt
- Pinch of black pepper
Instructions
- Crack the eggs into a small bowl. Add the salt and pepper. Whisk the eggs vigorously until the yolks and whites are fully combined and slightly frothy, about 30 seconds. If using cream or milk, whisk it in now.
- Place a non-stick skillet over low to medium-low heat. Add the butter and let it melt completely until it foams slightly. Do not let the butter brown.
- Pour the egg mixture into the warm skillet. Let the eggs sit undisturbed for about 30 seconds until the edges just begin to set.
- Using a heat-resistant rubber spatula, gently push the cooked egg from the edge toward the center, tilting the pan so the uncooked egg flows underneath.
- Continue this gentle folding and pushing motion slowly across the pan. Keep the heat low. This slow process builds soft curds.
- When the eggs are mostly set but still look slightly wet and glossy (this is key for creaminess), remove the pan from the heat immediately. The residual heat will finish cooking them.
- Serve immediately for the best texture.
Notes
- For fluffier eggs, add a splash of water instead of milk and whisk thoroughly before cooking.
- For richer, creamier eggs, cook over very low heat and stir constantly, removing the pan from the heat briefly every minute.
- If adding cheese, stir it in during the last 30 seconds of cooking when the eggs are almost done.
- Prep Time: 2 min
- Cook Time: 5 min
- Category: Breakfast
- Method: Stovetop Cooking
- Cuisine: American
Nutrition
- Serving Size: 1 serving
- Calories: 220
- Sugar: 1
- Sodium: 150
- Fat: 17
- Saturated Fat: 10
- Unsaturated Fat: 7
- Trans Fat: 0
- Carbohydrates: 1
- Fiber: 0
- Protein: 13
- Cholesterol: 450


Comments are closed.